About
Enable this option on your player to engage your audience with interactive Call to Action (CTA) messages. Add overlays or toasts with clickable buttons for announcements, content recommendations, and more - right from the player.
Multiple CTAs can be added per player, labeled sequentially as Call to Action 1, Call to Action 2, and so on.
VOD
Access the player settings
- Log in to your Rich Media CMS and click the Studio tab.
- Click the player you want to edit from the list (or use the search bar in the top right).

The Player Studio page displays.
If you haven't created a player yet, check out our article Create a player for guidance.

The player settings display.

Set the CTAs
1. Scroll down to the Engagement & Interactivity section, find Call to action and click the toggle to open the settings.
You can set up CTAs manually for each video or automate them using metadata:
- Manual CTAs: Set up predefined messages and buttons for each video.
- Metadata-Based CTAs: When enabled, video CTAs dynamically update their text and destination based on the entry's metadata. When disabled, all videos in this player show the same CTA.
When you enable Call to action, additional options display:
2. Configure the following:
Metadata based CTA – See below for setup details.
To create a standard CTA instead, simply skip the Metadata based CTA field and continue with the following configuration:
Standard CTA
Type - Choose one of the following options:
- Overlay - The CTA displays across the entire player, pausing the video until the specified 'Hide after' duration elapses.
- Toast - The CTA appears at the bottom right corner of the player, allowing playback to continue for the specified 'Hide after' duration.
Hide After - Click the box to enable. Enter the desired duration in seconds for the CTA message. If left blank, the CTA will remain until the user closes it.
Title - Enter a custom title for the CTA message. You can replace the default text "New call to action" with your own.
Description - Type your message.
Button - Enable/disable the button by clicking the box. If enabled, provide the following information:
- Label - Enter the text that will appear on the button.
- URL - Input the link that the button will direct the user to.
Secondary button - Click the box to add a secondary button (optional).
Position - Choose from the options. If left empty, the CTA will be displayed until closed out by the user.
- Start (enabled by default) - CTA will appear at the start of video playback.
- Time from start (in seconds) - Enter a time in seconds from the start of playback until CTA appears.
If the start position is greater than the video length, the CTA will not be displayed.
- Time from end - Enter a time in seconds counting back from the end of the video when the CTA should appear.
- End - Click the box to enable.
If the CTA duration exceeds the video length, it will be displayed until the end of the video.
Delete Call to Action - Click to delete the CTA. A message displays: “Are you sure you want to permanently delete this CTA?”. Click Delete.
+ Add call to action - Click to add additional CTAs.
Only one CTA configuration can be opened at once. When clicking to open a specific CTA, the rest will be minimized.

The CTA text and design (font family, font size, font color, button shape, button color etc.) can be customized with external CSS. The default color is the player primary color.
 CTA as toast
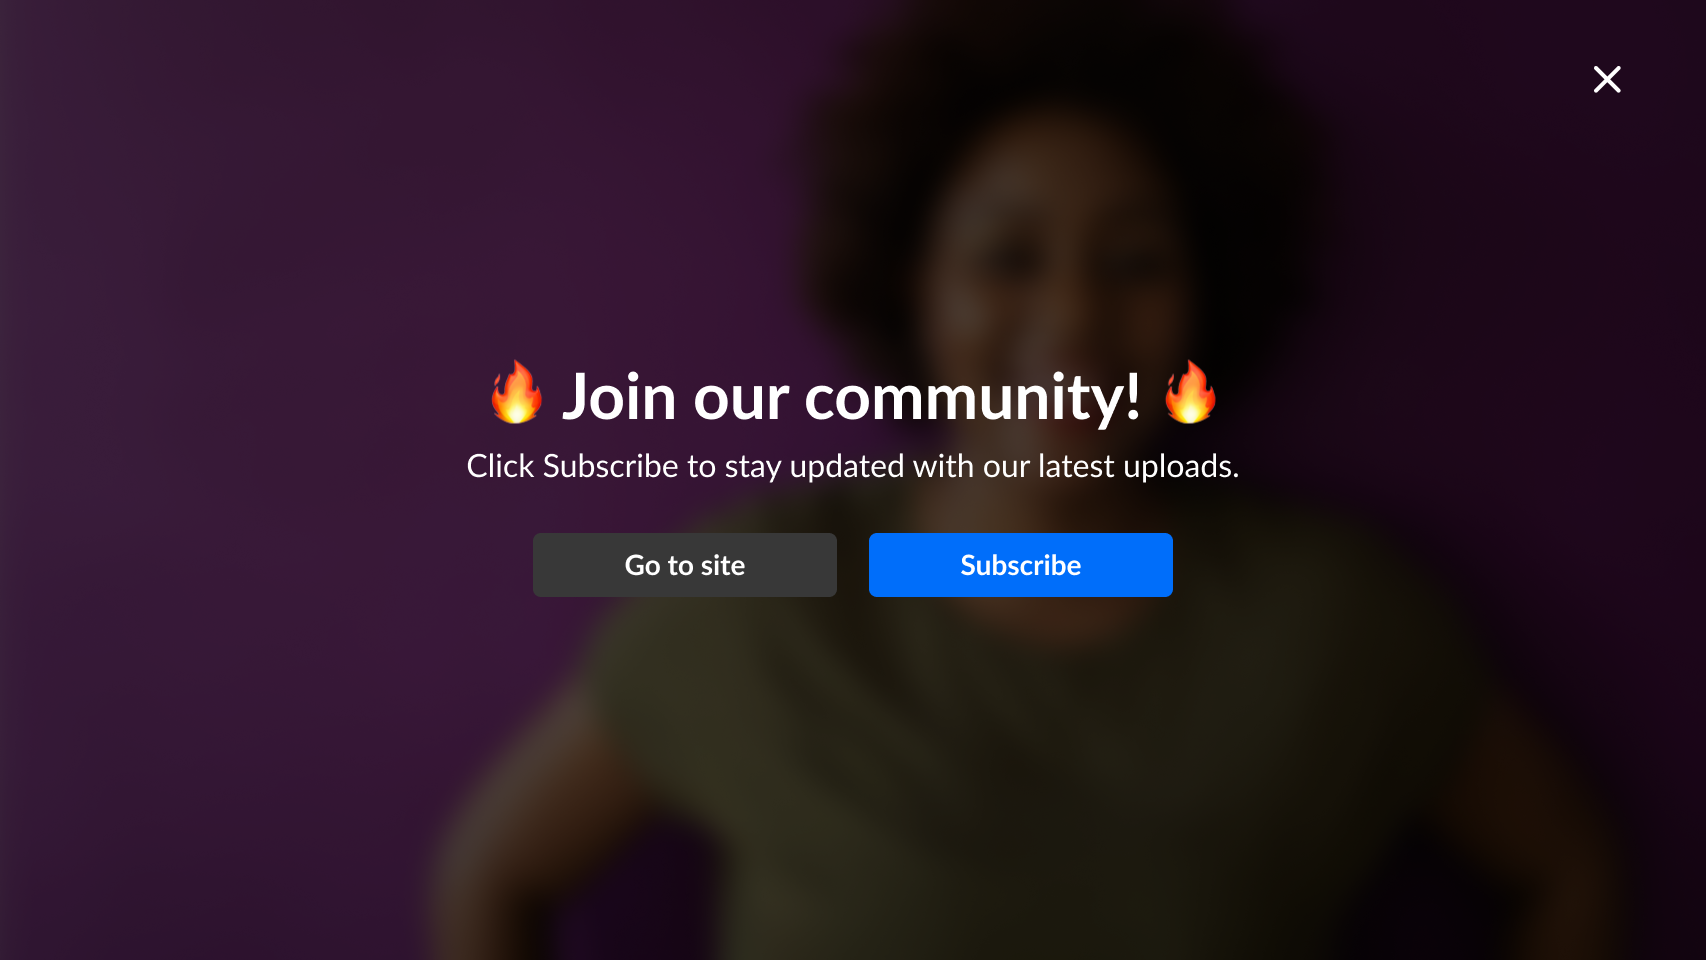 CTA as overlay
Metadata-based CTA
To use metadata-based CTAs, start by creating a custom metadata schema. Check out our guide Create a custom metadata schema for CTAs for step-by-step instructions.
Configure the following:
Metadata based CTA - Click to enable.
Additional options display.

Metadata profile ID - Enter the ID of the metadata profile containing the CTA fields. Need help finding it? Check out Create a custom metadata schema for CTAs.
Type - Choose one of the following options:
- Overlay - The CTA displays across the entire player, pausing the video until the specified 'Hide after' duration elapses.
- Toast - The CTA appears at the bottom right corner of the player, allowing playback to continue for the specified 'Hide after' duration.
Hide After - Click the box to enable. Enter the desired duration in seconds for the CTA message. If left blank, the CTA will remain until the user closes it.
Title metadata field - Enter the metadata field that the CTA title should be taken from (replace the default text "New call to action" with your own). Be sure to use the system name shown in the edit custom schema window as it may differ slightly from the field label you entered (as shown in the image below).
Need help finding it? Check out Create a custom metadata schema for CTAs.
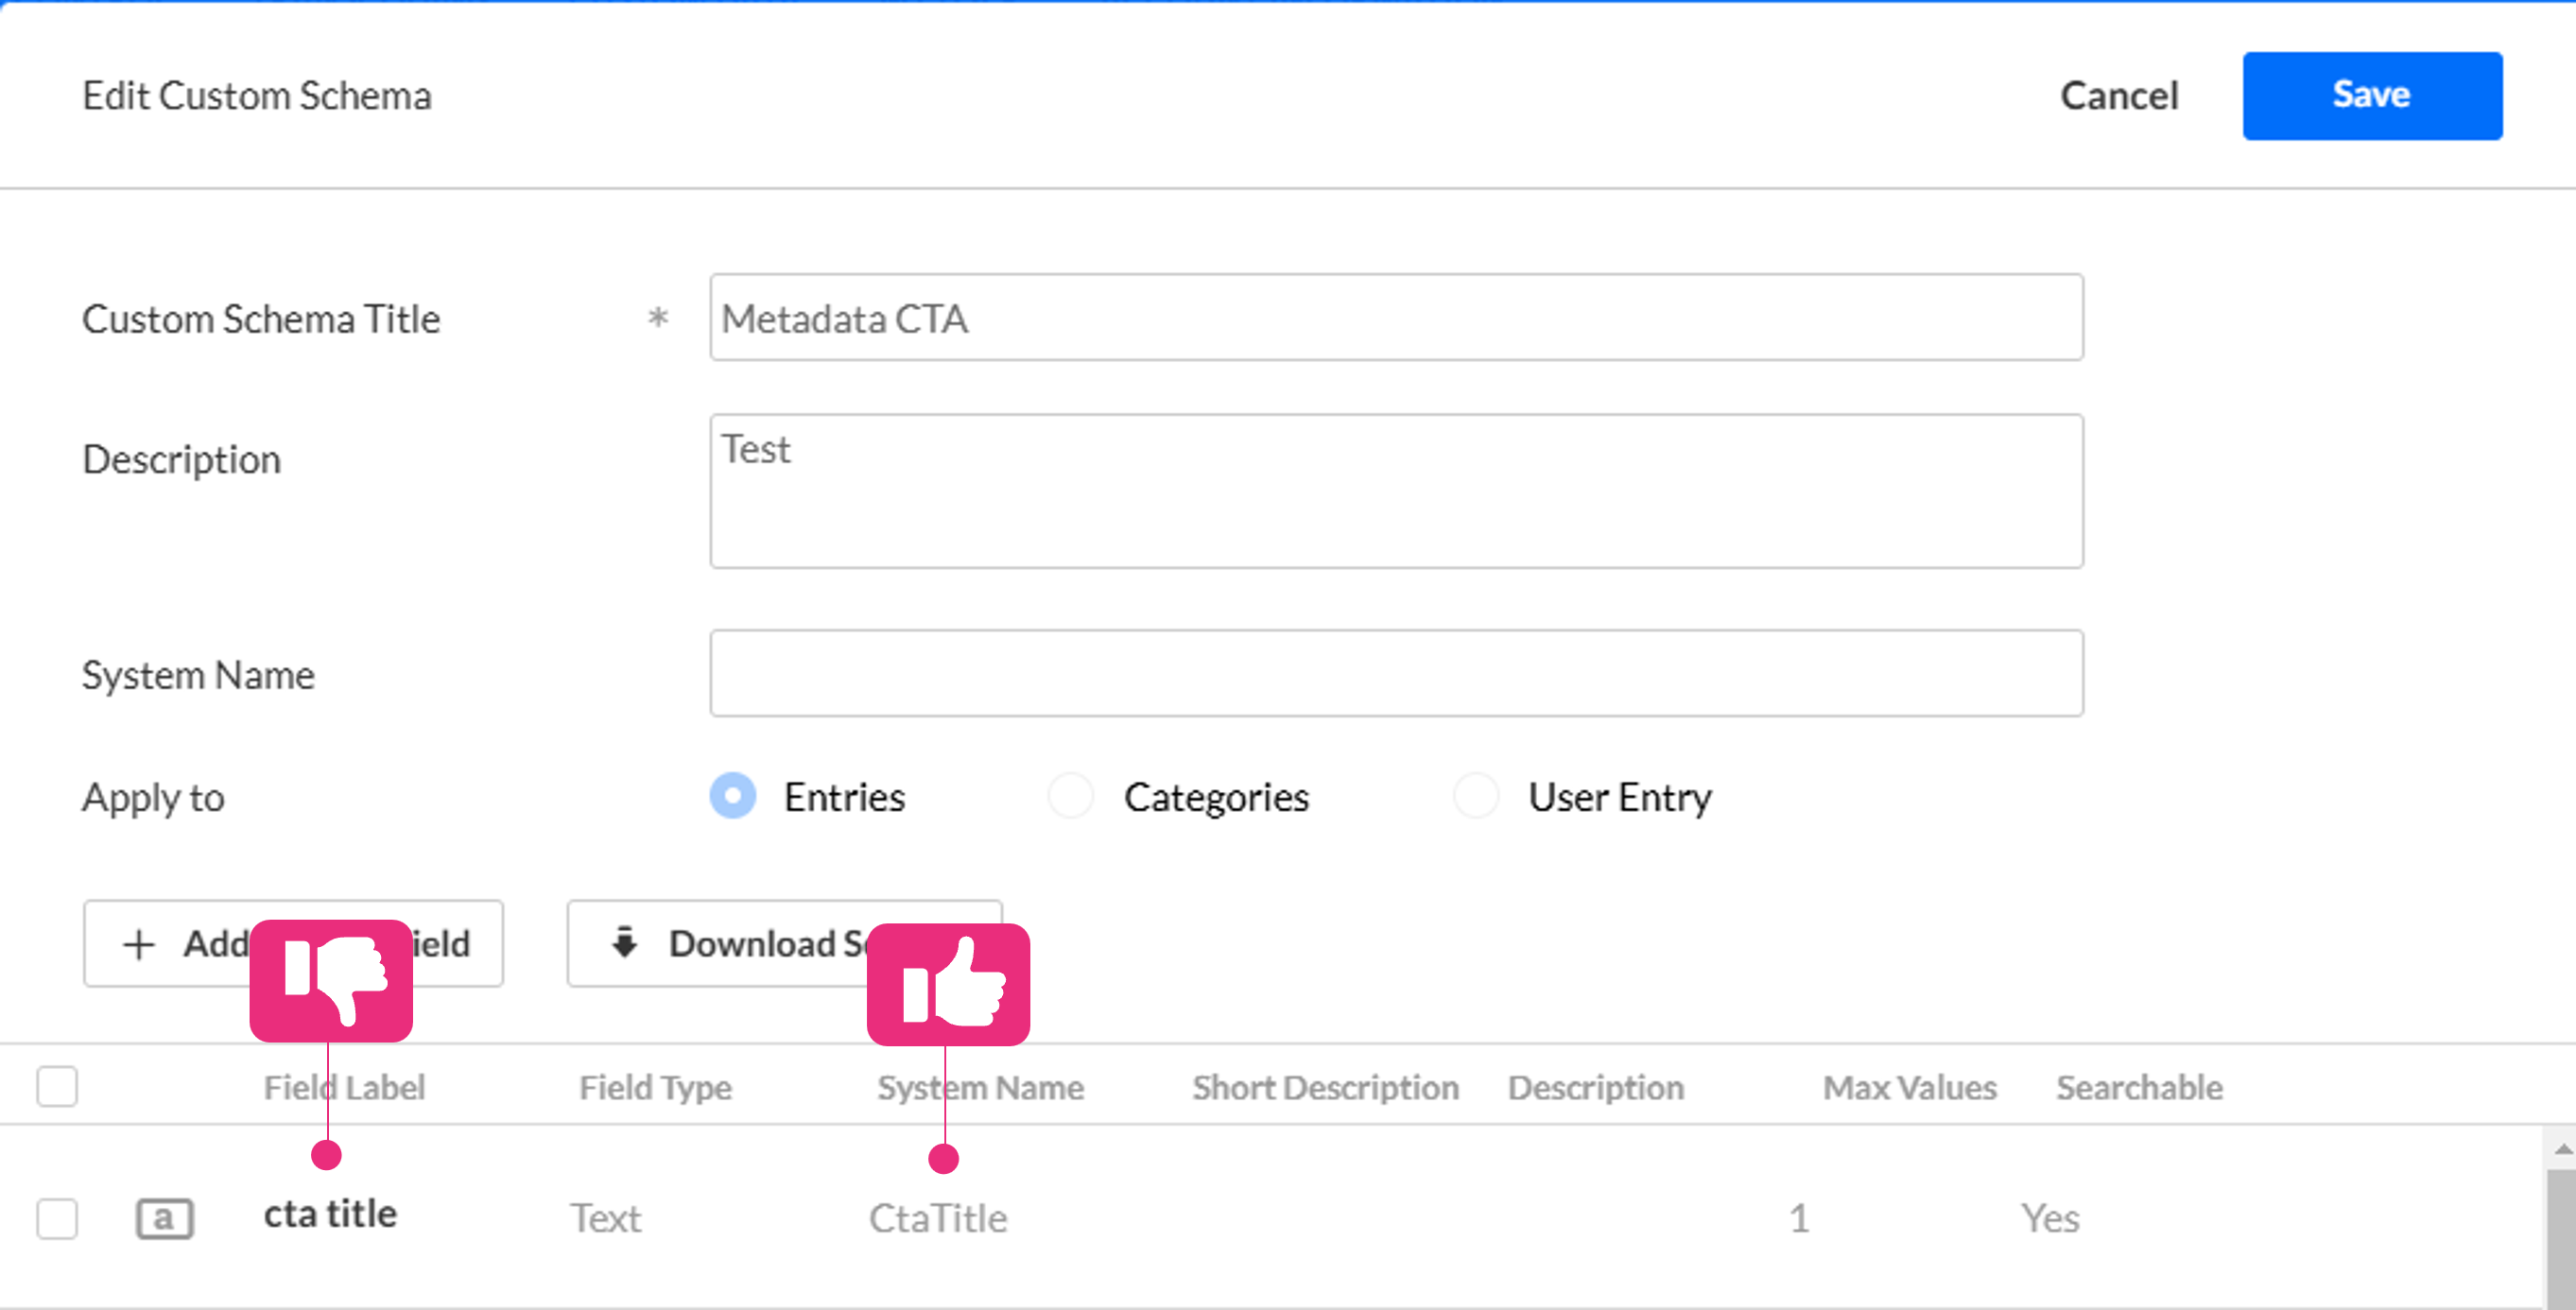 Example taken from the Edit Custom Schema window in Rich Media CMS
Description metadata field - Enter the metadata field for the CTA description. Use the system name from your schema.
Button - Enable by checking the box, then enter:
- Label - Enter the text (use the system name).
- URL - Enter the destination link (use the system name).
Secondary button - Check the box to add a second button (optional) and repeat the steps above.
 Example configuration
Position - Continue with the steps for standard CTA above.
3. Click Save at the top right of the settings page.
For the user guide, see Call to action (CTA) plugin.
