About
Custom metadata allows you to create dynamic Call to Action (CTA) messages in your videos based on an entry’s metadata. This is particularly useful when managing large content libraries where CTAs need to vary depending on the video, ensuring that each CTA is relevant to the specific media entry.
By mapping metadata fields to CTA components, you can automate updates, eliminating the need for manual adjustments per video.
 Example of metadata CTA in a Video Portal entry
Step 1: Create a custom metadata schema
Access the Custom Data page
- Log into your Rich Media CMS.
- Click the Settings gear icon at the right of the navigation menu.
- Click the Custom Data tab.
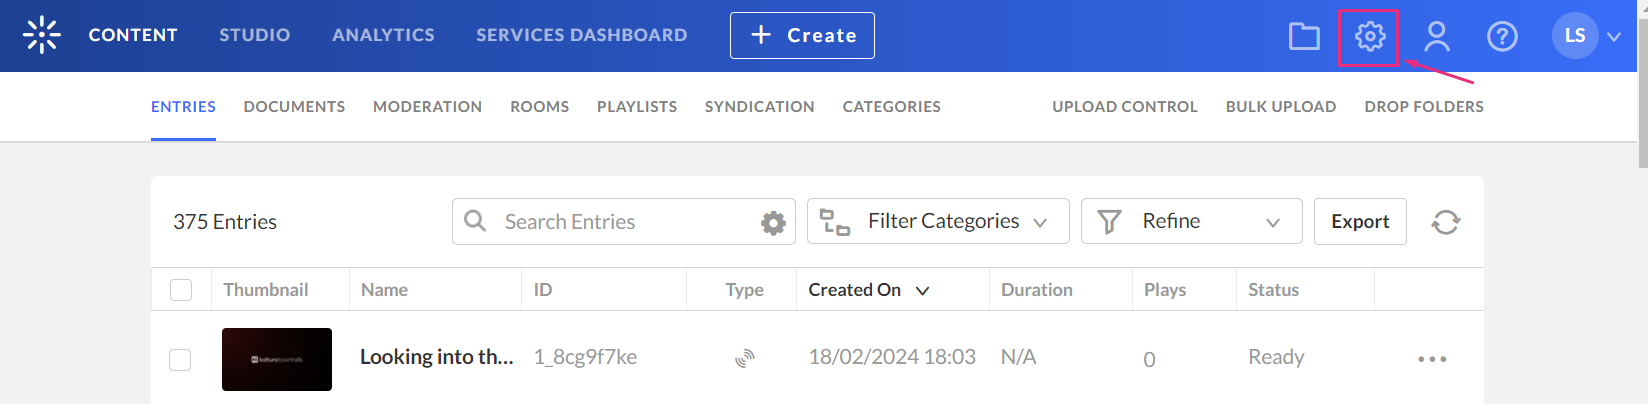
The Account page displays.

The Custom Data page displays.

Create a custom metadata schema
- Click Add Custom Schema.
- Complete the following fields:
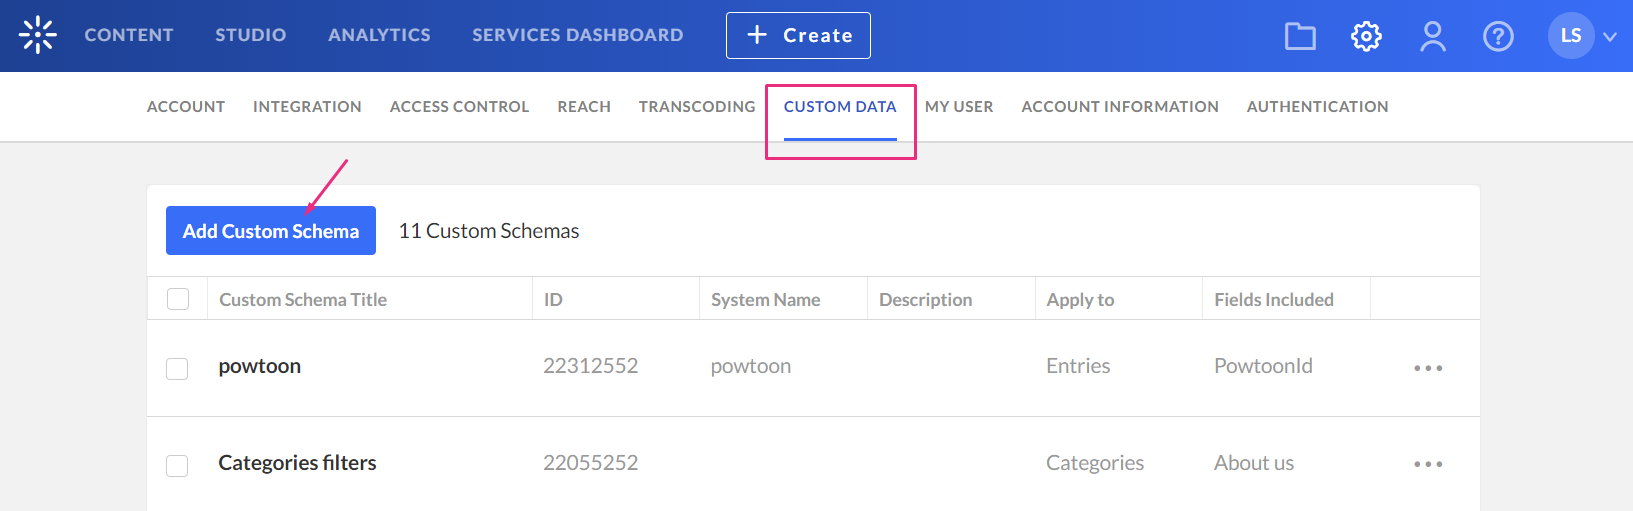
The Add Custom Schema window displays.
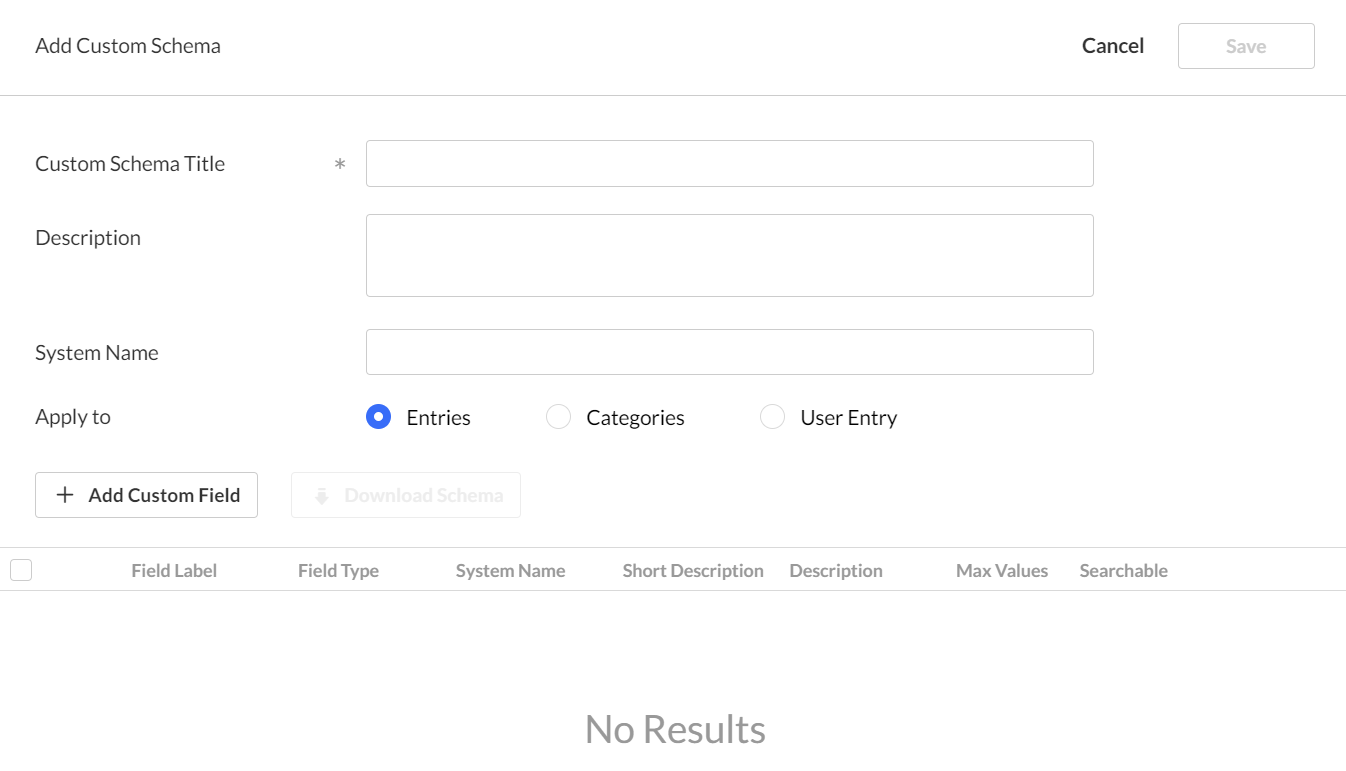
- Custom Schema Title - Add a title (for example, Metadata CTA)
- Description - optional - Enter a relevant description.
- System name - optional - This field is required if you are uploading content using bulk XML files or if you need access to the schema via the API.
- Apply to - Select Entries.


The Add Custom Field window displays.

4. Complete the fields.
You will need to create fields that correspond to each CTA element: title, description, button and URL. See Metadata-based CTA in Player -settings tab.
- Field Type - Select Text.
- Max No. of Values - Choose Single (default).
- Field Label - Type a name for the first metadata field, for example, ctaTitle.
- Short description - optional
- Description - optional
- Searchable - You might want to make sure the searchable button is enabled, this will allow the metadata to be findable in the search results.
- Required - This makes the field mandatory. The user must fill it out to submit the form.
- Hidden - This hides the field from the registration form. Use this option for fields you're unsure about, allowing you to show or hide them as needed without replacing the form.
5. Click Add to save the custom field.

6. Repeat steps 3 - 5 above for the CTA elements you wish the player to display:
- Title
- Description
- Primary button label
- Primary button URL
- Secondary button label
- Secondary button URL
7. Click Save at the top right to finalize the schema.
Use the following image as a guideline, but feel free to choose different names that fit your needs:
 Example configuration
Your new metadata schema displays under the Custom Data tab.

Save the metadata profile ID - you’ll need it when setting up the player.

Step 2: Complete the custom metadata fields for the entry
- Access the entry details page by clicking the Content tab in the navigation menu.
- Click on the desired entry's title or thumbnail.
- Scroll down to the Metadata CTA section.
- Complete the fields:

The Entries page displays by default.


- Title - Enter the CTA's title
- Description - Enter the description to display under the CTA title
- Primary button URL- Add the desired URL
- Secondary button URL- Add the second URL
- Primary button label - Enter the text for the button's label
- Secondary button label - Enter the text for the second button's label
The field names in the image below are just examples. Yours will match your metadata schema.

