About
The EmailService module lets you send emails to video portal users using the email service you choose to configure in the module. You can configure how user-triggered emails (like registration) are sent, and then set up email templates for each trigger/action using the EmailTemplates module.
- Select Local to send emails via the Kaltura service using a few predefined kaltura.com addresses.
- Choose SMTP to set up your own SMTP email service.
- To use SES (Amazon’s Simple Email Service), please contact your Kaltura representative.
- Select Kaltura Messaging Service to send emails using the Kaltura SendGrid based email service.
Configure
1. Go to your Configuration Management console, and click the EmailService module. You can also navigate directly using a link: https://{your_KMS_URL}/admin/config/tab/emailService.

The module page displays.

2. Configure the desired fields as follows:
There are four types of email services: Local, SMPT, SES or Kaltura messaging service.
If you want to use the SES (Amazon’s Simple Email Service), please reach out to your Kaltura representative.

Local
Local uses the Kaltura service and sends emails from donotreply@kaltura.com. It doesn't give you any permission to modify or customize who the sender is.

- Service - Select 'Local' from the dropdown.
- emailFrom - Enter the email sender.
- nameFrom - Enter the sender's name to display on emails sent via the email service. If left blank, the site’s title will be used instead.
- Click Save
SMPT
Simple Mail Transfer Protocol (SMTP) is a TCP/IP protocol used in sending and receiving email. It is typically used with POP3 or Internet Message Access Protocol to save messages in a server mailbox and download them periodically from the server for the user. This allows you to send emails from a gmail account or whatever service provider you choose.

For SMTP, configure the following:
- Service - Select 'SMTP' from the dropdown.
- host - Enter the SMTP host name.
- securedProtocol - Select from the dropdown the secured or encryption protocol that you want.
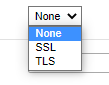
SSL (Secure Sockets Layer) is the standard technology for keeping an internet connection secure and safeguarding any sensitive data that is being sent between two systems. TLS (Transport Layer Security) is an updated, more secure, version of SSL.
- port - Enter the port used to connect to the SMTP host.
Port 587 is the default port for SMTP submission on the modern web. While you can use other ports for submission, you should always start with port 587 as the default and only use a different port if circumstances dictate (like your host blocking port 587 for some reason). Port 587 also supports TLS, which means that you can securely submit mail.
- authentication - Does your SMTP server require an authentication? If it does, select 'Yes'. If not, select 'No'. If you select 'Yes', the screen expands and you are asked to complete the following fields:

- username - used to authenticate
- password - used to authenticate
- emailFrom - Enter the email sender.
- nameFrom - Enter the sender's name to display on emails sent via the email service. If left blank, the site’s title will be used instead.
6. Click Save
SES
Amazon SES is a cloud email service provider that can integrate into any application for sending bulk email and lets you reach customers without an on-premises Simple Mail Transfer Protocol (SMTP) system. If you wish to use the SES (Amazon’s Simple Email Service), please reach out to your Kaltura representative.
Kaltura messaging service
Kaltura Messaging Service is a SendGrid-powered email option that enables sending user-triggered emails, such as registration confirmations and invitations, with enhanced customization and token support for personalized messaging.

For Kaltura Messaging Service, configure the following:
- Service - Select Kaltura Messaging Service from the dropdown.
- emailFrom - Enter the sender's email to show on emails sent by the app.
- nameFrom - Enter the sender's name to show on emails sent by the app. Leave empty to use the site’s title.
- Click Save.
