About
Custom metadata lets you control bumper videos per entry instead of using the same bumper for all videos in a player.
By mapping metadata fields to bumper settings, each entry can define its own bumper video, click-through URL, and position.
This is useful when managing large content libraries where bumper content varies between entries.
Step 1: Create a custom metadata schema
Access the Custom Data page
- Log into your Rich Media CMS.
- Click the Settings gear icon at the right of the navigation menu.
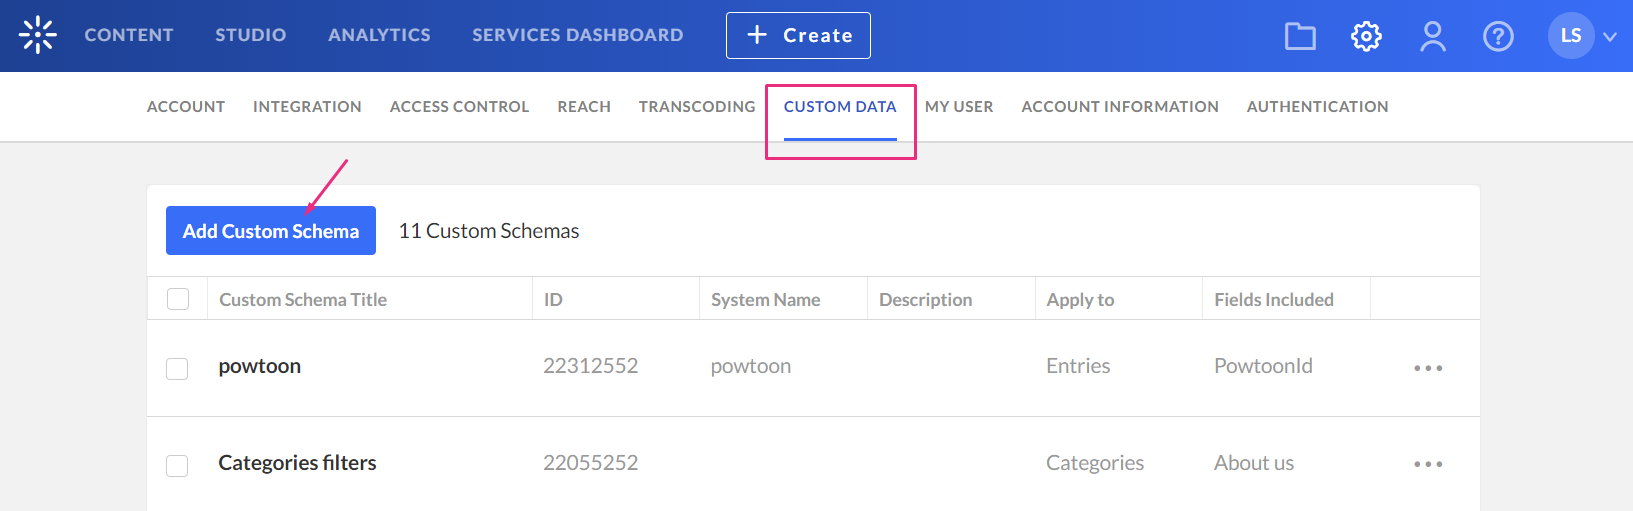
- Click the Custom Data tab at the top of the page.
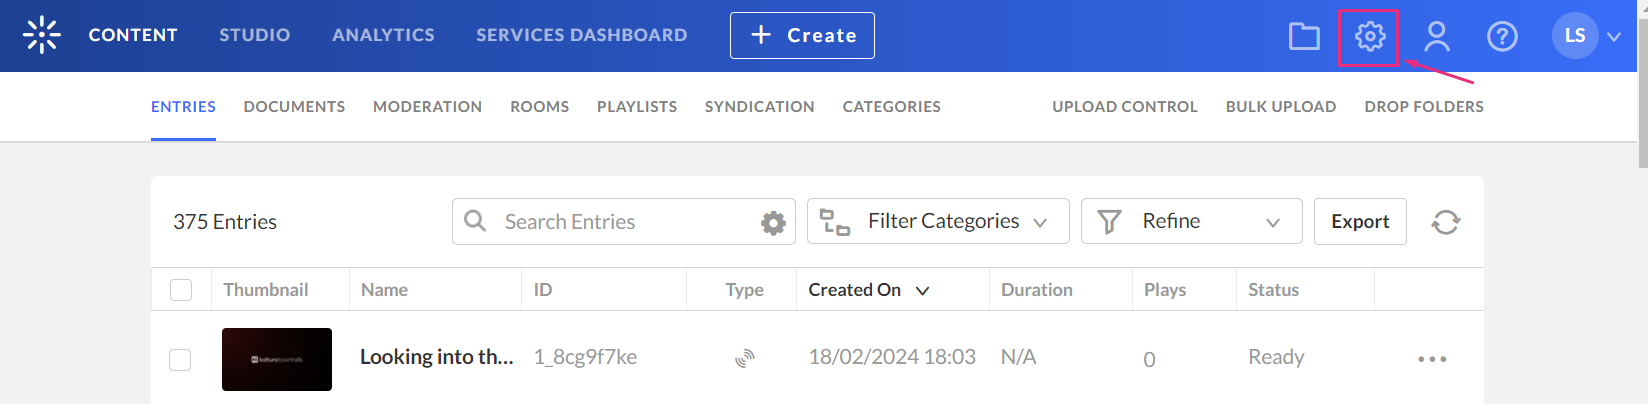
The 'Account' page displays.

The 'Custom Data' page displays.

Create a custom metadata schema
- Click Add Custom Schema.
- Complete the following fields:
The Add Custom Schema window displays.
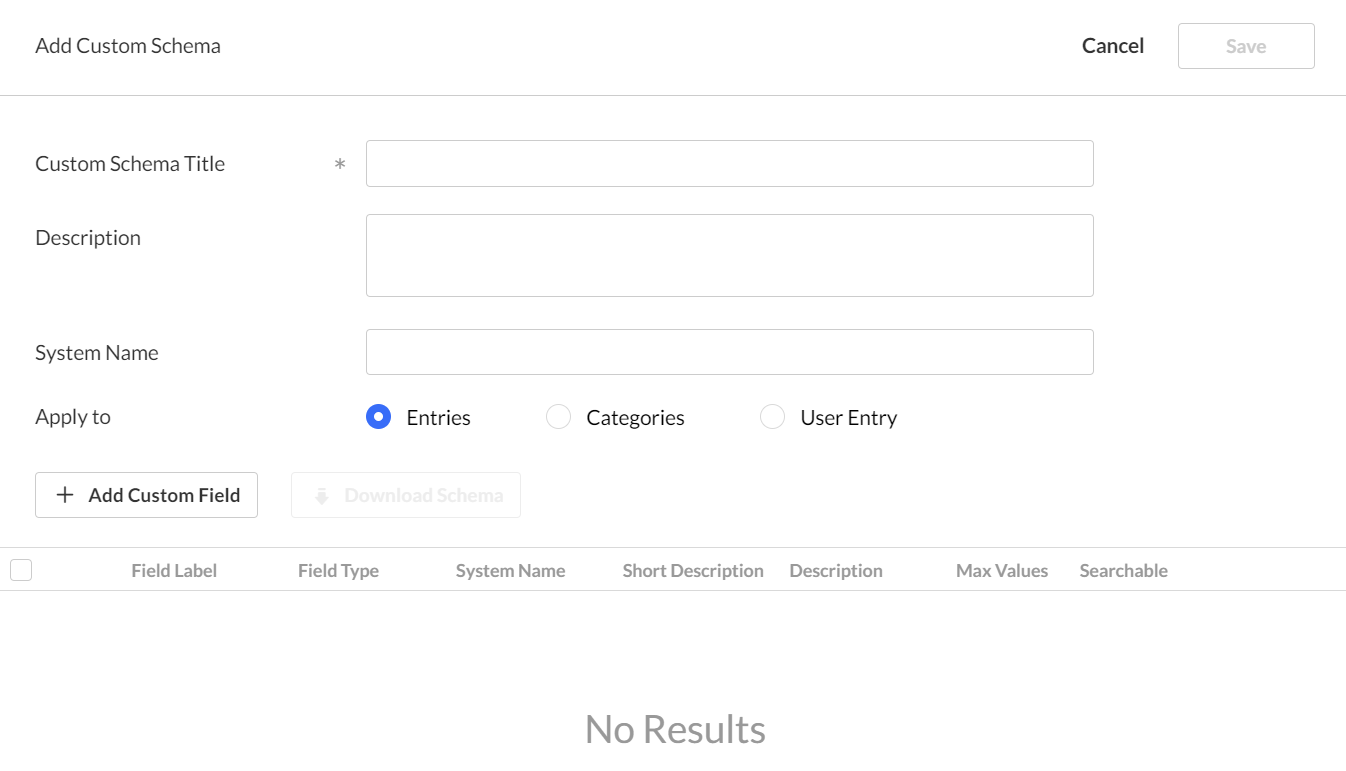
- Custom Schema Title - Add a title (for example, Bumper metadata)
- Description - (optional) Enter a relevant description.
- System name - (optional) This field is required if you plan to use the schema with bulk XML uploads or APIs.
- Apply to - Select Entries (default).

The 'Add Custom Field' window displays.

4. Complete the fields:
- Field Type - Select Text.
- Max No. of Values - Choose Single (default).
- Field Label - BumperUrl (You must type BumperUrl exactly as shown in these instructions. The player only reads metadata fields with this exact field label.)
- Short description - optional
- Description - optional
- Searchable - Enable if you want to allow search by this field.
5. Click Add.

The field displays in your custom schema list.

6. Click +Add Custom Field and repeat the steps above for the remaining fields:
BumperClickThroughUrl
- Field Type – Text
- Field label – BumperClickThroughUrl
BumperPosition
- Field Type – Text
- Field label - BumperPosition
- Use the exact field labels shown above. The player only reads metadata fields with these exact names.
- Metadata-based bumpers support the fields BumperUrl, BumperClickThroughUrl, and BumperPosition. Although Player Studio supports a Bumper Entry ID field for player-level configuration, Entry IDs are not supported in the custom metadata schema.
7. Click Add to save the custom field.
8. Click Save in the top-right corner to finalize the schema.

Your new metadata schema appears under the Custom Data tab.
Step 2: Add bumper metadata to an entry
- Access the entry details page by clicking the Content tab in the navigation menu.
- Click on the desired entry's title or thumbnail.
- Scroll down to the bumper metadata section.
- Complete the fields as needed:

The Entries page displays by default.


- BumperUrl - Enter the bumper video URL
- BumperClickThroughUrl - (optional) Enter a destination URL
- BumperPosition - Enter one of the supported values exactly as shown:
- 0 – before playback
- -1 – after playback
- 0,-1 – before and after playback
5. Click Save.
The bumper is applied when the entry is played in a player with Metadata based bumper video enabled.
If BumperUrl or BumperPosition contains an invalid or empty value, the bumper is not displayed and the player falls back to the global bumper settings.

