About
Lecture Capture automatically uses the highest available camera quality by default. You can select a different camera and adjust settings such as resolution, frame rate, encoder, and bitrate before you start recording.
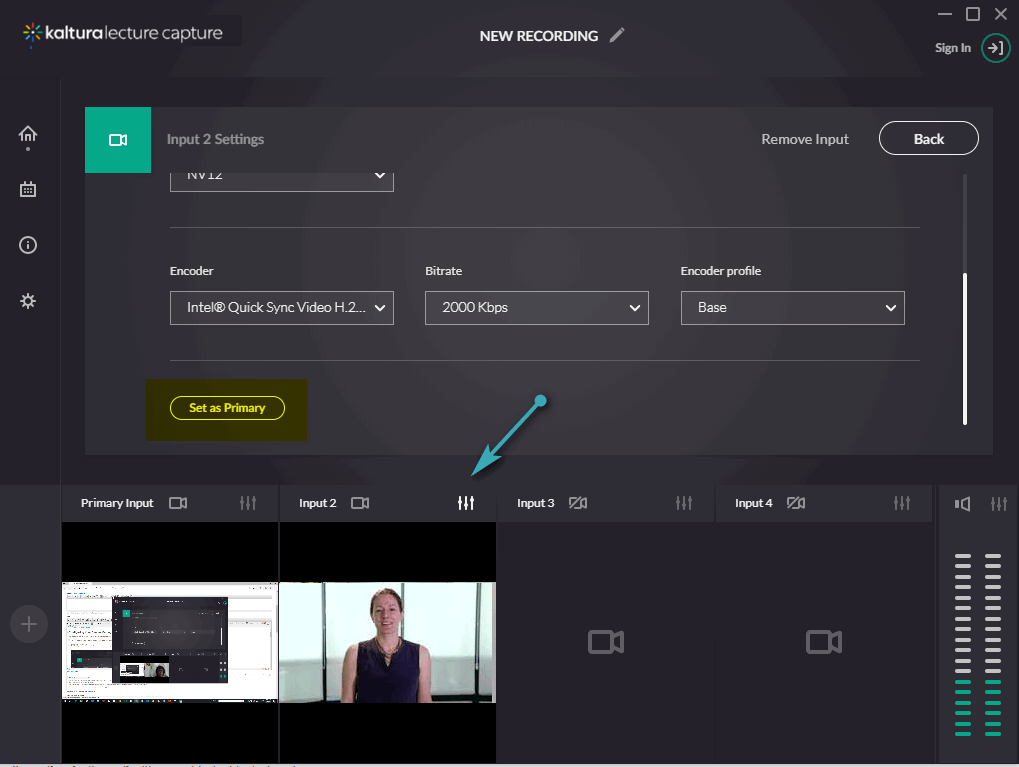
Configure camera settings
You can’t change camera settings during a recording. Configure your camera before you start recording.
- Click the settings icon.
- Scroll down and select Set as Primary.
- From the input source dropdown, select the camera you want to use.
-
Lecture Capture automatically selects the optimal camera settings. Change any of the following settings as needed:
- Resolution - Select the recording resolution. A higher resolution provides higher recording quality and produces a larger file.
- FPS - Select the number of frames per second. We recommend 30 FPS. A lower frame rate can cause fast movement to appear blurred.
- Color Space - Select the color space for the video.
- Encoder - Select the encoder.
- Bitrate - Select the bitrate.
- Encoder Profile - Select High, Main, or Baseline.
- Review your changes in the preview window.
- Click Back to return to the main recording window.