This article documents the legacy KME room. For our next-generation virtual classroom and collaborative meeting solution, please visit the Kaltura Room documentation.
Use the Kaltura Meetings Captioning Tool to enable a captioner to write out captions for other participants.
How To Set A Closed Captioner? (Host,Instructor)
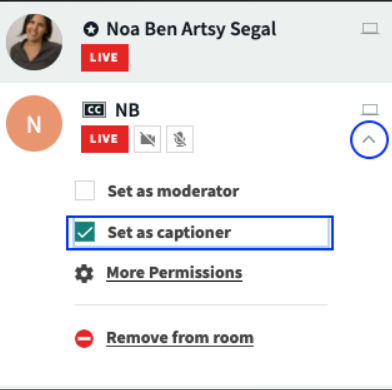
Instructors can set anyone in the session as a captioner - including themselves. In order to set someone as a captioner:
- Find the name of the preferred captioner in the participant list.
- Click the drop down V next to their name.
- Click Set As Captioner.
💡Once set as captioner, the closed captioning icon (CC) will appear next to their name.
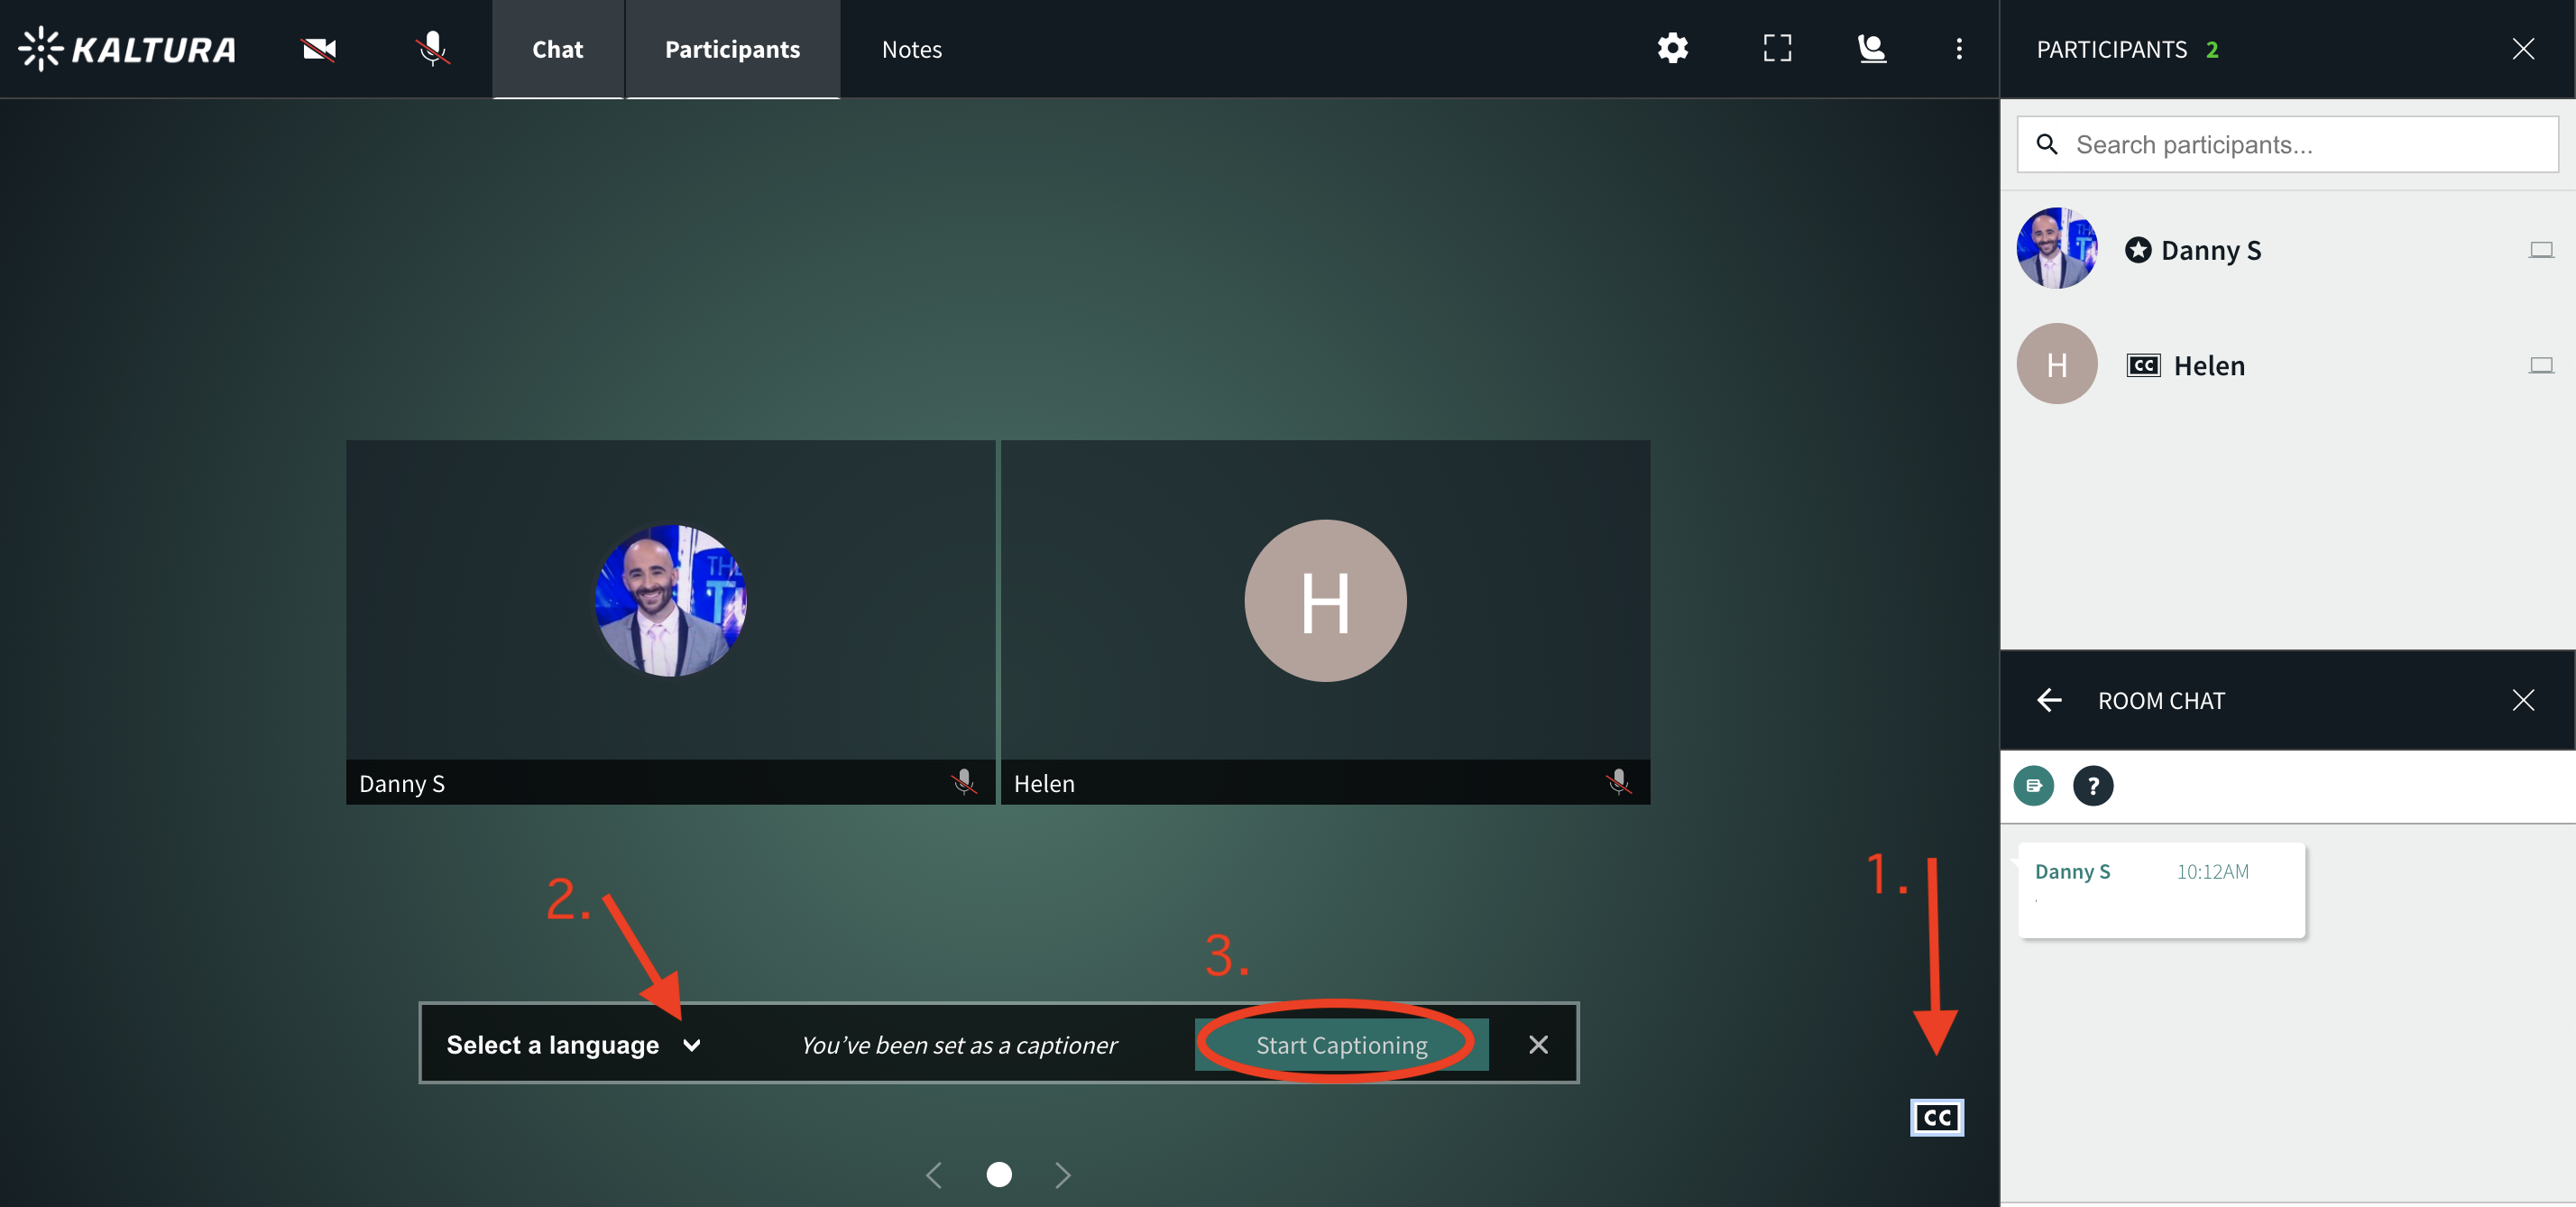
How To Begin Captioning? (Captioner)
Once set as a captioner, this person is ready to caption. The captioner must:
- Hover cursor in the bottom right and click the CC (closed captioning) icon.
- Select a language.
- Click Start Captioning.
- Begin typing.
💡Participants who enable closed captioning in a session will see what the captioner is typing.
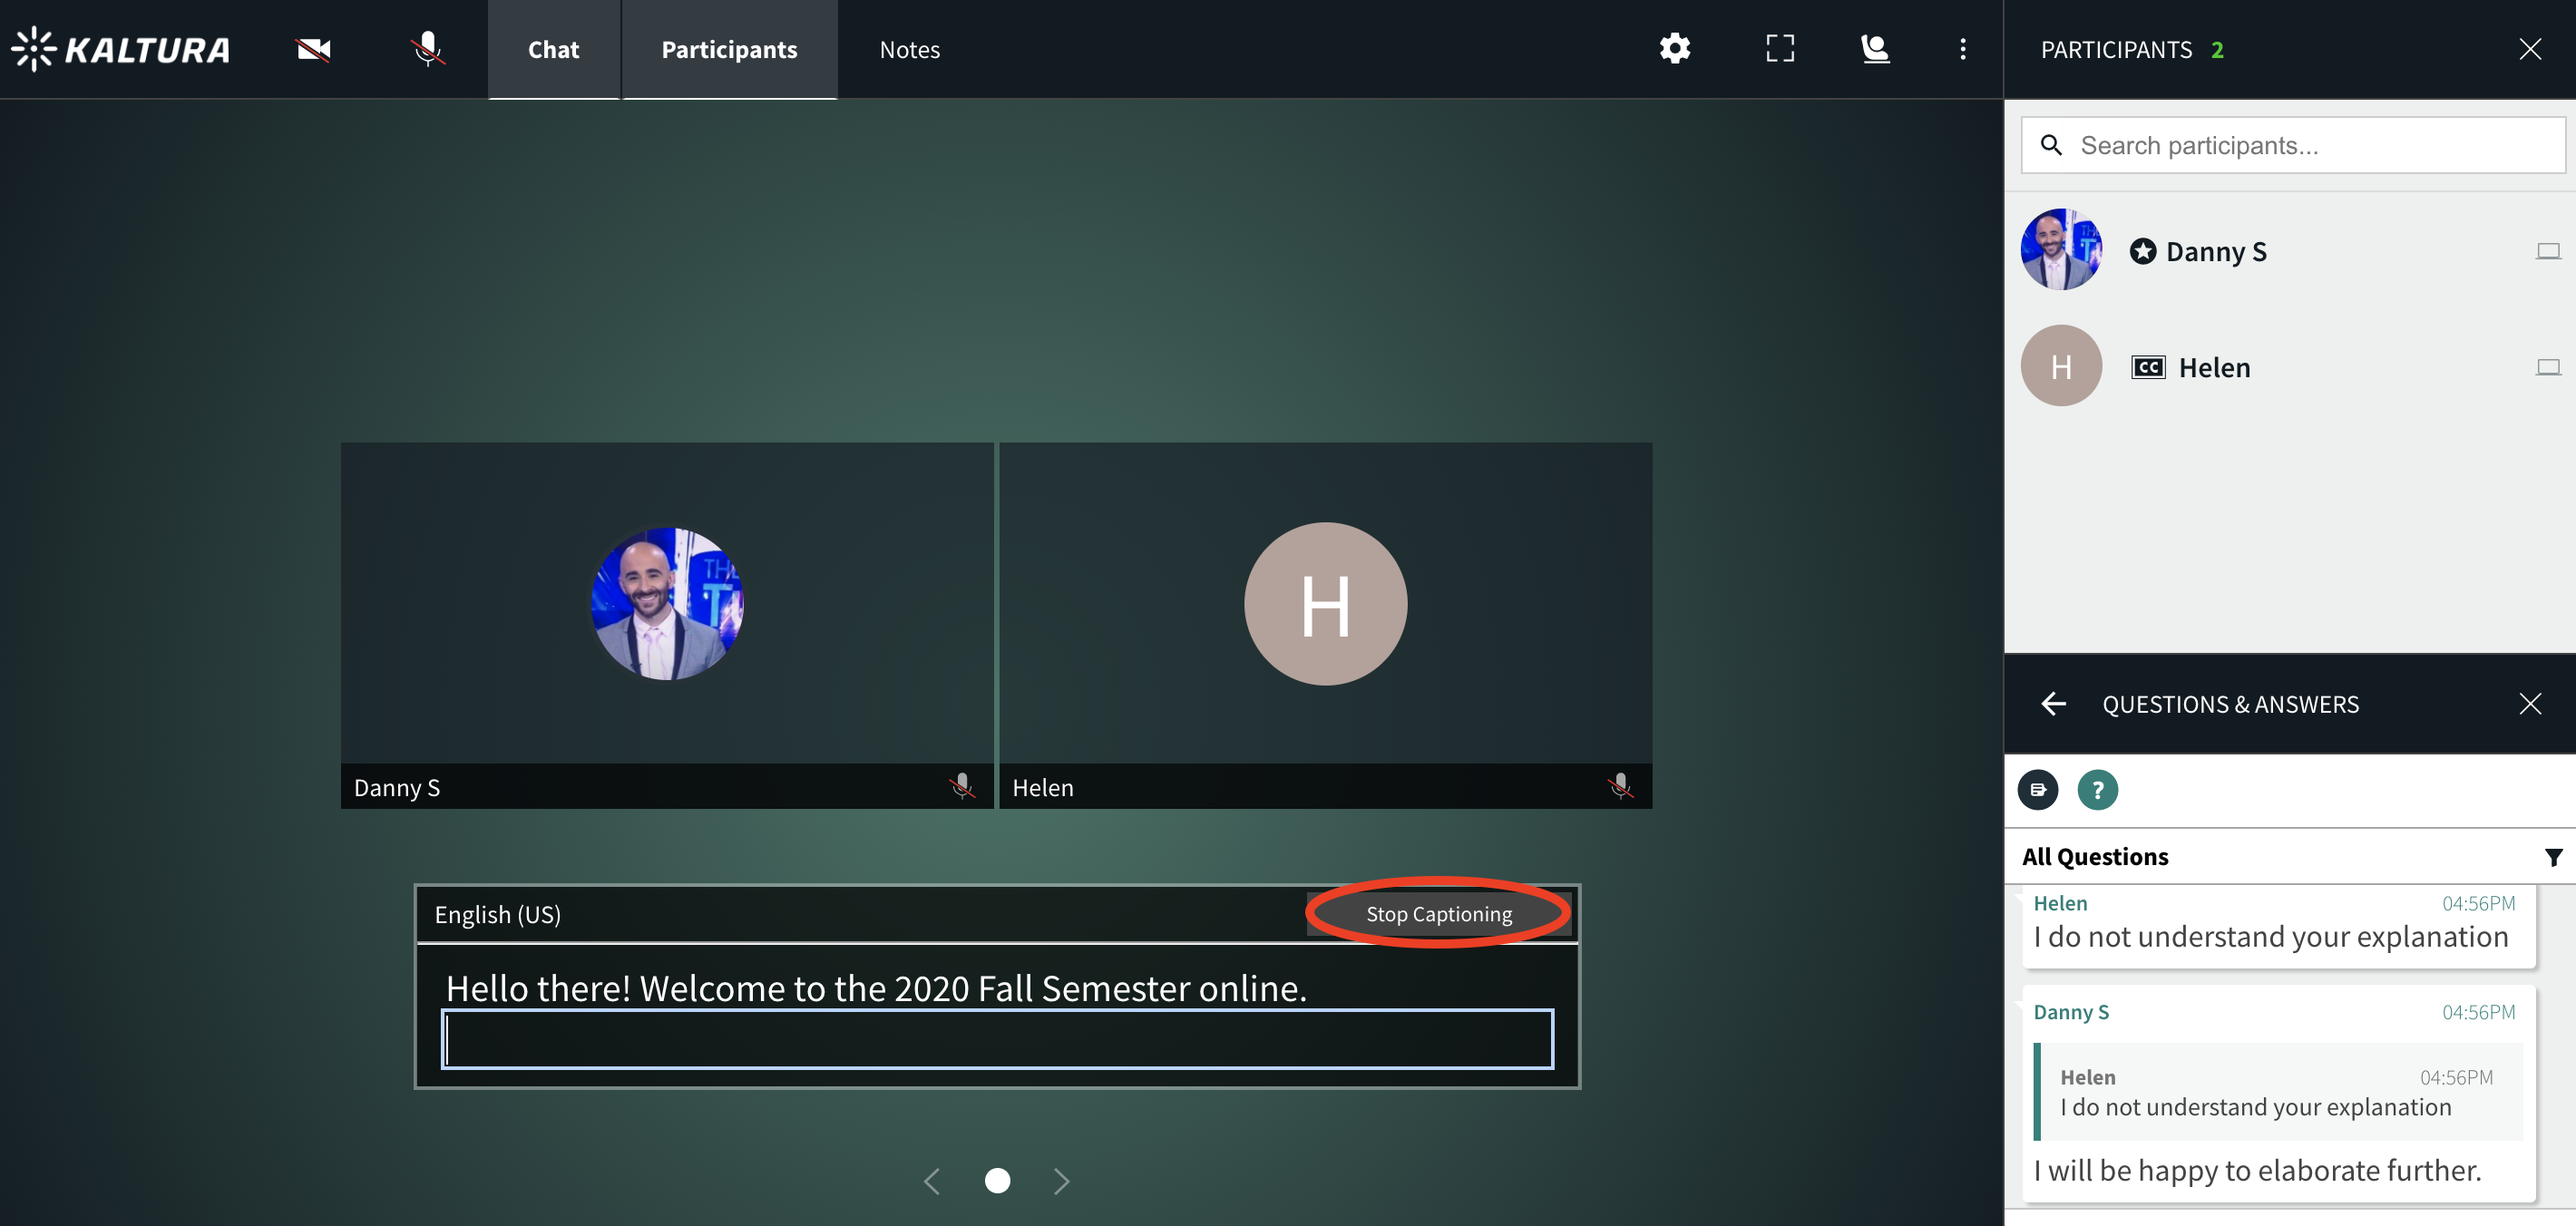
How To Stop Captioning? (Captioner)
Once a captioner is finished captioning, they can stop captioning. The captioner must:
- Click the Stop captioning button.
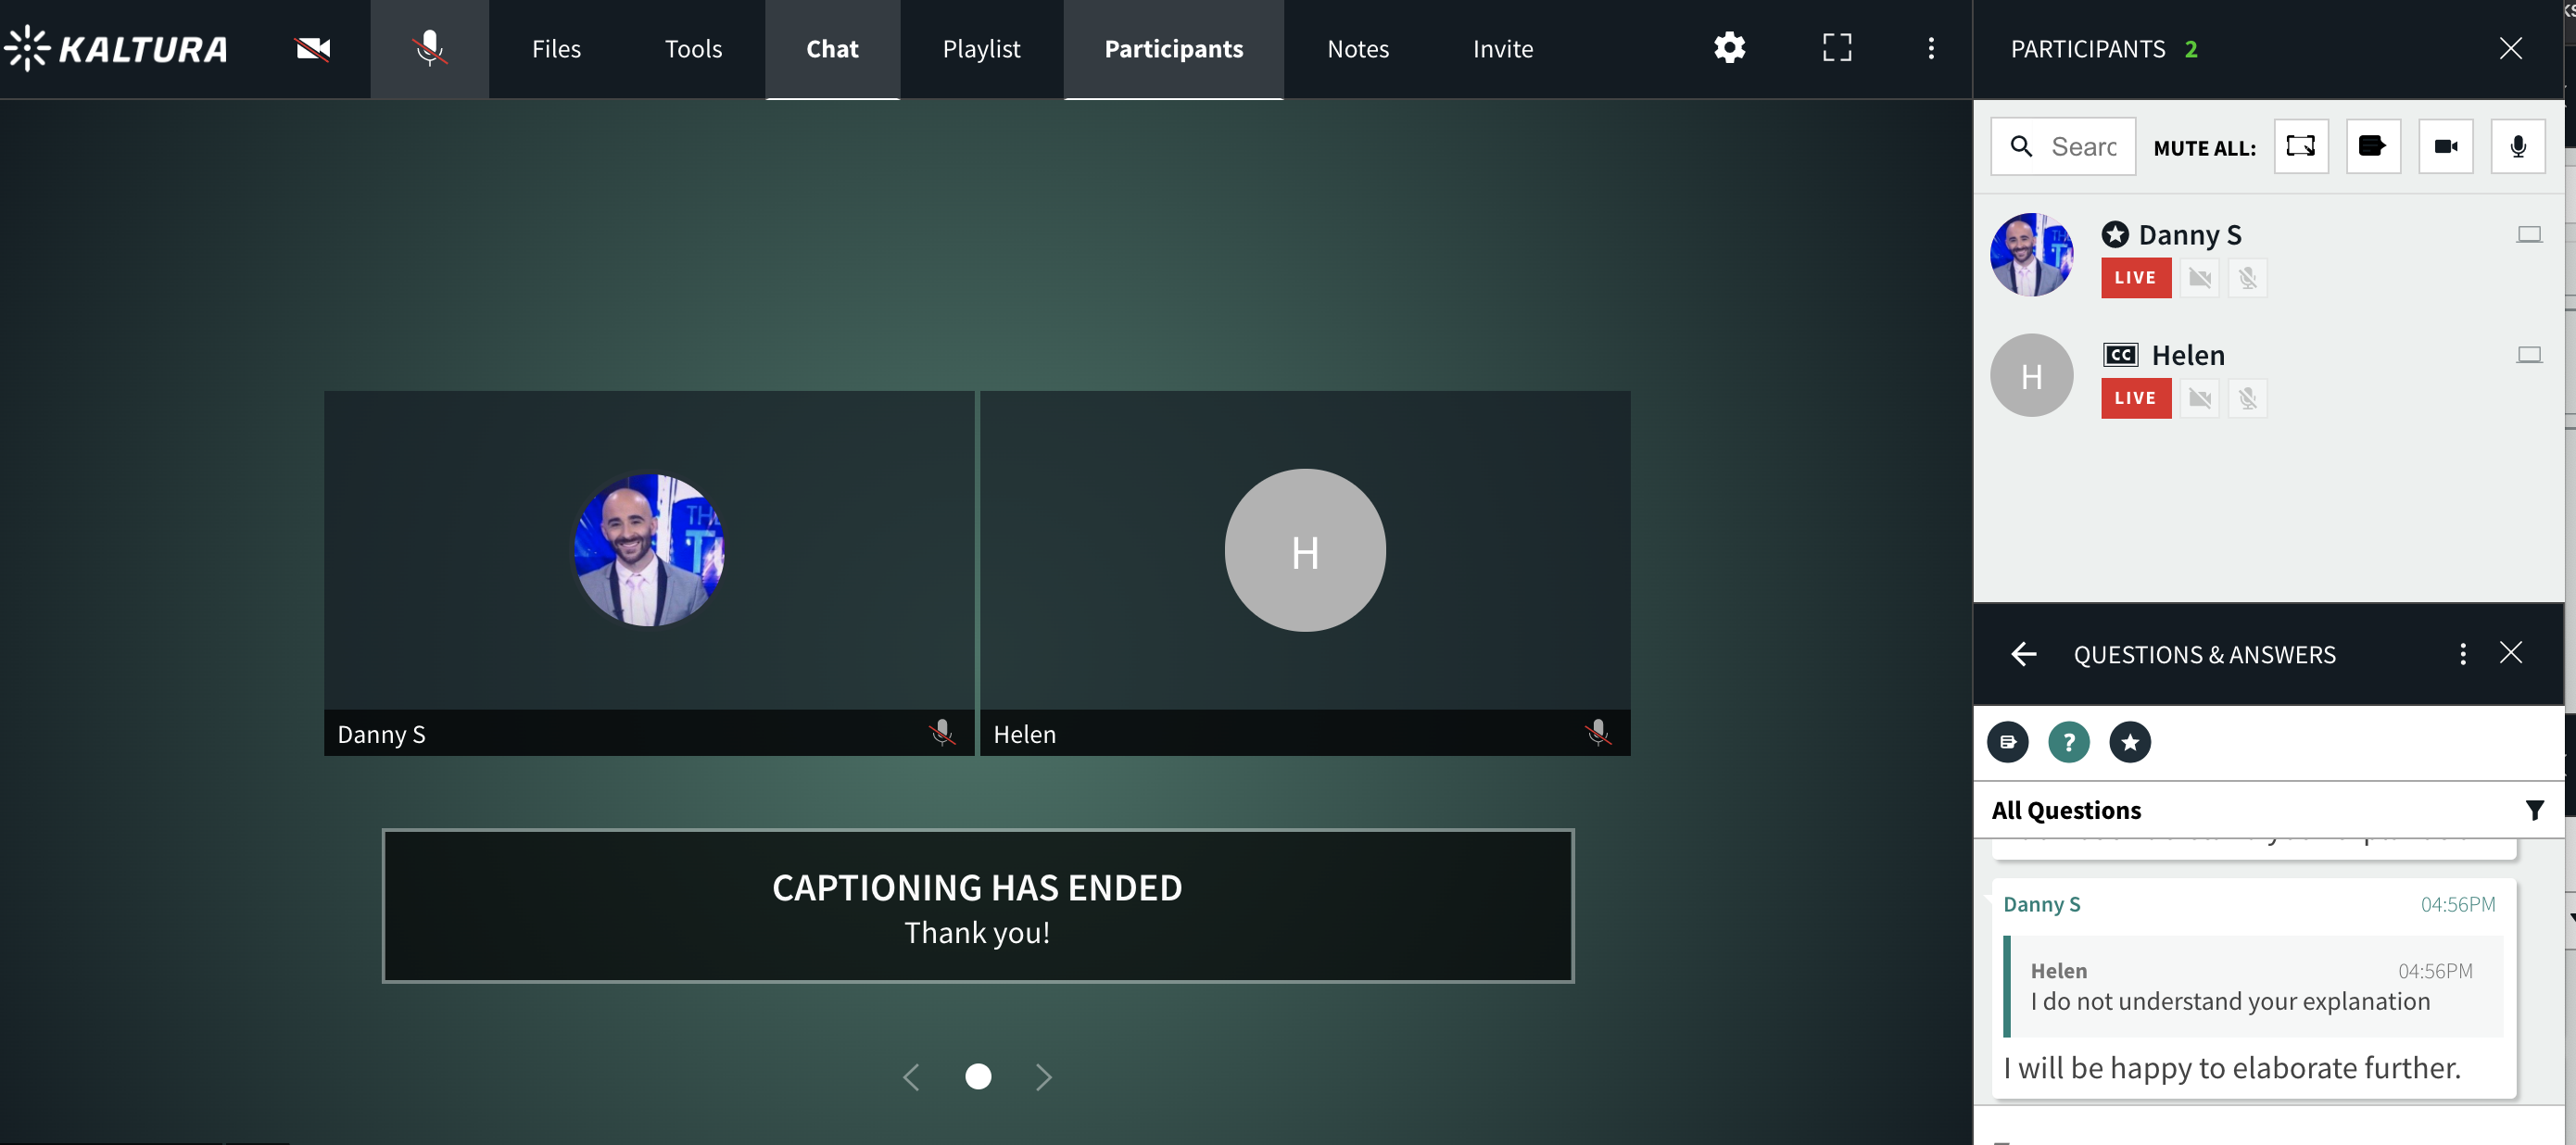
💡The Captioning Has Ended banner will display for participants.
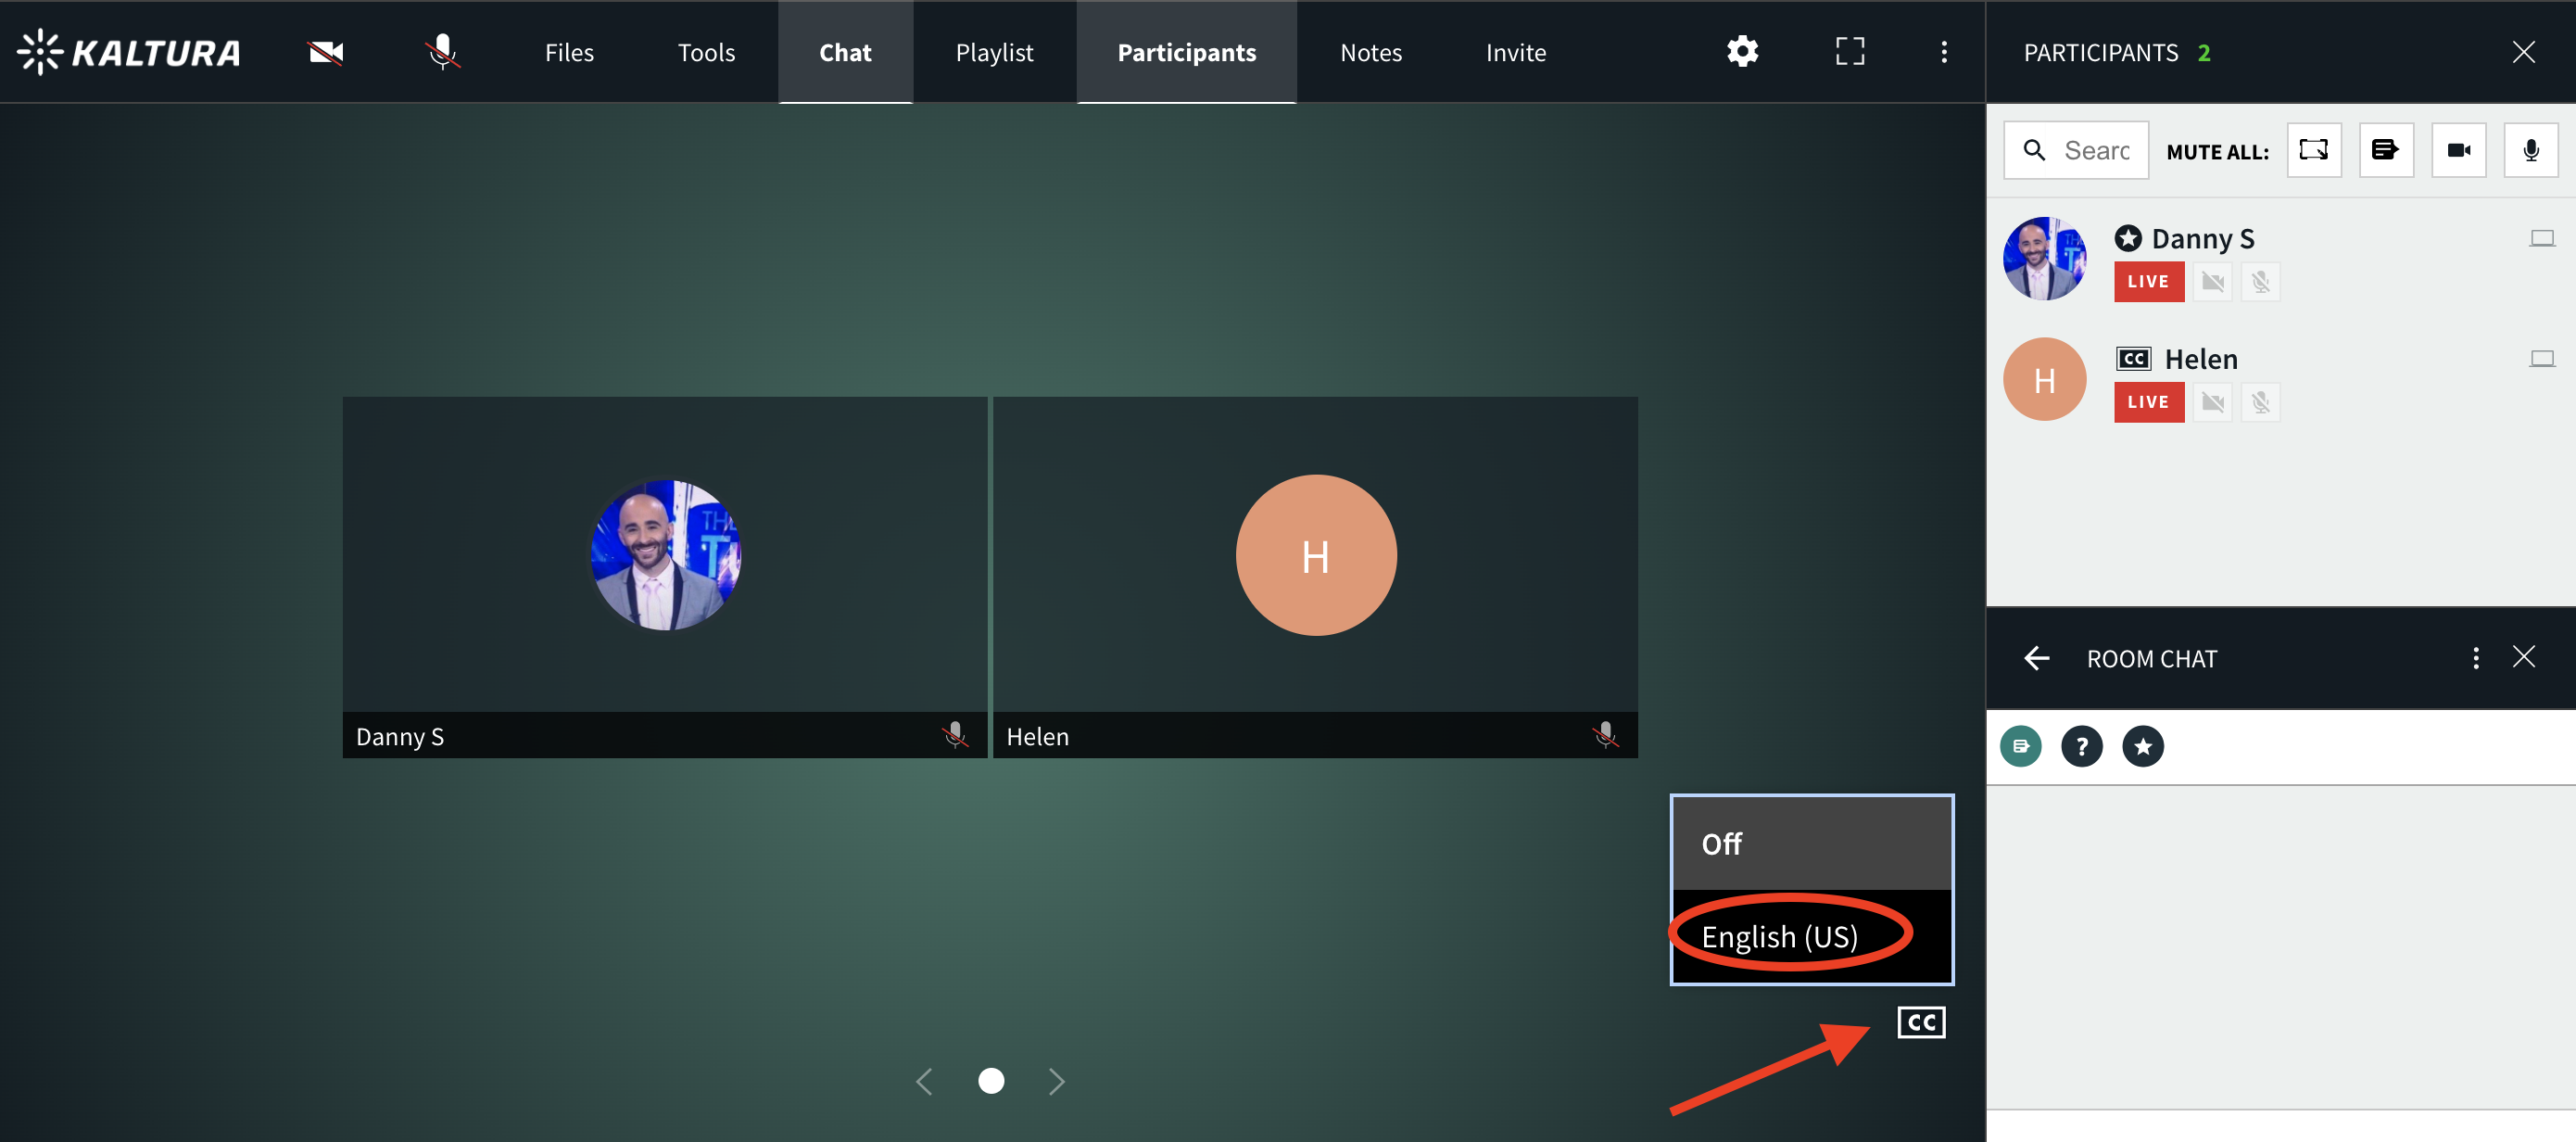
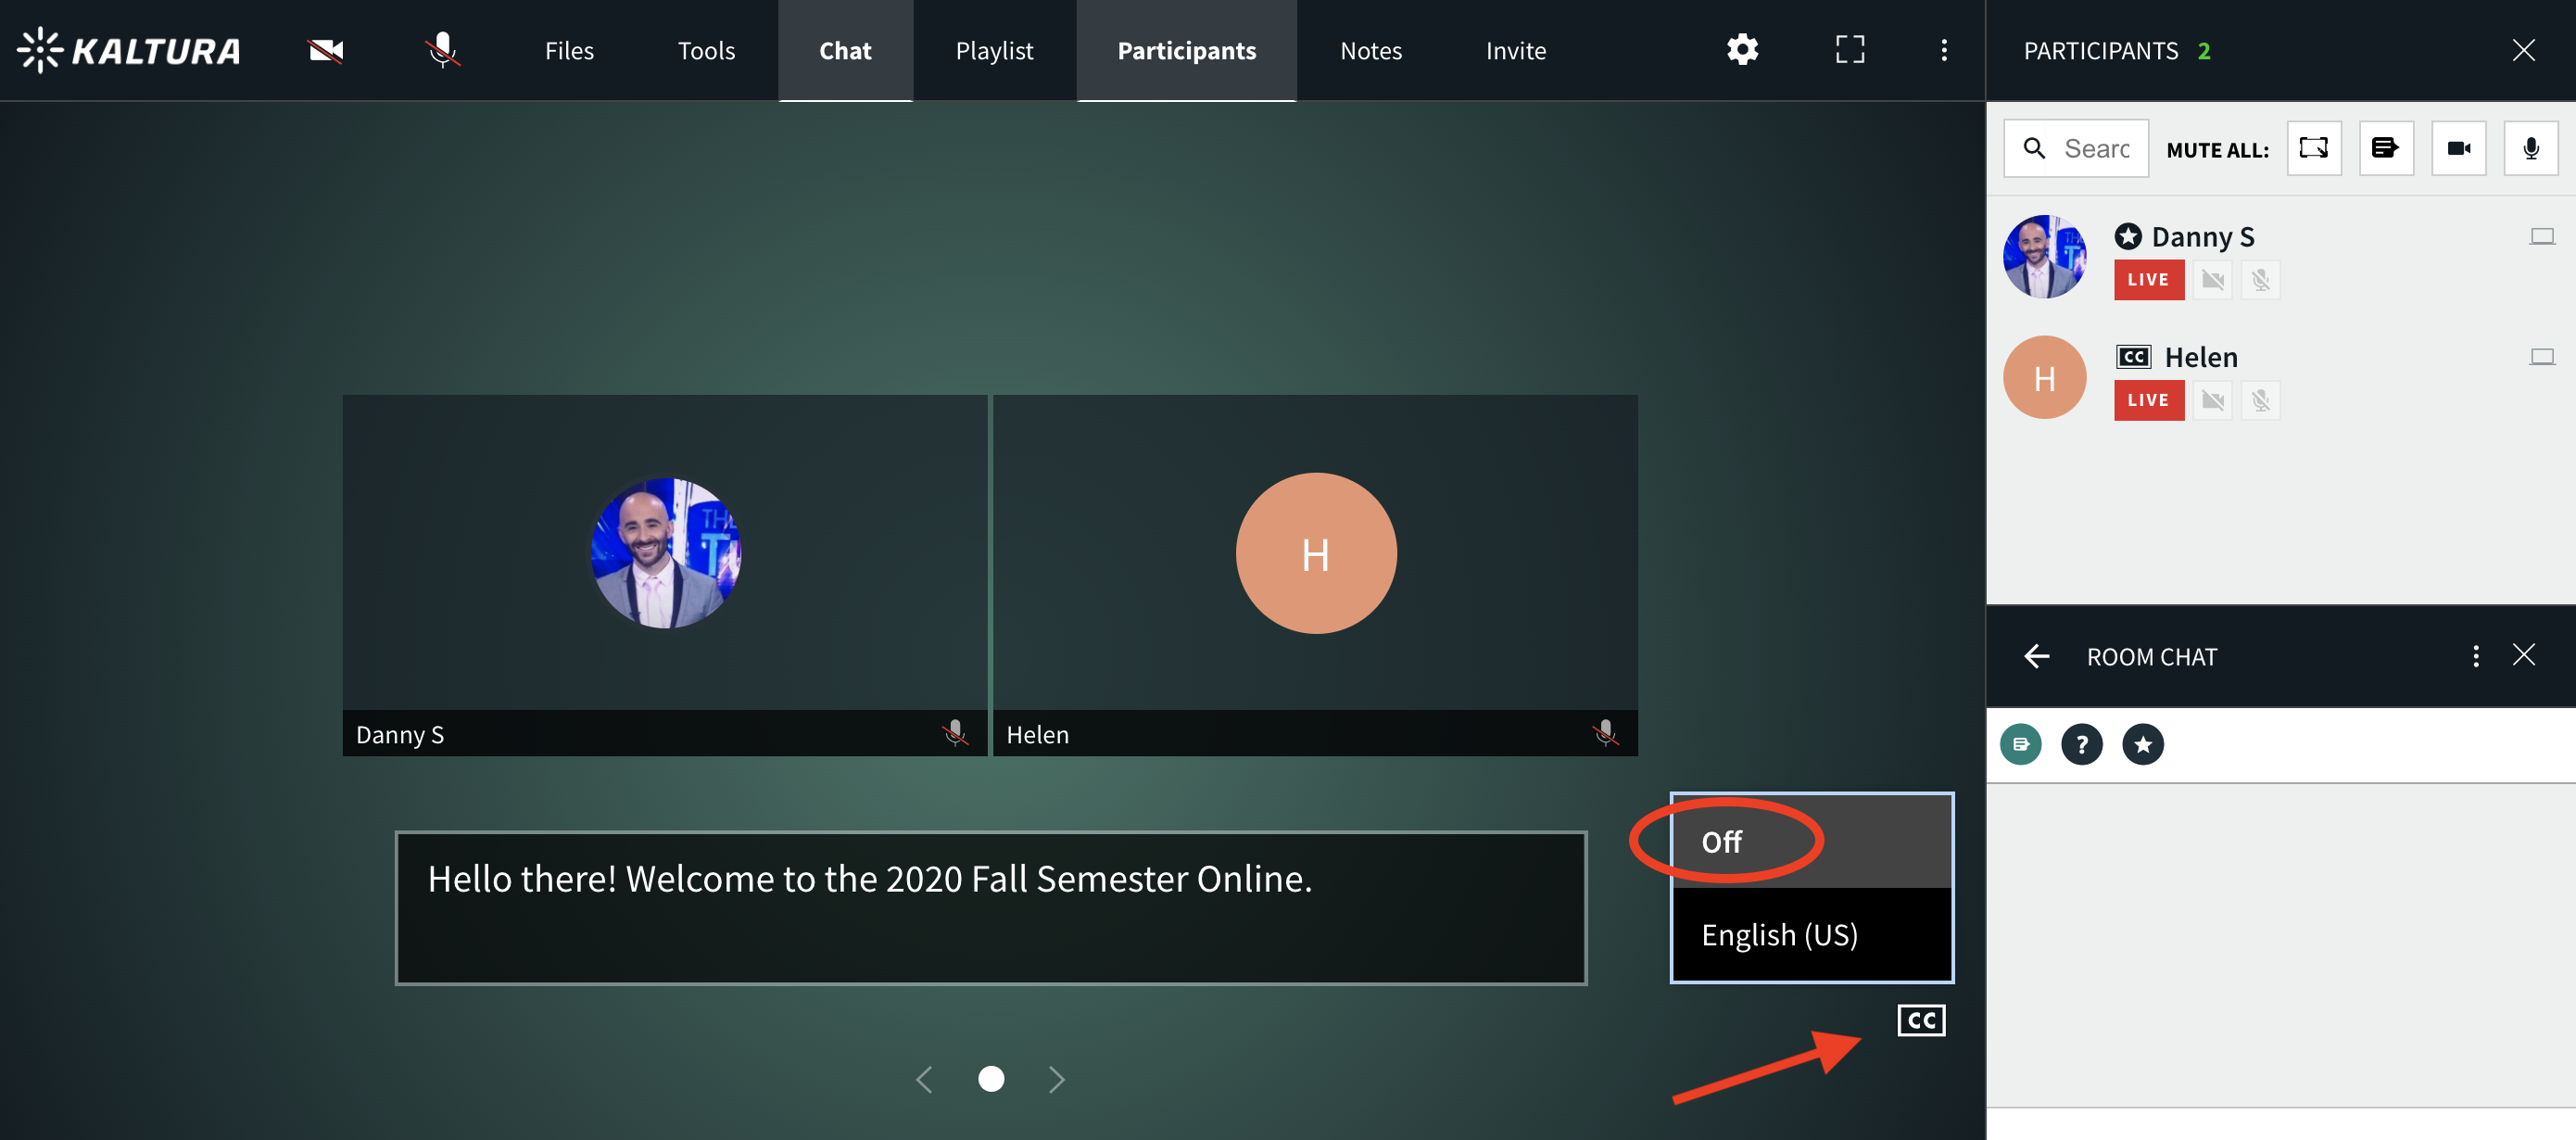
How To Enable Closed Captioning? (Participants)
Participants in the session can view captions with the click of a button. Participants who want to receive closed captioning must:
- Hover cursor in the bottom right and click the CC (closed captioning) icon.
- Select a language.
- The text being written by the captioner will appear on their screen in real time.
💡If there is no room captioner, participants using Google Chrome can enable live captions. Please check out Enable Live Captions In Google Chrome for more information.