About
Kaltura Mediaspace (KMS) GO is not accessible to native apps by default. Your KMS administrator must enable the KMS GO app and set it up before you can start using it.
Be certain that KMS GO has been enabled by your KMS administrator.
Download KMS GO
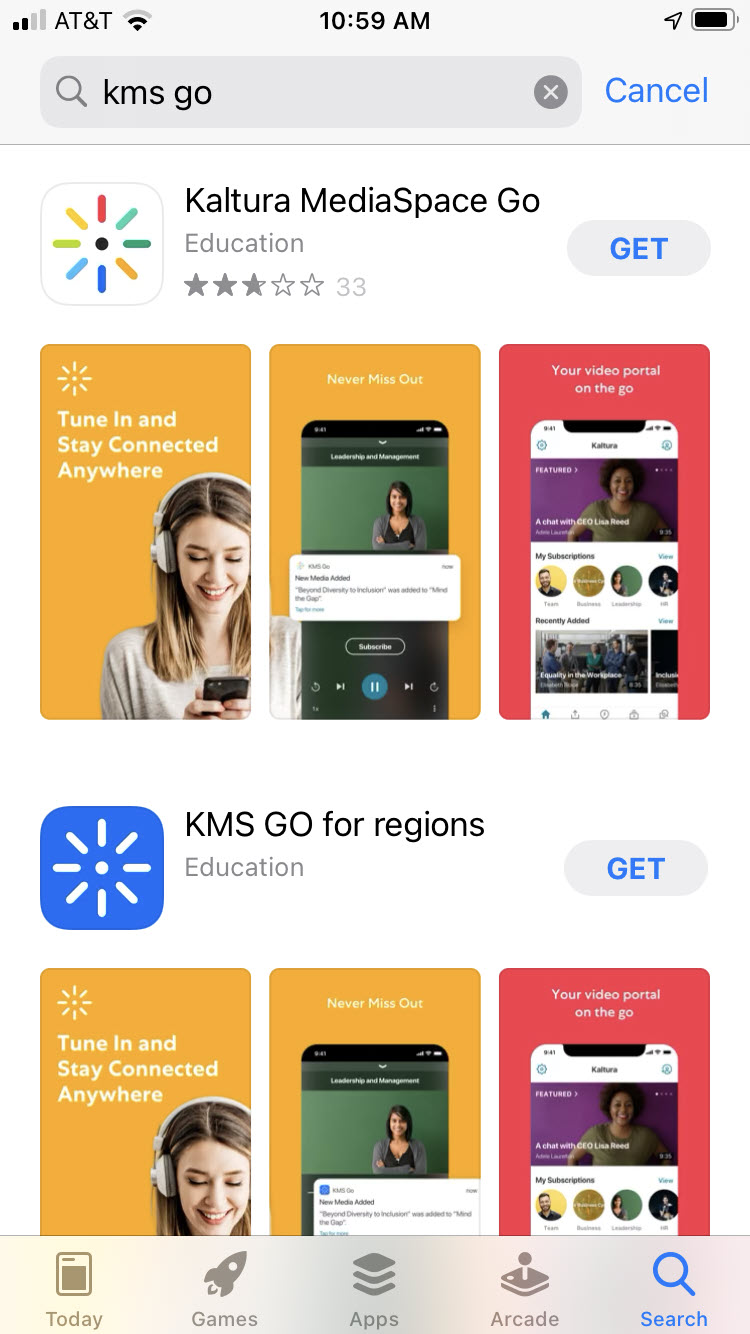
- Download the KMS GO app from the App Store.
- Click Open. The app asks if you would like to allow notifications.
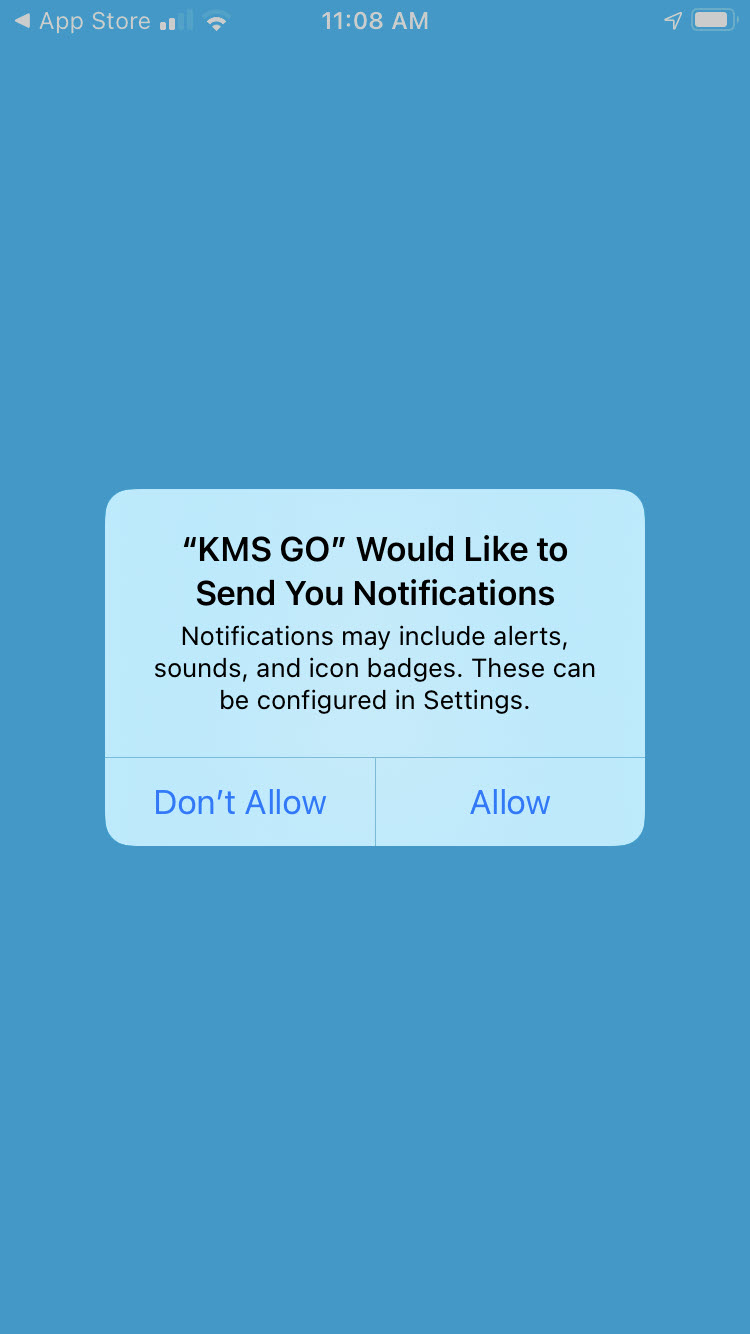
- Click Don't Allow if you do not want to receive notifications, or click Allow if you would like to receive notifications.


There are three KMS GO apps available on the App Store. "Kaltura MediaSpace GO - Education" is our default/generic app that is not compatible with Regional Clouds. "KMS GO for regions - Education" serves our four Regional Clouds. "BCNET KMS GO - Education" is a branded version of KMS GO used by BCNET customers.
Log In
- Enter your site’s address. Note that "https://" is already populated for you because it is required to be entered before the site address.
For the purposes of this guide, we will be using the Kaltura demo site, https://corporatetube.mediaspace.kaltura.com/.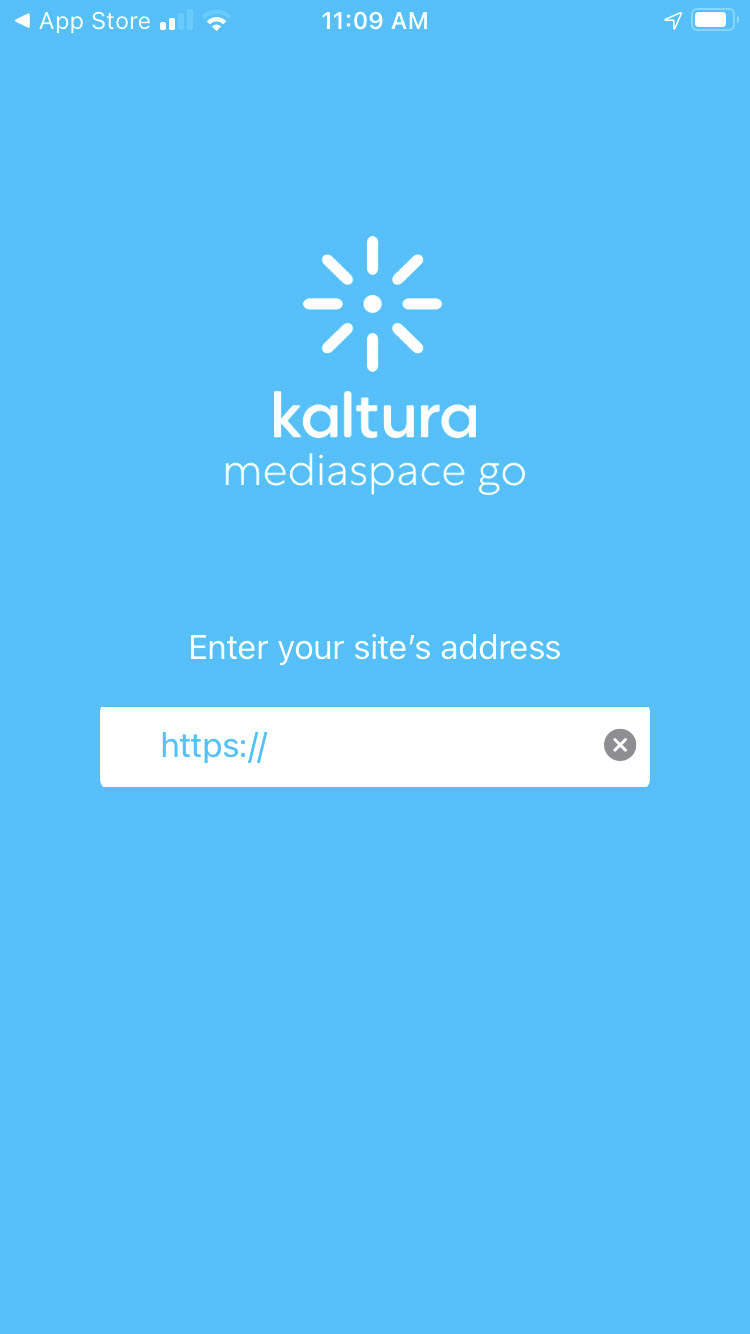 If you enter a site address for which KMS GO is not configured, you receive a notification that the address could not be found and to please try again.
 - Click go. The KMS GO home page displays.

The My Page icon on the top left of the home page has a "+" sign, indicating that you have not logged in. You may continue using KMS GO as a Guest or login for a richer experience. - To login, click the My Page icon on the top left of the home page. The Login screen displays.
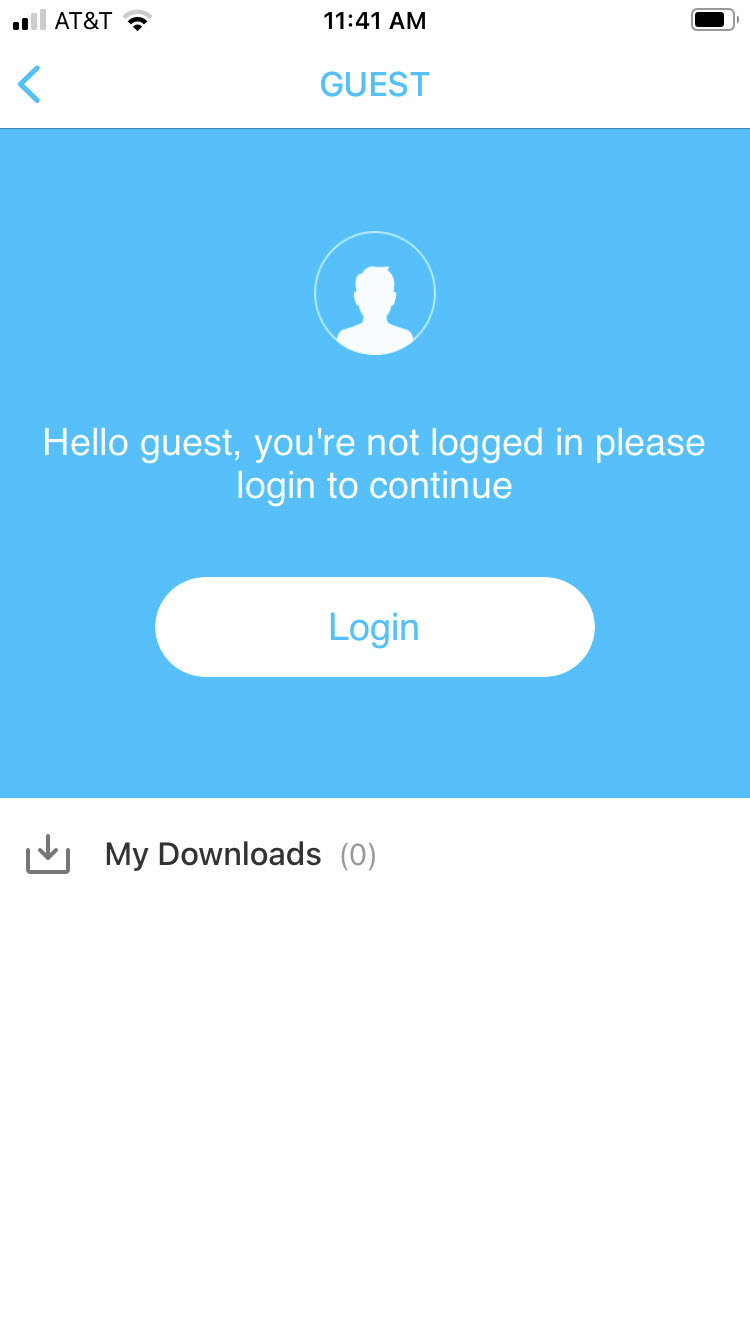
- Click Login.
- Enter your User ID and Password, then click Sign in. The KMS GO home page displays.
The My Page icon on the top left of the home page no longer has a "+" sign, indicating that you are now logged in.
 If you enter a site address for which KMS GO is not configured, you receive a notification that the address could not be found and to please try again.


3D Touch Quick Actions
If your device is running iOS 13 or later, quick actions are enabled for KMS GO. Touch and hold the app icon (on a 3D Touch device, press briefly on the icon) to display a menu of available quick actions. For more information about 3D Touch Quick Actions, see 3D Touch Explained: Peek, Pop, and Quick Actions.
The menu of available quick actions for KMS GO is displayed as follows.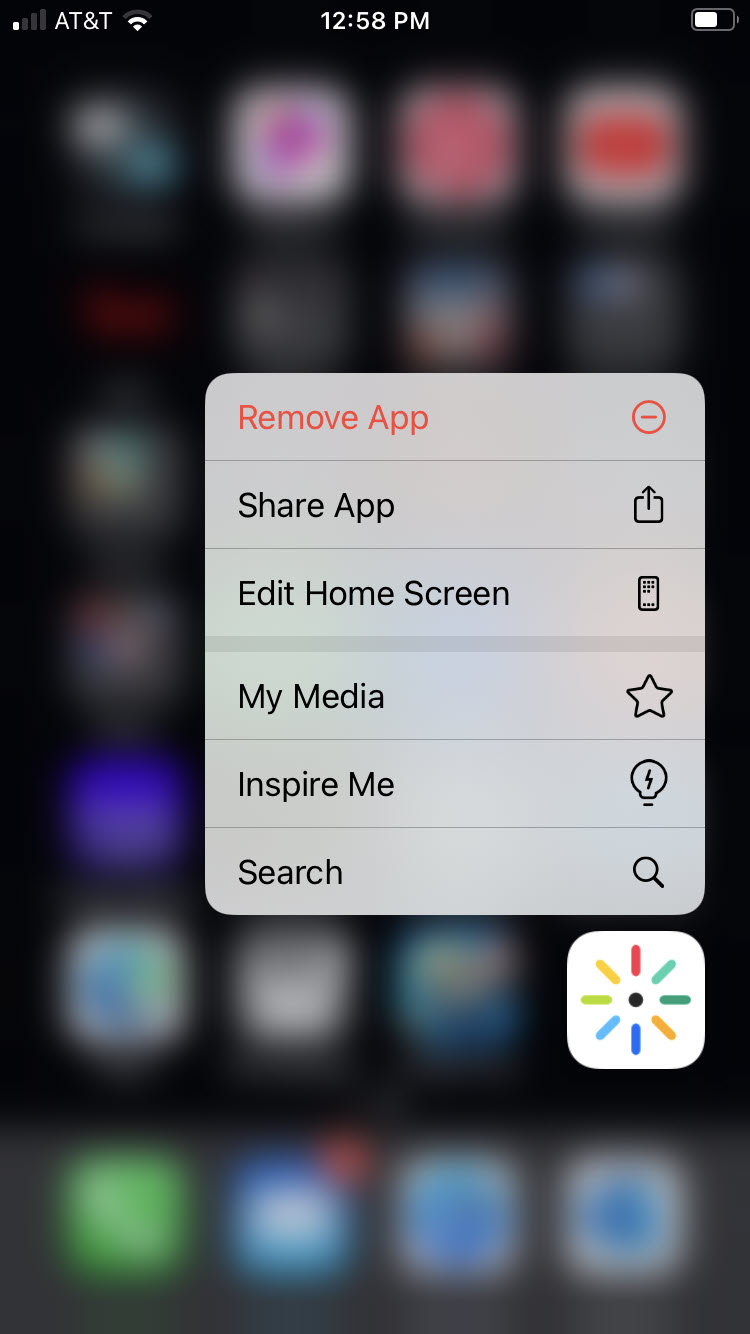
Remove App - Delete the app from your App Library or remove the app from your device home screen and keep the app in your App Library.
Share App - Share the app via Airdrop, Message, Mail, or via various other apps that are installed.
Edit Home Screen - Customize your device home screen by repositioning apps, deleting, or removing apps from your device home screen.
My Media
- When logged in, redirects you to My Media.
- When not logged in, redirects you to the login form.
Inspire Me
- Whether logged in or not, redirects you to Inspire Me.
Search
- When logged in, redirects you to Search (with channels).
- When not logged in, redirects you to Search (without channels).
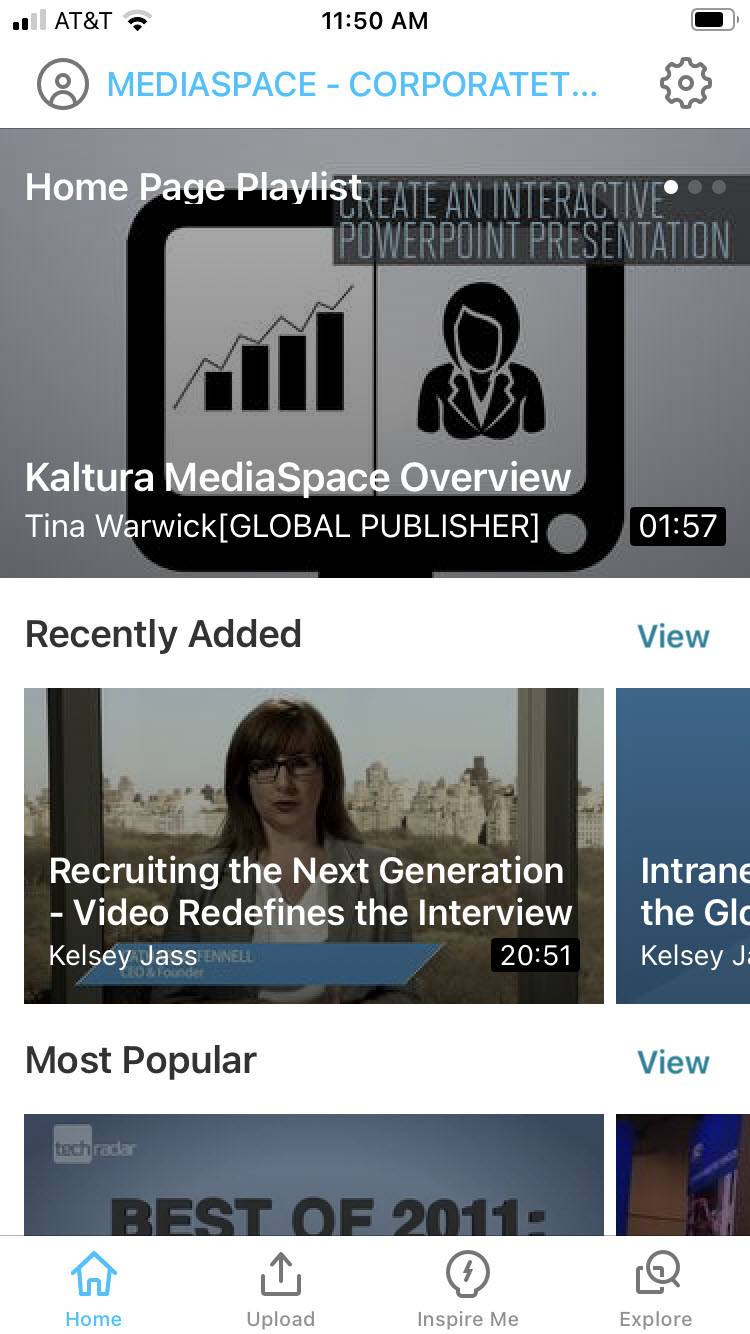
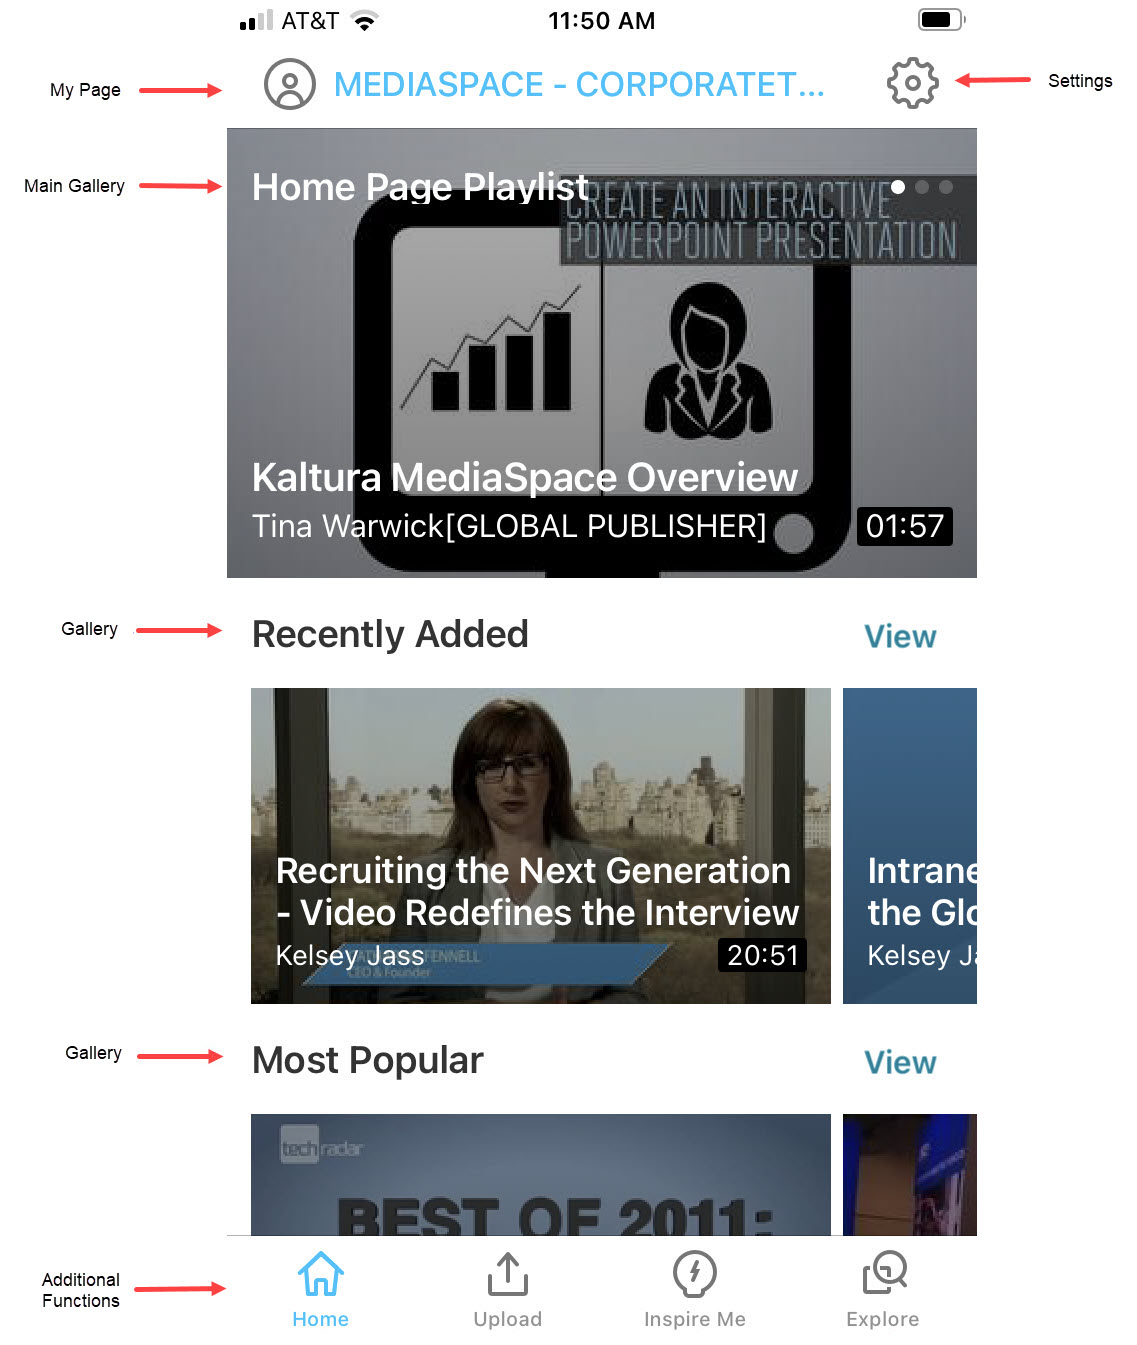
Your KMS GO Home Page
The KMS GO home page displays the following:
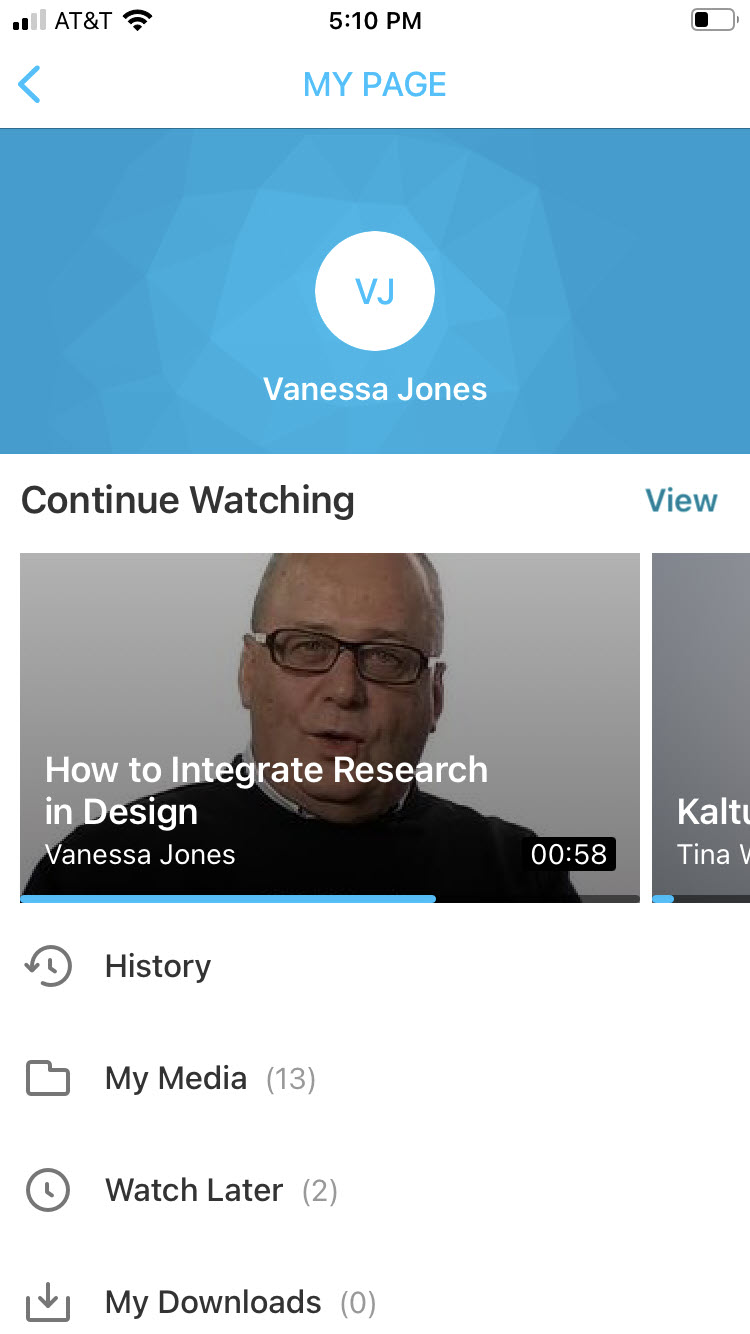
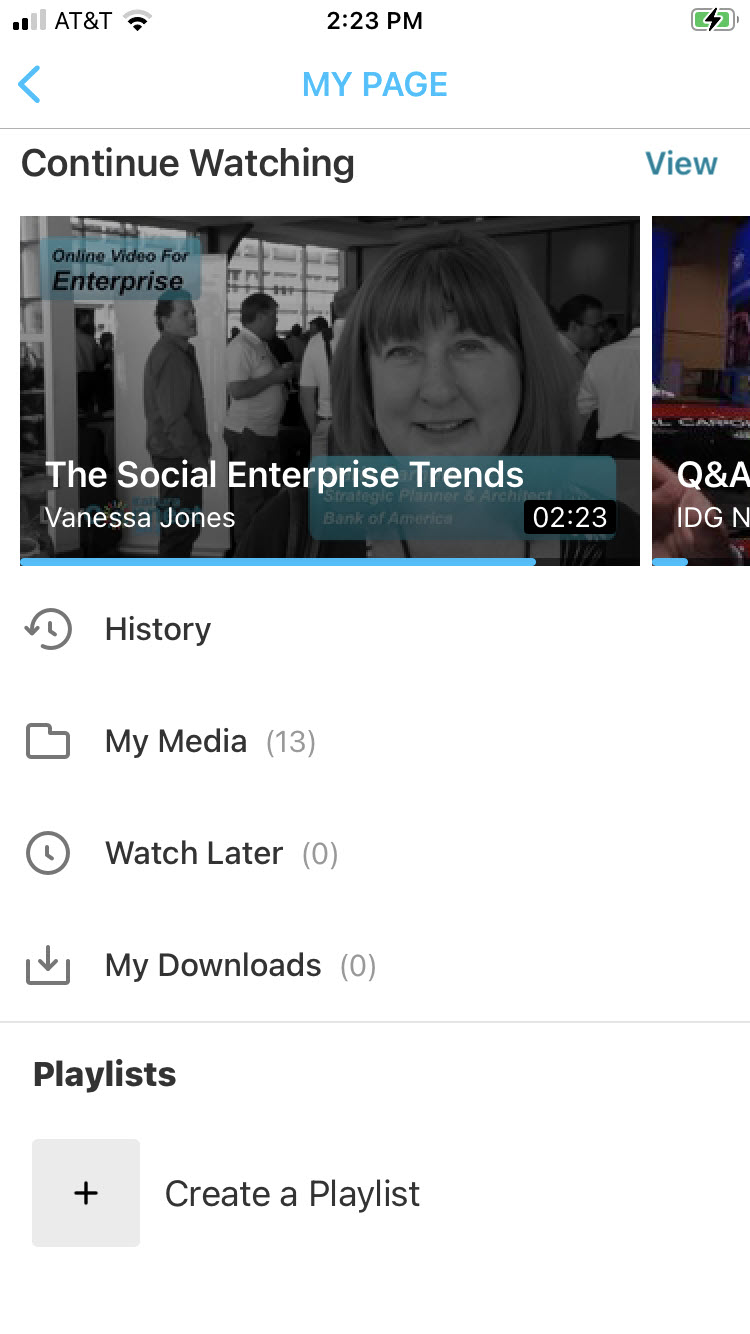
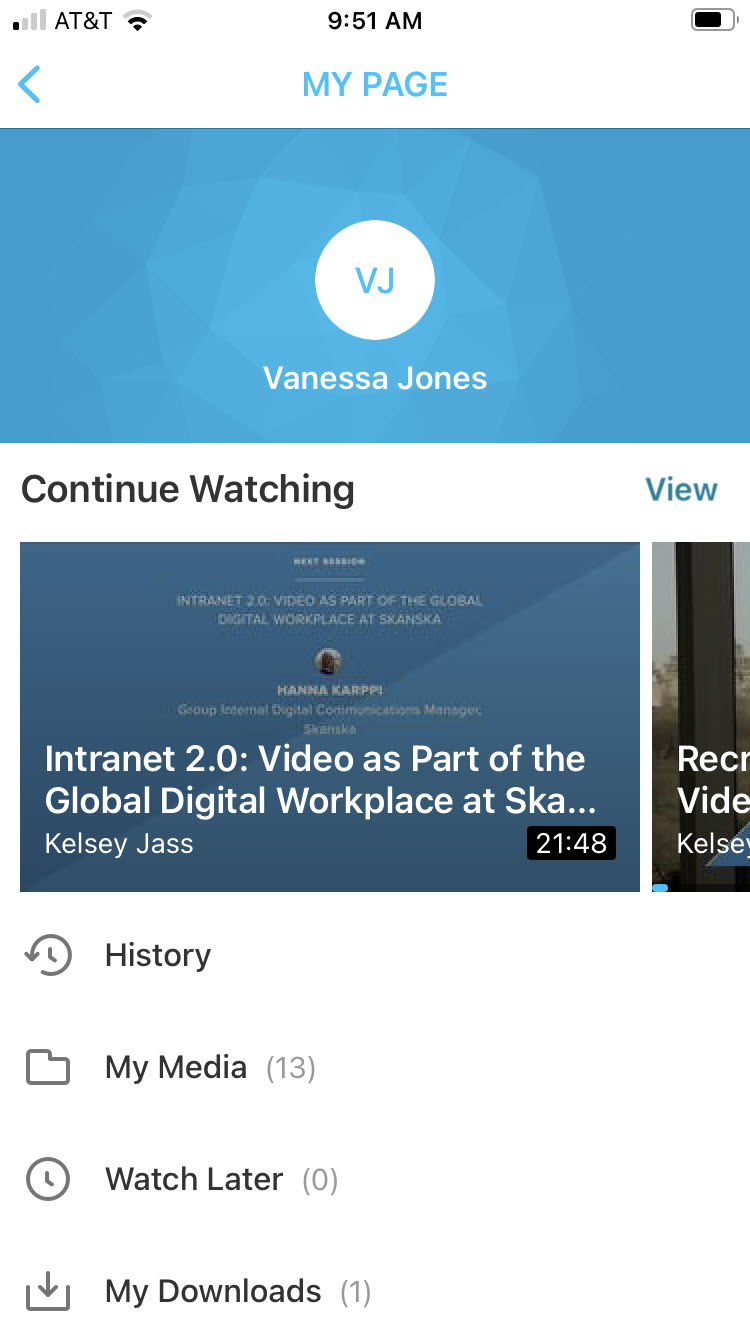
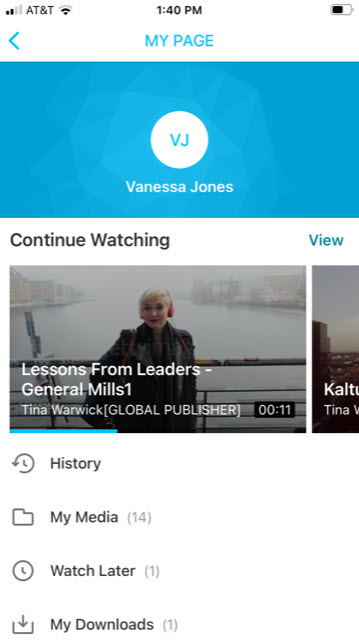
- My Page icon – Opens your unique profile page on KMS GO. Here you can continue watching media, view your history, access My Media, Watch Later, and Downloads. You can also view/edit/create playlists.
- Settings icon - Opens the Settings page where you can configure your application settings.
- Link to Main Gallery
- Links to Other Galleries
- Additional functions on the bottom navigation bar:
- Home - Returns you to the app home page.
- Upload - Allows you to take media from your camera, a gallery, or the cloud. For more information, see Create and Upload Media.
- Inspire Me - Provides a fun way to get inspired and discover media based on a time frame. See Inspire Me.
- Explore - Opens the KMS GO powerful search tool and browsing options. For more information, see Exploring Media.

The home page display depends on your KMS administrator’s configuration settings and may be reconfigured.
If you have KMS admin privileges, please see the Kaltura MediaSpace iOS Mobile Application Setup Instructions where you can find customization details and instructions on how to set up KMS GO and reconfigure your home page.
Your home page may look different from the Kaltura demo site.
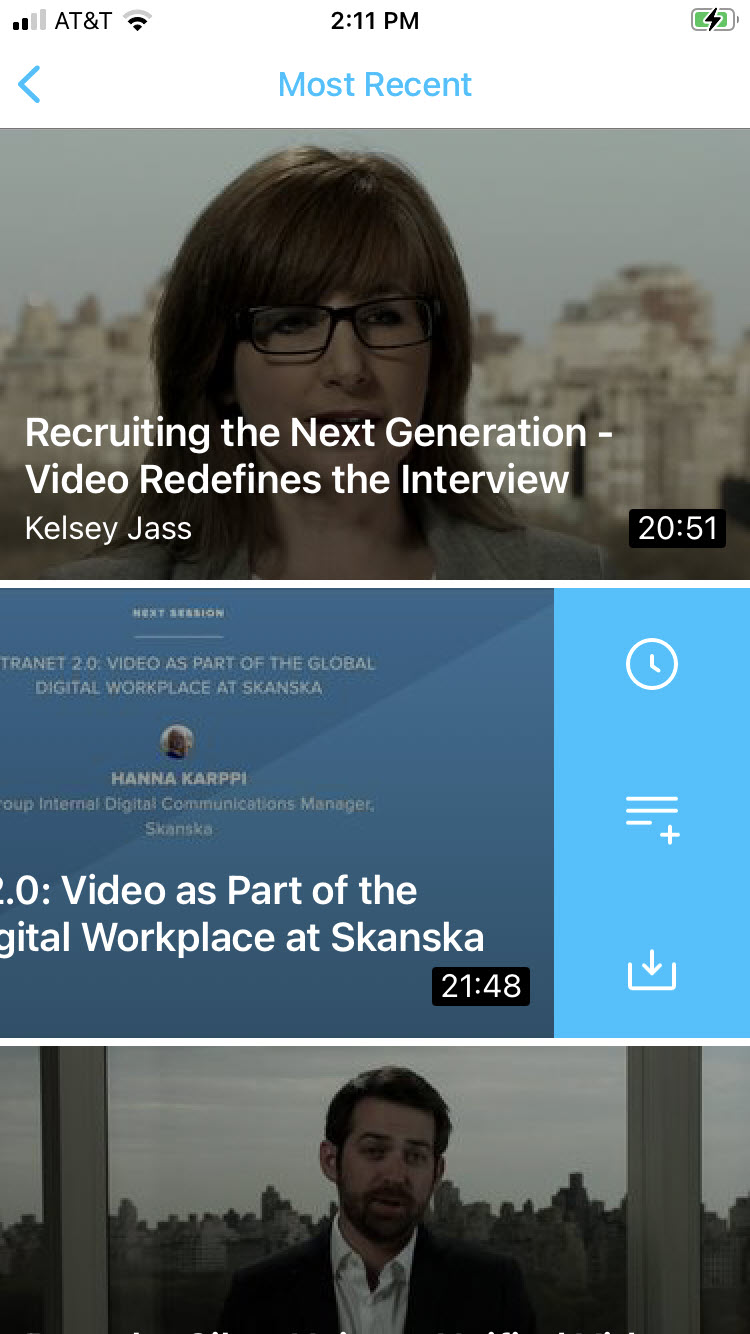
Media Discovery and Interaction
Media discovery starts on your KMS GO home page. You can browse the gallery by swiping horizontally or tapping on a gallery name for vertical scrolling.
The following shows an example of the vertical display of selected media item on your gallery.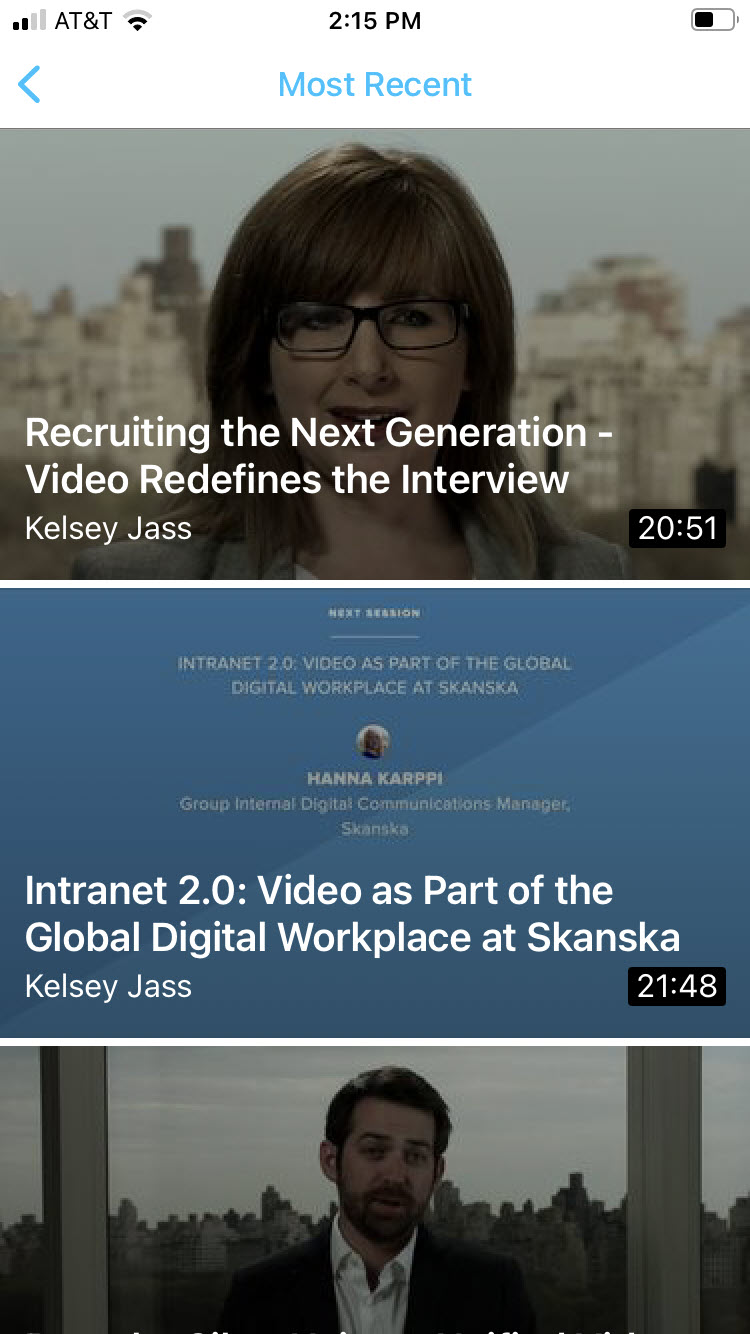
While on the vertical view, media Quick Actions are available by swiping horizontally, either to the left or the right.
Swiping left displays:
Swiping right displays:
You can also comment on media items. See Commenting on Media.
Watch Later
When configured by your administrator, the Watch Later playlist is a quick and easy way to set aside a video for later viewing.
To Access the Watch Later Playlist
- Click on the My Page icon.
- Select Watch Later to access the Watch Later playlist.
If you have media in your Watch Later playlist, the media displays.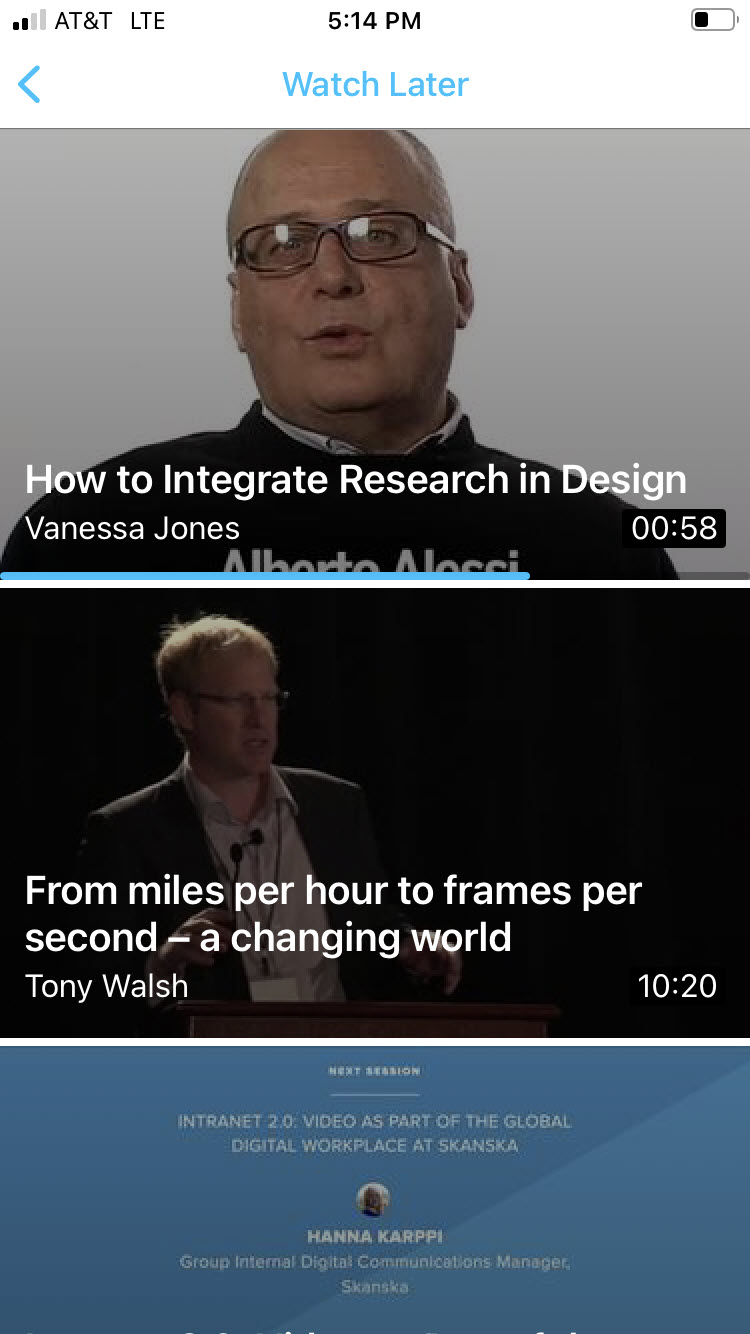 If you do not have media in your Watch Later playlist, you receive a notification that your Watch Later playlist is empty and you are given an option to be redirected to the KMS GO home page.
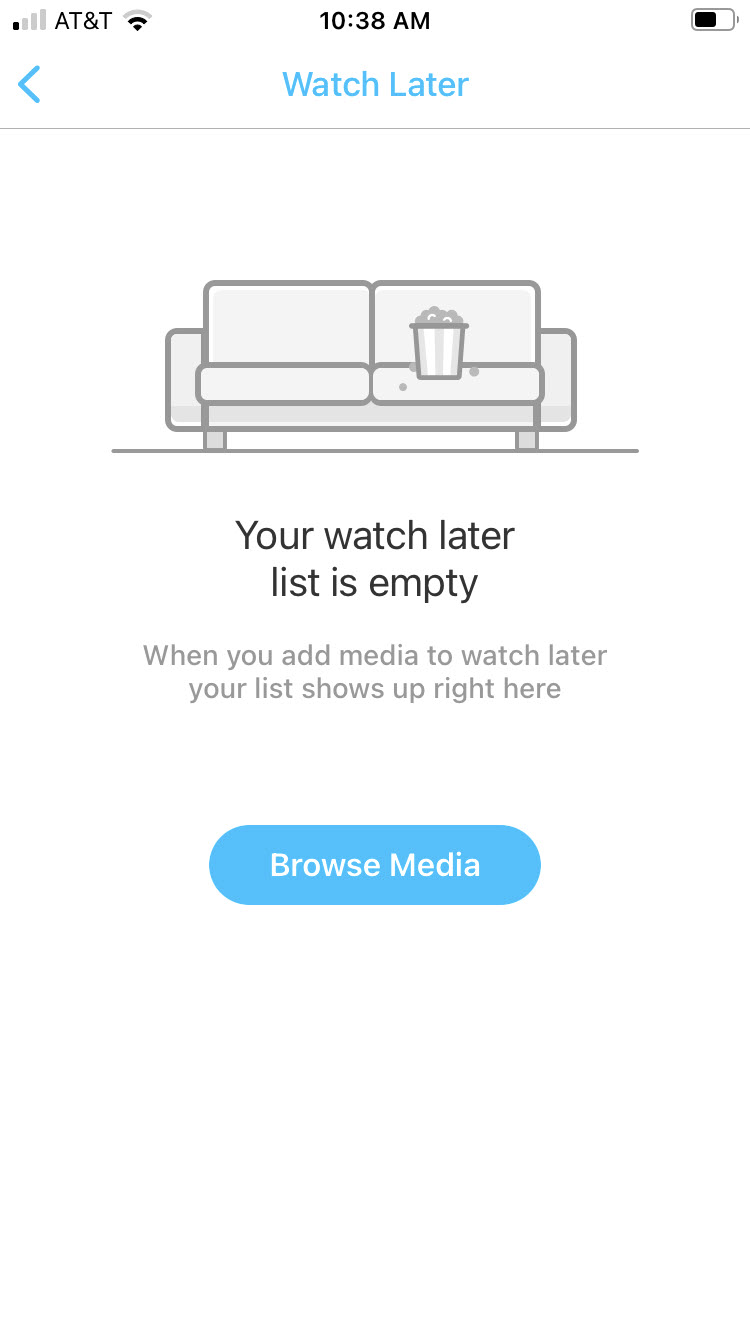

 If you do not have media in your Watch Later playlist, you receive a notification that your Watch Later playlist is empty and you are given an option to be redirected to the KMS GO home page.
To add media to the Watch Later Playlist
You can add media to the Watch Later Playlist in three ways:
- From any gallery or playlist using the Add to Watch Later (clock) Quick Action icon.
- From any gallery or playlist using the Add Media To (lines with plus sign) Quick Action icon.
- From any media page using the menu accessible via the ellipse (...).
From a Gallery or Playlist Using the Add to Watch Later (Clock) Quick Action Icon
- Select a gallery or playlist.
- Swipe the selected media to the left. A series of Quick Action icons display to the right of the media.
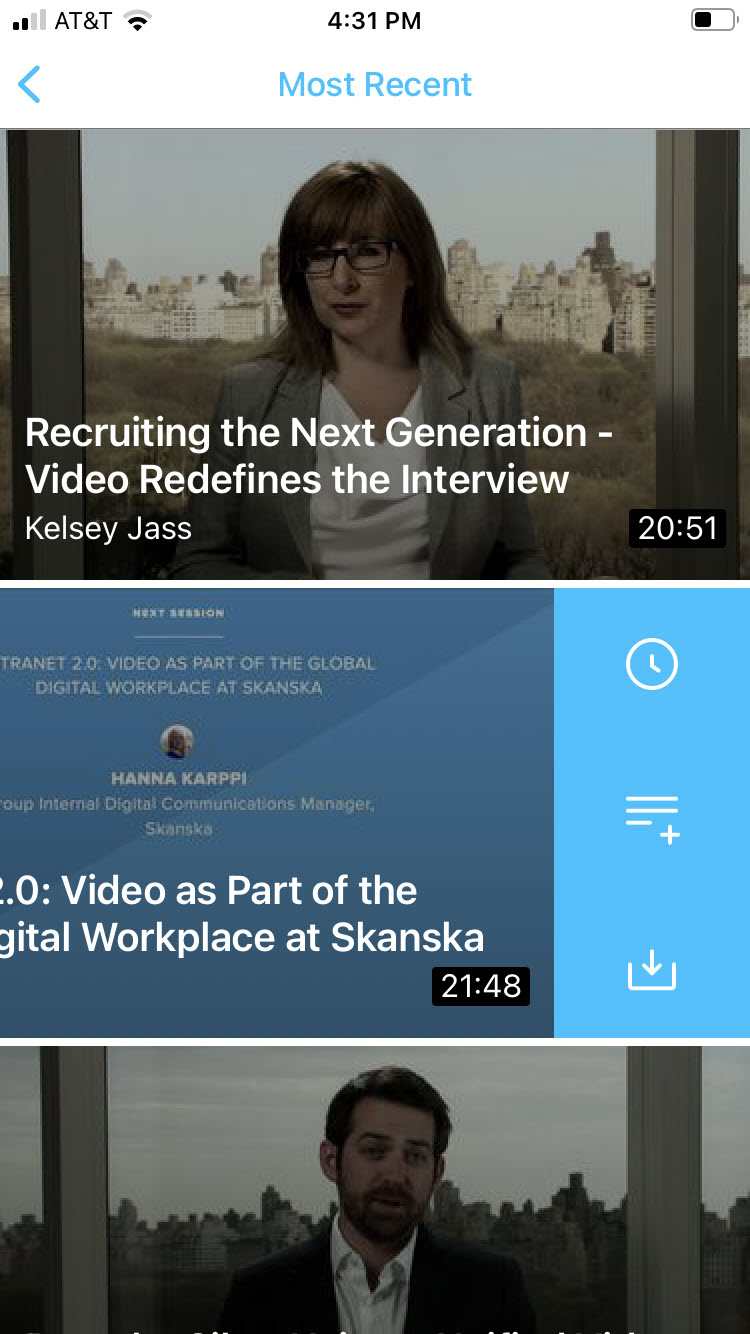
- Click the Add to Watch Later (clock) icon to add media to the Watch Later playlist.

From a Gallery or Playlist Using the Add Media To (Lines with Plus Sign) Quick Action Icon
- Select a gallery or playlist.
- Swipe the selected media to the left. A series of Quick Action icons display to the right of the media.
- Click the Add Media To (lines with plus sign) icon.
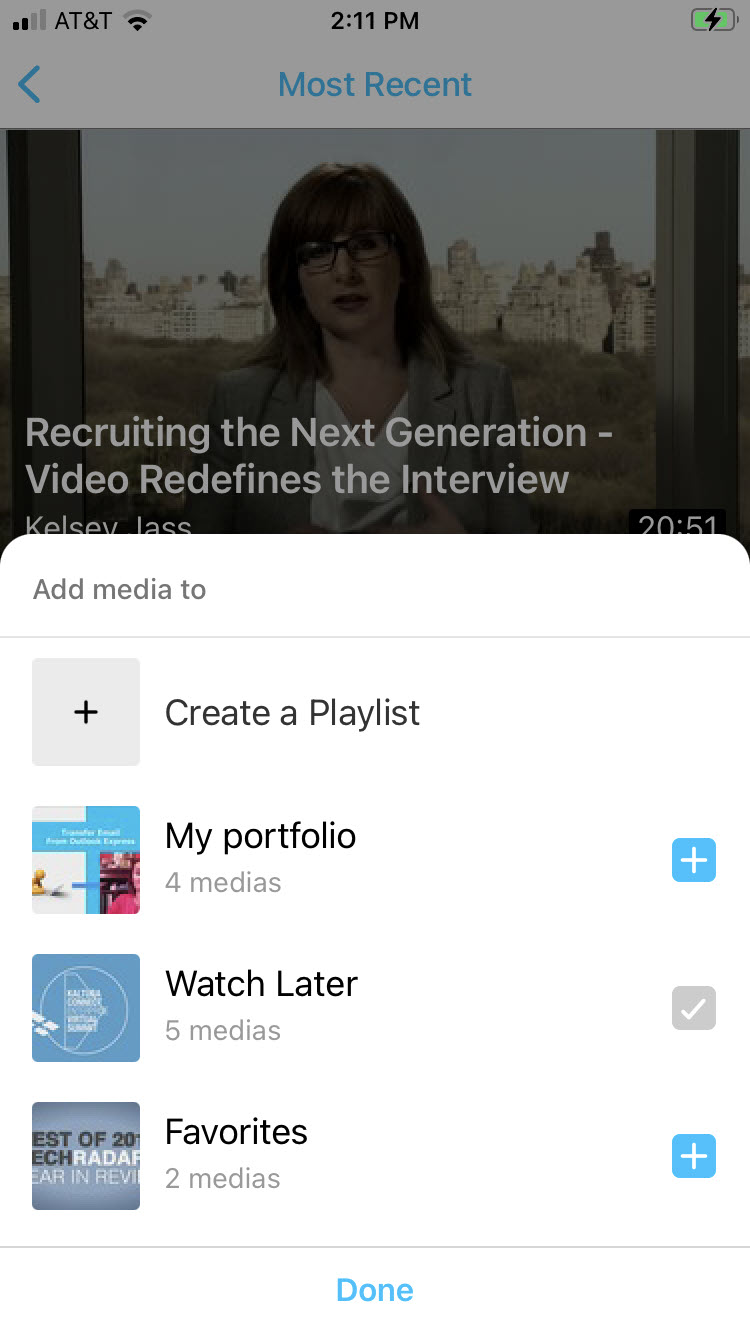
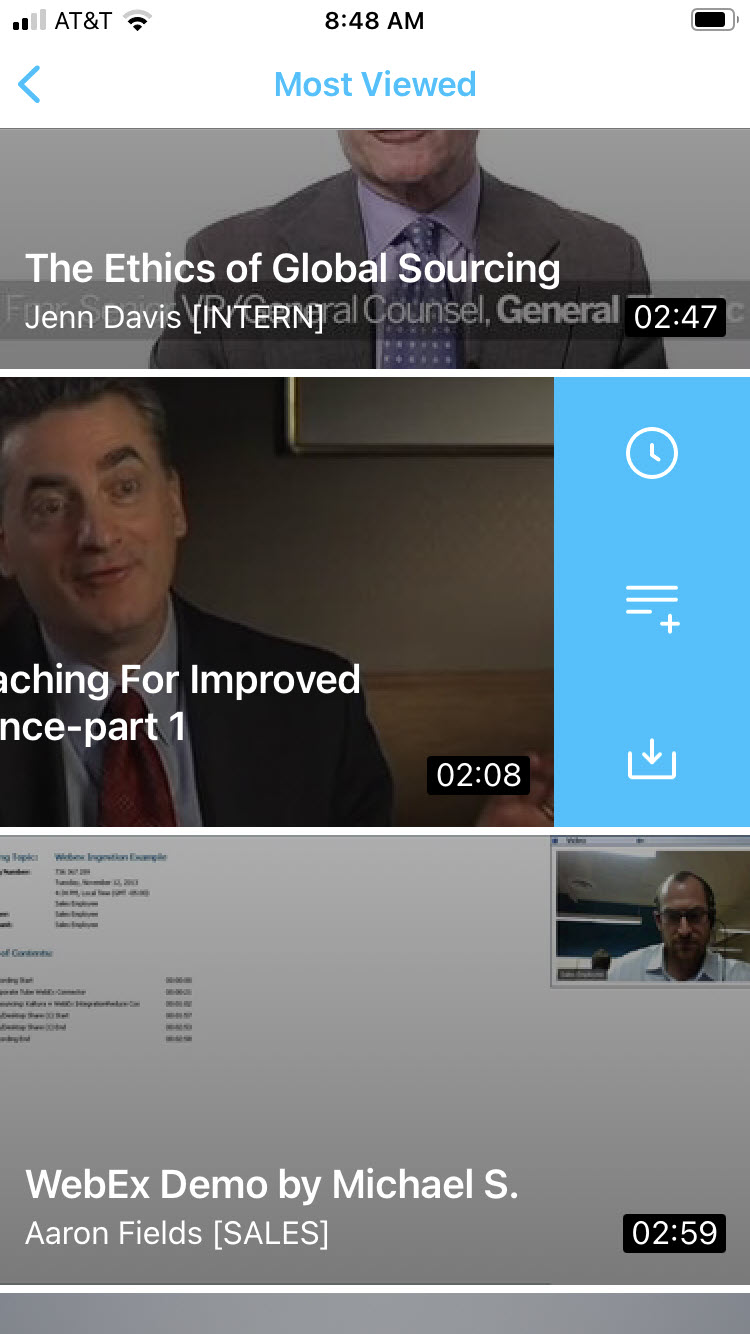 The Add media to screen displays.
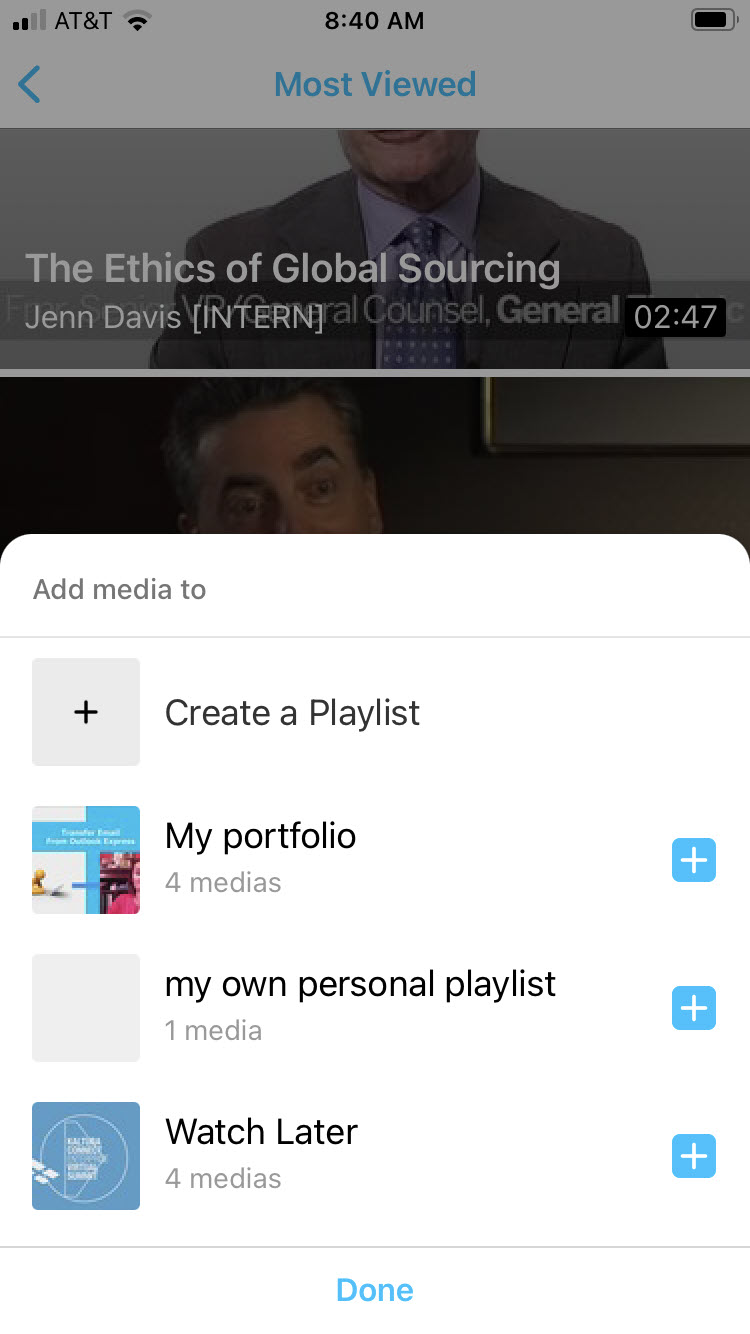
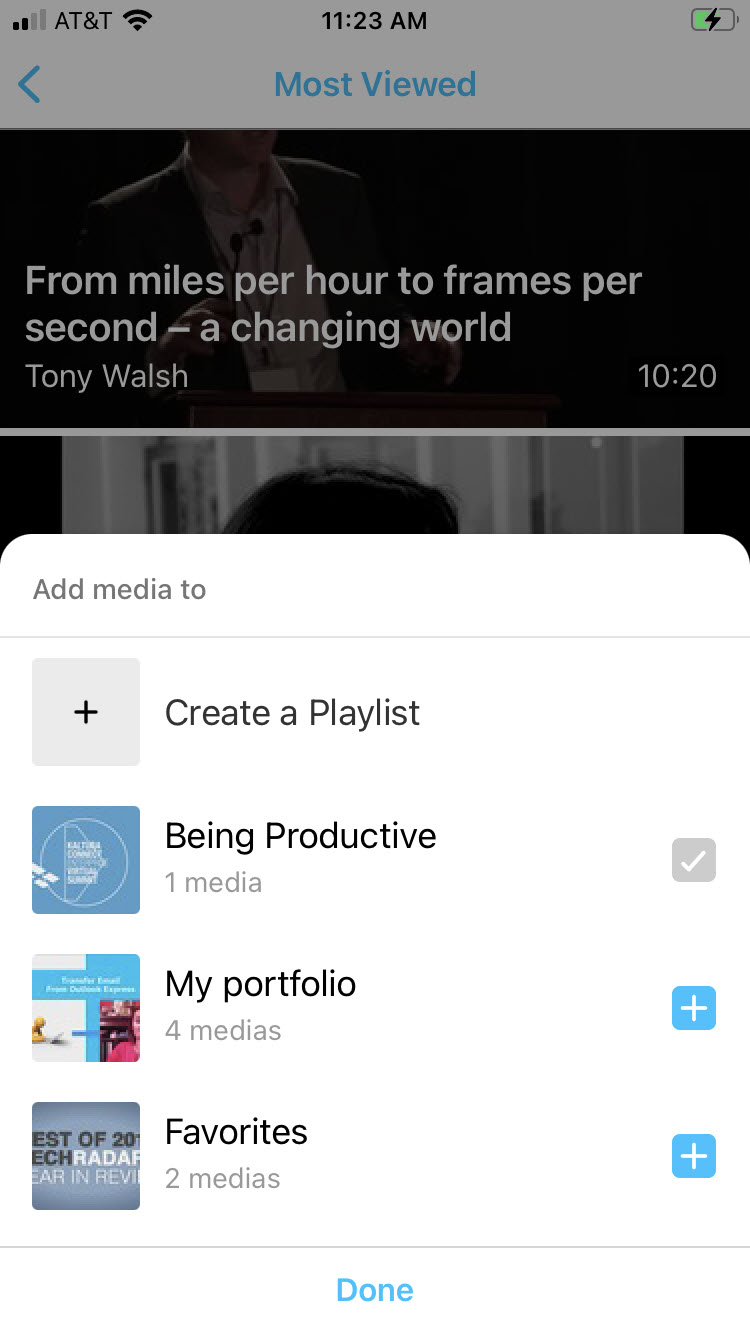
- Click the blue plus sign to the right of Watch Later. The blue plus sign becomes a gray checked box.
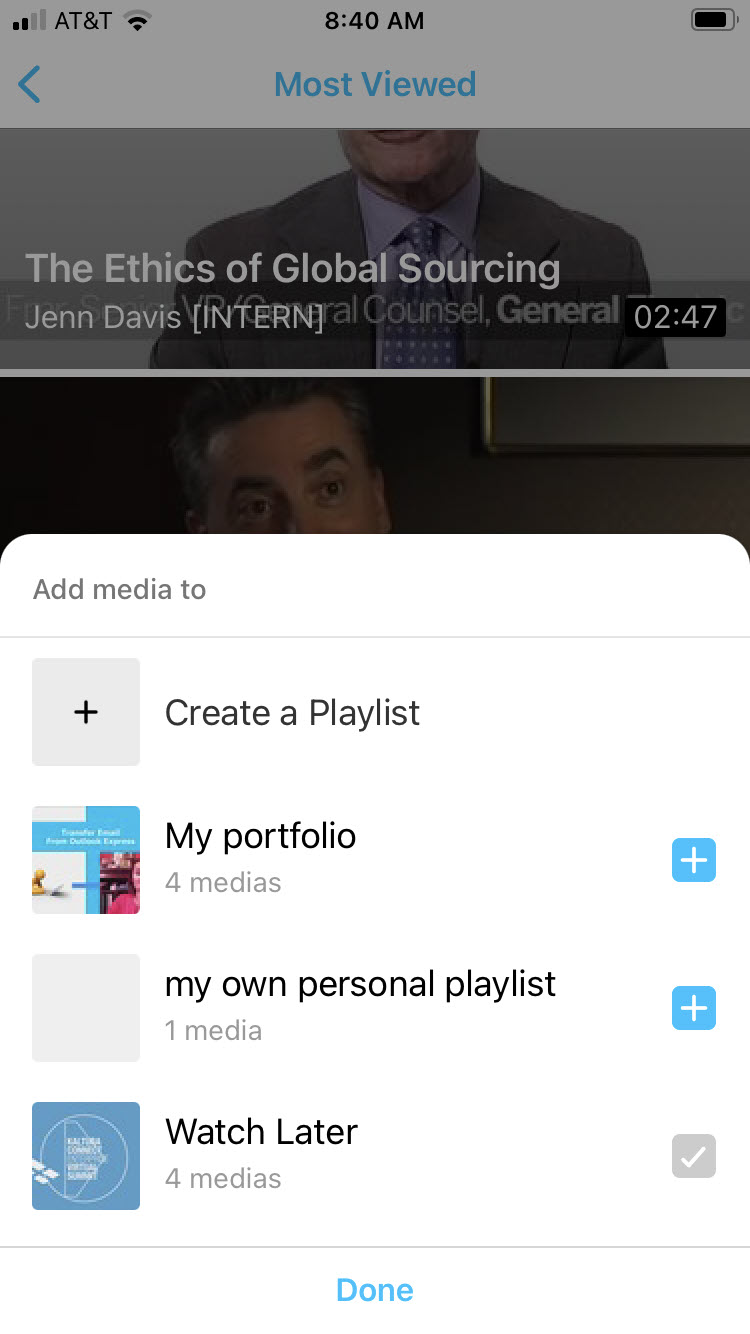
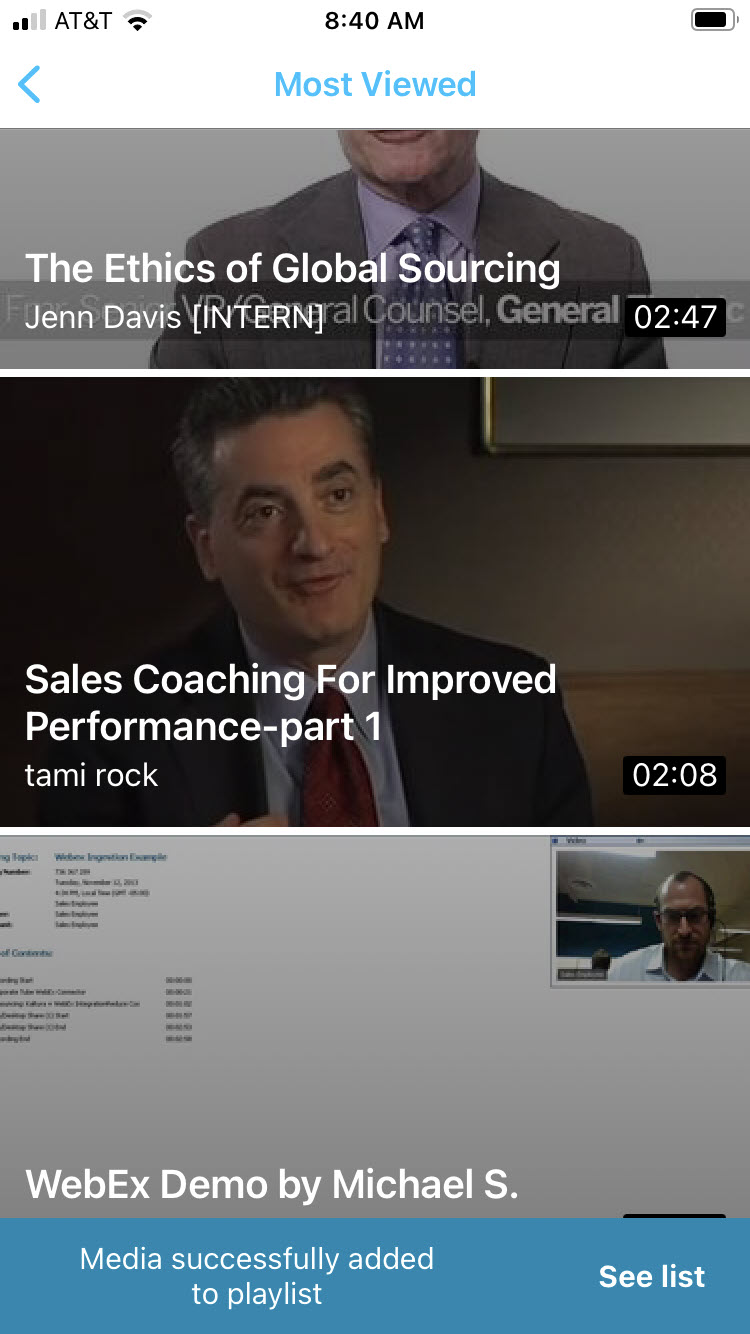
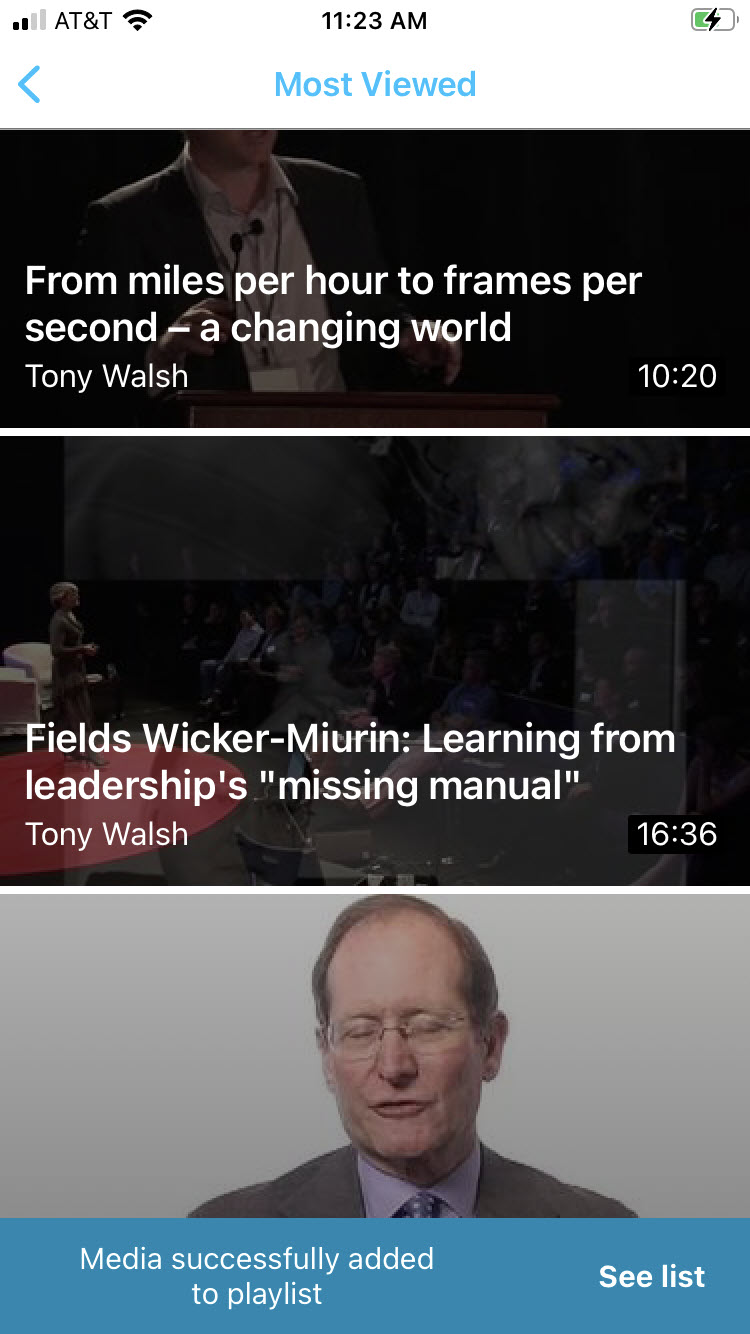
- Click Done. You receive notification that the media was successfully added to the playlist and you are given an option to be redirected to the list.
 The Add media to screen displays.


From a Media Page
- Access My Media.
- Click on a media item. The Media Page displays.
- Click the ellipse (…) on the lower right corner of the media page. Additional options display.
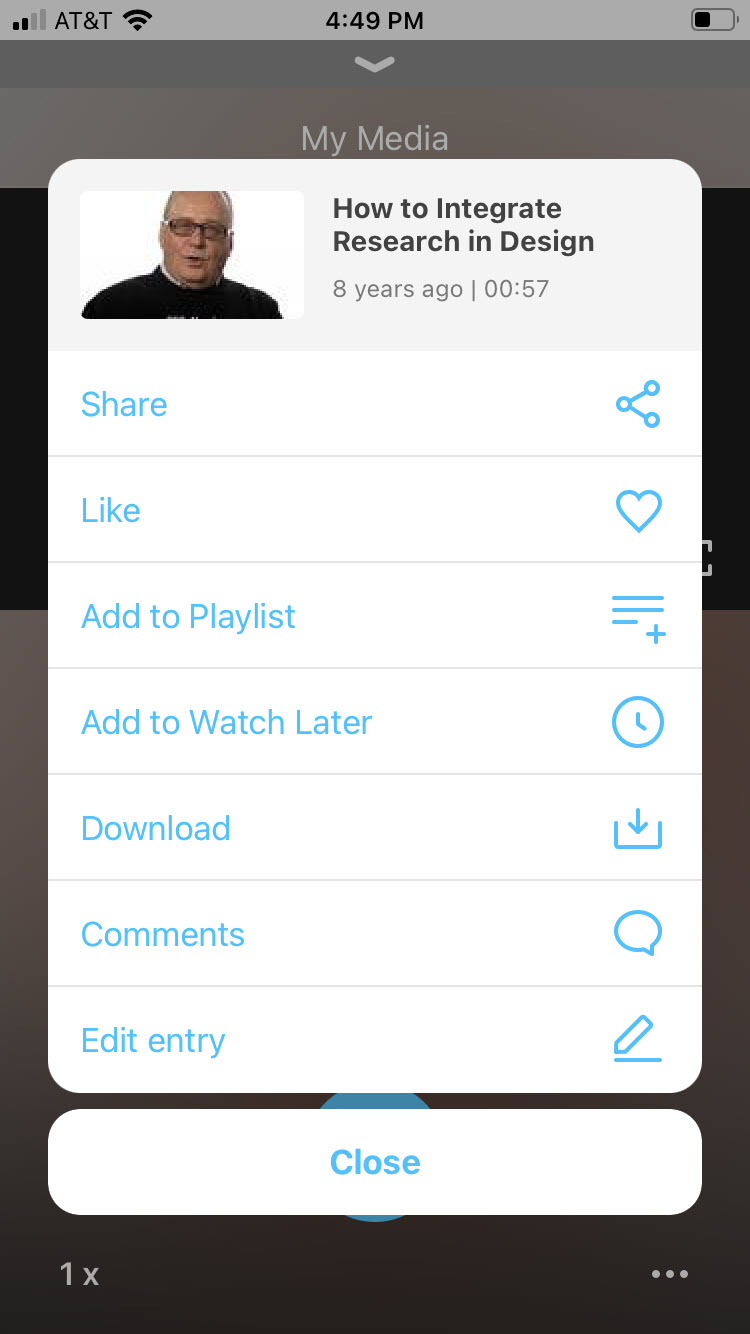
- Click the Add to Watch Later (clock) icon to add the media to the Watch Later playlist. The icon turns blue.
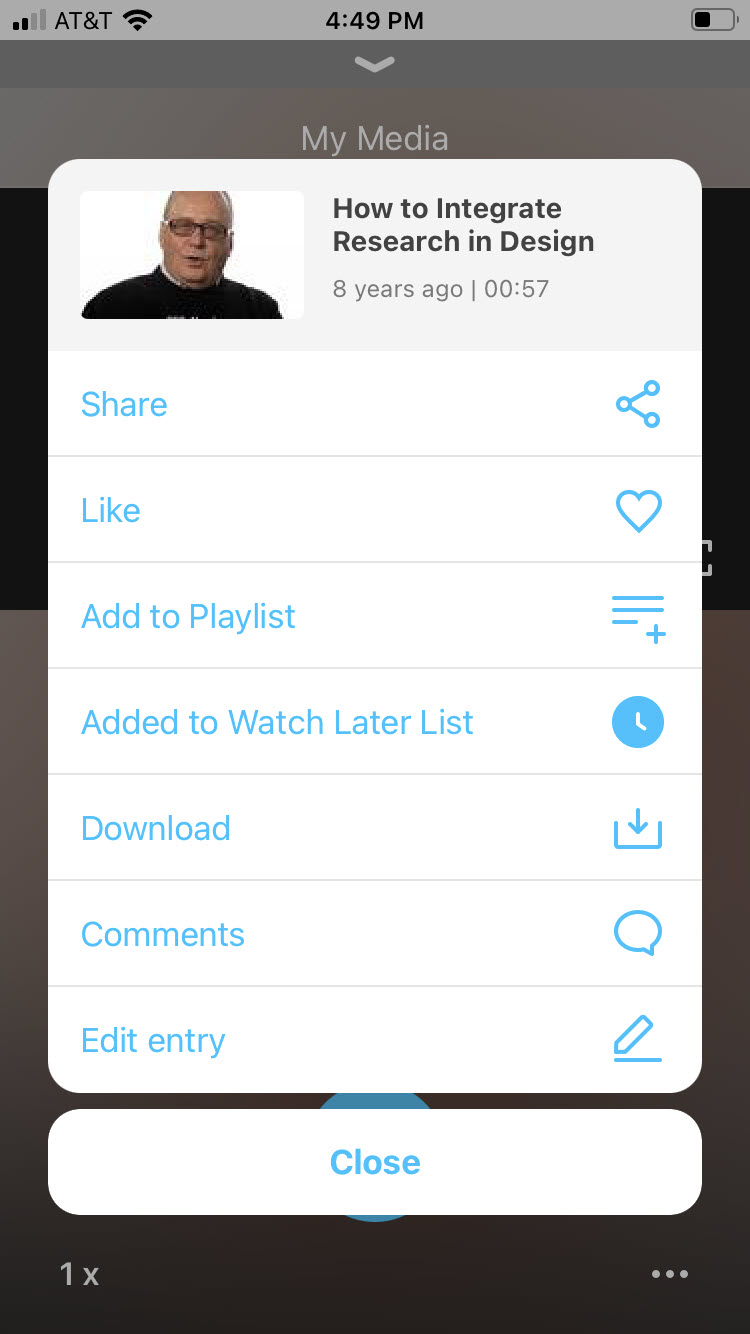
- Click Close.


To remove media from the Watch Later Playlist
You can remove media from the Watch Later Playlist in three ways:
- Access the Watch Later Playlist, swipe the selected media to the left, and click the blue Add to Watch Later (clock) icon.
- Access My Media, swipe the selected media to the left, and click the blue Add to Watch Later (clock) icon.
- Access the Media Page, click the ellipse (…), and click the blue Add to Watch Later (clock) icon.
Add Media To
We've already discussed how to use the Add Media To functionality to add media to your Watch Later playlist. You can also use the Add Media To functionality to create new playlists and add media to playlists other than the Watch Later playlist.
To create a playlist
Using the Add Media To functionality is not the only way to create a playlist. You can also create a playlist from My Page.
- Select a gallery or playlist.
- Swipe the selected media to the left. A series of Quick Action icons display to the right of the media.
- Click the Add Media To (lines with plus sign) icon. The Add media to screen displays.
- Click Create a Playlist. The Create a Playlist screen displays.
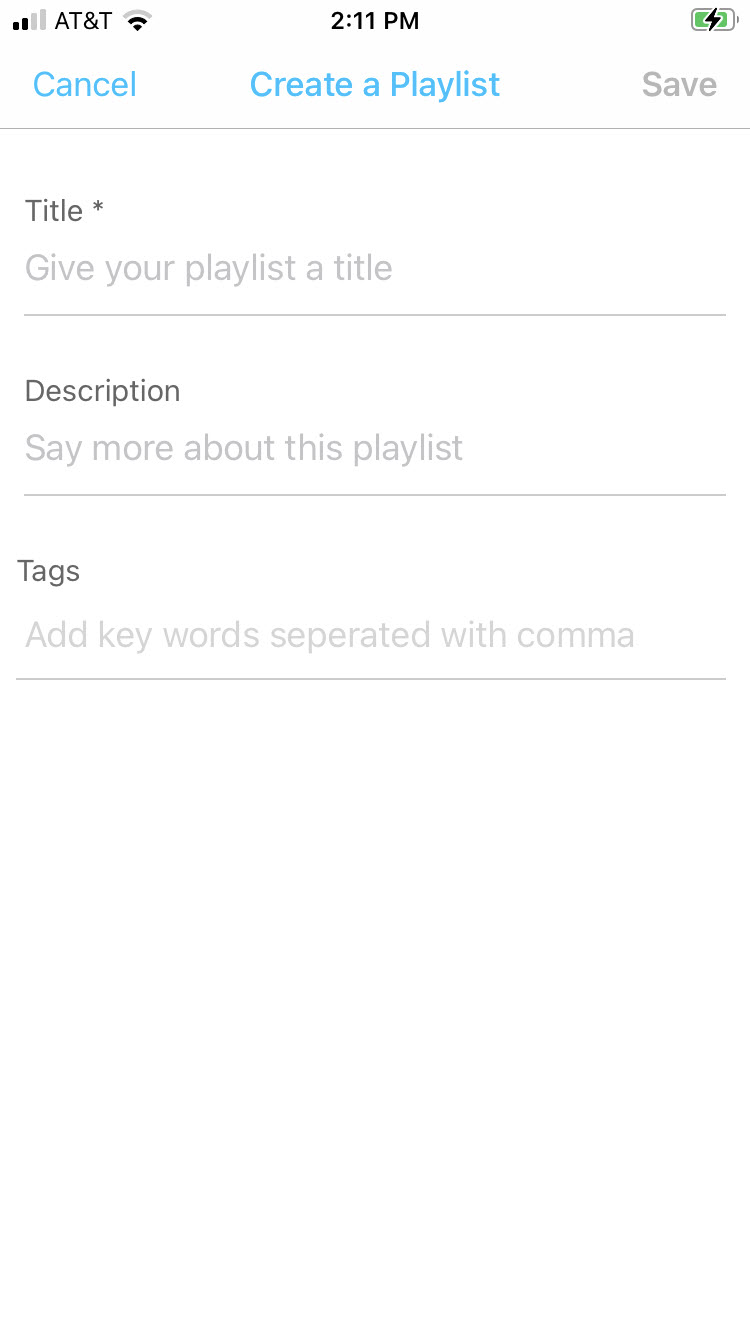
- Type a Title, Description, and Tags for your Playlist.
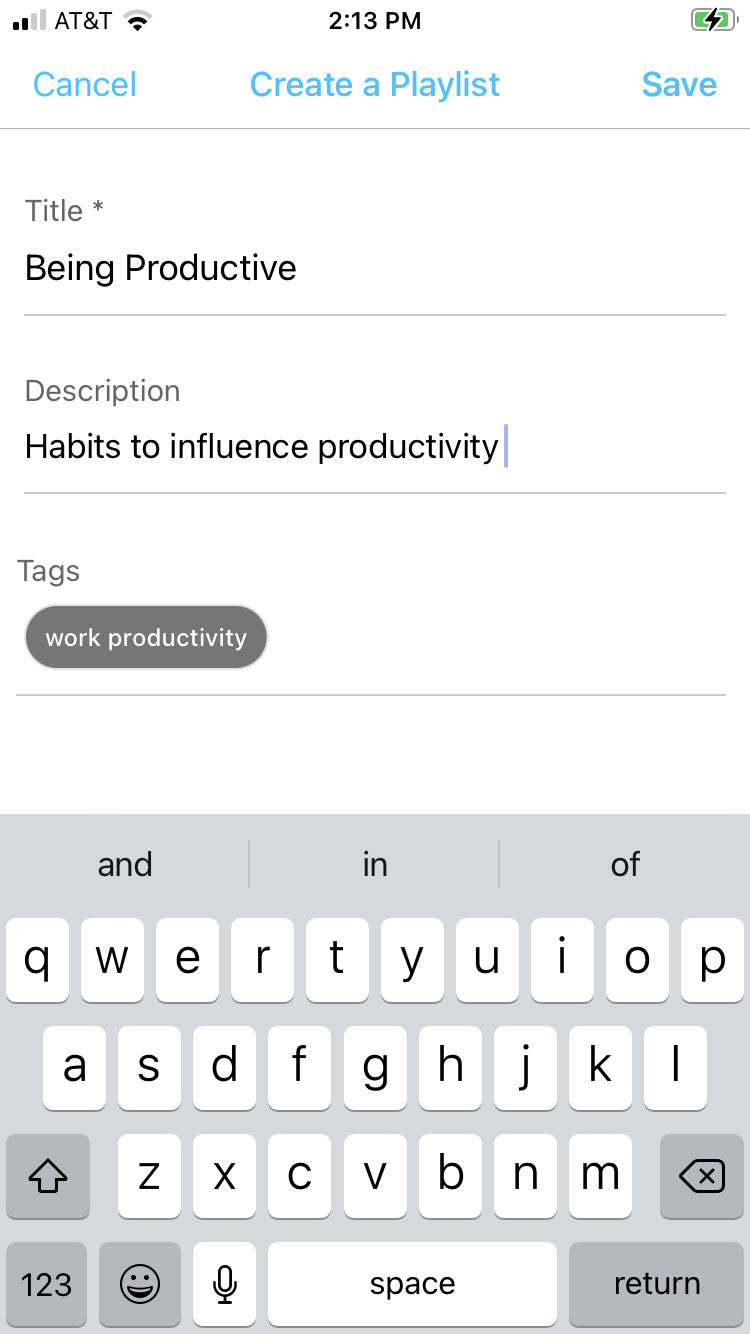
- Click Save.


You can also create playlists from My Page.
- Click on the My Page icon, then scroll down and click Create a Playlist.
- Follow steps 5 and 6 above.

To add media to your playlists other than the Watch Later playlist
- Select a gallery or playlist.
- Swipe the selected media to the left. A series of Quick Action icons display to the right of the media.
- Click the Add Media To (lines with plus sign) icon.
 The Add media to screen displays.
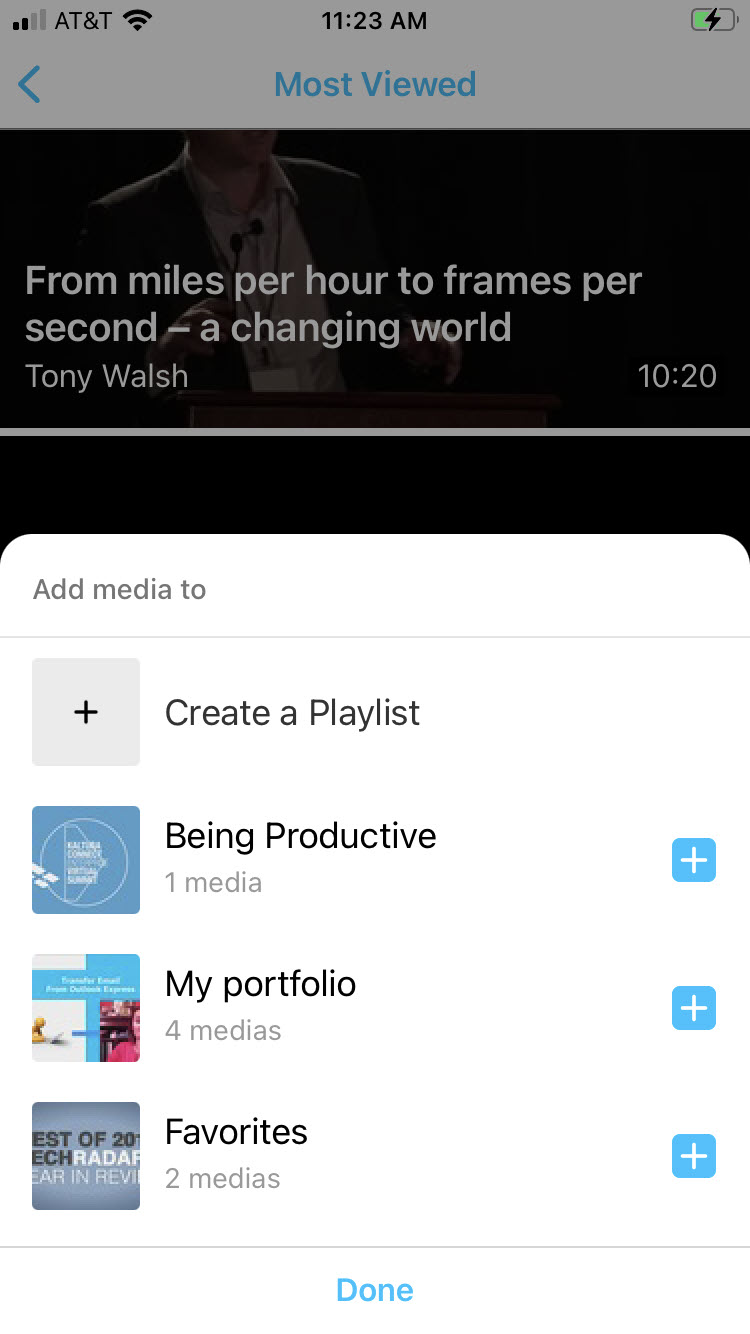
- Click the blue plus sign to the right of your desired playlist. The blue plus sign becomes a gray checked box.
- Click Done. You receive notification that the media was successfully added to the playlist and you are given an option to be redirected to the list.
 The Add media to screen displays.


Download
When allowed by your administrator, you can download media.
Please note that when you download media using KMS GO, the file stays within the app and cannot be accessed or played outside of KMS GO's native player.
To Access Your Downloads
- Click on the My Page icon.
- Select My Downloads to access your downloads.
If you have downloaded media, the media displays.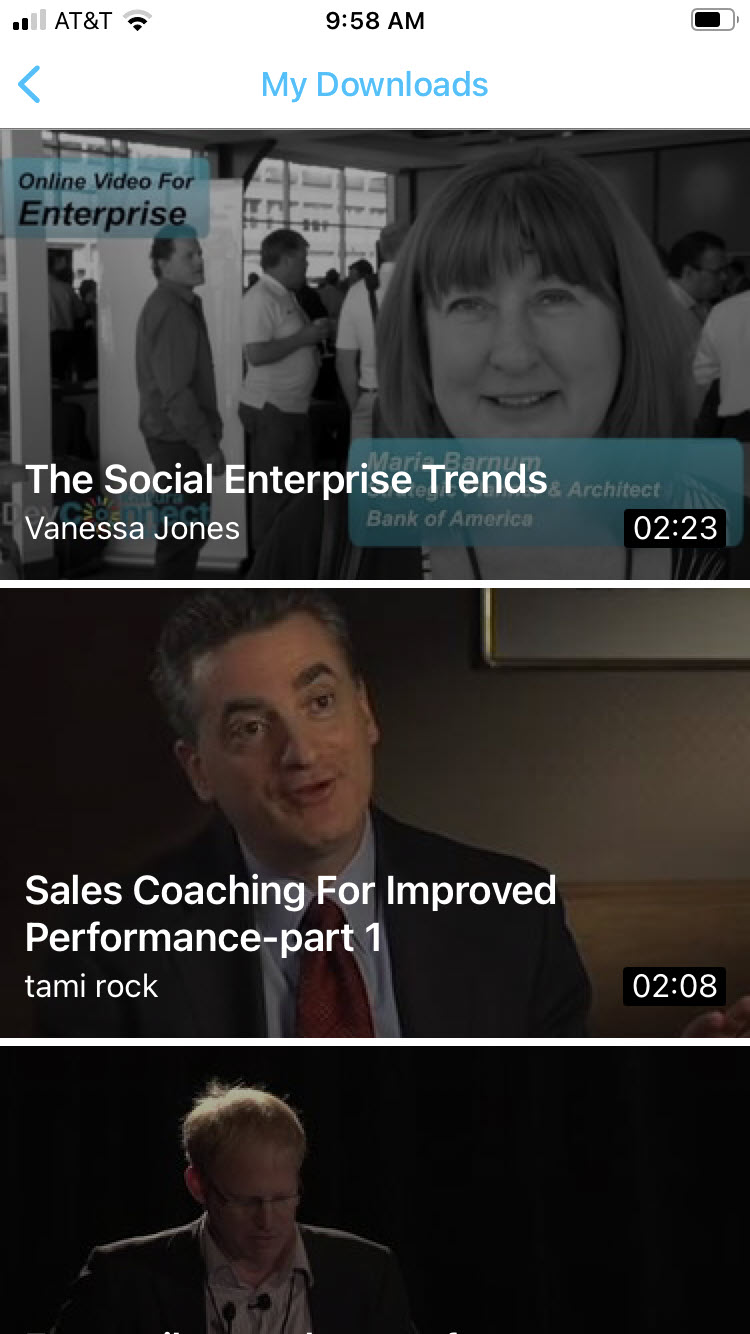 If you have not downloaded media, you receive a notification that your downloads list is empty and you are given an option to be redirected to the KMS GO home page.
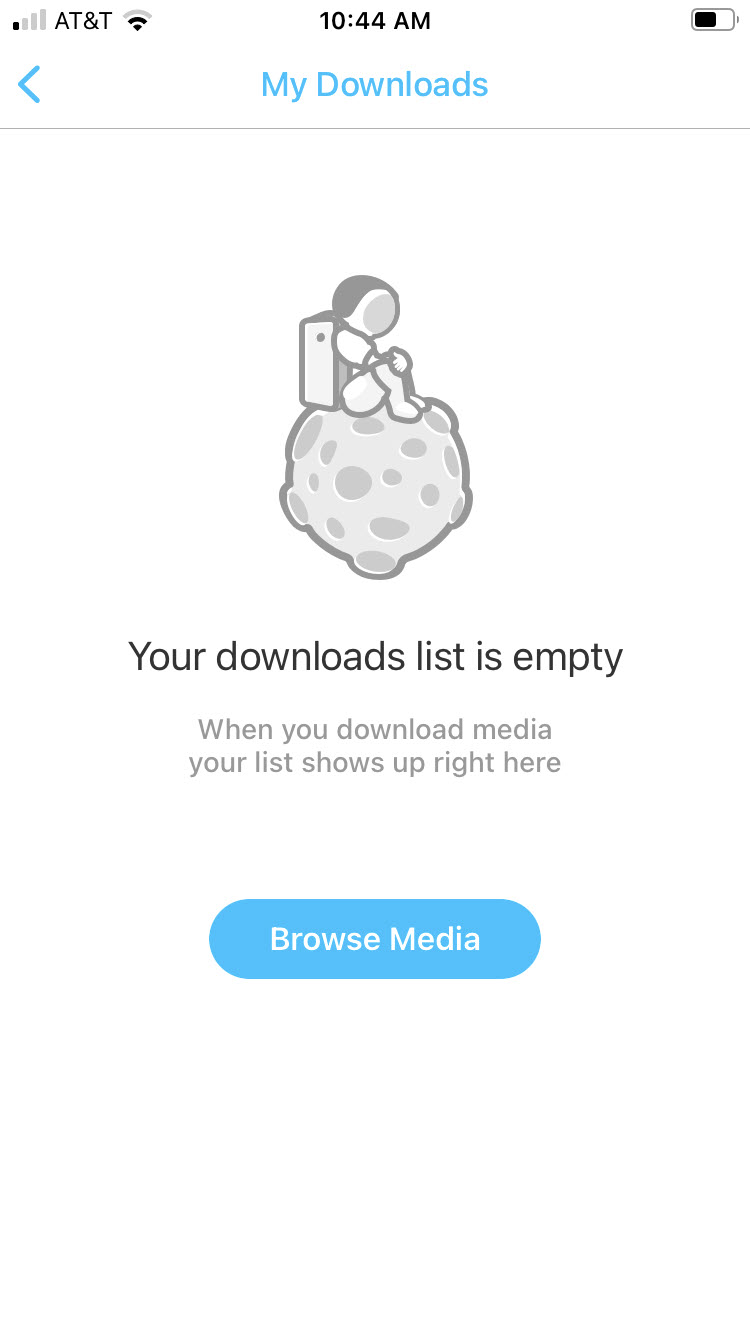

 If you have not downloaded media, you receive a notification that your downloads list is empty and you are given an option to be redirected to the KMS GO home page.
To download media
You can download media in two ways:
- From any gallery or playlist using the Download Media (down arrow) Quick Action icon.
- From any media page using the menu accessible via the ellipse (...).
From a Playlist or Gallery Using the Download Media (Down Arrow) Quick Action Icon
- Select a gallery or playlist.
- Swipe the selected media to the left. A series of Quick Action icons display to the right of the media.
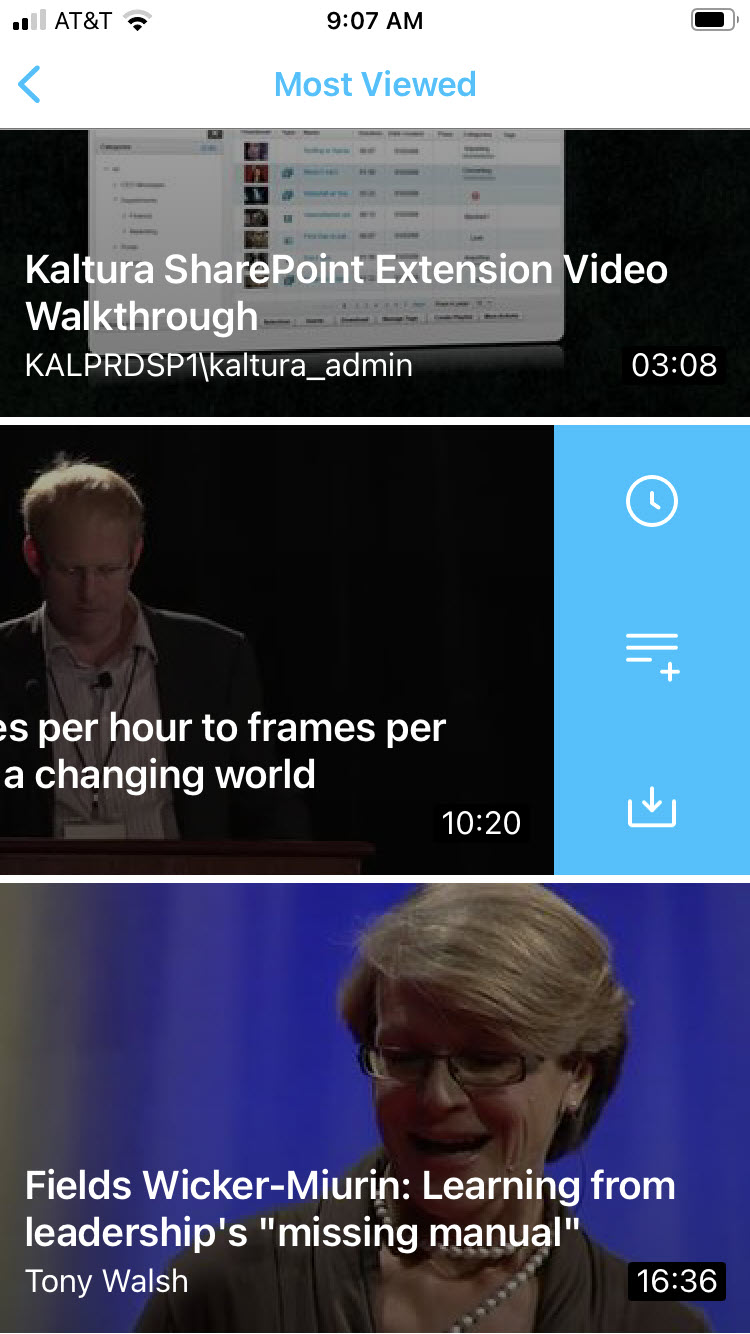
- Click the Download Media (down arrow) icon. The media begins to download. A circle with an "X" in the center is displayed with a blue progress indicator.
If you would like to stop the download, click on the "X". You will be asked to confirm your action. Once confirmed, you will receive a notification that the item was successfully deleted from your device. Click OK.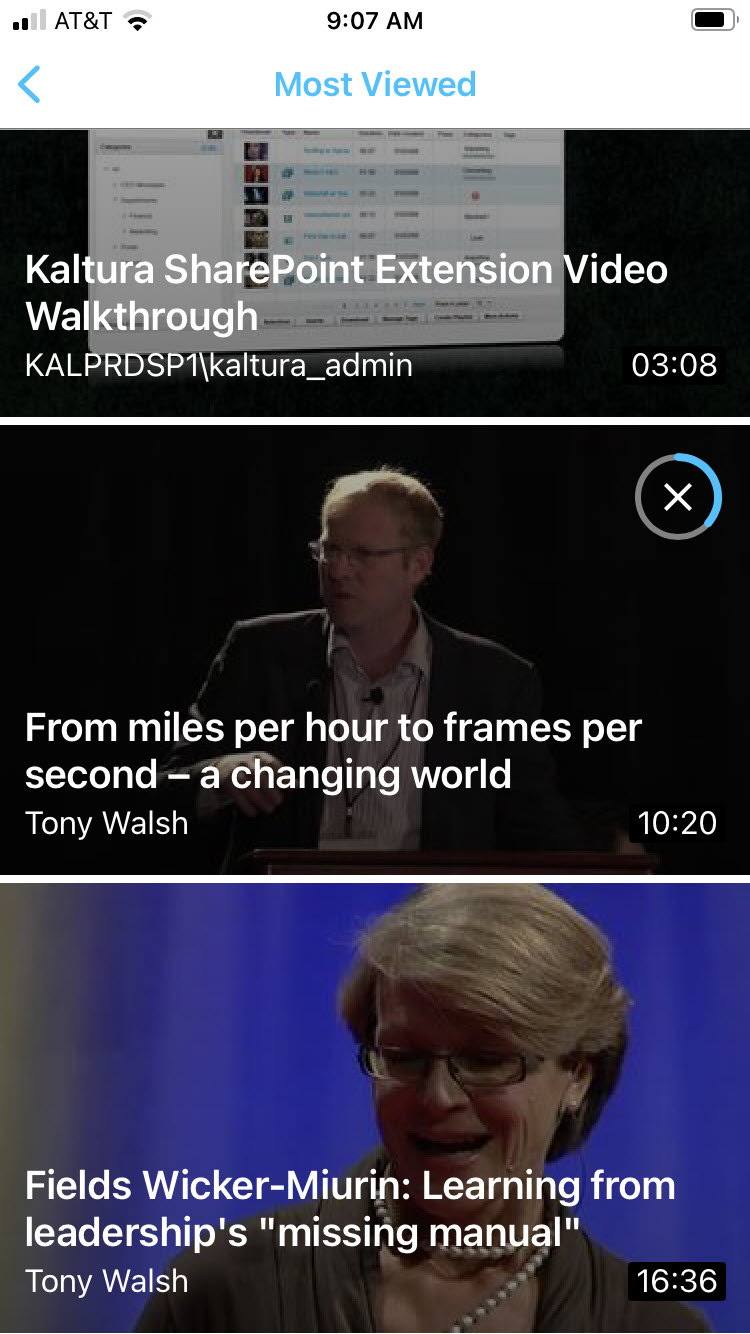 A circle with a checkmark in the center is displayed once the download is complete.
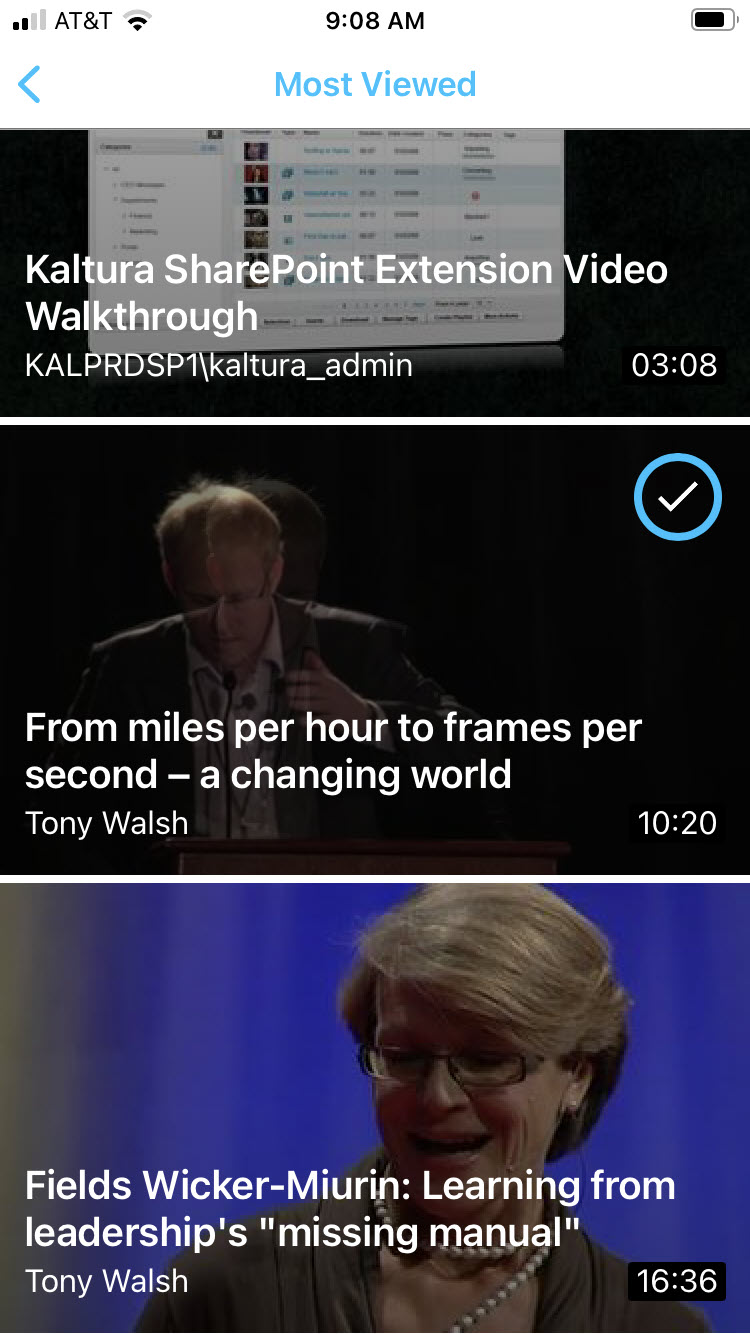

 A circle with a checkmark in the center is displayed once the download is complete.
From a Media Page
- Access My Media.
- Click on a media item. The Media Page displays.

- Click the ellipse (…) on the lower right corner of the media page. Additional options display.
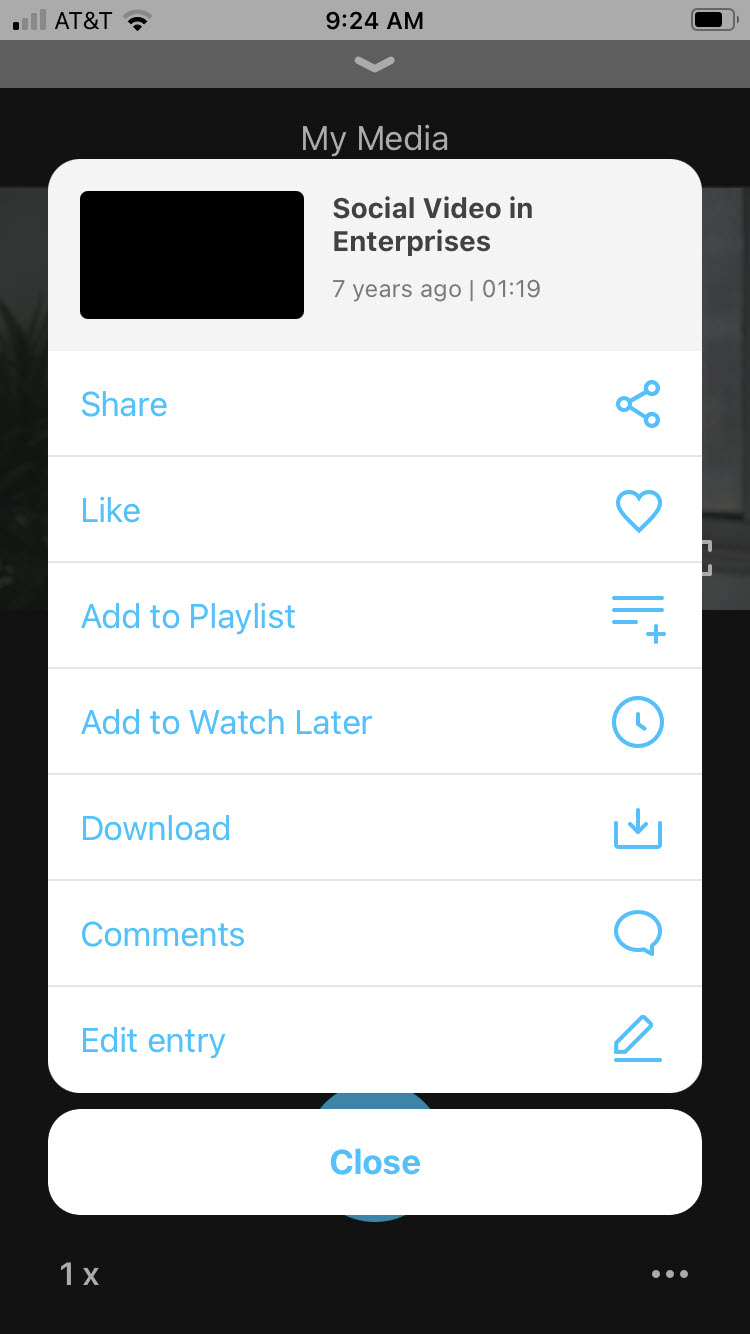
- Click the Download Media (down arrow) icon. The media begins to download. A circle with an "X" in the center is displayed with a blue progress indicator.
If you would like to stop the download, click on the "X". You will be asked to confirm your action. Once confirmed, you will receive a notification that the item was successfully deleted from your device. Click OK.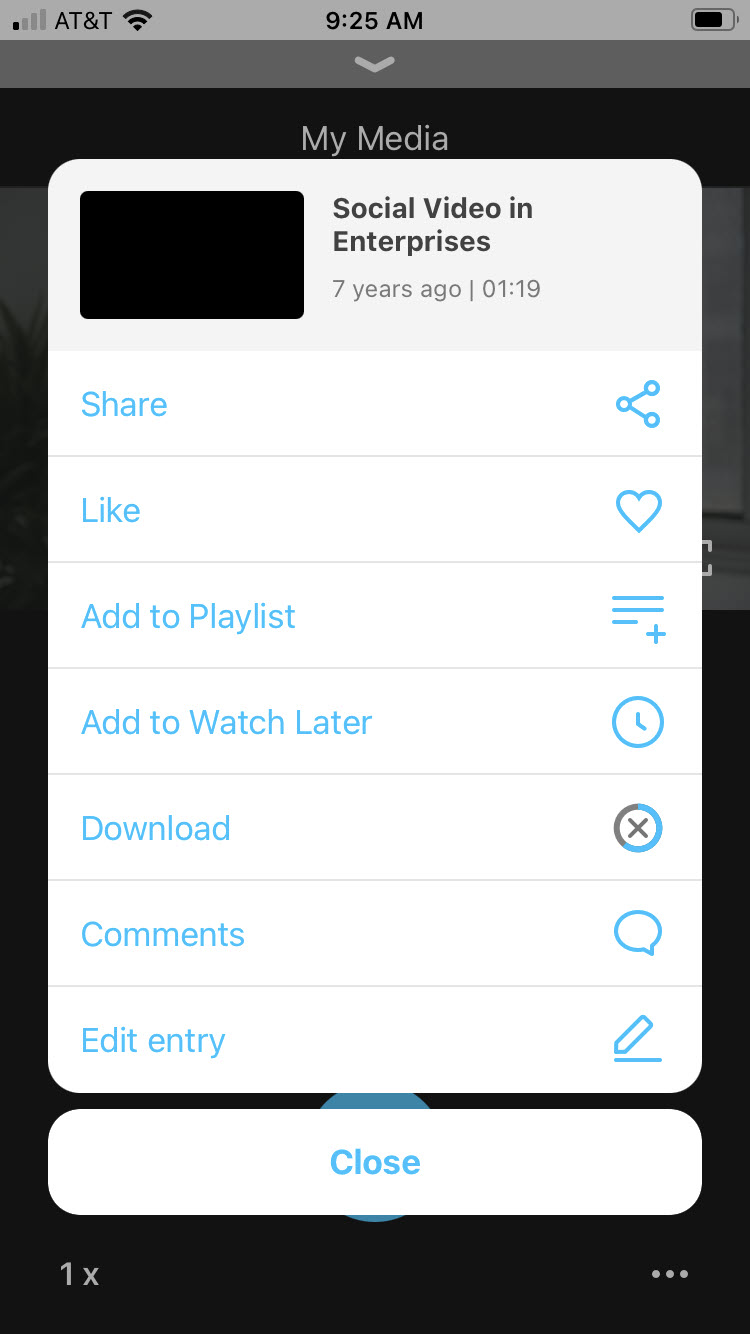 The Download Media (down arrow) icon is overlaid with a checkmark once the download is complete.


 The Download Media (down arrow) icon is overlaid with a checkmark once the download is complete.
To remove downloaded media from your device
You can remove downloaded media from your device in four ways:
- Access My Downloads, swipe the selected media to the left, and click the Download Media (down arrow overlaid with a checkmark) icon.
- Access My Media, swipe the selected media to the left, and click the Download Media (down arrow overlaid with a checkmark) icon.
- Access the Media Page, click the ellipse (…), and click the Download Media (down arrow overlaid with a checkmark) icon.
- If the item is in your Watch Later Playlist, access the Watch Later Playlist, swipe the selected media to the left, and click the Download Media (down arrow overlaid with a checkmark) icon.
Like and Share Media
KMS GO allows you to like media and share media with others.
To like and share media
You can like and share media in two ways:
- From any gallery or playlist using the Share (2 lines/3 circles) or the Like (heart) Quick Action icons.
- From any media page using the menu accessible via the ellipse (...).
From a Gallery or Playlist Using the Share (2 lines/3 circles) or the Like (heart) Quick Action Icons
- Select a gallery or playlist.
- Swipe the selected media to the right. A series of Quick Action icons display to the right of the media.
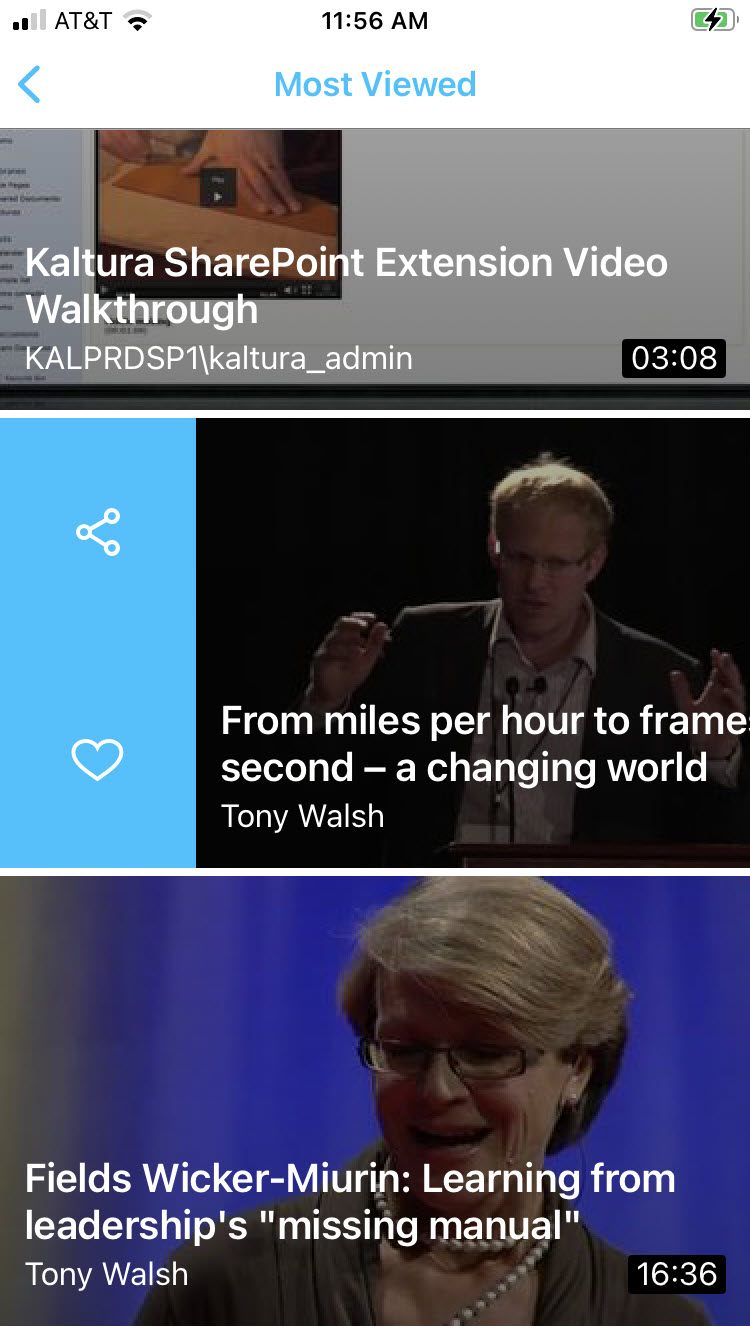
- To share the media, click the Share (2 lines/3 circles) icon, then choose the means by which you want to share the media (i.e., Messages, Email, app, etc.). To like the media, click the Like (heart) icon.
From a Media Page
- Access My Media.
- Click on a media item. The Media Page displays.

- Click the ellipse (…) on the lower right corner of the media page. Additional options display.

- To share the media, click the Share (2 lines/3 circles) icon, then choose the means by which you want to share the media (i.e., Messages, Email, app, etc.). To like the media, click the Like (heart) icon.


Comment on Media
You can comment on media and reply to others' comments about a media item.
To comment on a media item
- Access My Media.
- Click on a media item. The Media Page displays.
- Click the ellipse (…) on the lower right corner of the media page. Additional options display.

- Click the Comments (speech bubble) icon. The Comments screen displays.
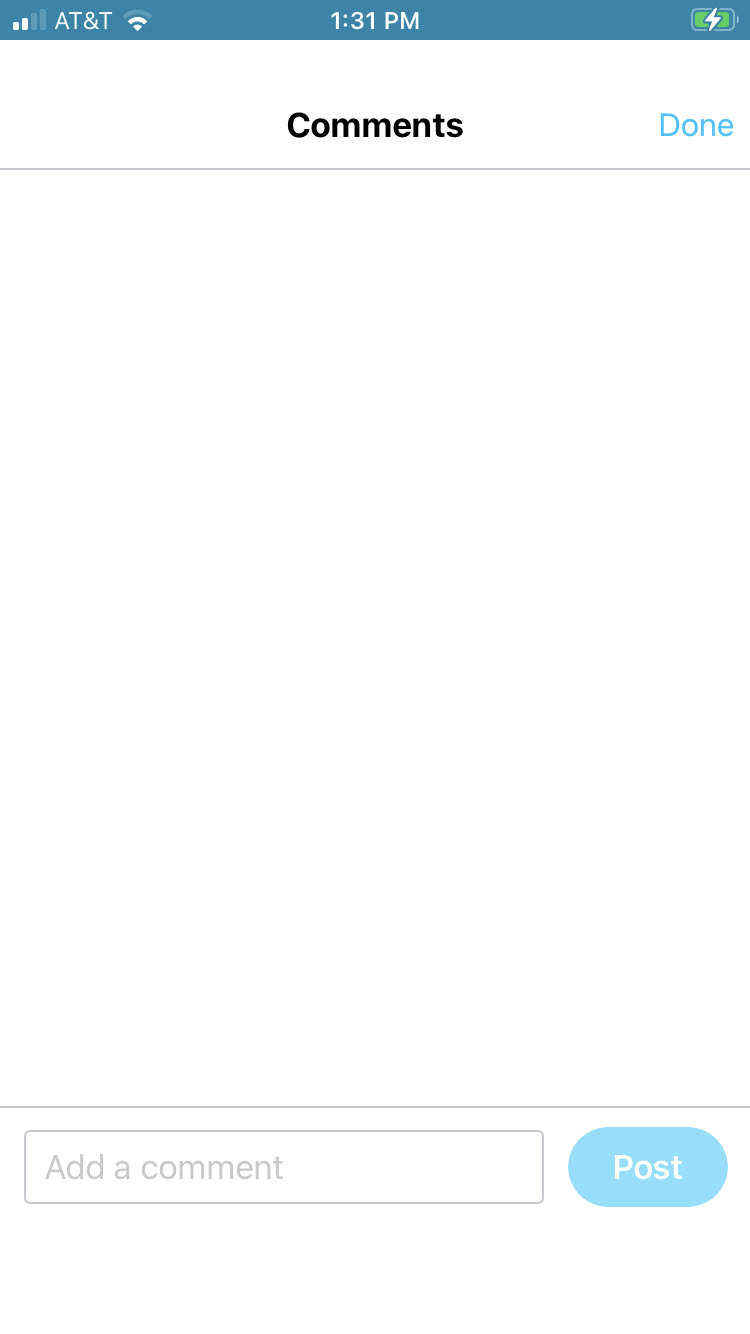
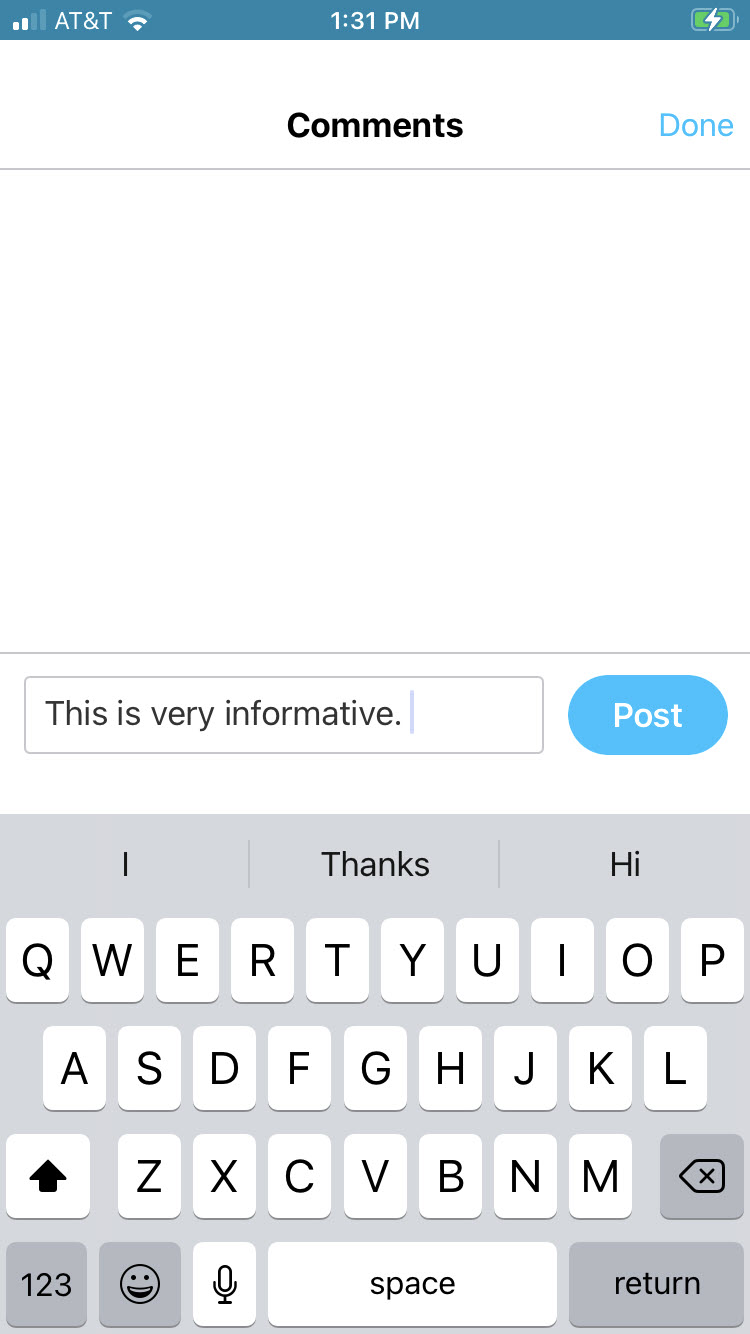
- Type a comment and click Post.
- To reply to an existing comment, click Reply, type a comment, and click Post.


All media discovery and actions are subject to entitlements defined by your KMS admin. Your administrator may or may not have enabled commenting.
View History
When configured by your administrator, History is accessed via My Page and displays videos that you have viewed while signed in. This includes videos that you have watched while signed in to the KMS GO app or browser on a mobile device. Changes you make to your account history will appear on all devices you sign in to with using your account.
History tracks your activity across the instance as a whole, both on the KMS GO app and on KMS.
Continue Watching
When configured by your administrator, Continue Watching is accessed from the home page and displays videos that you have partially viewed while signed in. This includes videos that you have watched while signed in to the KMS GO app or browser on a mobile device.
The video progress bar makes it easy to see where you left off the last time you watched a video. When you play the video again, the video restarts from where you left off.
If your administrator has set the video's ending time to a point other than the actual end of the video, you may not be given the option to continue watching and the video will automatically restart.
Explore
KMS GO offers a powerful unified keyword search.
To access the explore feature
- Click the Explore button on the bottom of the home page.

The Explore page displays.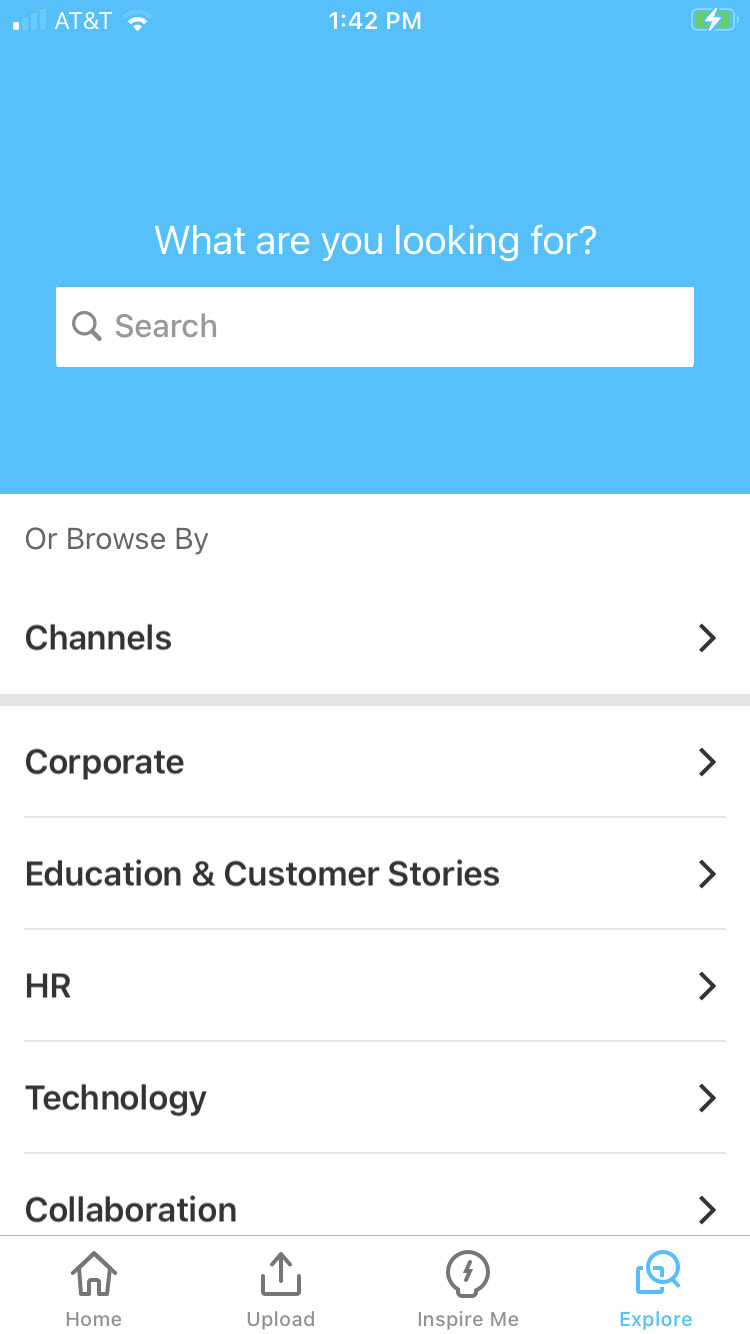


The search is performed on the following:
- Metadata
- Slides
- Captions
- Channels
- Categories
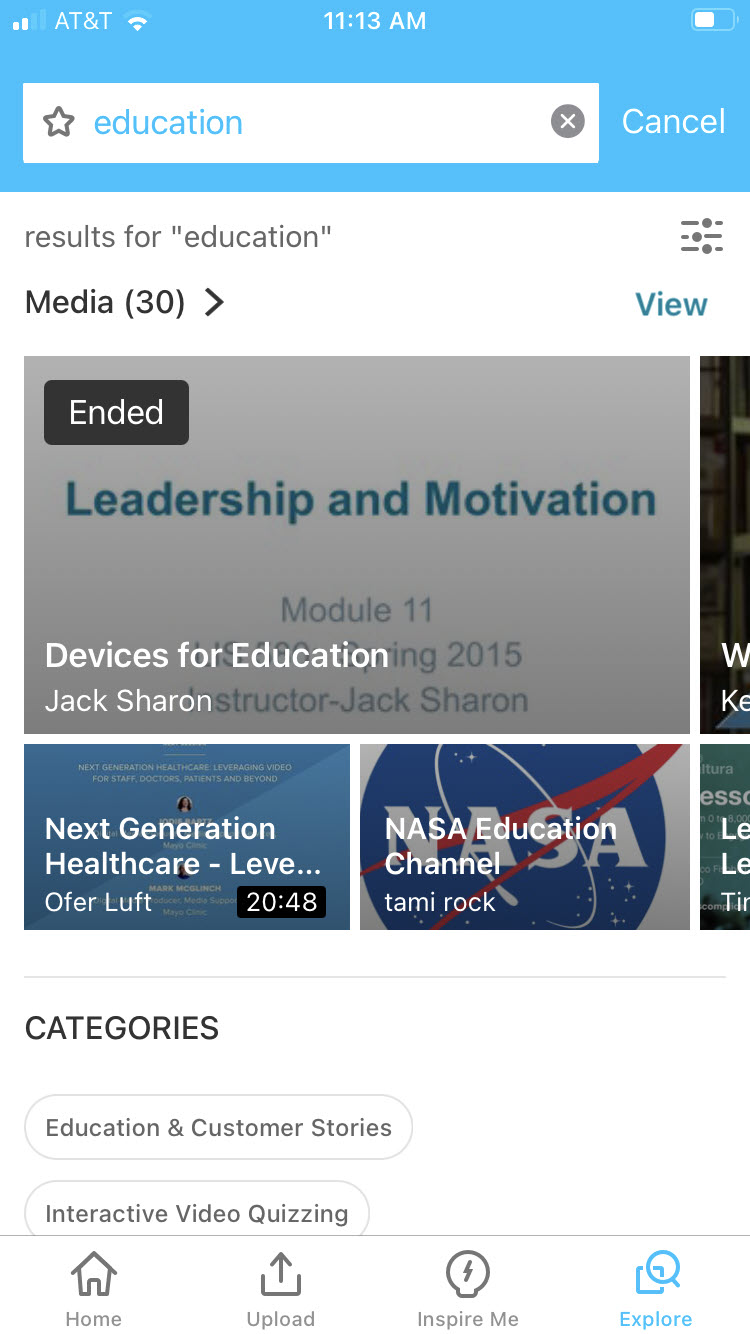
Search Results Screen
KMS GO provides the best matches to your search criteria in a magazine-style display. If there are channels that satisfy your search criteria, they are displayed as well.
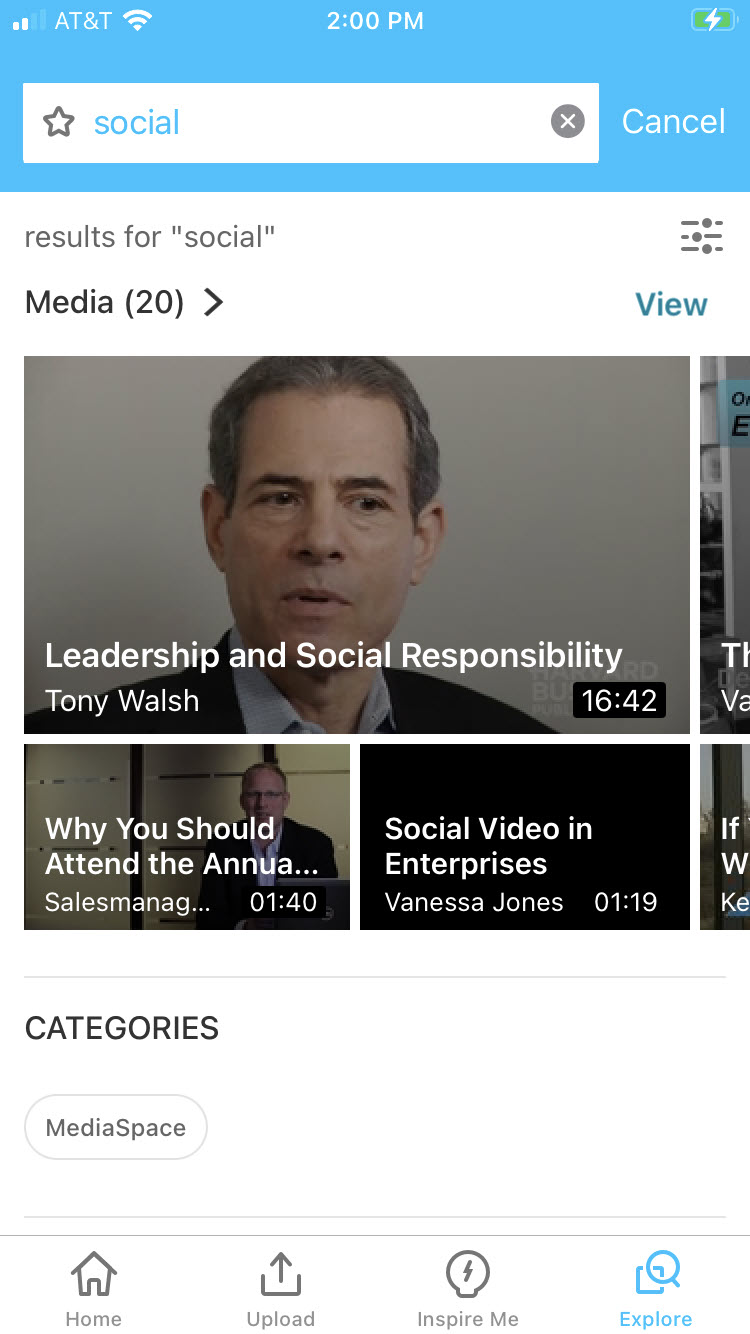
Sorting and Filtering Through Search Matches
You can sort and filter your search results by clicking on the filter icon in the top right corner of the search results page.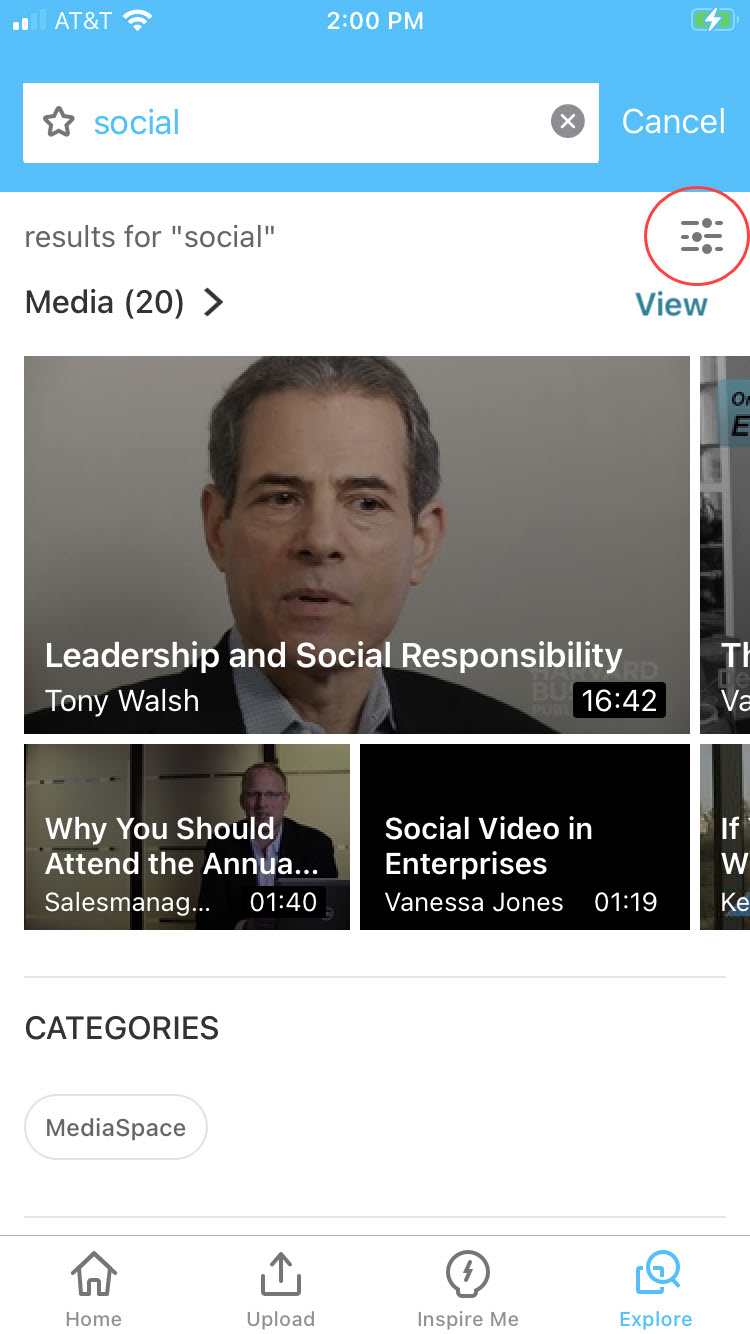
The search results can be sorted by:
- Relevance
- Creation Date - Descending
- Creation Date - Ascending
- Update Date - Ascending
- Update Date - Descending
- Alphabetically - A to Z
- Alphabetically Z to A
- Views
- Plays
- Likes
You can search in:
- All Fields
- Details
- Chapters/Slides
- Captions
- Quiz
You can search by the following Media Types:
- Video
- Quiz
- Audio
- Image
- Webcast Events
- Interactive Video
Saving a Search
Your search can be saved by clicking on the star near your keywords in the search window. The star turns blue when the search is saved.
Search not saved (star is white):
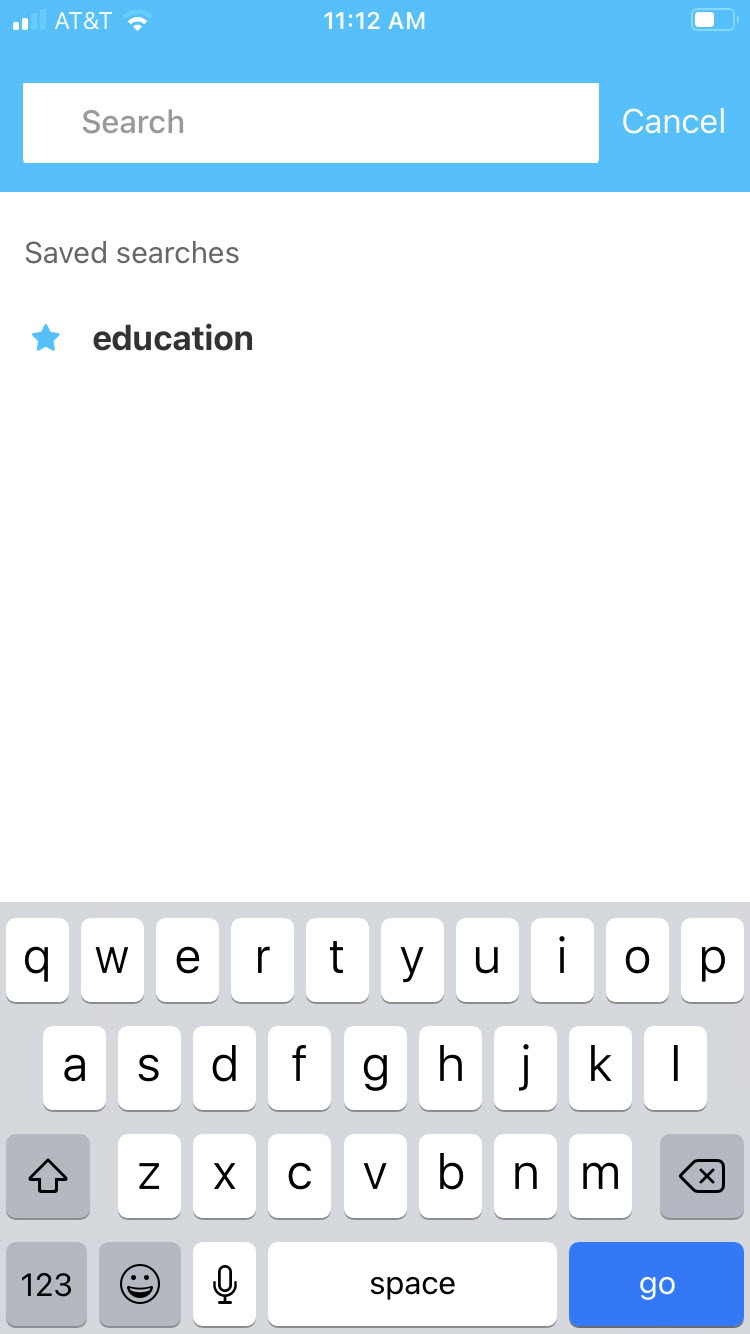
Search is saved (star is blue):

To access your saved search
- Access the Explore feature (click the Explore button on the bottom of the home page).
- Click on the search field to access the saved searches screen.

You can always "un-save" your searches by clicking on the blue star next to the search.
Browse
Uses who are not logged in can use the Explore screen to browse through categories. Users who are logged in can additionally can use the Explore screen to browse through channels. The Browsing menu that includes categories and channels is displayed below the search area.

For additional information about channels vs categories, please see Understanding Galleries and Channels in Kaltura MediaSpace.
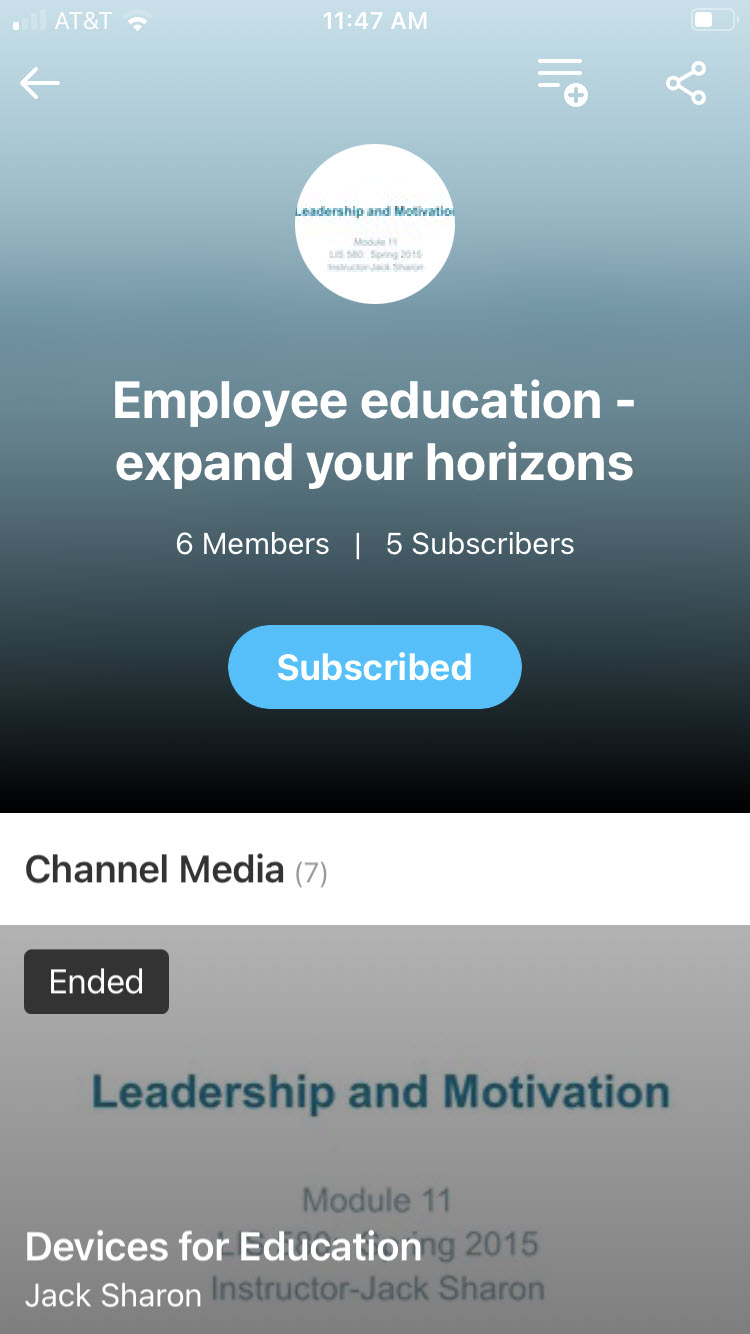
Media Channels
Every channel in KMS GO has a dedicated channel page, where you can see:
- All the media in the channel
- Number of the channel’s members
- Number of the channel’s subscribers
To access a channel page
There are two ways to access a channel page.
- Click Channels on the Explore screen. A list of available channels displays.
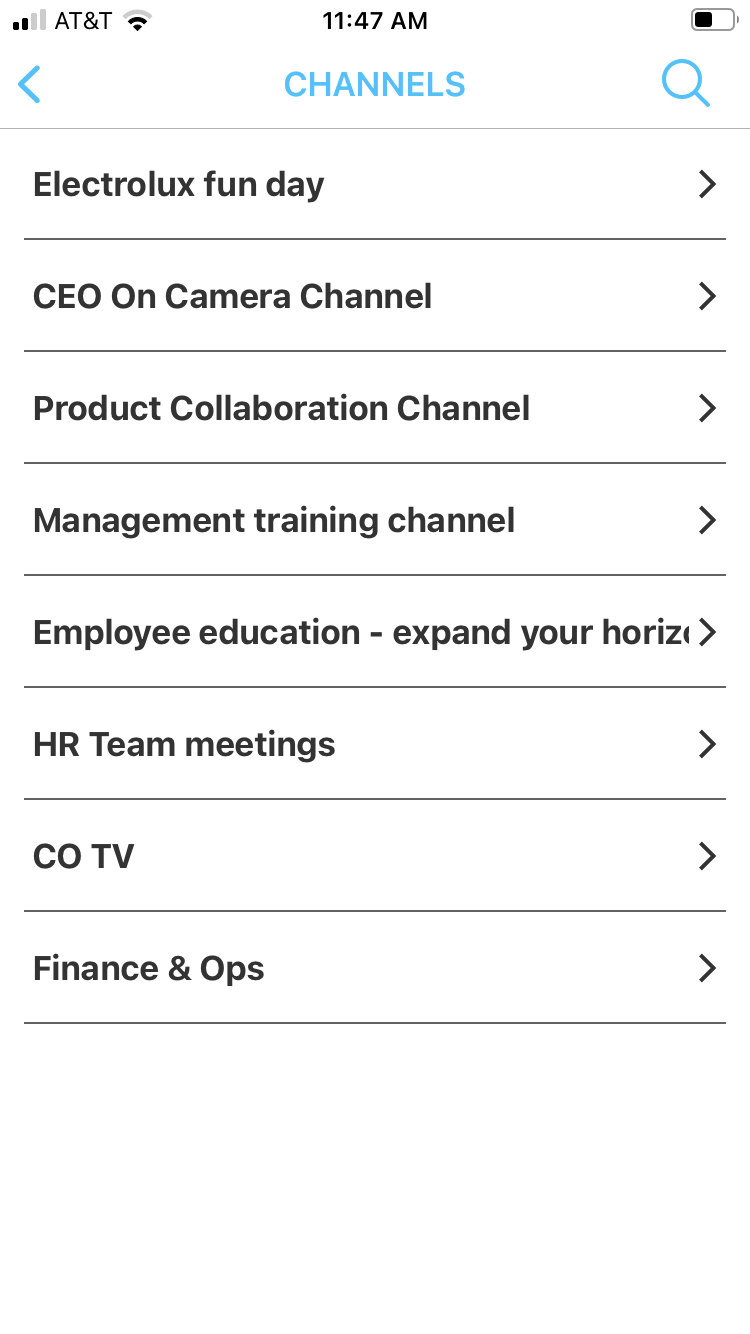

or
- Click on a specific channel from your search results.

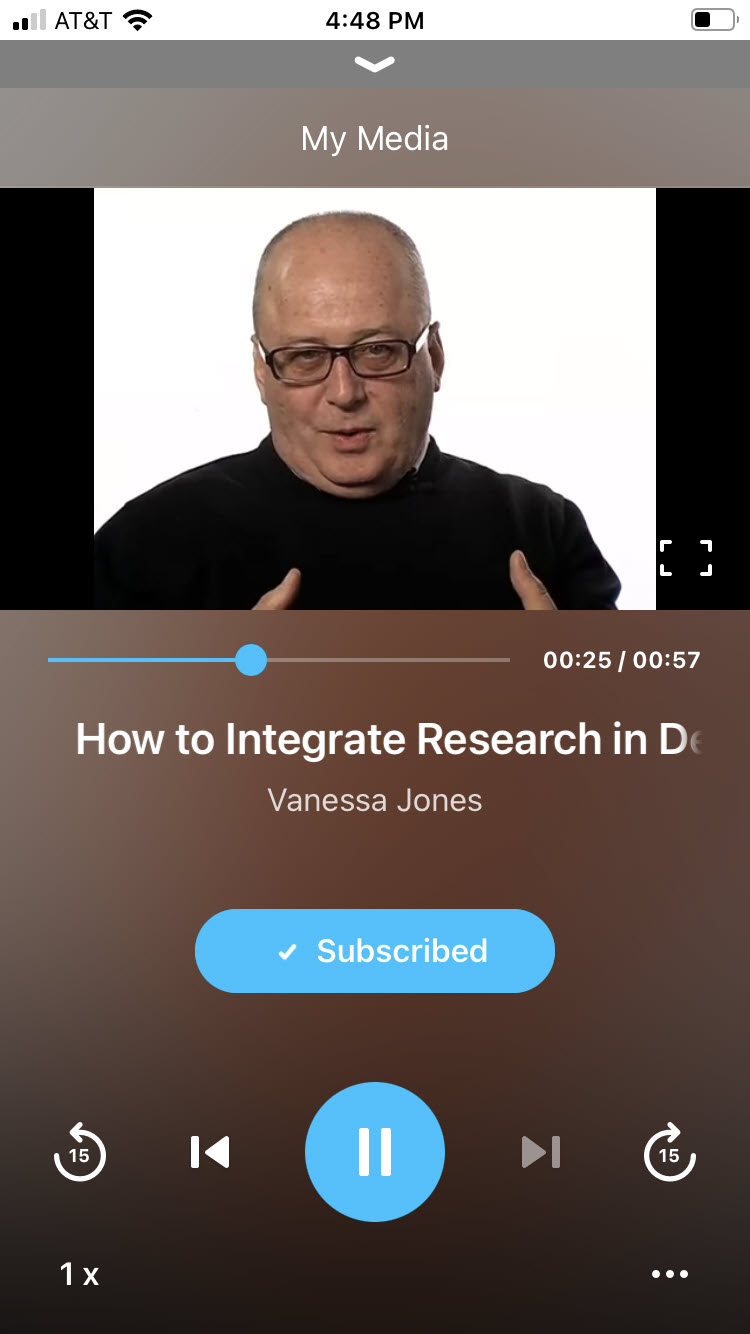
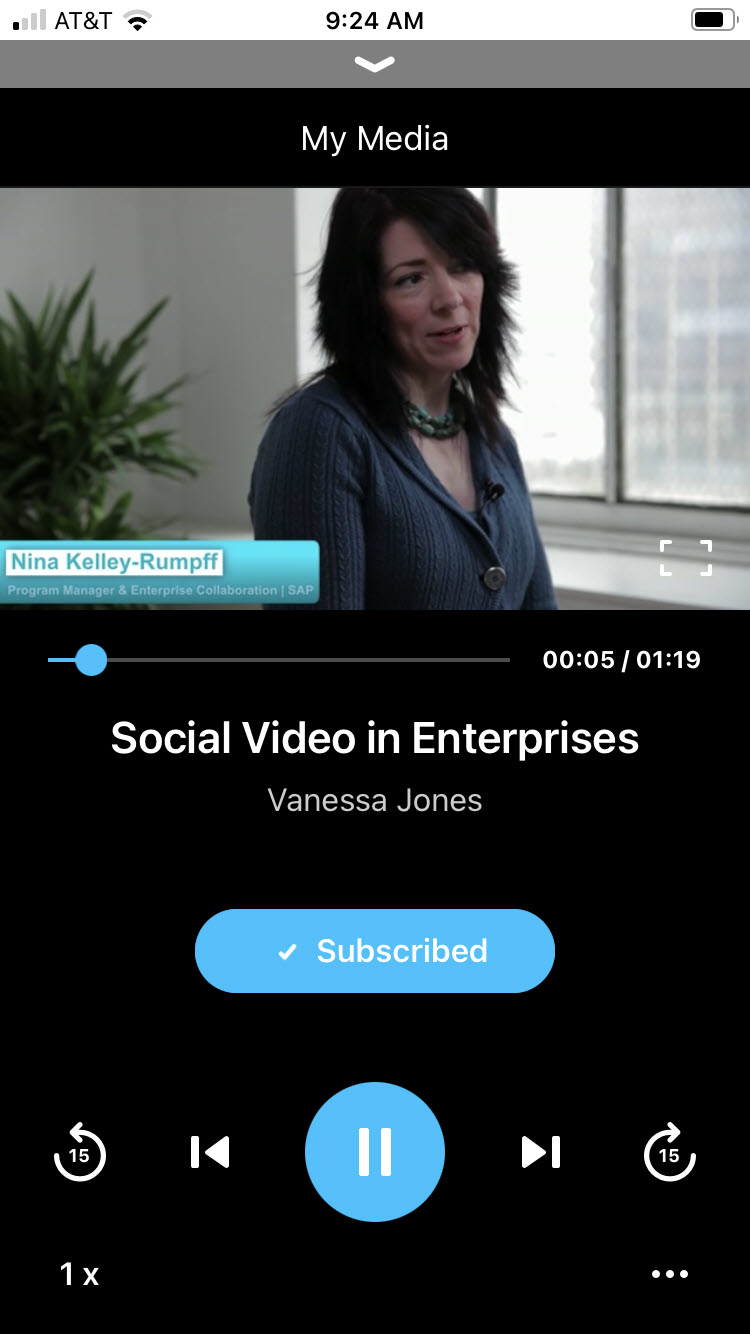
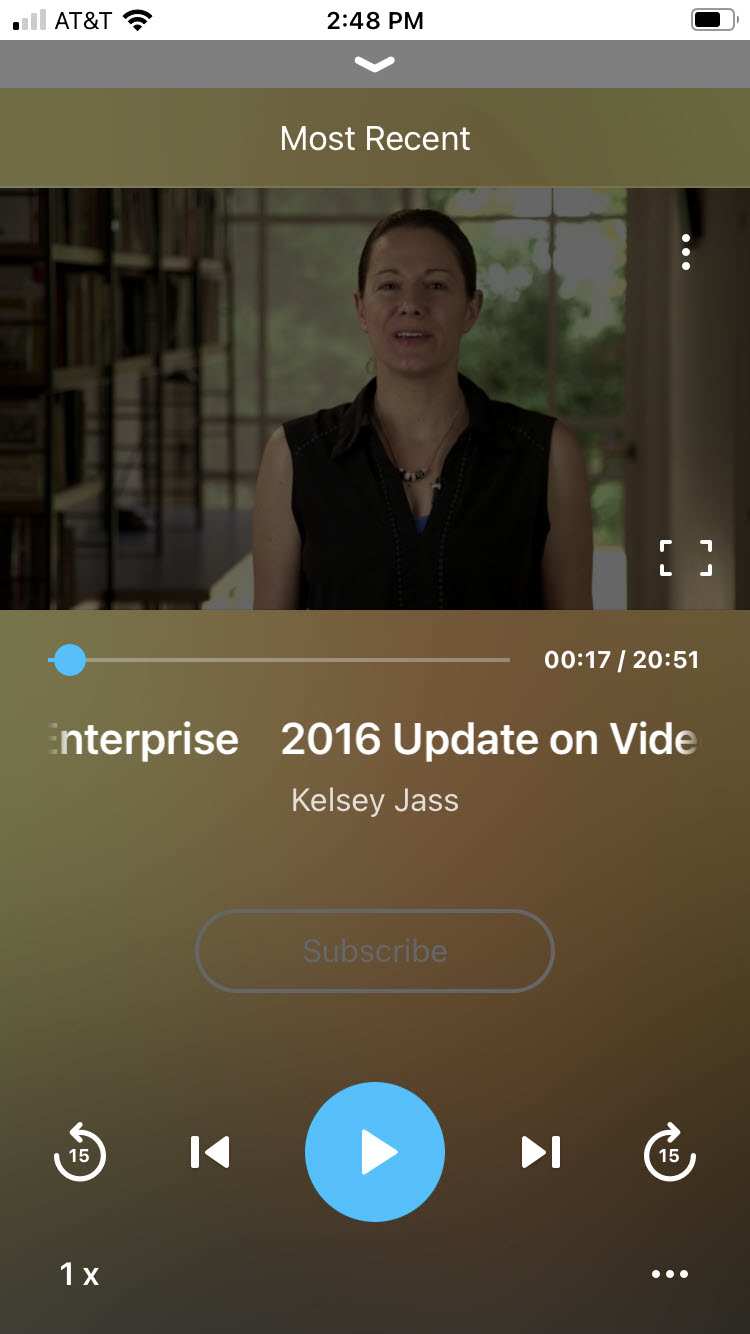
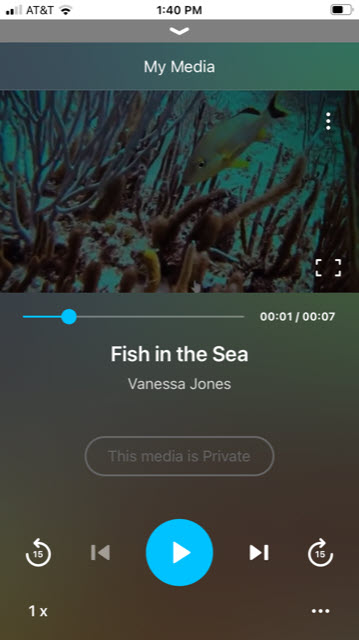
Media Page
Every media has its dedicated page. In addition to the media itself, this Media Page contains the following information:
- Media name
- Media owner
- Publish date
- Media Status (Public, Private,
- Number of views
- Number of likes
- Description
- Tags
You can perform the following actions from this page:
- Play audio track (if available)
- Turn on Closed Captions and choose language (if available)
- Rotate the device to enter the full screen view
- Choose a point in the video to watch
- Subscribe (if available)
- Tap to play the video
- Go back and forward in the video by 15 seconds
- Go back to the beginning or go to the end of the video
- Share
- Like
- Add to playlist
- Add to Watch Later playlist
- Download
- Comment or respond to comment
- Edit entry

Create and Upload Media
The Upload icon is located on the bottom of the KMS GO home page.

Use the Upload icon to add media from your existing photos (Gallery) or from the Cloud. You may also use the Upload icon to create media for upload using your device's camera.
To create media
- On the KMS GO home page, click the Upload icon. Depending on your configuration you may be required to login.
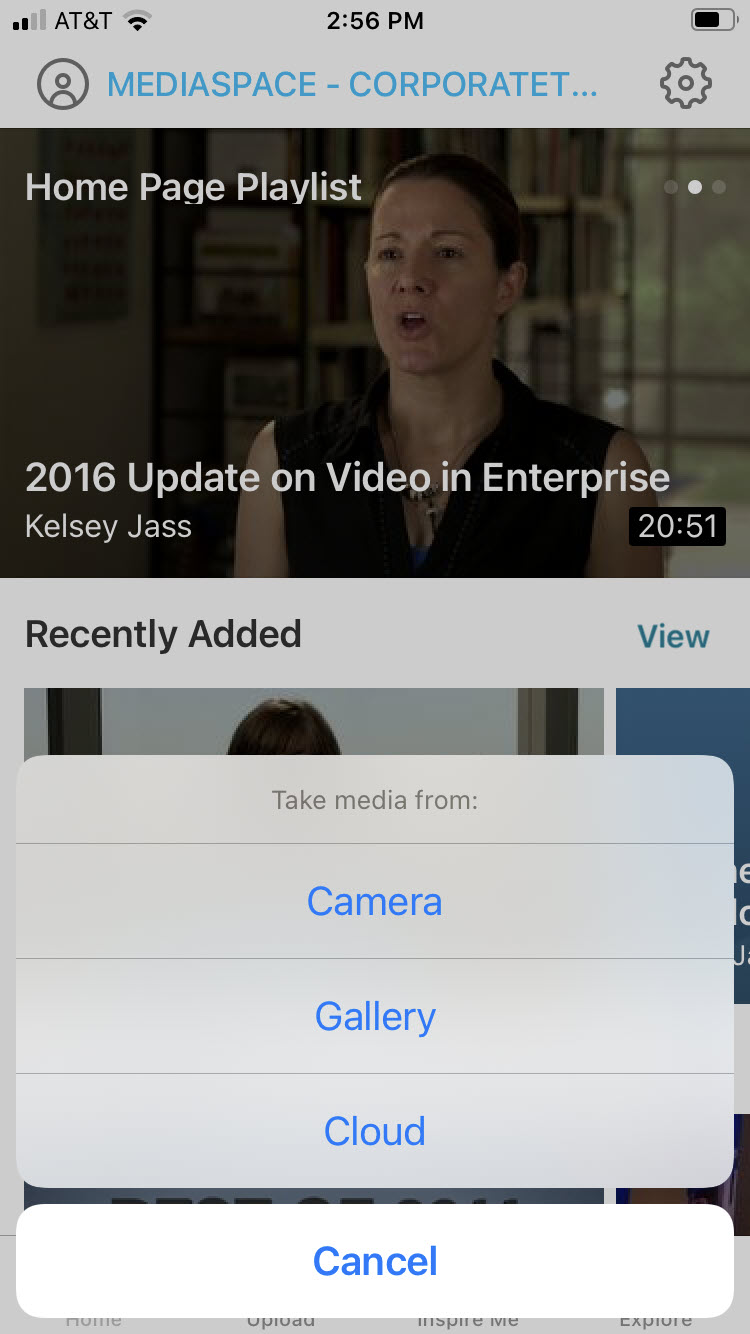
- Click Camera to create media for upload using your device's camera.
- Choose Video if you would like to take a video. Choose Photo if you would like to take a photo.
- After taking a video/photo, you are asked if you would like to retake or use the video/photo.
- If you choose Retake, you will be given the opportunity to retake the video/photo.
- If you choose Use Photo/Video, you are prompted to enter a title then either upload or save a copy of the media on your device for later upload.

To upload media
- On the KMS GO home page, click the Upload icon. Depending on your configuration you may be required to login.
- Click Gallery to upload media from your device or Cloud to upload media from the cloud.
- Click the media you want to upload. The media displays in a player.
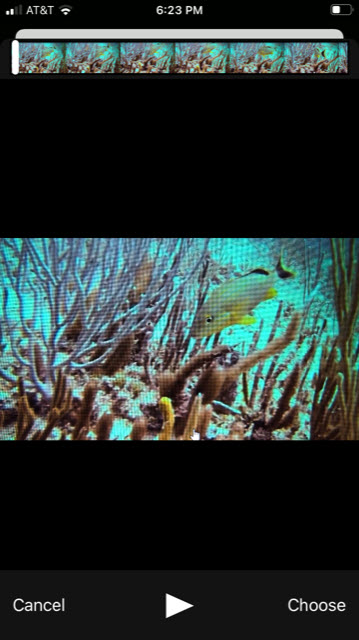
- You can click the Play button to watch the media or Choose to choose it for upload. The Trim screen displays.
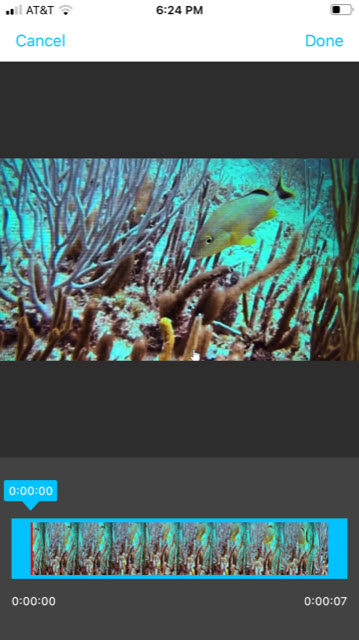
- You can select to trim the media from either end, then click Done or you can leave the media as is and click Done. You are prompted to enter a title.

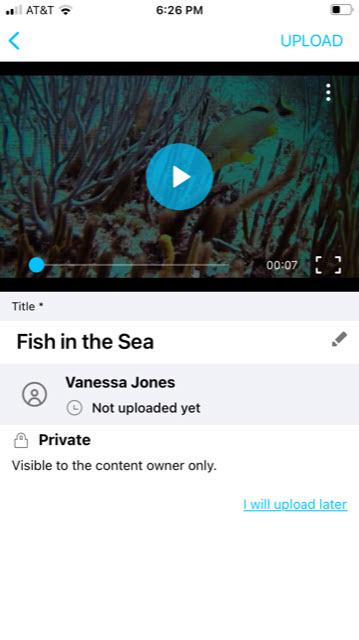
- Type a title and click done. The Upload screen displays. Here you may choose to upload now (by clicking UPLOAD) or later (by clicking I will upload later).
- If you choose to upload later, the media is saved on your device gallery for later upload and not presented in the app itself. When you are ready to upload, simply repeat the steps in this section and, instead of clicking I will upload later, click UPLOAD.
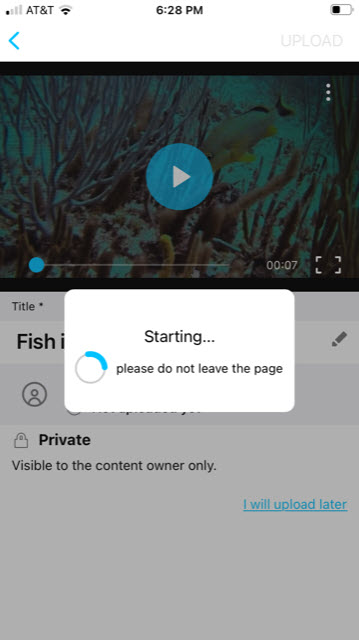
- To upload now, click UPLOAD. The upload progress bar is displayed.
 Once uploaded successfully, you are given a choice to Publish.
The uploaded video is now available for viewing depending on your publishing settings. You can find on My Page in My Media.
- If you choose to upload later, the media is saved on your device gallery for later upload and not presented in the app itself. When you are ready to upload, simply repeat the steps in this section and, instead of clicking I will upload later, click UPLOAD.


 Once uploaded successfully, you are given a choice to Publish.
Add and Edit Metadata, Change Publishing Settings, and Delete Media
- Click the ellipse (…) on the lower right corner of the media page. Additional options display.

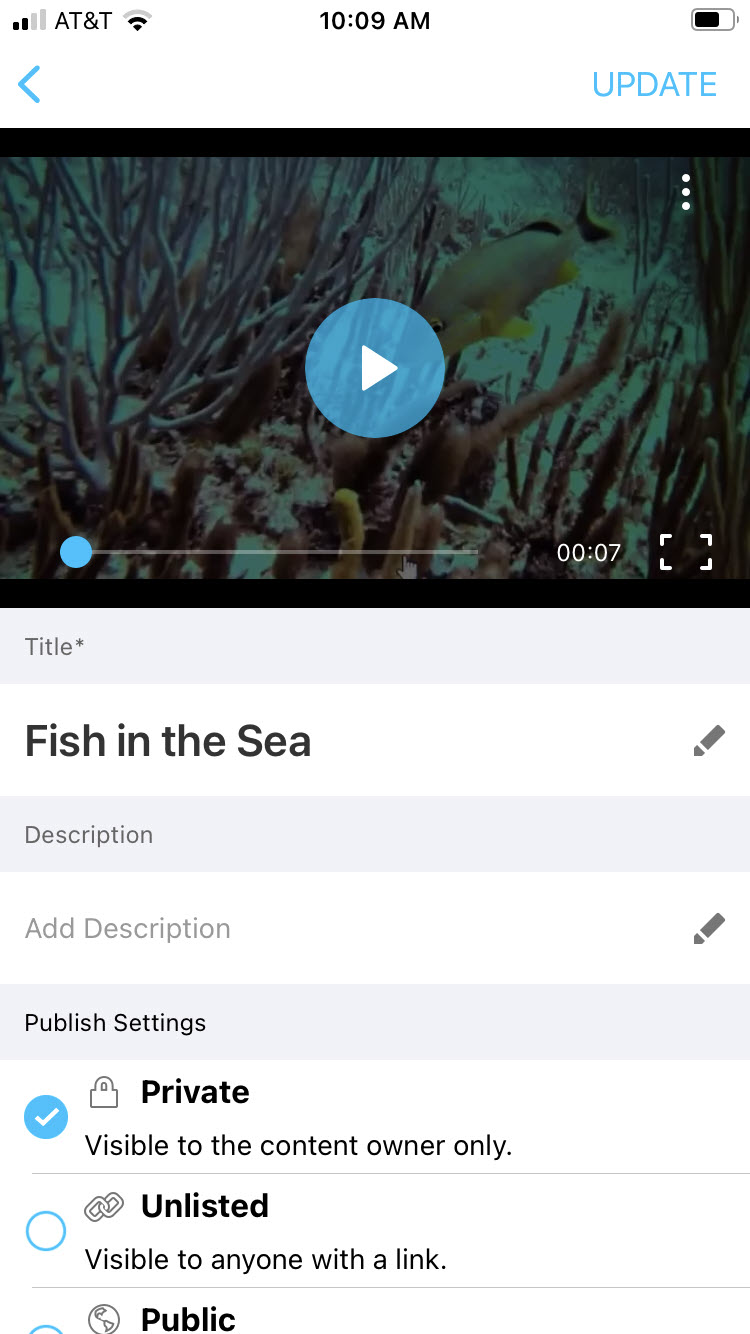
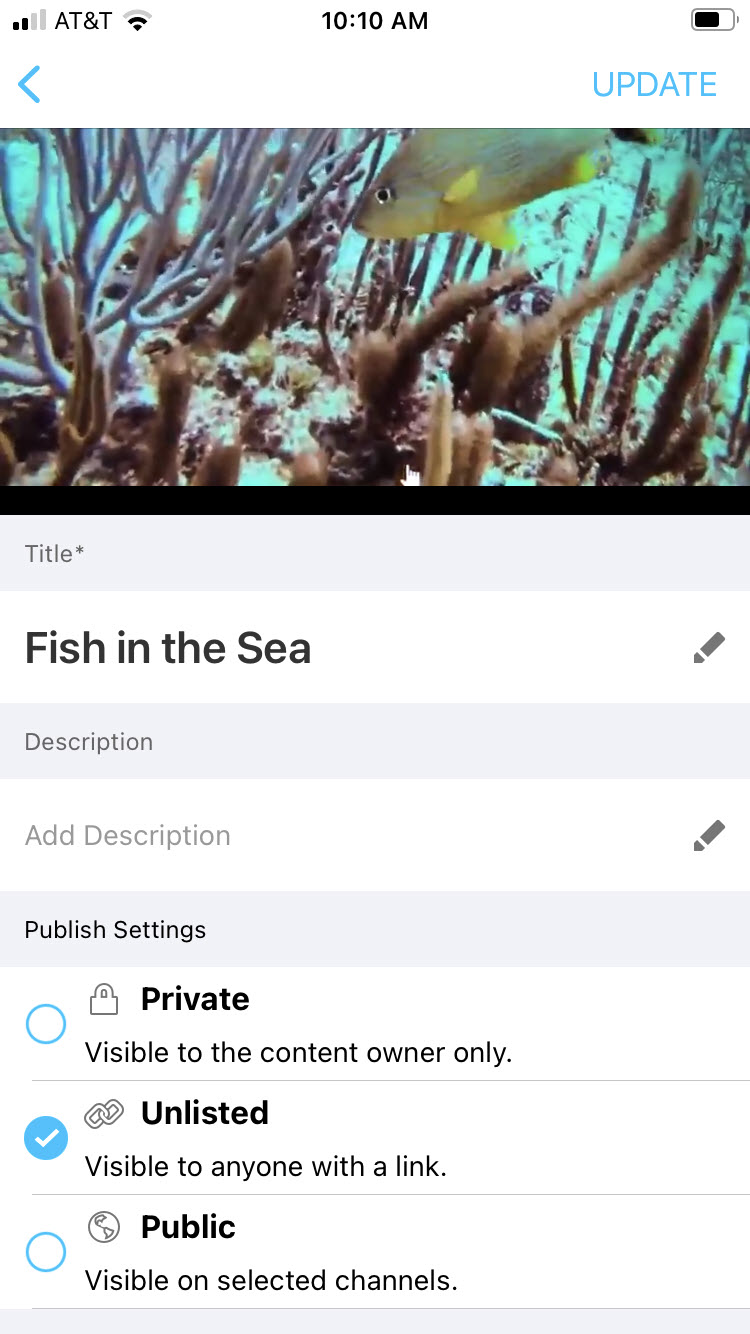
- Choose Edit entry. Note that editing requires the appropriate privileges. The Edit Media page displays.
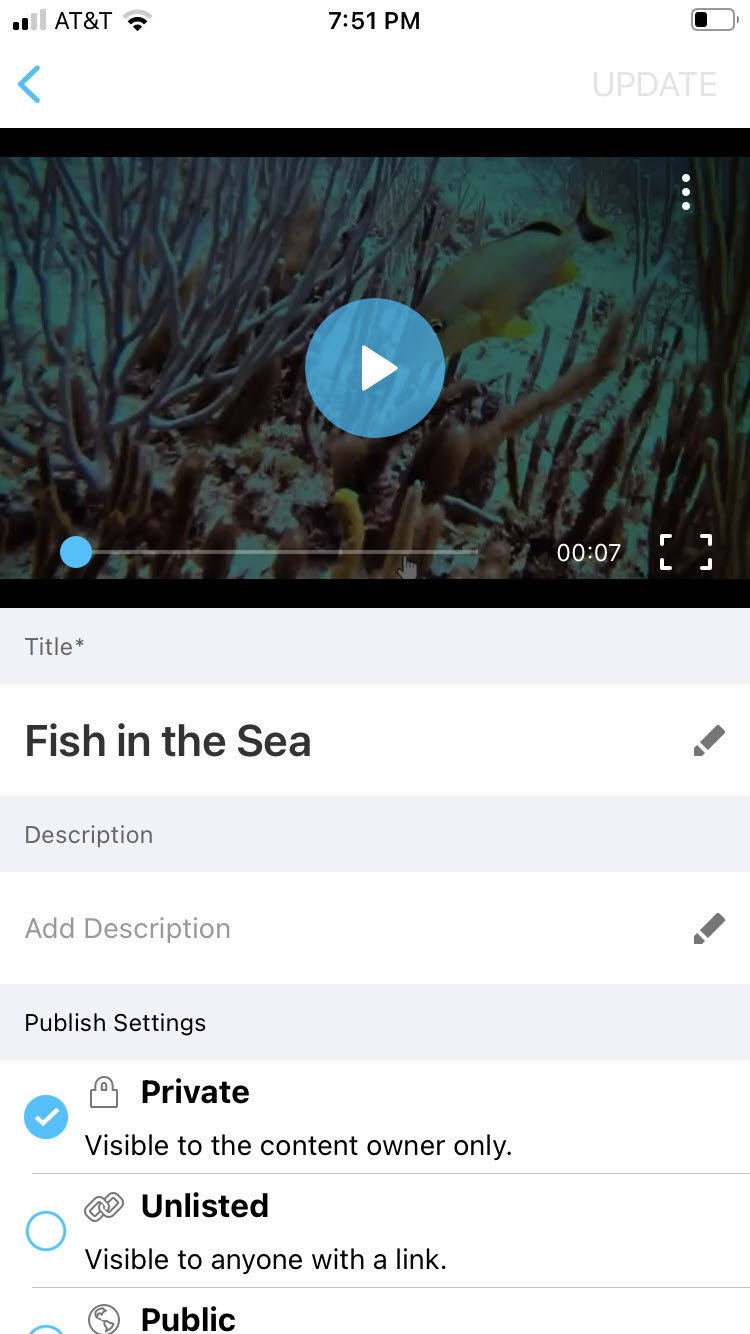
- Click the pencil icon(s) to the right of each field to edit.
- After editing a field, click Done.
- Click UPDATE to update the information on the server.


You can edit the following:
- Click the ellipse (…) on the lower right corner of the media page. Additional options display.
- Choose Edit entry. Note that editing requires the appropriate privileges. The Edit Media page displays.
- Under Publish Settings, click Private, Unlisted, or Public.
- Click UPDATE to update the information on the server.
To delete media
- Click the ellipse (…) on the lower right corner of the media page. Additional options display.
- Choose Edit entry. Note that editing requires the appropriate privileges. The Edit Media page displays.
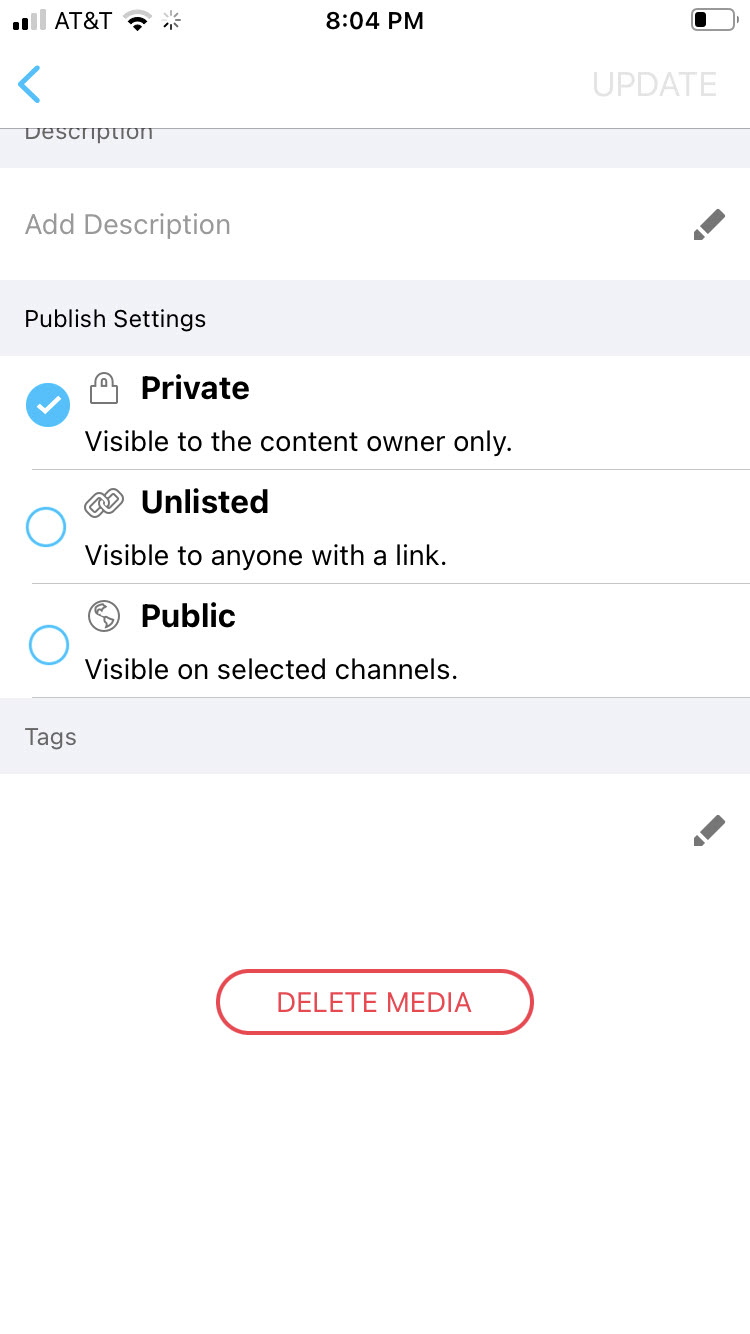
- Scroll to the bottom and Click Delete Media. You are asked to cancel or confirm the deletion.

Publish Media
- Click on the My Page icon. Depending on your configuration, you may be required to login. My page displays.
- Click My Media. My Media displays.
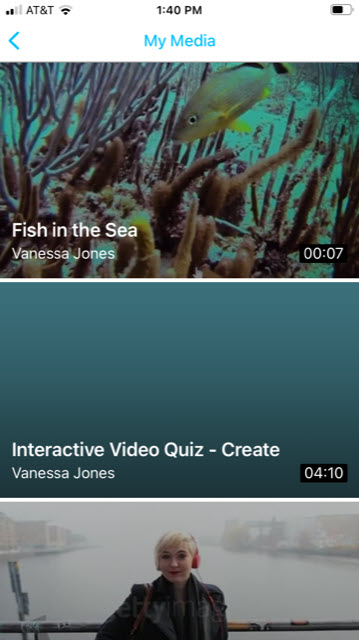
- Select the video you want to publish. The media page displays.
- Click the ellipse (…) on the lower right corner of the media page. Additional options display.
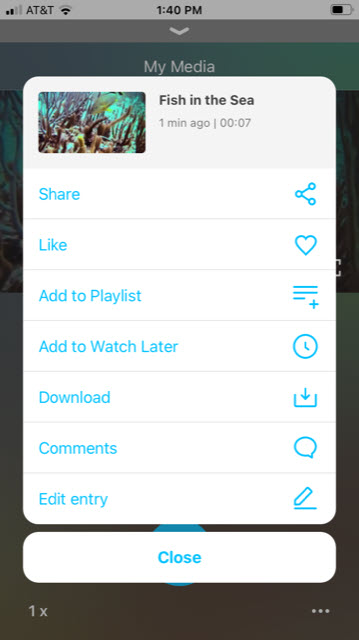
- Click Edit entry (pencil icon) to enter edit mode.
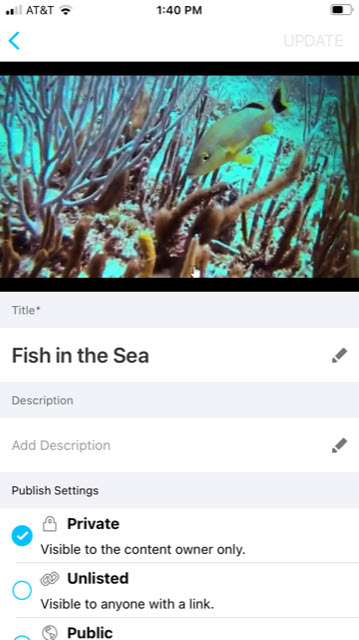
- In edit mode, the publishing options are displayed: Private, Unlisted, Public.


To publish as Private
- In edit mode, choose Private. This is the default publish setting. This means that the media will be visible to the content owner only.
- Click UPDATE.

To publish as Unlisted
- In edit mode, choose Unlisted. This means that the media will be visible to anyone with a link.
- Click UPDATE. You are asked if you would like to copy the media URL to the clipboard.

- Click NO or YES.


To publish as Public
- In edit mode, choose Public. This means that the media will be visible on selected channels/categories.
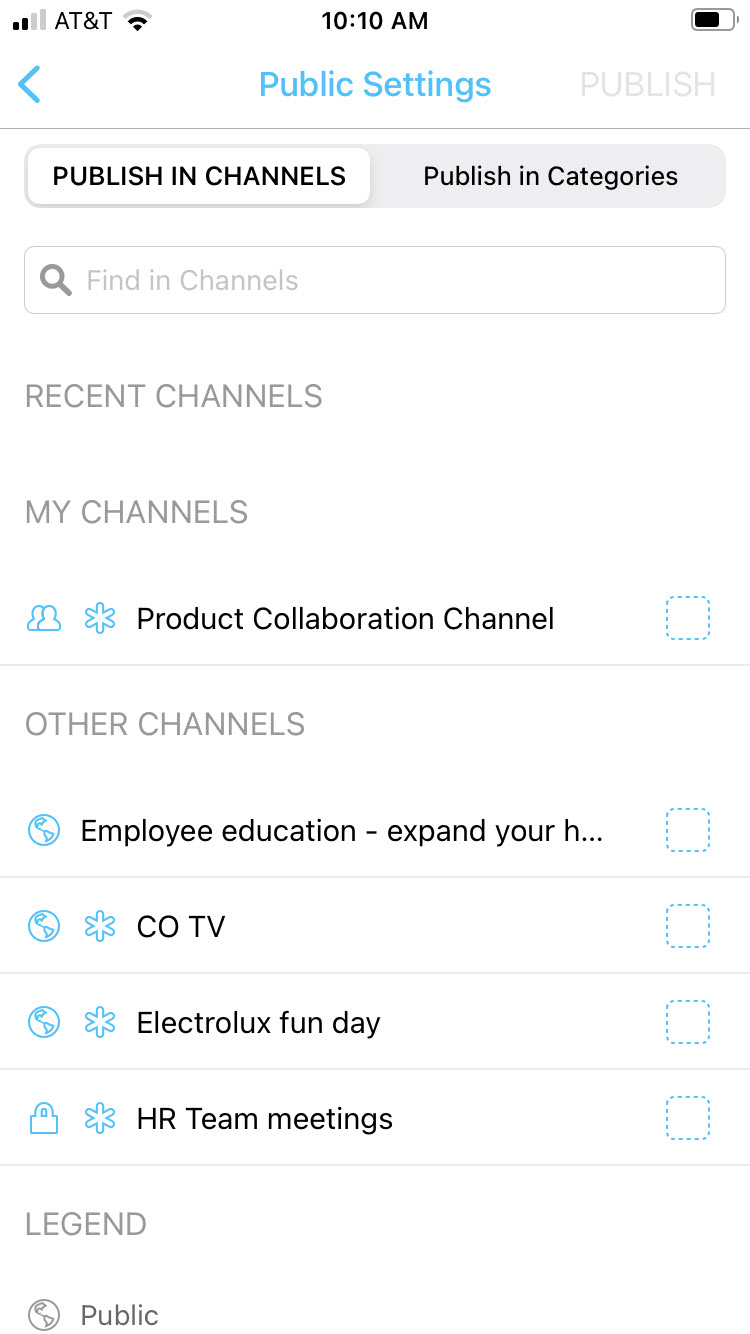 The Public setting allows you to publish to channels or categories to which you are permitted to publish. Note that some metadata is marked as required for publishing, or required for publishing in a shared repository in particular. There are two tabs in the Publishing Settings page: Publish in Channels and Publish in Categories. By default, the Publish in Channels tab is active.
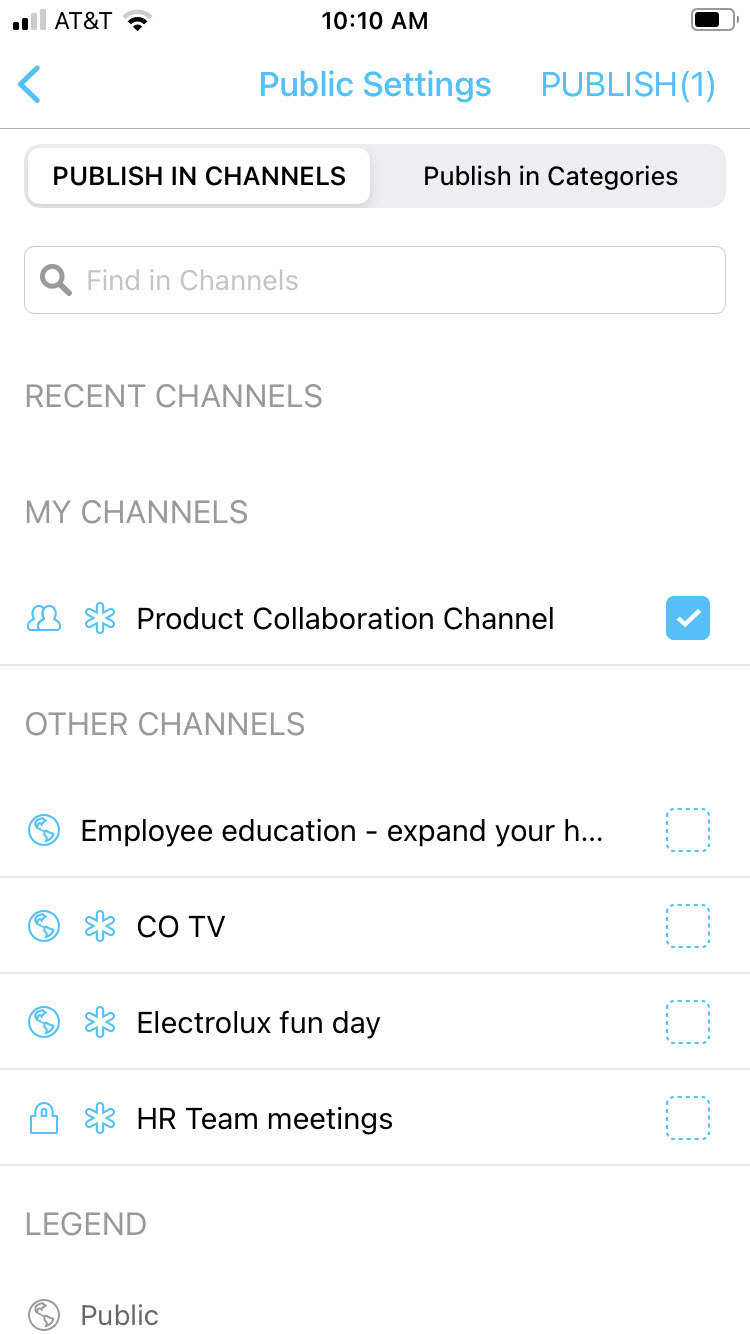
 - Select the checkbox next to the channels to which you want to publish.
- Click the Publish in Categories tab and select the checkbox next to the categories to which you want to publish.
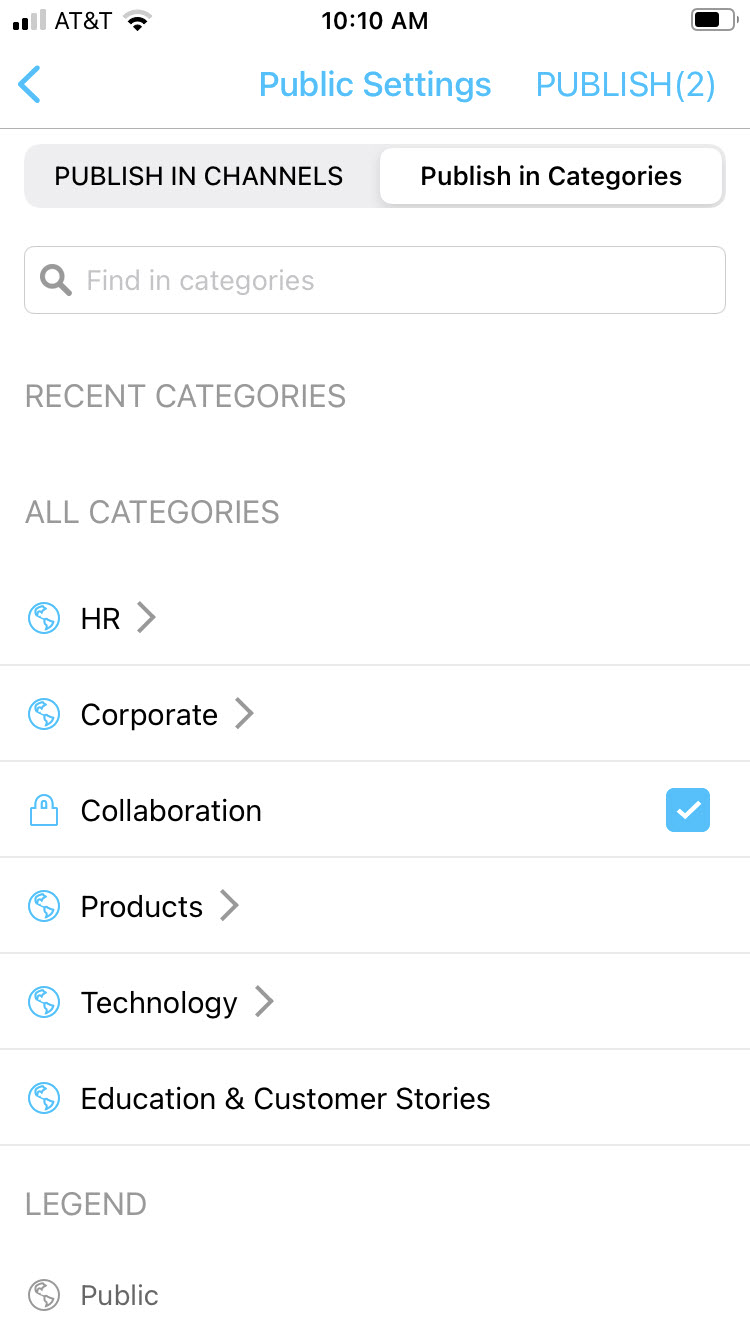 The counter for the total number of channels and/or categories that you have selected is located in parenthesis in the upper right corner of the screen, next to the PUBLISH button.
You can also use the Find in Channels/Find in Categories fields to search for a channel or category. As you type, search results are displayed. You may then select the checkbox next to the desired result.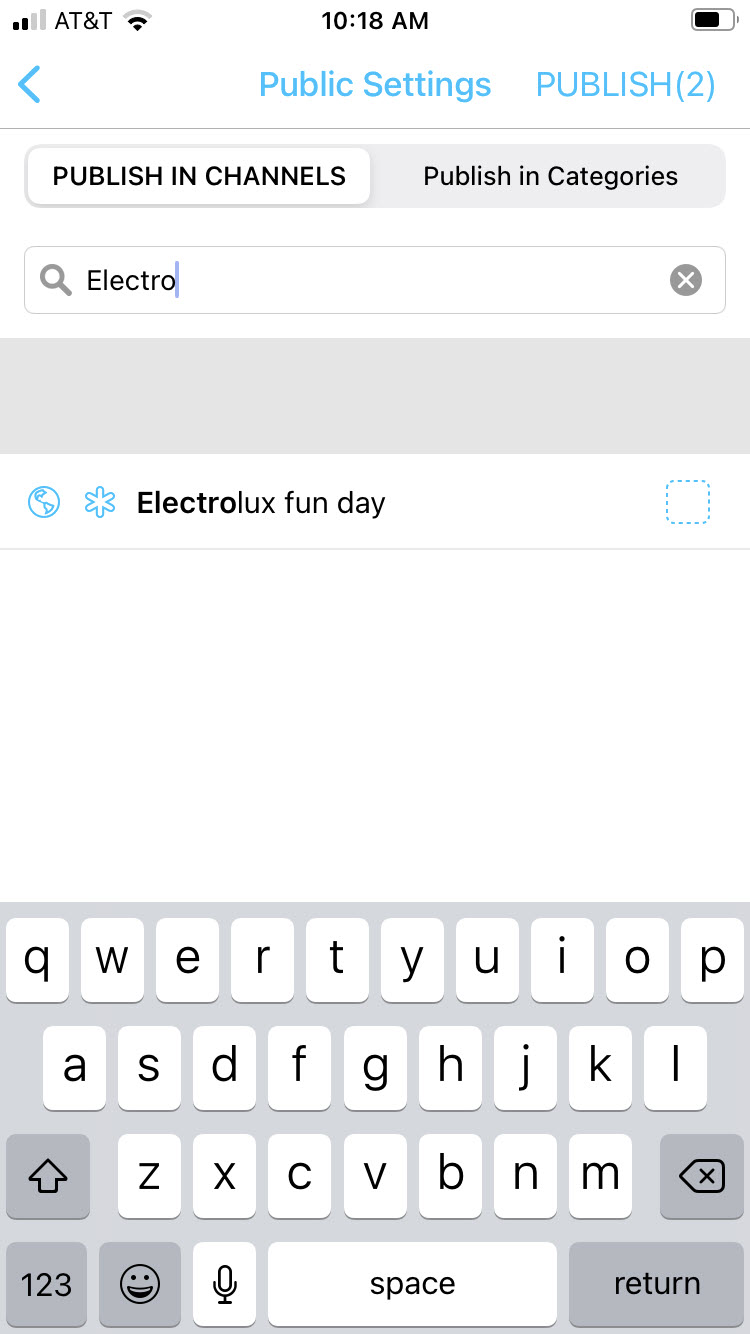
- Click PUBLISH.
 The Public setting allows you to publish to channels or categories to which you are permitted to publish. Note that some metadata is marked as required for publishing, or required for publishing in a shared repository in particular. There are two tabs in the Publishing Settings page: Publish in Channels and Publish in Categories. By default, the Publish in Channels tab is active.
 The counter for the total number of channels and/or categories that you have selected is located in parenthesis in the upper right corner of the screen, next to the PUBLISH button.
Inspire Me
KMS GO “Inspire Me” is a fun way to discover media based on your available time. You can access the Inspire Me screen by clicking on the light bulb icon on the bottom navigation bar.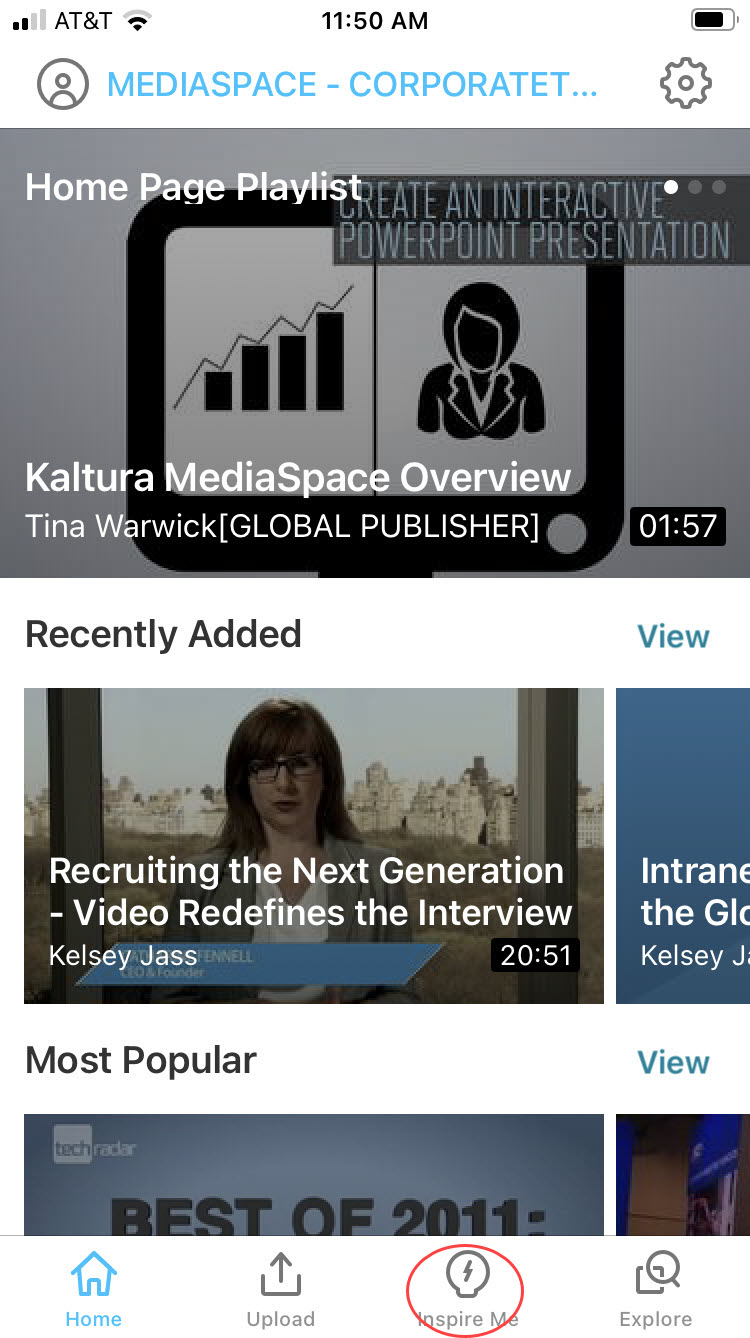
To discover media
- On the Inspire Me screen, swipe left or right to select your available time. You may choose 3, 5, 10, 15, 20, 30, 45, 60, or 75 minutes.
- Click Let’s Go.
 A stack of suggested media displays.
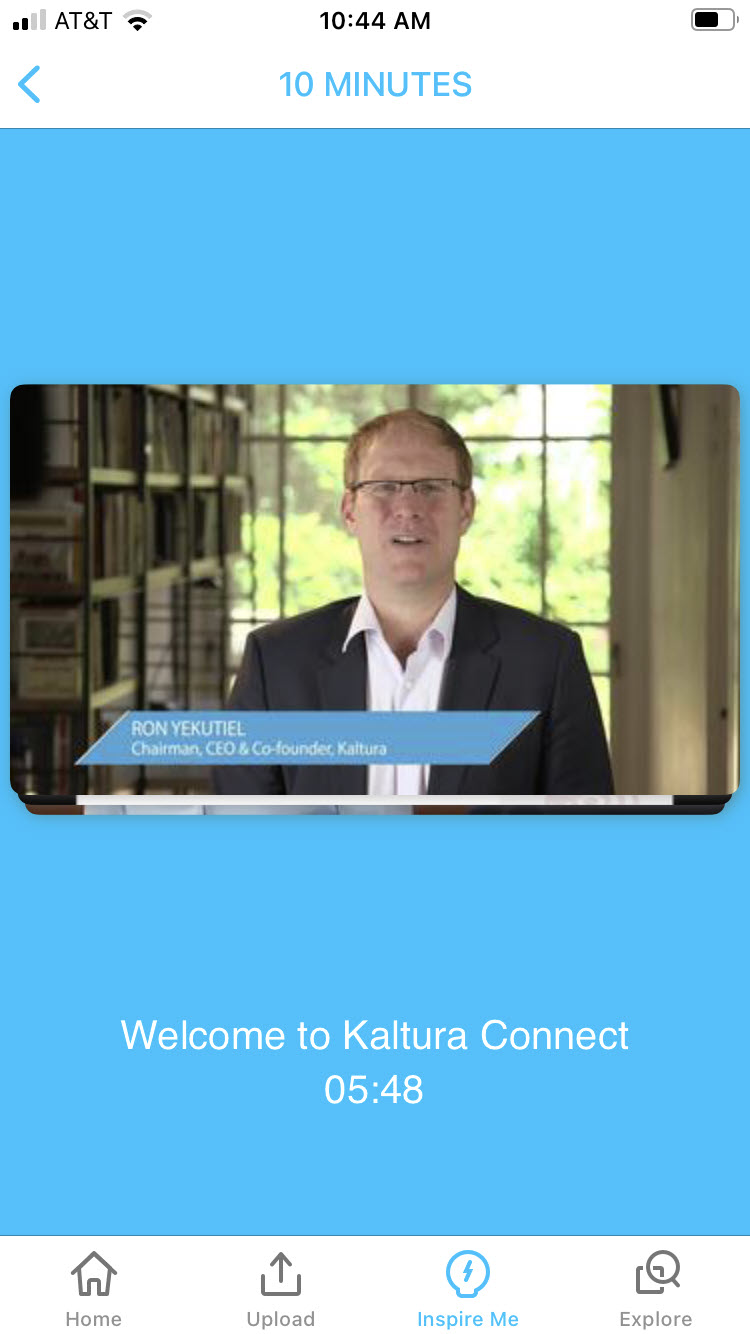
- Swipe right to dismiss suggested media or tap on media to view it.
 A stack of suggested media displays.
Settings
The Settings page allows you to configure your application settings. You can access the Settings page by clicking on the Settings icon (cog) on the top right corner of the home page.
The Settings page is displayed.
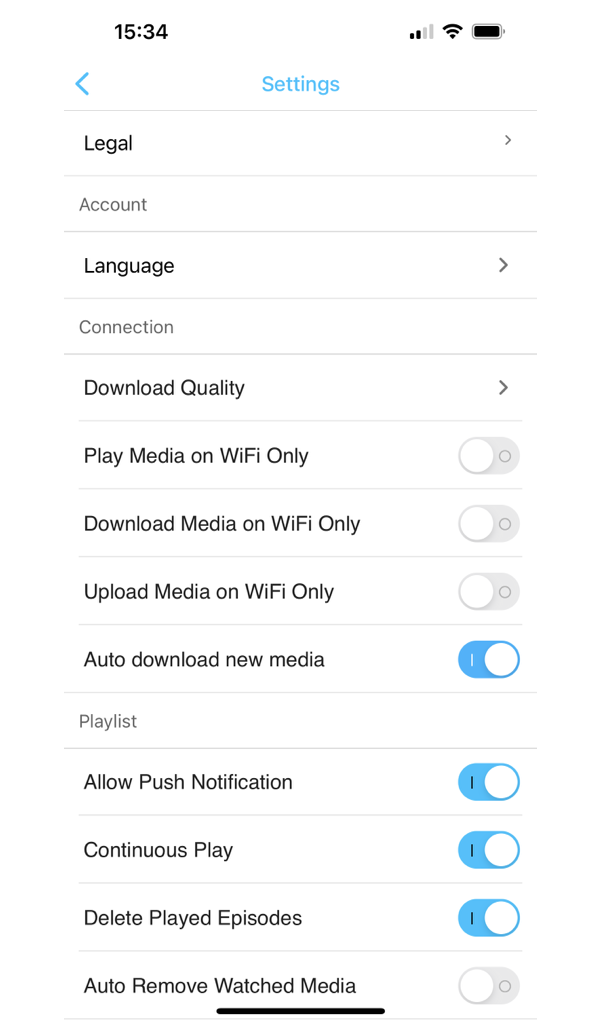
The Settings page includes the following:
About
- Application version
- Link to the open source documentation
- Legal - Link to the KMS GO end User License Agreement
- Auto download new media - The quality of the video available to download for offline playback may be selected from one of the following options:
Account
- Language - Change the display language, if configured for your account.
Connection - enable/disable your connection settings
- Play Media on Wifi Only
- Download media on Wifi Only
- Upload media on Wifi Only
Playlist
- Continuous Play
- Delete Playlist Episodes
- Auto Remove Watched Media
Connected to
- Change Site Address - Change the site address, based on configuration created by your admin.
- Logout - You may logout and continue to browse in Guest mode.
- Clear Multi Auth Selection - Clear multi authentication, if configured on your account.
Send Logs - Send KMS Go Application logs to a specified email address.
Settings on Your iOS Devices
In the App Setting section on your iOS device you can specify whether KMS GO should use cellular data.
The CSS cleanup tool helps you to organize your style files.

