About
Kaltura’s edit extended audio description (EAD) editor lets you review and edit EAD files for your videos.
Extended audio description files are time-coded text files that the Kaltura player converts into spoken narration using browser speech synthesis. Editing an EAD file allows you to refine descriptions, adjust timing, and improve clarity for viewers who rely on audio description.
EAD files are uploaded in VTT format and edited using the same interface as captions. Editing an EAD file doesn’t change its type or playback behavior.
To use the features described here, Kaltura REACH needs to be enabled with the right user permissions.
Access the editor
- From the user menu, select My Media.
- Locate the desired media and click the three dots at the far right and select Edit.
- Click the Captions tab.
- Click Edit captions.
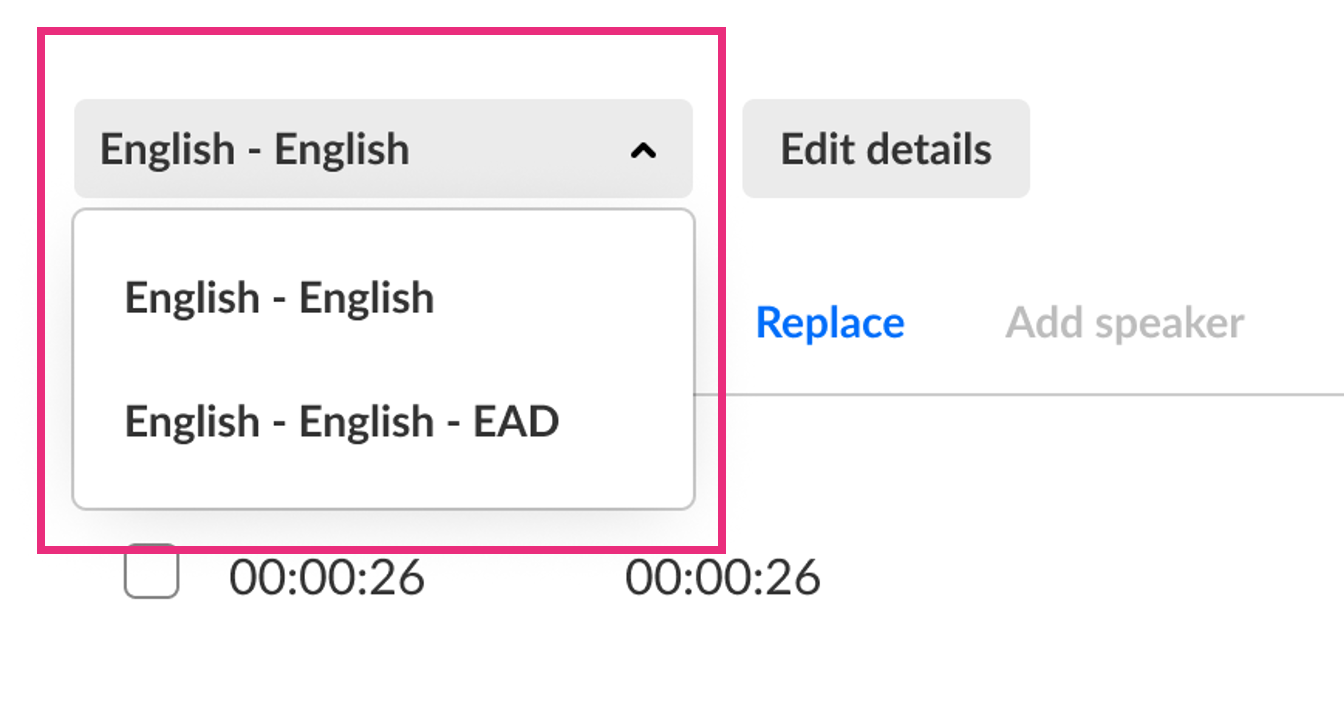
- Audio description file selector - If the entry includes more than one EAD file, you can select the file you want to edit from the list.
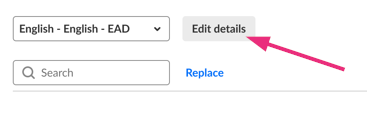
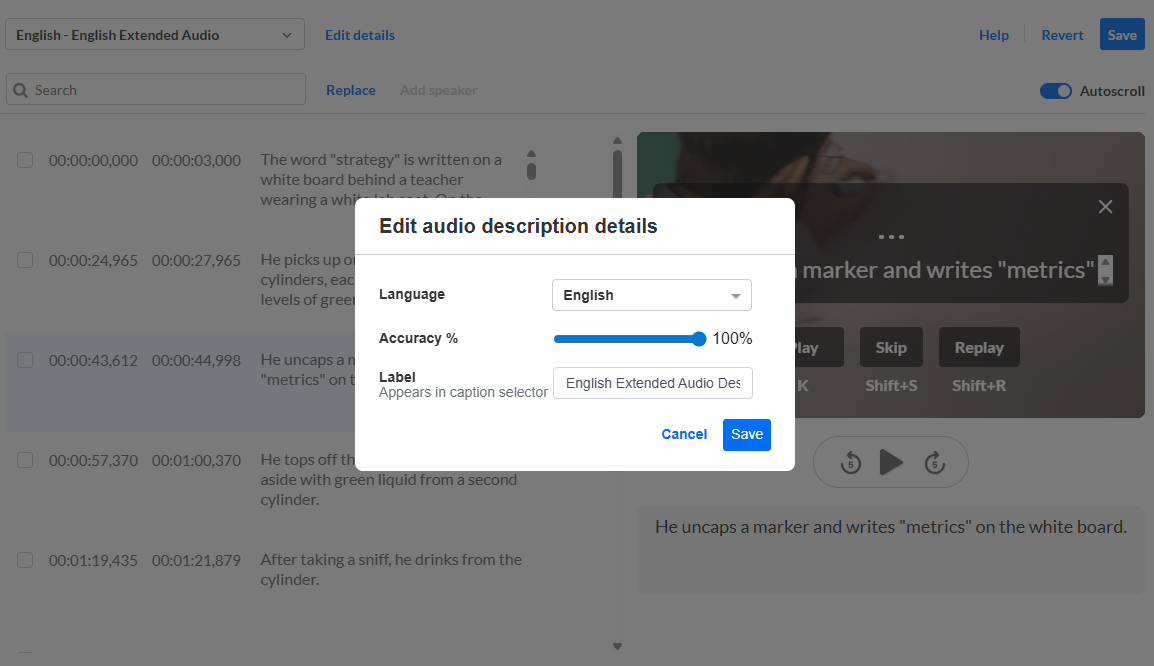
- Edit details - Click 'Edit details' to update the audio description’s language, accuracy, or label.
- Search field - Enter a search term and press Enter. Matching results are highlighted.
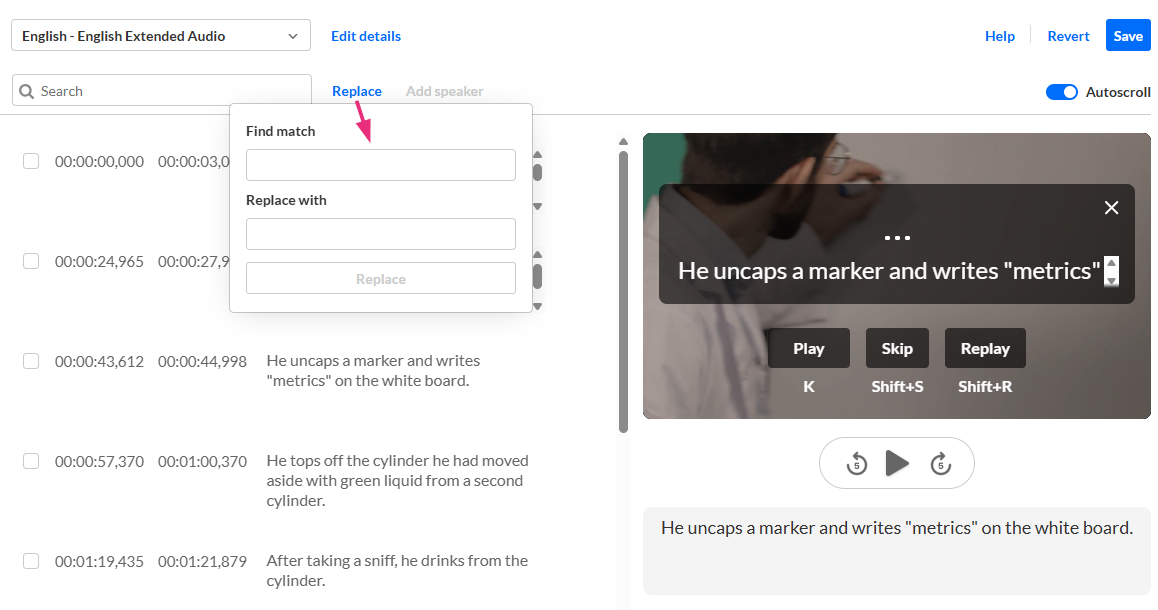
- Replace - Click Replace to quickly find specific words or phrases and replace them with new text.
- Autoscroll - Click 'Autoscroll' to automatically follow the audio descriptions while the media plays. Delete cue - When you hover over a cue, a trash can icon appears. Click the icon to delete the cue.
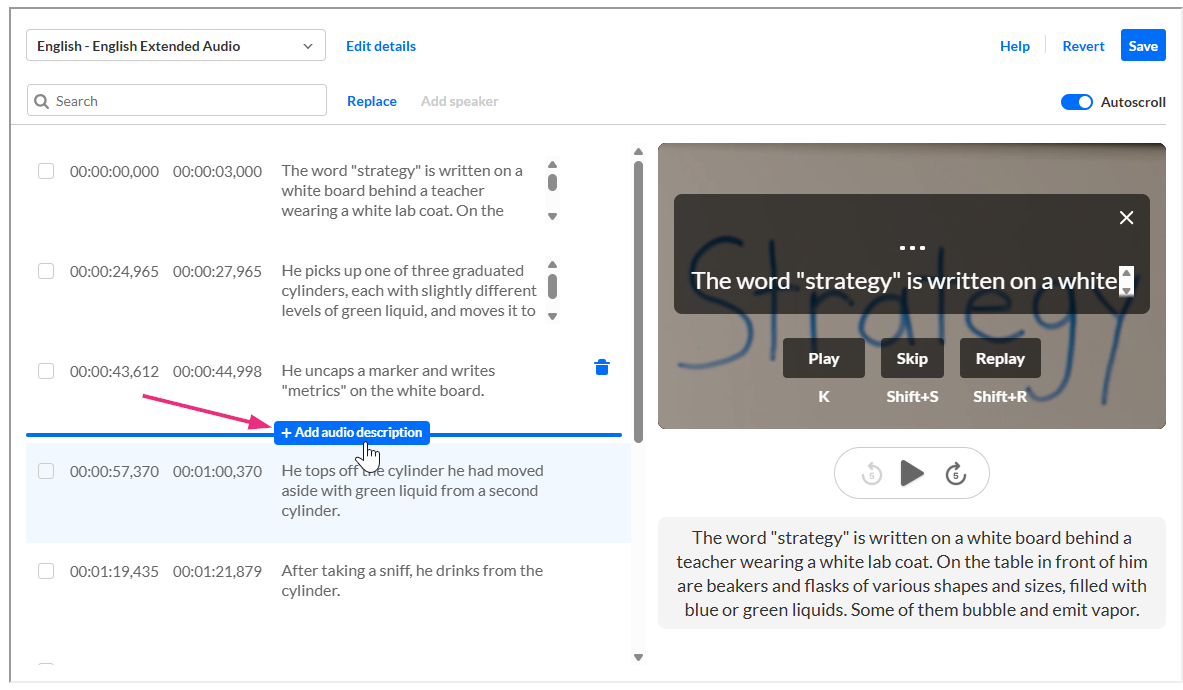
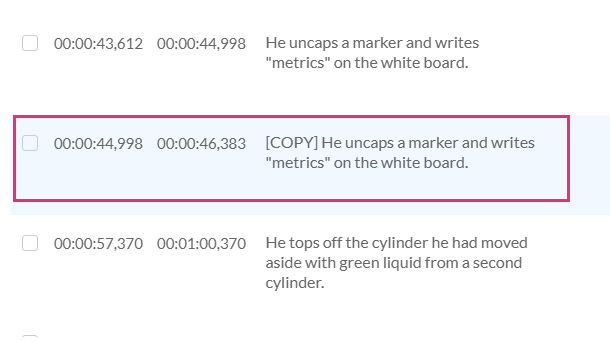
- Add audio description - Hover over a cue row and click + Add audio description to add a new cue.
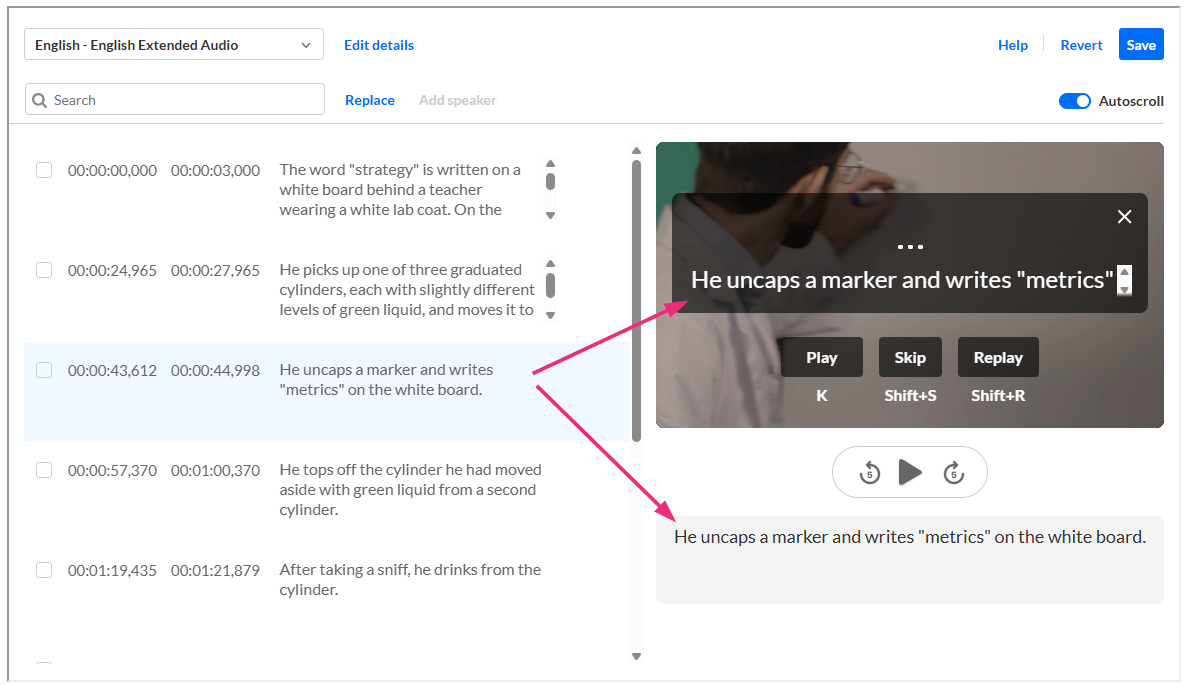
- Timestamp - Click a cue’s timestamp to edit the start or end time.
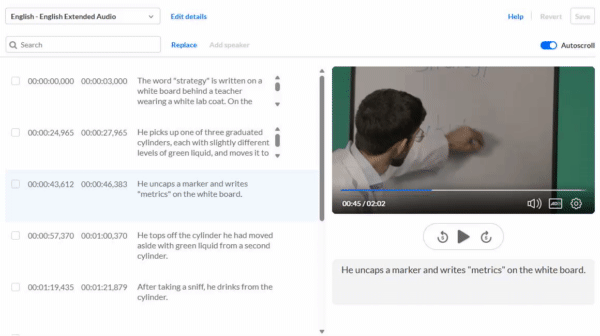
- Text field - Click inside the text field to edit the cue’s content. The editor supports dual-panel viewing so you can work in the list while previewing changes in the player.
- Start time – when the described visuals begin
- End time – when the visuals end
- Click on Edit details.
- Click Save. The information is immediately updated.
- Click Replace.
- Enter the search term in the Find match field,
- Enter the replacement term in the Replace with field.
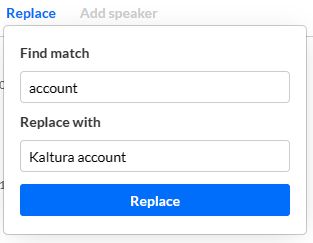
- Click Replace then click Save at the top right.
- Move the slider accordingly.
- Click Save. The search term is replaced immediately.
- Hover over the row until you see + Add audio description and then click on it.
- Click inside the text field to edit the content as needed.
- Click Save.
- Move the slider accordingly.
- Click Save. The information is updated immediately.
- Click the text of the audio description to activate the text field.
- Edit the text as needed.
- Click Save.
- Move the slider accordingly.
- Click Save. The information is updated immediately.

The 'My Media' page displays.


The edit media page displays.

The captions and EAD for that media display.

The editor displays.
Click the drop-down menu and choose the EAD file you want to edit.

Editor layout
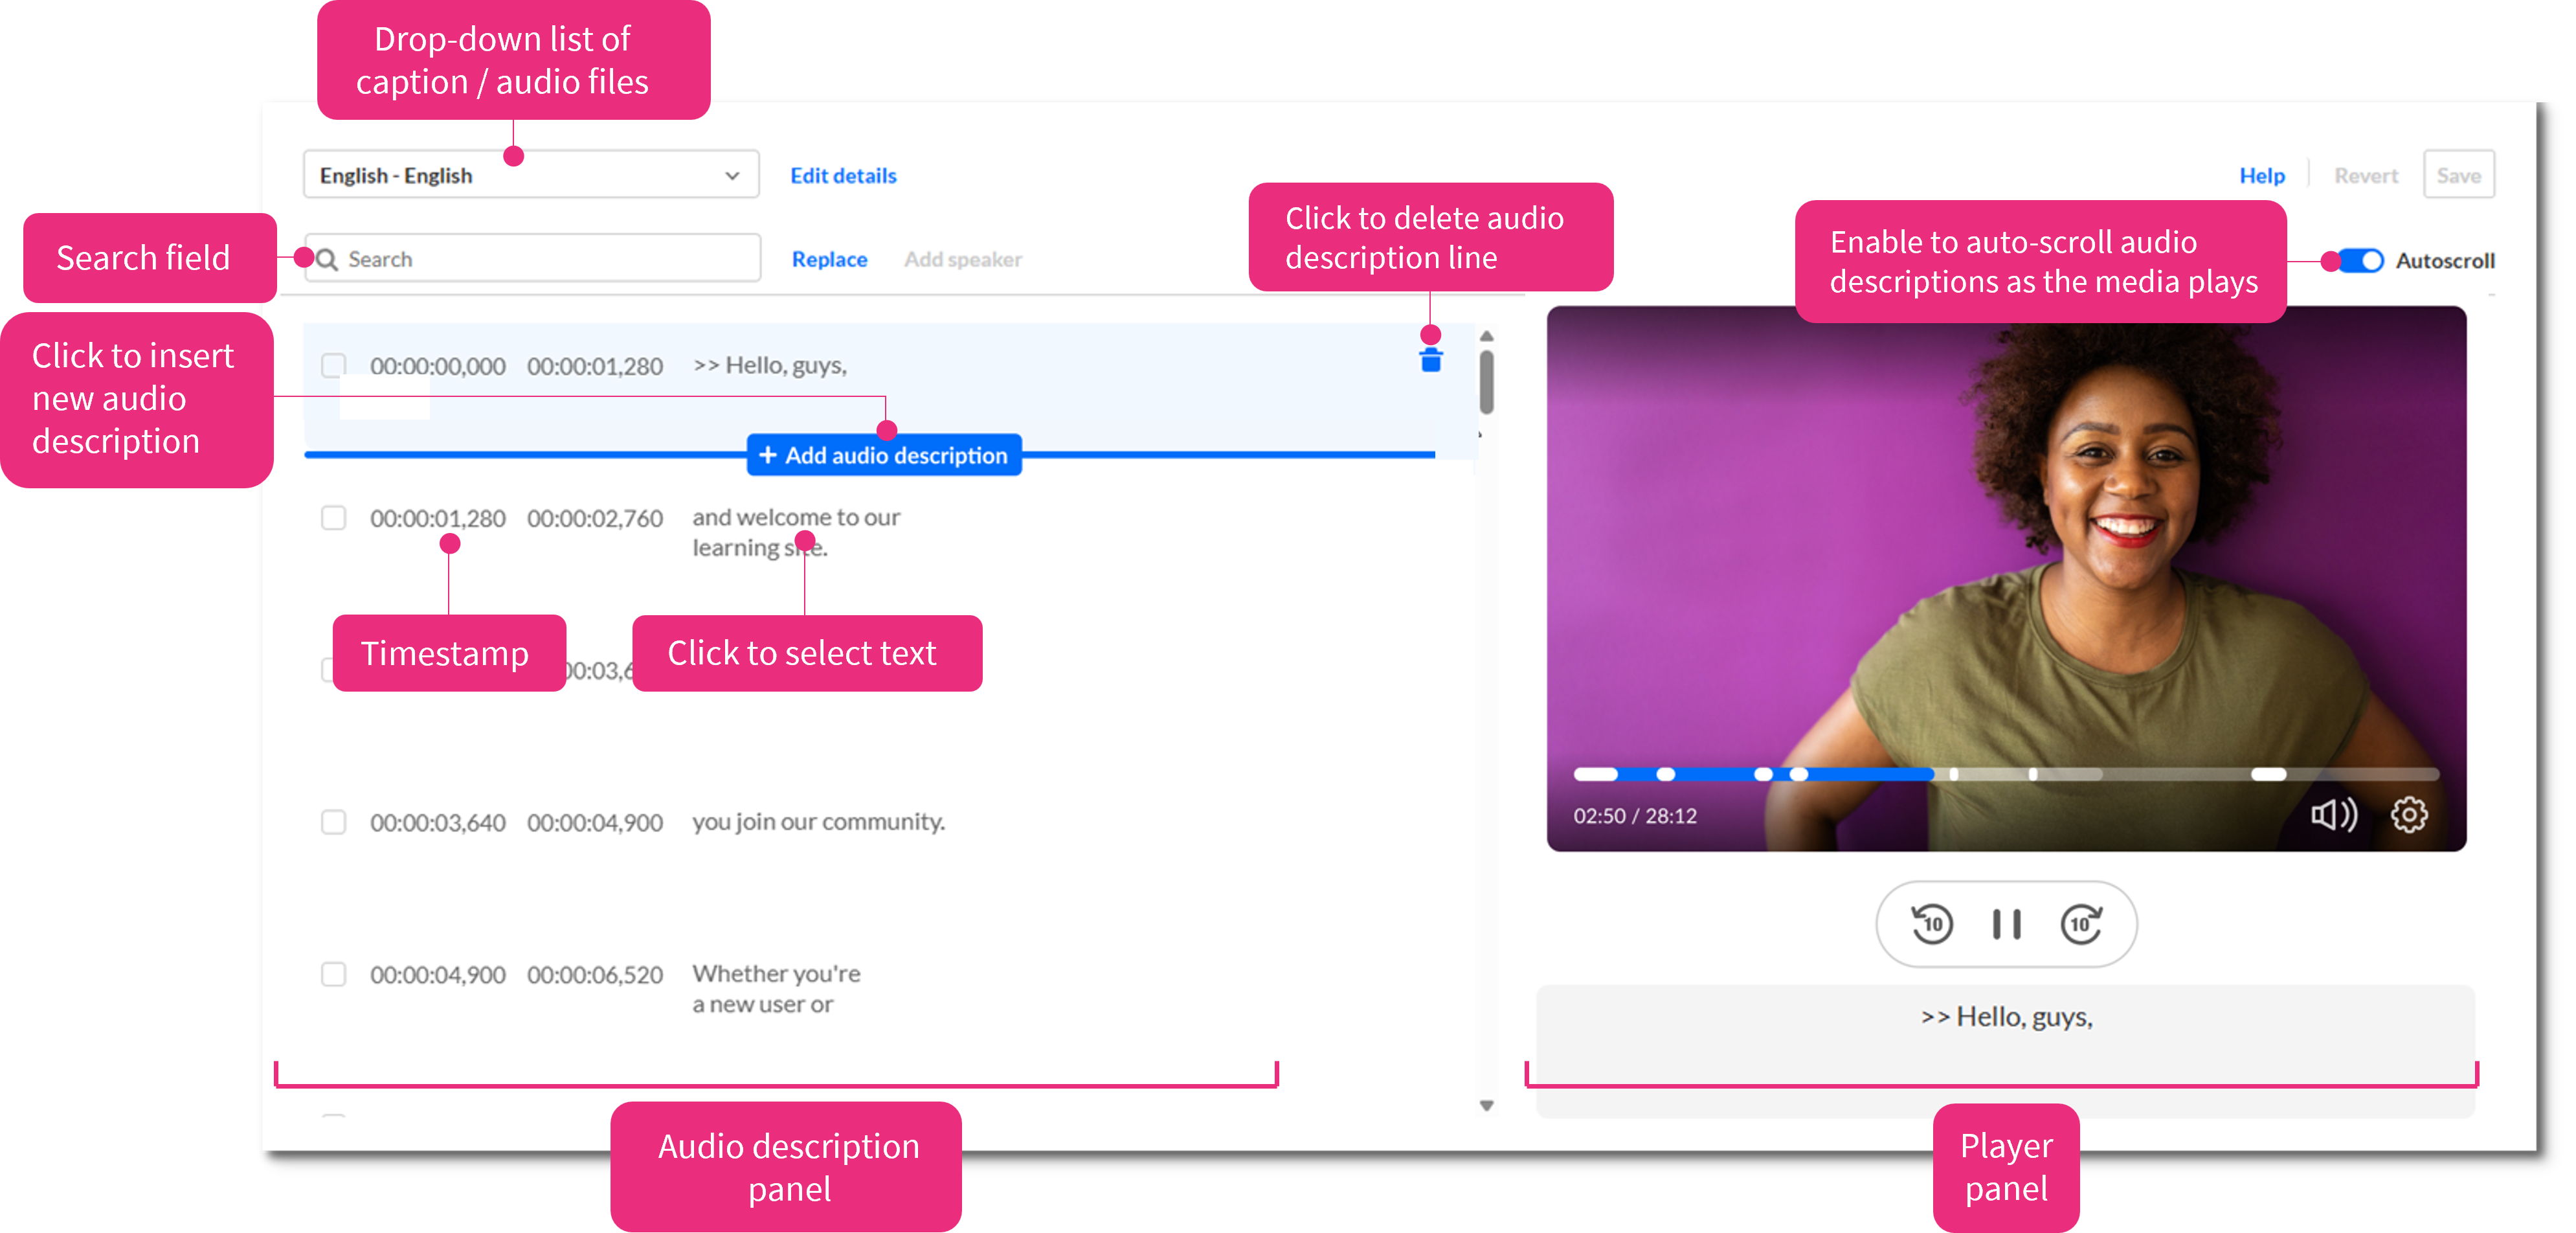
The editor has two main areas - the audio descriptions panel and the player panel.
Audio descriptions panel
The audio descriptions panel lists all audio description cues and provides tools for editing them.

The editor uses the SMPTE time format: hours, minutes, seconds, and milliseconds (hh:mm:ss,mmm). This format helps you set precise start and end points.
Kaltura supports dual screen inside the captions editor.
Player panel
The player panel shows the media and plays back audio descriptions using your browser’s text-to-speech voice.
When you click an audio description cue in the panel, the player jumps to the matching timestamp to help you sync text with visual and audio content.
Editing options
When editing Extended Audio Descriptions (EAD), make sure the timing stays aligned with the visual scene.
EADs are active from their start time to their end time. If a viewer skips to any point within that time range, the description will play.
Set timestamps based on the visual scene, not the length of the spoken description:
Even if the narration starts earlier or finishes later, the player uses the defined time range to decide when to play the description.
After editing, confirm that the end time matches the end of the scene so the description plays correctly when viewers skip during playback.
Edit audio description details
The 'Edit audio description details' screen displays. You can update the language, accuracy, and label.
Find and replace text
Use find and replace to quickly update wording across multiple audio description cues, such as fixing typos, correcting names, or standardizing phrasing.
A popup displays asking you to confirm audio description accuracy.
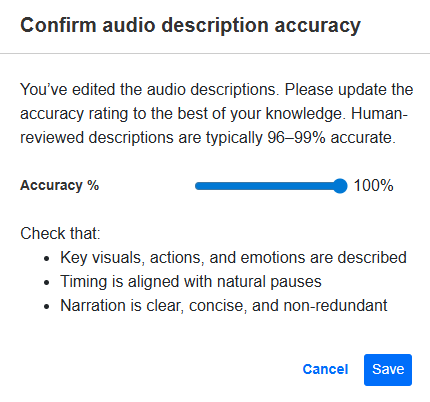
This step indicates that you've reviewed your edits and believe the audio descriptions are correct. It also marks the file as edited for compliance and workflow tracking.
Add an audio description
A new audio description cue is added.
When adjusting timing, make sure cues don’t overlap. The editor highlights timing issues in red to help you correct them.

A popup displays asking you to confirm audio description accuracy.
This step indicates that you've reviewed your edits and believe the audio descriptions are correct. It also marks the file as edited for compliance and workflow tracking.
Edit an audio description
A popup displays asking you to confirm audio description accuracy.
This step indicates that you've reviewed your edits and believe the audio descriptions are correct. It also marks the file as edited for compliance and workflow tracking.
