This article documents the legacy KME Room. For information on the new room, please visit the new Kaltura Room documentation.
About
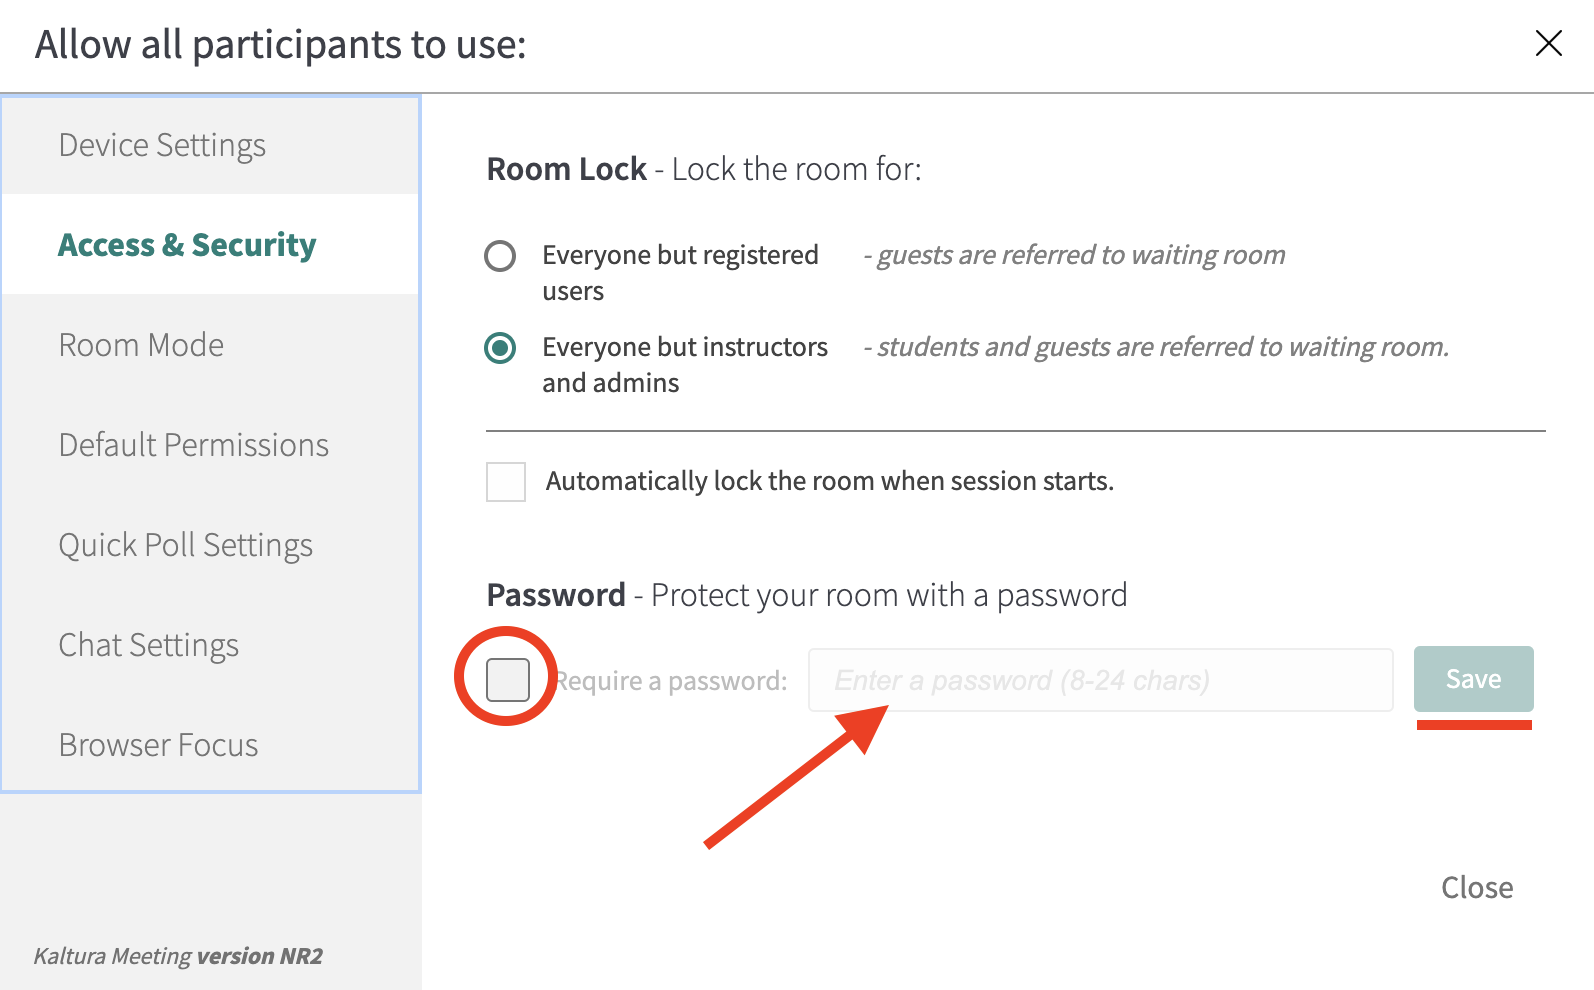
The Access & Security Tab allows room hosts/instructors or moderators to configure the 'Lock The Door' feature and the possibility to password protect the live room.
The Lock The Door feature allows Instructors to lock the door to their virtual room and admit participants in selectively. Hosts/Instructors may lock the door to make sure no one enters the room while they are preparing their session, or before the stage is set. The door may be locked automatically when the room is launched or may be preset to lock minutes later. The Lock the Door feature may also be used to increase security measures when holding external meetings with guests from outside the organization.
Password protection is session-specific. Once a session ends, the password will reset, and you'll need to set a new one for each session.
Set access (lock the room)
To ensure the security of the room, you can decide who you want to enter the room or not.
- Click Settings in the upper bar of the live room.
- Click the Access & Security tab
- Click who you want to lock the room for:
- Everyone but registered users (Instructors, Administrators, Students). Guests are referred to the waiting room.
- Everyone but instructors and administrators. Students and guests are referred to the waiting room.
- Click the checkbox below to automatically lock the room when session starts.

Password protect the room
A password can be set for your live room, meaning that guests who click the link will also have to enter in a password given to them by the host/instructor in order to enter.
- Click Settings in the upper bar of the live room.
- Click the Access & Security tab.
- Click the 'Require a password' box.
- Enter a password of your choice - please note that the password should be at least 8 characters long.
- Click Save.
- Hosts will send out the password so guests can enter the live session.
- To change your password, just enter the room, disable your password and reset it following steps 3 to 5 above.

