About
This article explains where to obtain the live stream details for live webcasting. When you create a live webcast, Kaltura automatically generates the streaming values used to connect your streaming tool.
In single-session events, this selection is made via the Live stream details area of the Overview page.
In multi-session events, this selection is made via the Basics tab in the session settings panel.
Single-session events
Access the stream details
- From the Events homepage, click the event you want to manage.
- On the Overview page, scroll down to the Live stream details section.

The Overview page displays.


If your account uses resource assignment, stream details may be preconfigured and you may not need to copy stream URLs manually.
Copy the stream details
- On the Overview page, in the Live stream details section, click the tab for the protocol you want to use - RTMP, RTMPS or SRT.
- Review the relevant section below and copy the required values:

RTMP / RTMPS
- Primary URL
- Secondary URL - (Optional) Use only if your streaming tool supports a backup connection in case the primary one fails.
- Stream name

SRT
- Primary URL
- Primary Stream ID
- Secondary URL and Secondary Stream ID - (Optional) Use only if your streaming tool supports a backup connection in case the primary one fails.
Enabling or disabling encryption updates the stream IDs. Copy the stream details only after the change is applied.

The encryption key is generated automatically.

If you prefer to create your own encryption key, you can delete the generated value and type in your own. The key must be 10–79 characters and include letters and numbers only (if the key doesn’t meet these requirements, an error message appears).
You can click Regenerate at any time to create a new key.

In single-session events, changes are saved automatically. There is no Save button on the 'Overview' page.
Multi-session events
Access session settings
There are two ways to reach session settings:
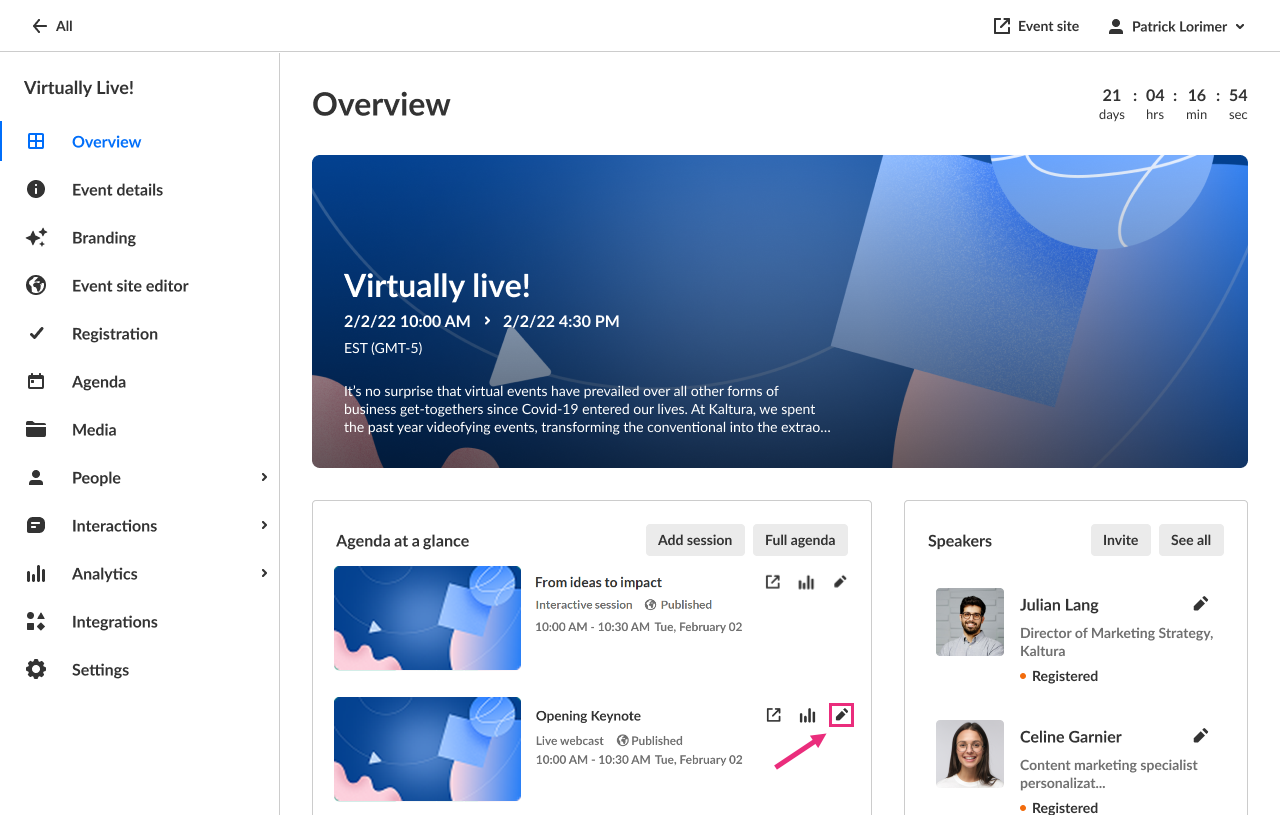
- On the Overview page, in the Agenda at a glance section, click the pencil icon next to the session.
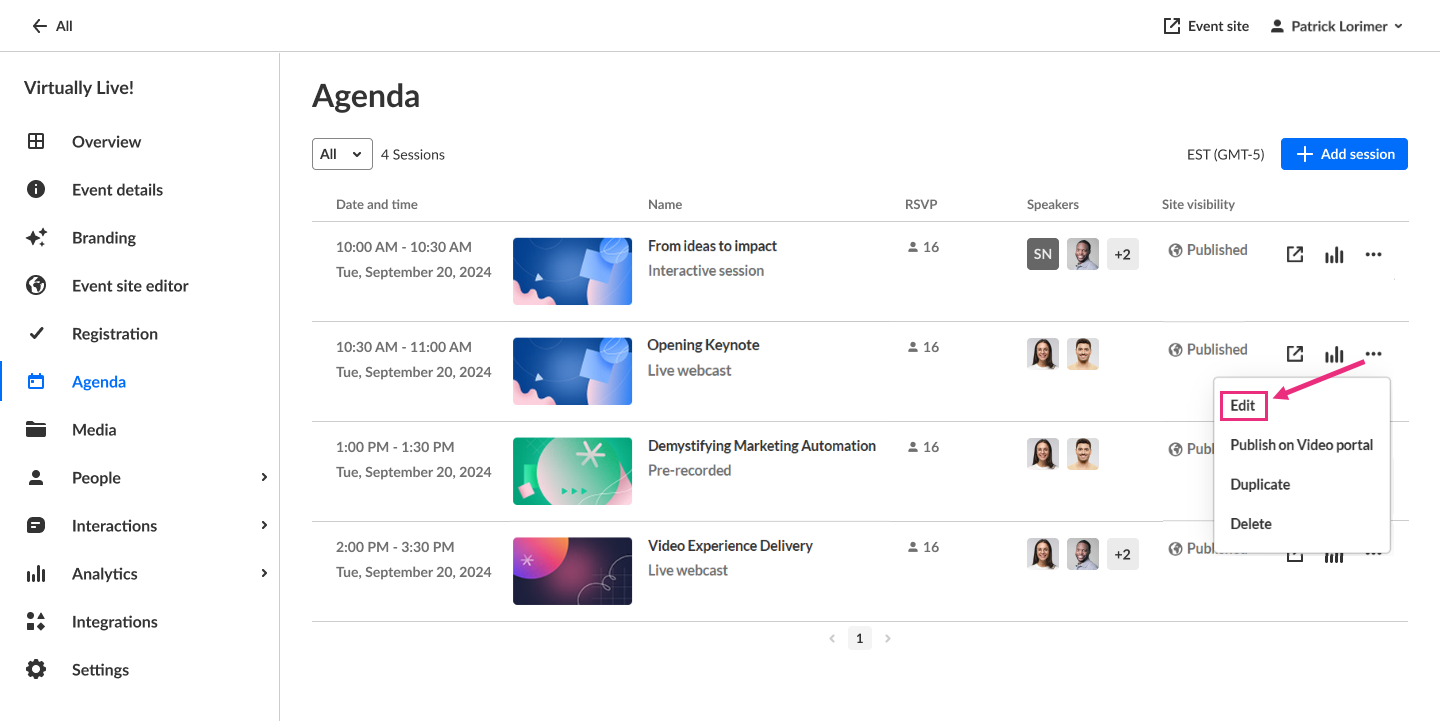
- On the Agenda page, click the three dots to the right of the session and choose Edit.


The session settings open in a side panel with the Basics tab selected by default.

Access the stream details
On the Basics tab, scroll down to the Live stream details section.

If your account uses resource assignment, stream details may be preconfigured and you may not need to copy stream URLs manually.
Copy the stream details
- On the Basics tab, in the Live stream details section, click the tab for the protocol you want to use - RTMP, RTMPS or SRT.
- Review the relevant section below and copy the required values:
RTMP / RTMPS
- Primary URL
- Secondary URL - (Optional) Use only if your streaming tool supports a backup connection in case the primary one fails.
- Stream name
SRT
- Primary URL
- Primary Stream ID
- Secondary URL and Secondary Stream ID - (Optional) Use only if your streaming tool supports a backup connection in case the primary one fails.
Enabling / disabling encryption changes the stream IDs, so if you change the encryption setting, click Save to apply the changes, then copy the updated stream details.
The encryption key is generated automatically.
If you prefer to create your own encryption key, you can delete the generated value and type in your own. The key must be 10–79 characters and include letters and numbers only (if the key doesn’t meet these requirements, an error message appears).
You can always click Regenerate to create a new key.
