About
Groups are a convenient way to assign access to a large number of users in Kaltura applications. For example, you can create groups and then assign entitlements and collaboration rights. The Manage Groups tab is located in the Video Portal and KAF Configuration Management window. Users that were added to a group using the Samlgroupsync module are recognized as automatically added users within each group.
Using the Manage Groups feature, admins can easily administer groups, add or delete users from groups and perform bulk actions on several groups/users at one time.
You can manage user group assignments in one of two ways:
- Manually - Groups that are created in the Groups Management Dashboard.
- Automatically - Groups that were created via Samlgroupsync /SSOGroupSync modules are displayed in the Group page.
Create groups
- Login to the application's Configuration Management console.

- Click the Manage Groups tab.
The Groups Management Dashboard is displayed.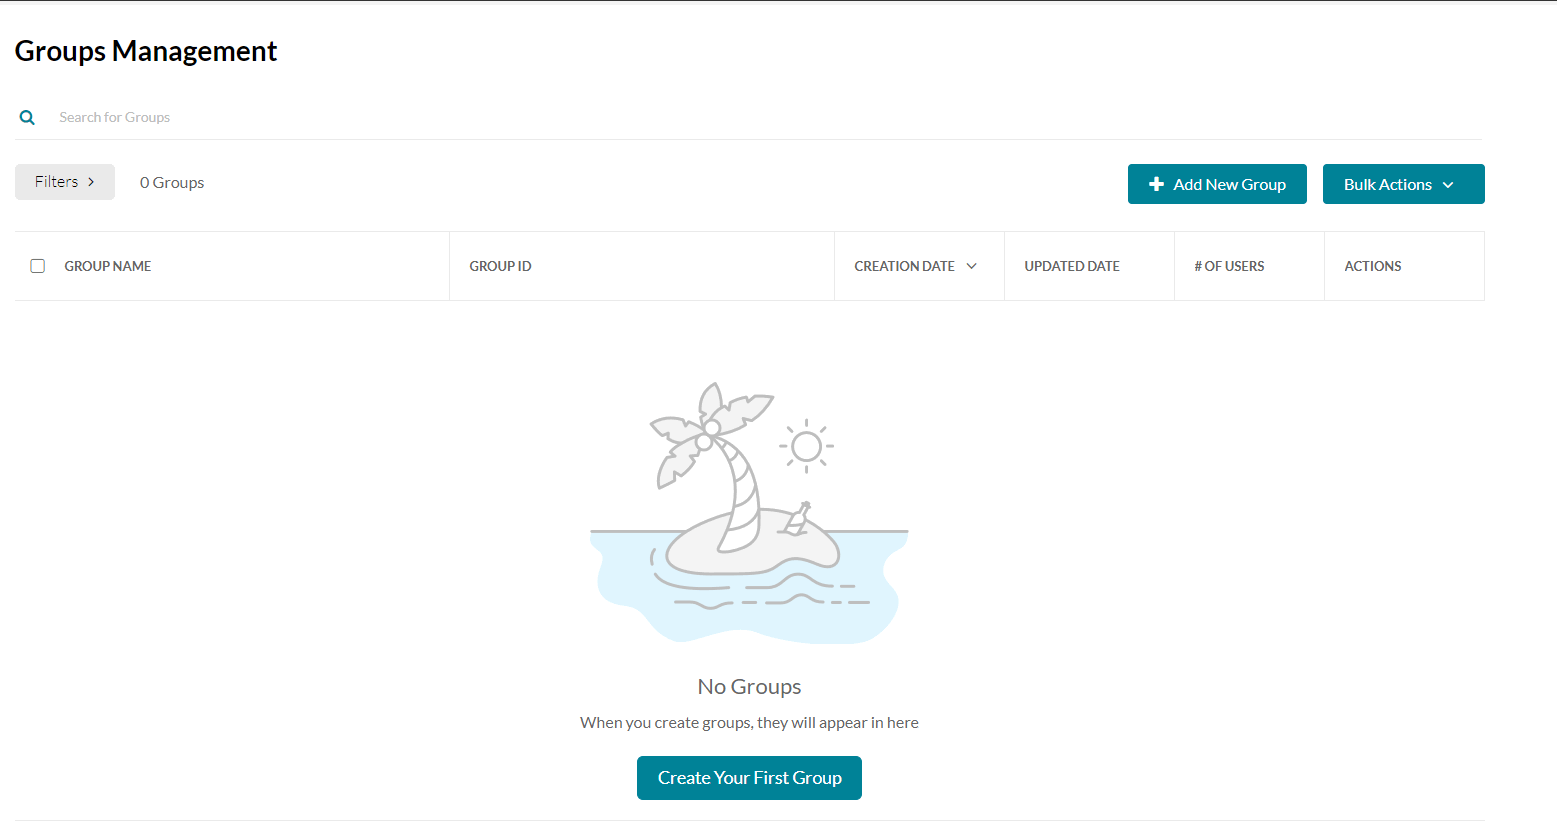
- Click Create Your First Group or Add New Group.
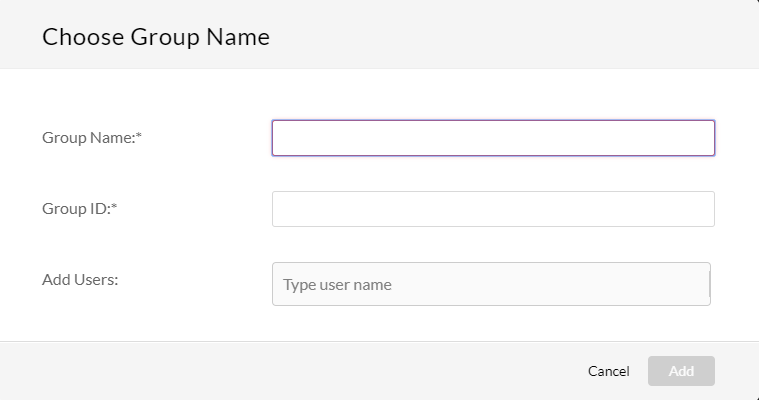
- Enter the Group Name.
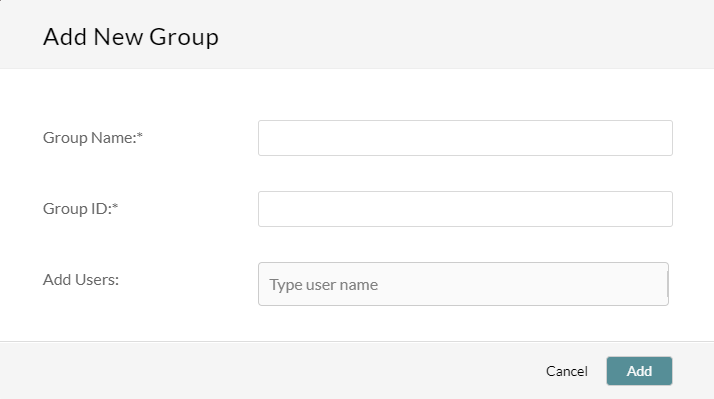 The Group ID is created automatically from the Group Name.
Creating a Group Name/ID with special characters is not supported. Special characters include all characters above the numbers (shift+Num) and other languages such as Japanese, Hebrew and Cyrrillic.
- Add users to the group.
Please note that no more than 3,000 users can be added in one batch.
Enter letters to automatically find users on your site. - Click Add.


Manage groups
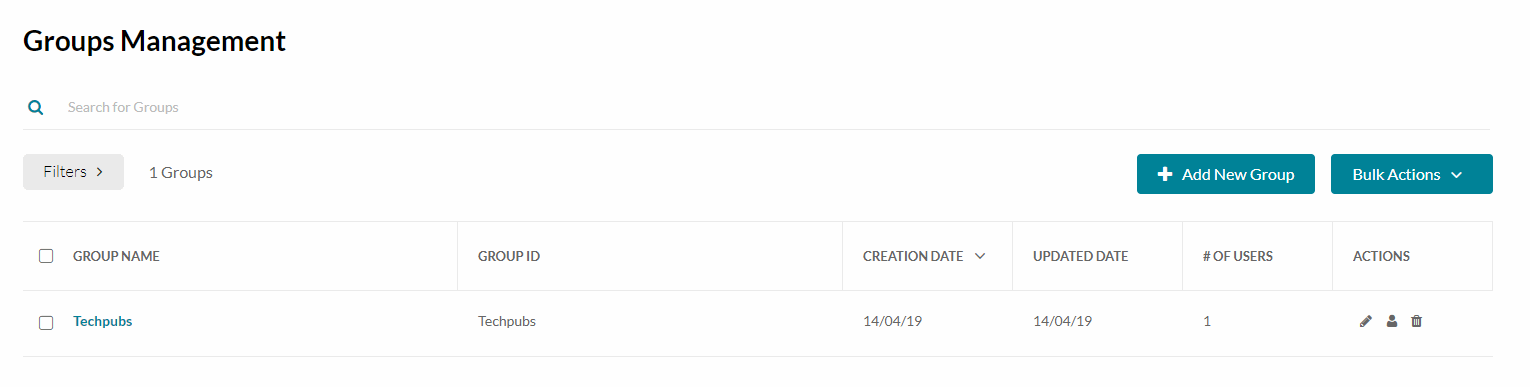
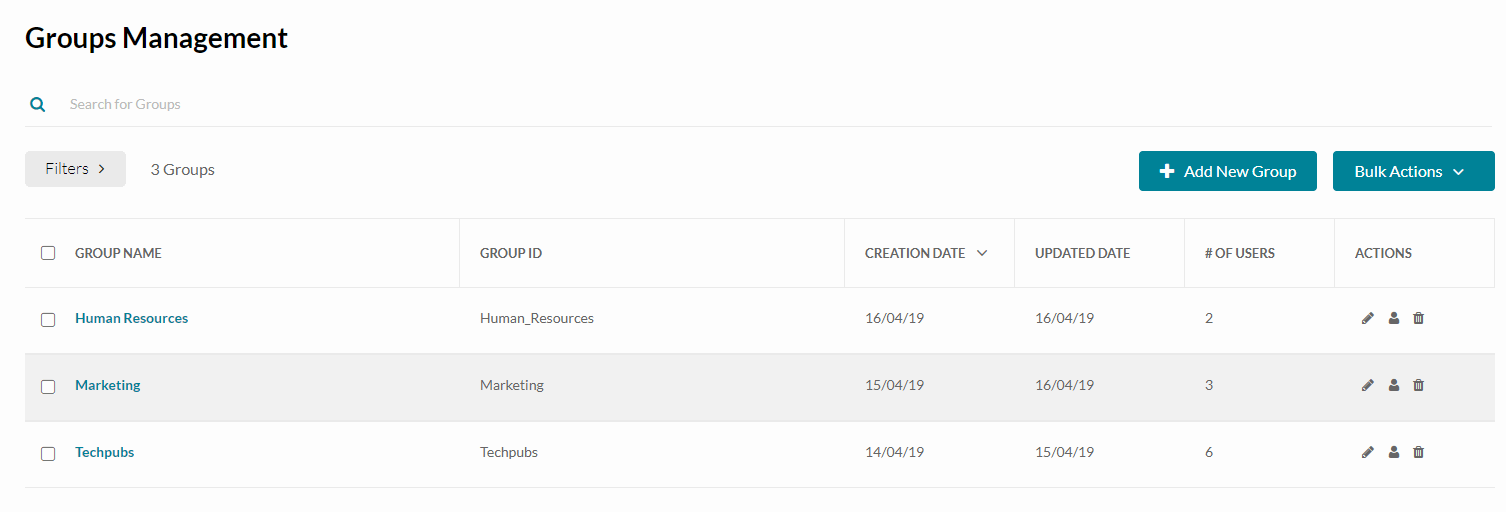
Groups management dashboard
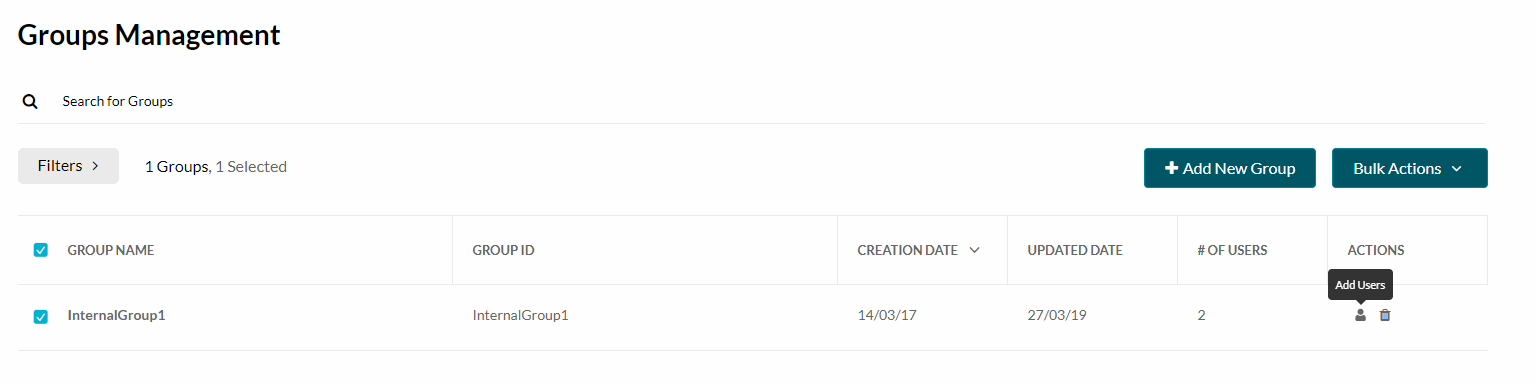
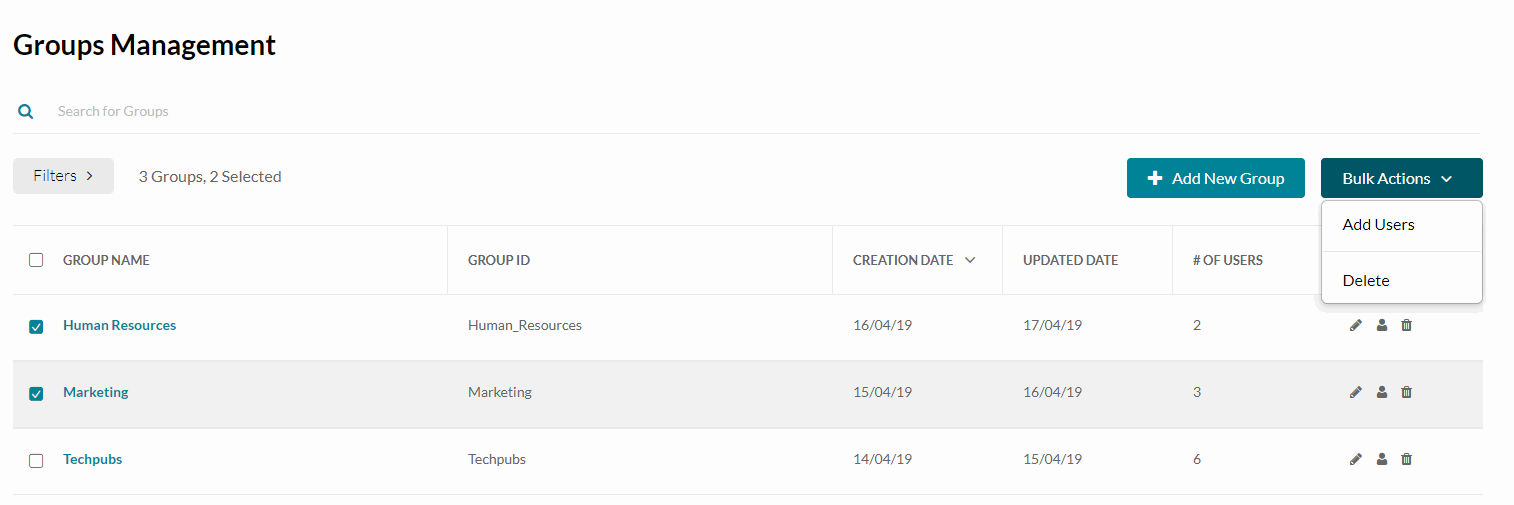
The groups management dashboard displays the following information and actions for each group:
- Group Name
- Group ID
- Creation date
- Updated date
- Number of users in the group
- Actions - The actions include Edit, Add Users, Delete Group
Use the groups management dashboard to:
- Create/Add groups
- Perform actions on a single group
- Perform (bulk) actions on multiple groups.
- Drill down into group details - The Group Dashboard
- Filter Groups
- Sort - Sort groups in ascending or descending order - according to their creation date.
- Search groups
Perform actions on a single group
The Actions available are: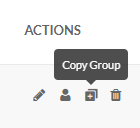
- Edit (pencil icon) - Click to open the Group Page.
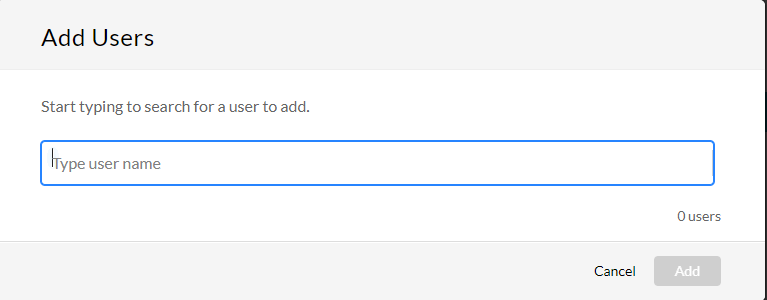
- Add Users - (person icon) - Click to add users. Enter user's names and click Add.
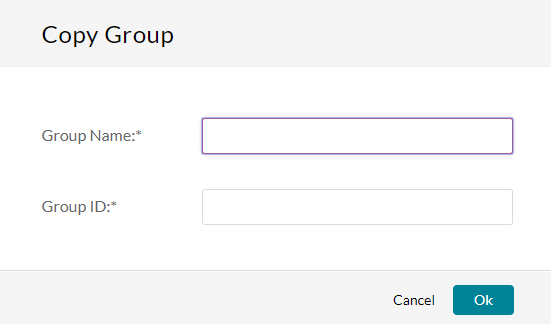
- Copy Group - (plus icon) click to copy a group. This option saves you time when creating groups with almost the same user list. Create a basic group of users, clone it, and then add the missing users to each cloned group.

- Select the group you want to copy and click the copy icon.
- Enter a Group Name and Group ID.
- Click OK to create the new group.

- Delete Group - (trash icon) click to delete a group. A warning message is displayed. Users in the group will be removed. Click Delete.
Perform (Bulk) actions on multiple groups
Th Bulk Actions feature allows administrators to add users to multiple groups, or delete groups through the Groups Management dashboard.
In the Groups Management dashboard, check the boxes next to the groups you want to modify.
Add users to multiple groups
- In the Groups Management Dashboard, check the boxes next to the groups you want to modify.
- Select Add Users from the Bulk Actions drop down menu.
- Add users in the Add Users window and click Add.
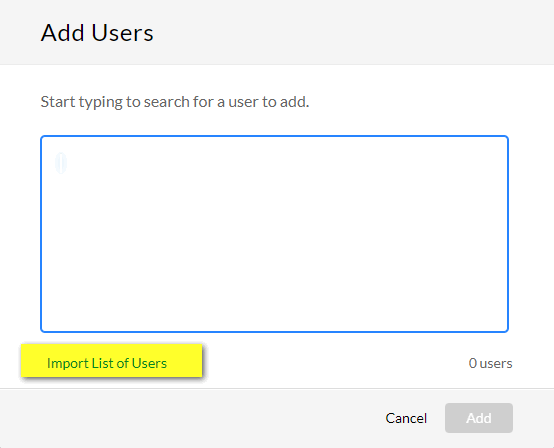
- Click Import List of Users to add new users to a group in a bulk. You can drop a list of user IDs separated by comma or semicolon.
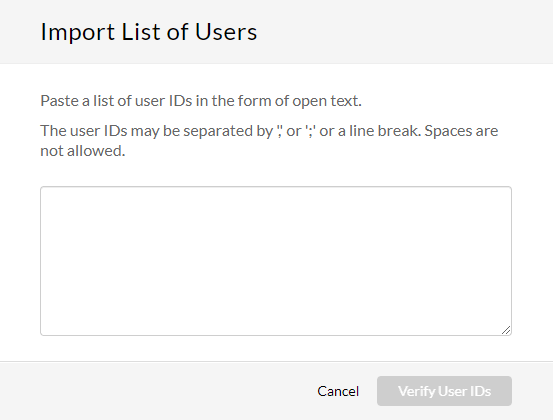
- Enter the list to import and click Verify User IDs.
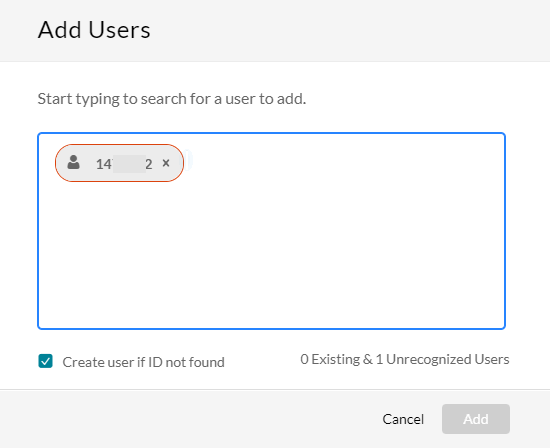
- (Optional) Click Create user if the ID is not found.
- Click Add to bulk import your list to multiple groups.


To delete (multiple) groups
- In the Groups Management Dashboard, check the boxes next to the groups you want to delete.
- Select Delete from the Bulk Actions drop down menu.
A delete confirmation message is displayed. - Click Delete.
The Group page - User's table
To view detailed information about the group (User's table) and other parameters
Click on a Group Name on the Groups Management Dashboard.
The Group Dashboard /User's Table contains the following information for each user in the group:
- User name - List of users in the group . The User's image is presented if available. If not, the user's initials are displayed. If neither is available, a generic user icon is displayed..
- User ID
- Email address
- Application role - set in the Manage Users tab. You can continue to use roles to create groups,however, the ability to renounce roles for permissions was moved to the Managing Groups tab.
- Creation mode - (Indicates whether the user added automatically or manually) See Creation Mode.
- Actions - (Trash icon) Click to Remove the User from the group.
Other actions available on the Group Dashboard /User's Table include:
- Group Name - The Group Name may be modified, see Change the Group's Name.
- Search for users.
- Filters - see Group Dashboard / User's Table Filters.
- Link to Back to Groups to return to the Groups Managment Dashboard.
- Sort - Users are sorted according to User Name by default. Click on the arrow in the User Name column to change from Ascending to Descending order.
Change the group's name
To change the group's name
- Hover over the group name. A pencil appears.
- Click the pencil to edit and to change the name.

A text box opens with the group name. Edit the name.
When done, "x" or "v" buttons are displayed to approve or reject the change.


Filter the data
You can filter the groups in the Groups Management dashboard based on:
- A specified time period according to the Creation Date
- A specified time period according to the Updated Date.
To filter the Groups Management Dashboard data
- Click Filters.
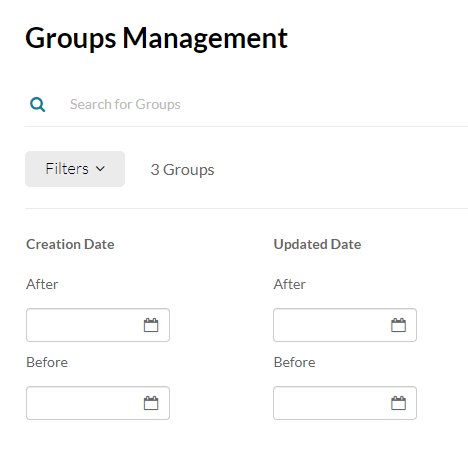
- Enter the filtering dates.
The Groups Management Dashboard displays the relevant groups.

You can filter the information in the groups dashboard by :
- User Roles (within the launching application)
- A specified time period according to the Creation Date
- A specified time period according to the Updated Date.
To filter the groups dashboard user's table data
- Click Filters.
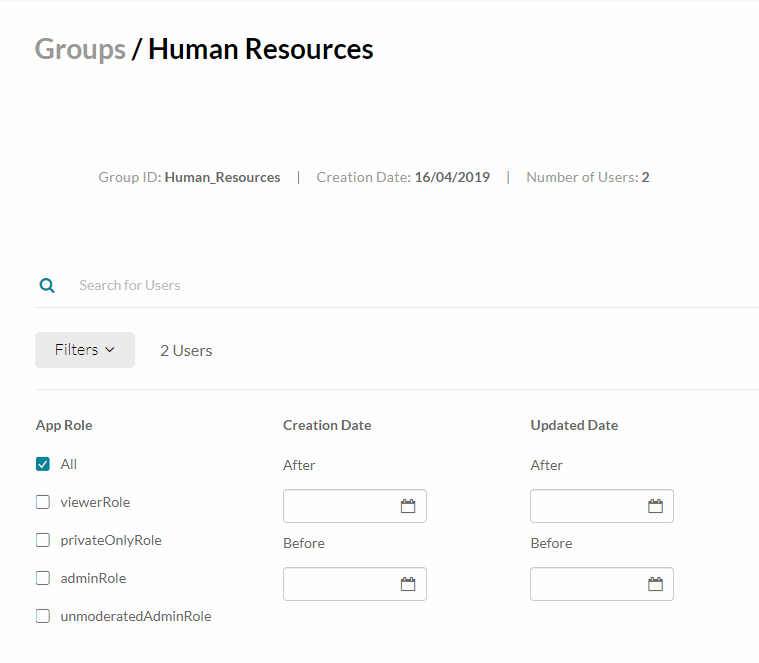
- Check the Application Roles that you want to filter out.
- Enter the filtering dates.
The groups dashboard user's table displays the relevant users.

