About
Increase interactivity and user engagement with the share screen feature. Sharing screens is a default permission for hosts and moderators, and can also be custom enabled for participants on an individual basis. With this feature, you can choose to share your entire screen, a select window or select tab, whether you are a viewer in the room or already a presenter on stage.
This article is relevant for Google Chrome, Firefox and Microsoft Edge browsers.
Share your screen
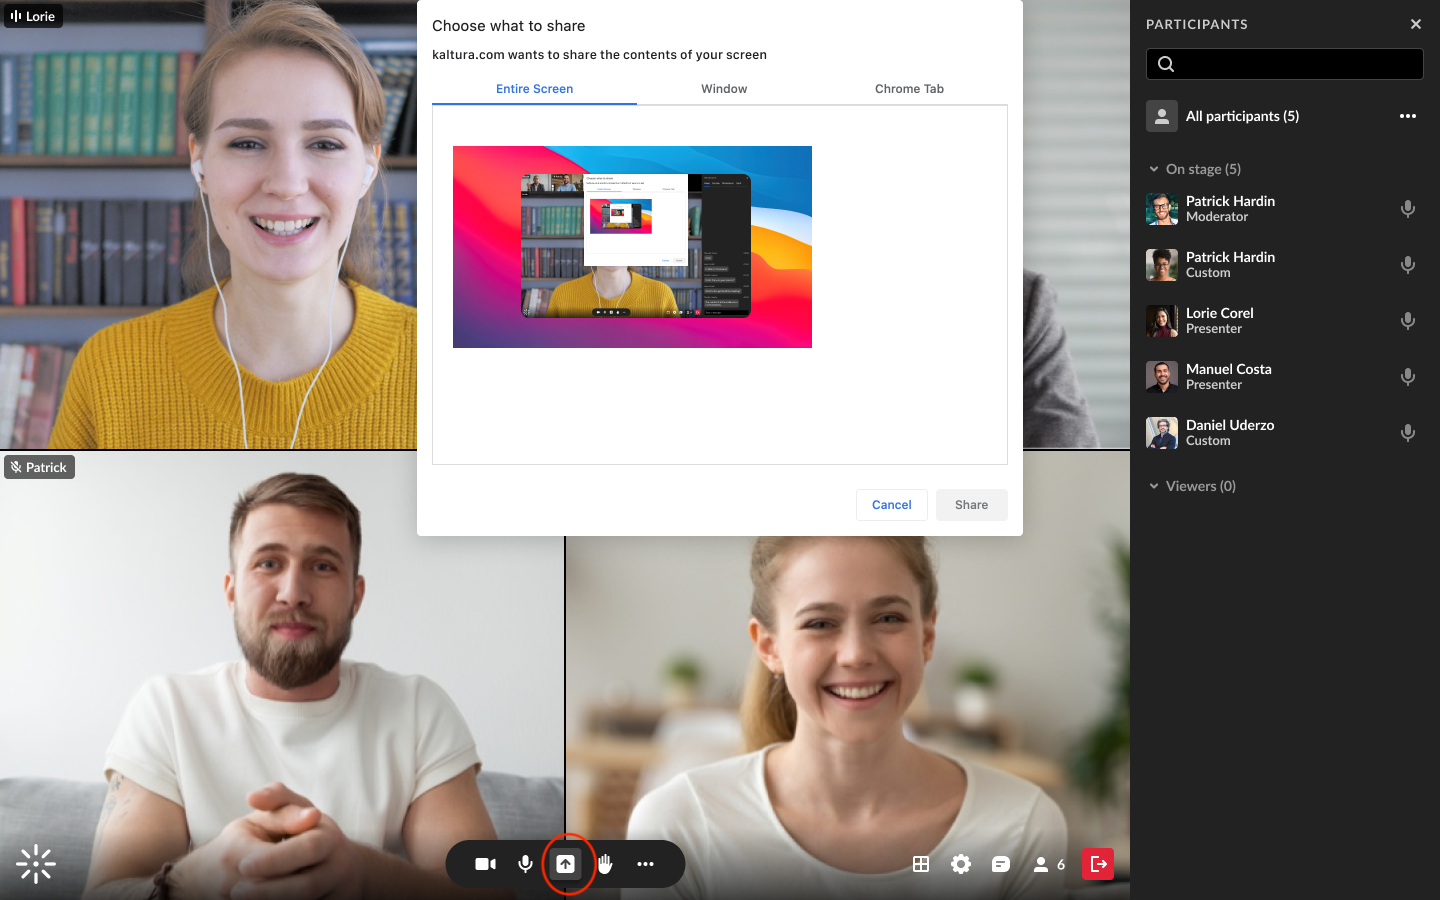
1. Click the screen share icon on the bottom toolbar. 
A screen sharing source menu will display with options of what you can share:
Entire Screen - This shares whatever is displayed on your own screen, and gives you the most flexibility to move between windows and applications while maintaining your screen share. If you have multiple screens, you can choose which screen to share.
Window - Select which particular application or window you'd like to share. Once shared, the application or window can't be hidden or minimized.
Tab - Choose a specific tab within your current browser.
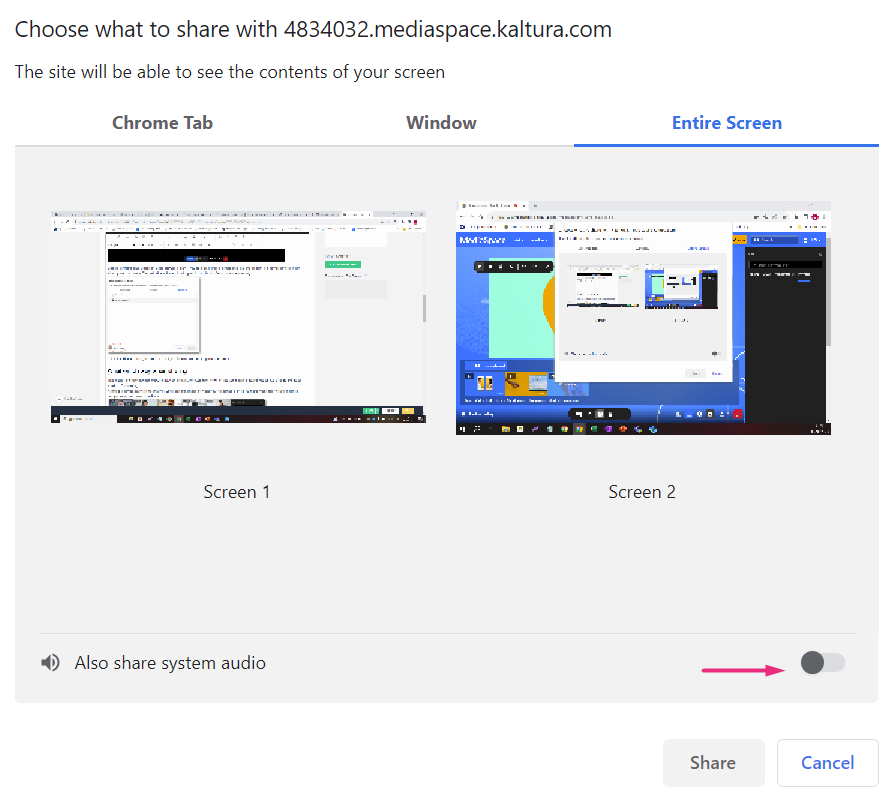
2. Click on the specific screen, window, or tab that you'd like to share.
You can also enable share system audio at the bottom of the screen sharing source menu (Google Chrome and Microsoft Edge browsers only). This will share the audio along with the visual of what you are sharing.
Not all browsers allow system audio sharing. It’s only supported when sharing a browser tab or application window, and is currently available in Google Chrome and Microsoft Edge.

What will display when sharing?
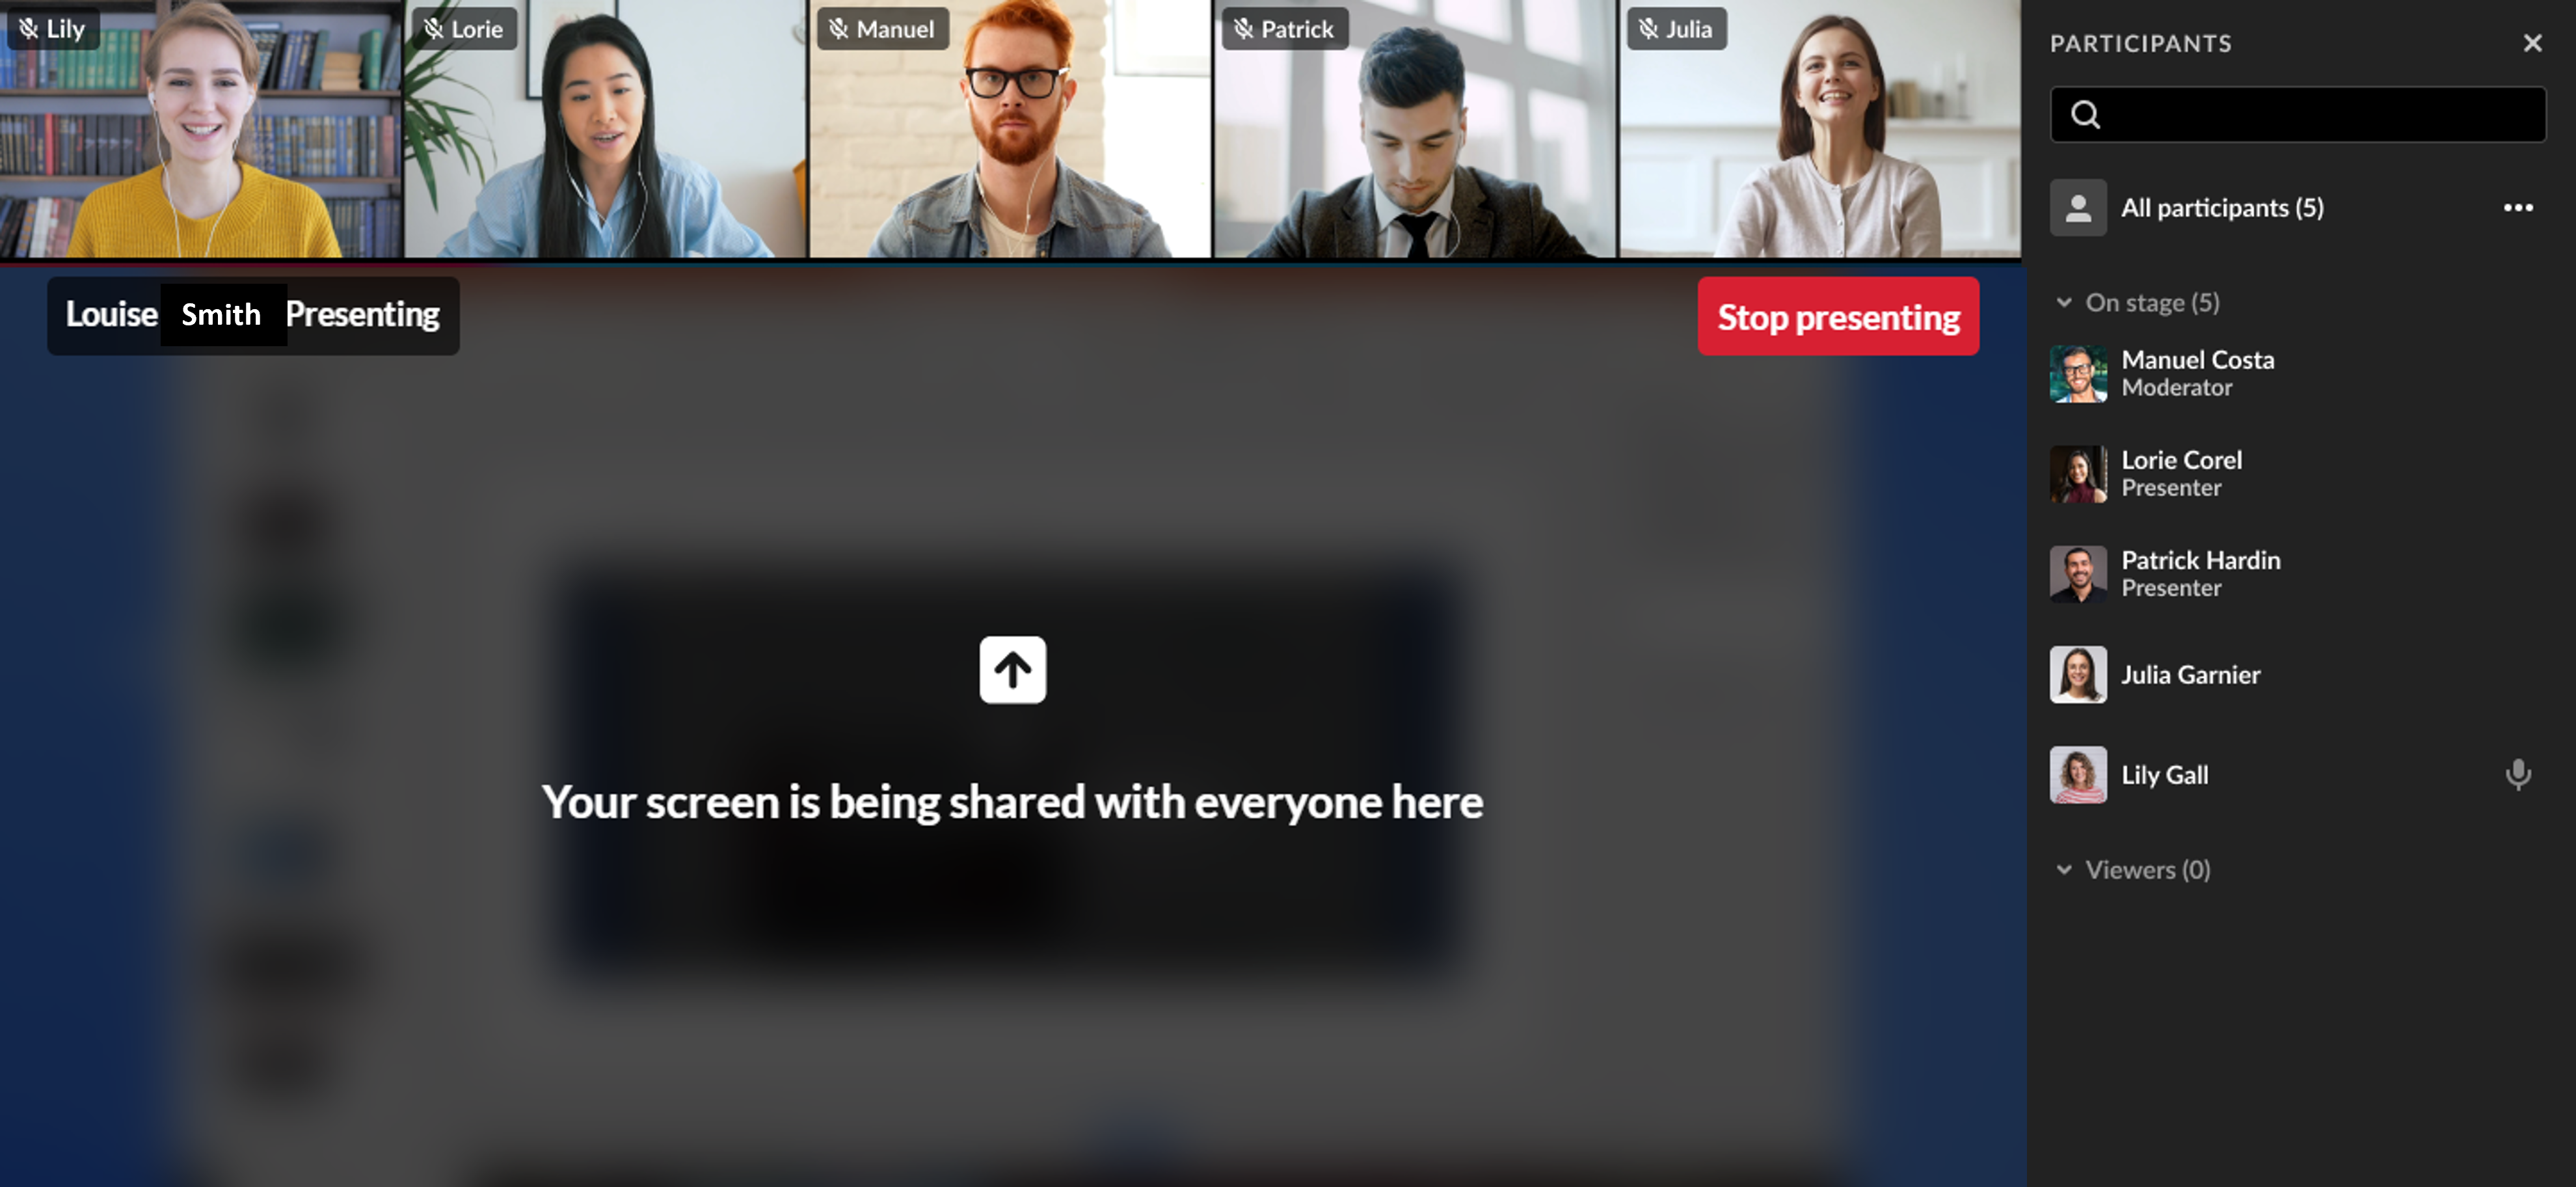
The stage in the meeting room will show, by default, the webcam views of the users on stage above the image of what you're sharing. As the presenter (the one sharing), the image you see of what you're sharing will be blurred, with the message "Your screen is being shared with everyone here."

When sharing a screen or window, you'll see a bottom bar notification (an extension footer bar) stating "window" or "screen" (depending on which you're sharing). The bar remains regardless if you switch screens / windows. You can dismiss this notification by clicking Hide.

When sharing a tab, you'll see a blue box on the tab itself to indicate that it's the one being shared, as well as an extension header bar, with the notification of what's being shared.

Stop sharing your screen
Ready to stop sharing your screen? There are a few ways to do so:
- Click the blue Stop Sharing / Stop button in the extension bar.
- Click the red Stop Presenting button on the top right of the stage.
- Click the X that replaced the share screen icon, on the bottom toolbar.
Additional permissions in macOS
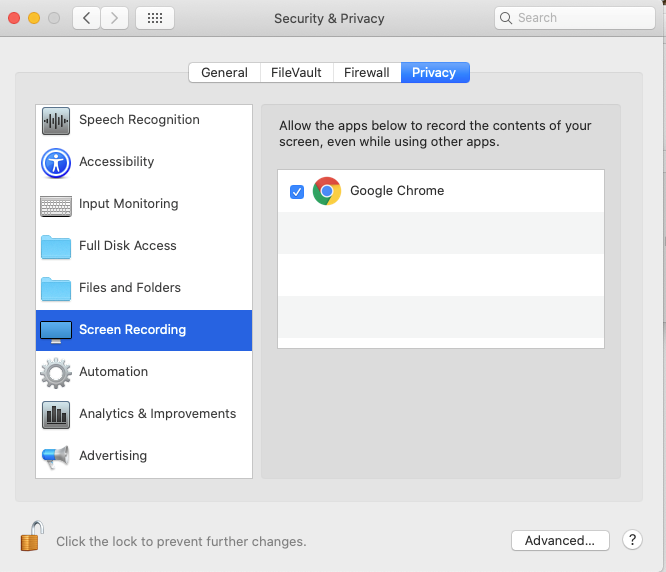
To share your screen, you must first give your web browser the "screen recording" permission.
- Click on the Apple icon in your computer's top navigation bar.

- Click System Preferences.
- Click Security & Privacy.
- Click the Privacy tab.
- Scroll through the left column until you find Screen Recording, and click it.
- In the Screen Recording section, click the box corresponding the web browser you are using, such as Google Chrome, Microsoft Edge or Firefox.

After you make this change, you might need to quit the web browser and relaunch. After you do, simply rejoin the session and try screen sharing again.

