About
With Kaltura's Zoom integration, you can effortlessly upload and archive your meetings and webinars, keeping everything organized in one place. Recordings are neatly categorized in Rich Media CMS, and under My Media in Kaltura's legacy Video Portal for the matched user ID.
The Zoom meeting host is the recording owner in Kaltura, plus, you can easily collaborate by adding co-hosts. And don't worry about losing important details - transcription files and chat transcripts are automatically saved alongside your recordings in Kaltura.
This article walks administrators through setting up the Zoom integration in Kaltura, configuring default behavior, and assigning recording categories and ownership.
Zoom integration features:
- Ability to delete recordings from Zoom after the import.
- Import legacy content.
- Connect multiple recordings from the same session to multi-stream video.
- Select whether to upload Zoom transcription.
- Automatically publish imported content to a specific selected Category / LMS Category.
- Set the recording owner - based on the Zoom user ID or CMS User ID.
- Support for up to three Zoom accounts per Kaltura.
The Zoom integration is available in the Zoom marketplace and can be found here: https://marketplace.zoom.us/apps/VqdWYBqSRg-G6y4GTVMnCQ
If the Zoom transcript option is enabled, REACH captions and transcripts will not be generated as these are ingested from Zoom. For REACH captions, please turn off the Zoom transcript option in the integration settings for Zoom.
Before you start
Zoom prerequisites:
- A paid Zoom account
- Access to Zoom Cloud Recording
Kaltura prerequisites:
- A Rich Media CMS User ID, Partner ID, an Administrator Secret for an administrator to configure the integration.
- A Kaltura user ID for end-users to set ownership of recordings in their Zoom profile.
Notes on administrator setup:
- Each Zoom account is linked to a specific Kaltura account for recording transfers.
Set up Zoom integration
For a quick guide on installing the Kaltura Zoom plug-in, check out the video below.
If you are using the legacy Zoom Kaltura Integration, please be certain to cancel and remove the legacy integration settings and enable the latest available Kaltura integration with Zoom from the Zoom Marketplace.
- Browse to the Zoom Marketplace website and login with your admin credentials.
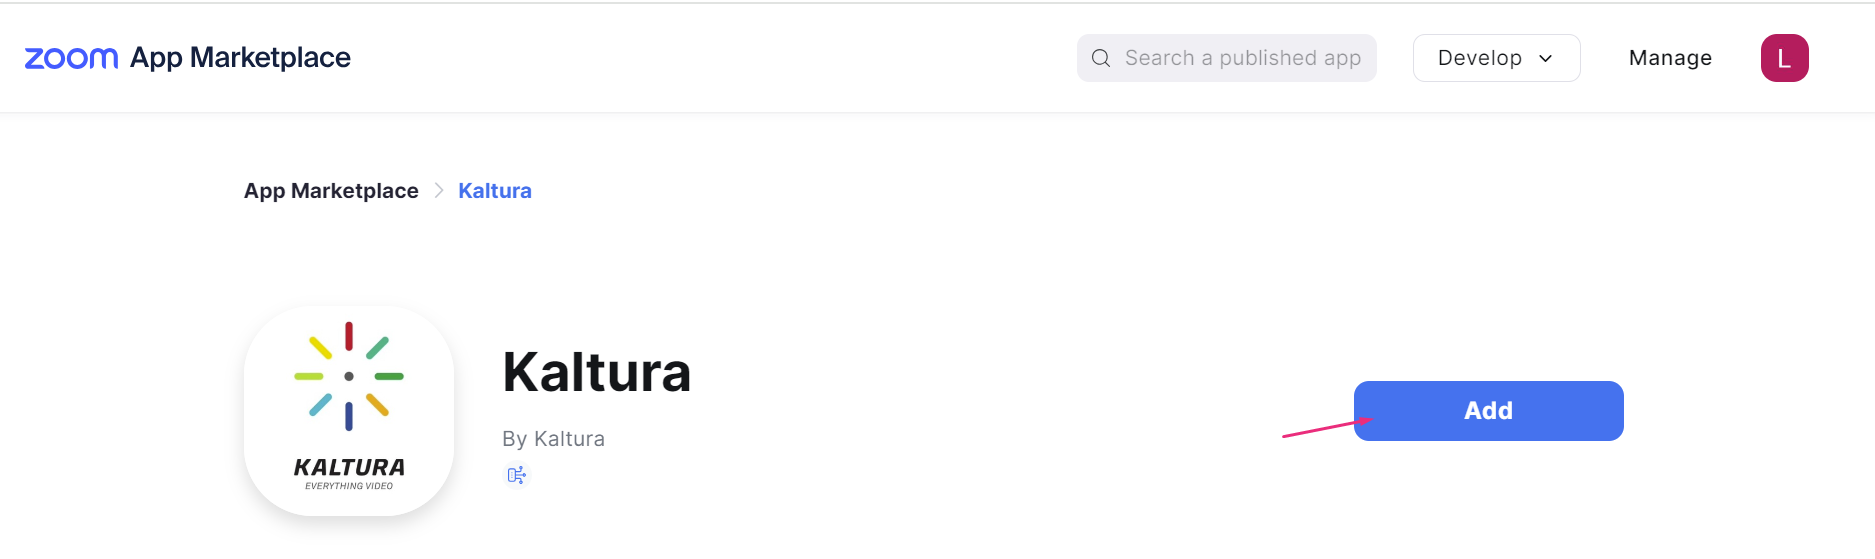
- Search for and then select Kaltura.
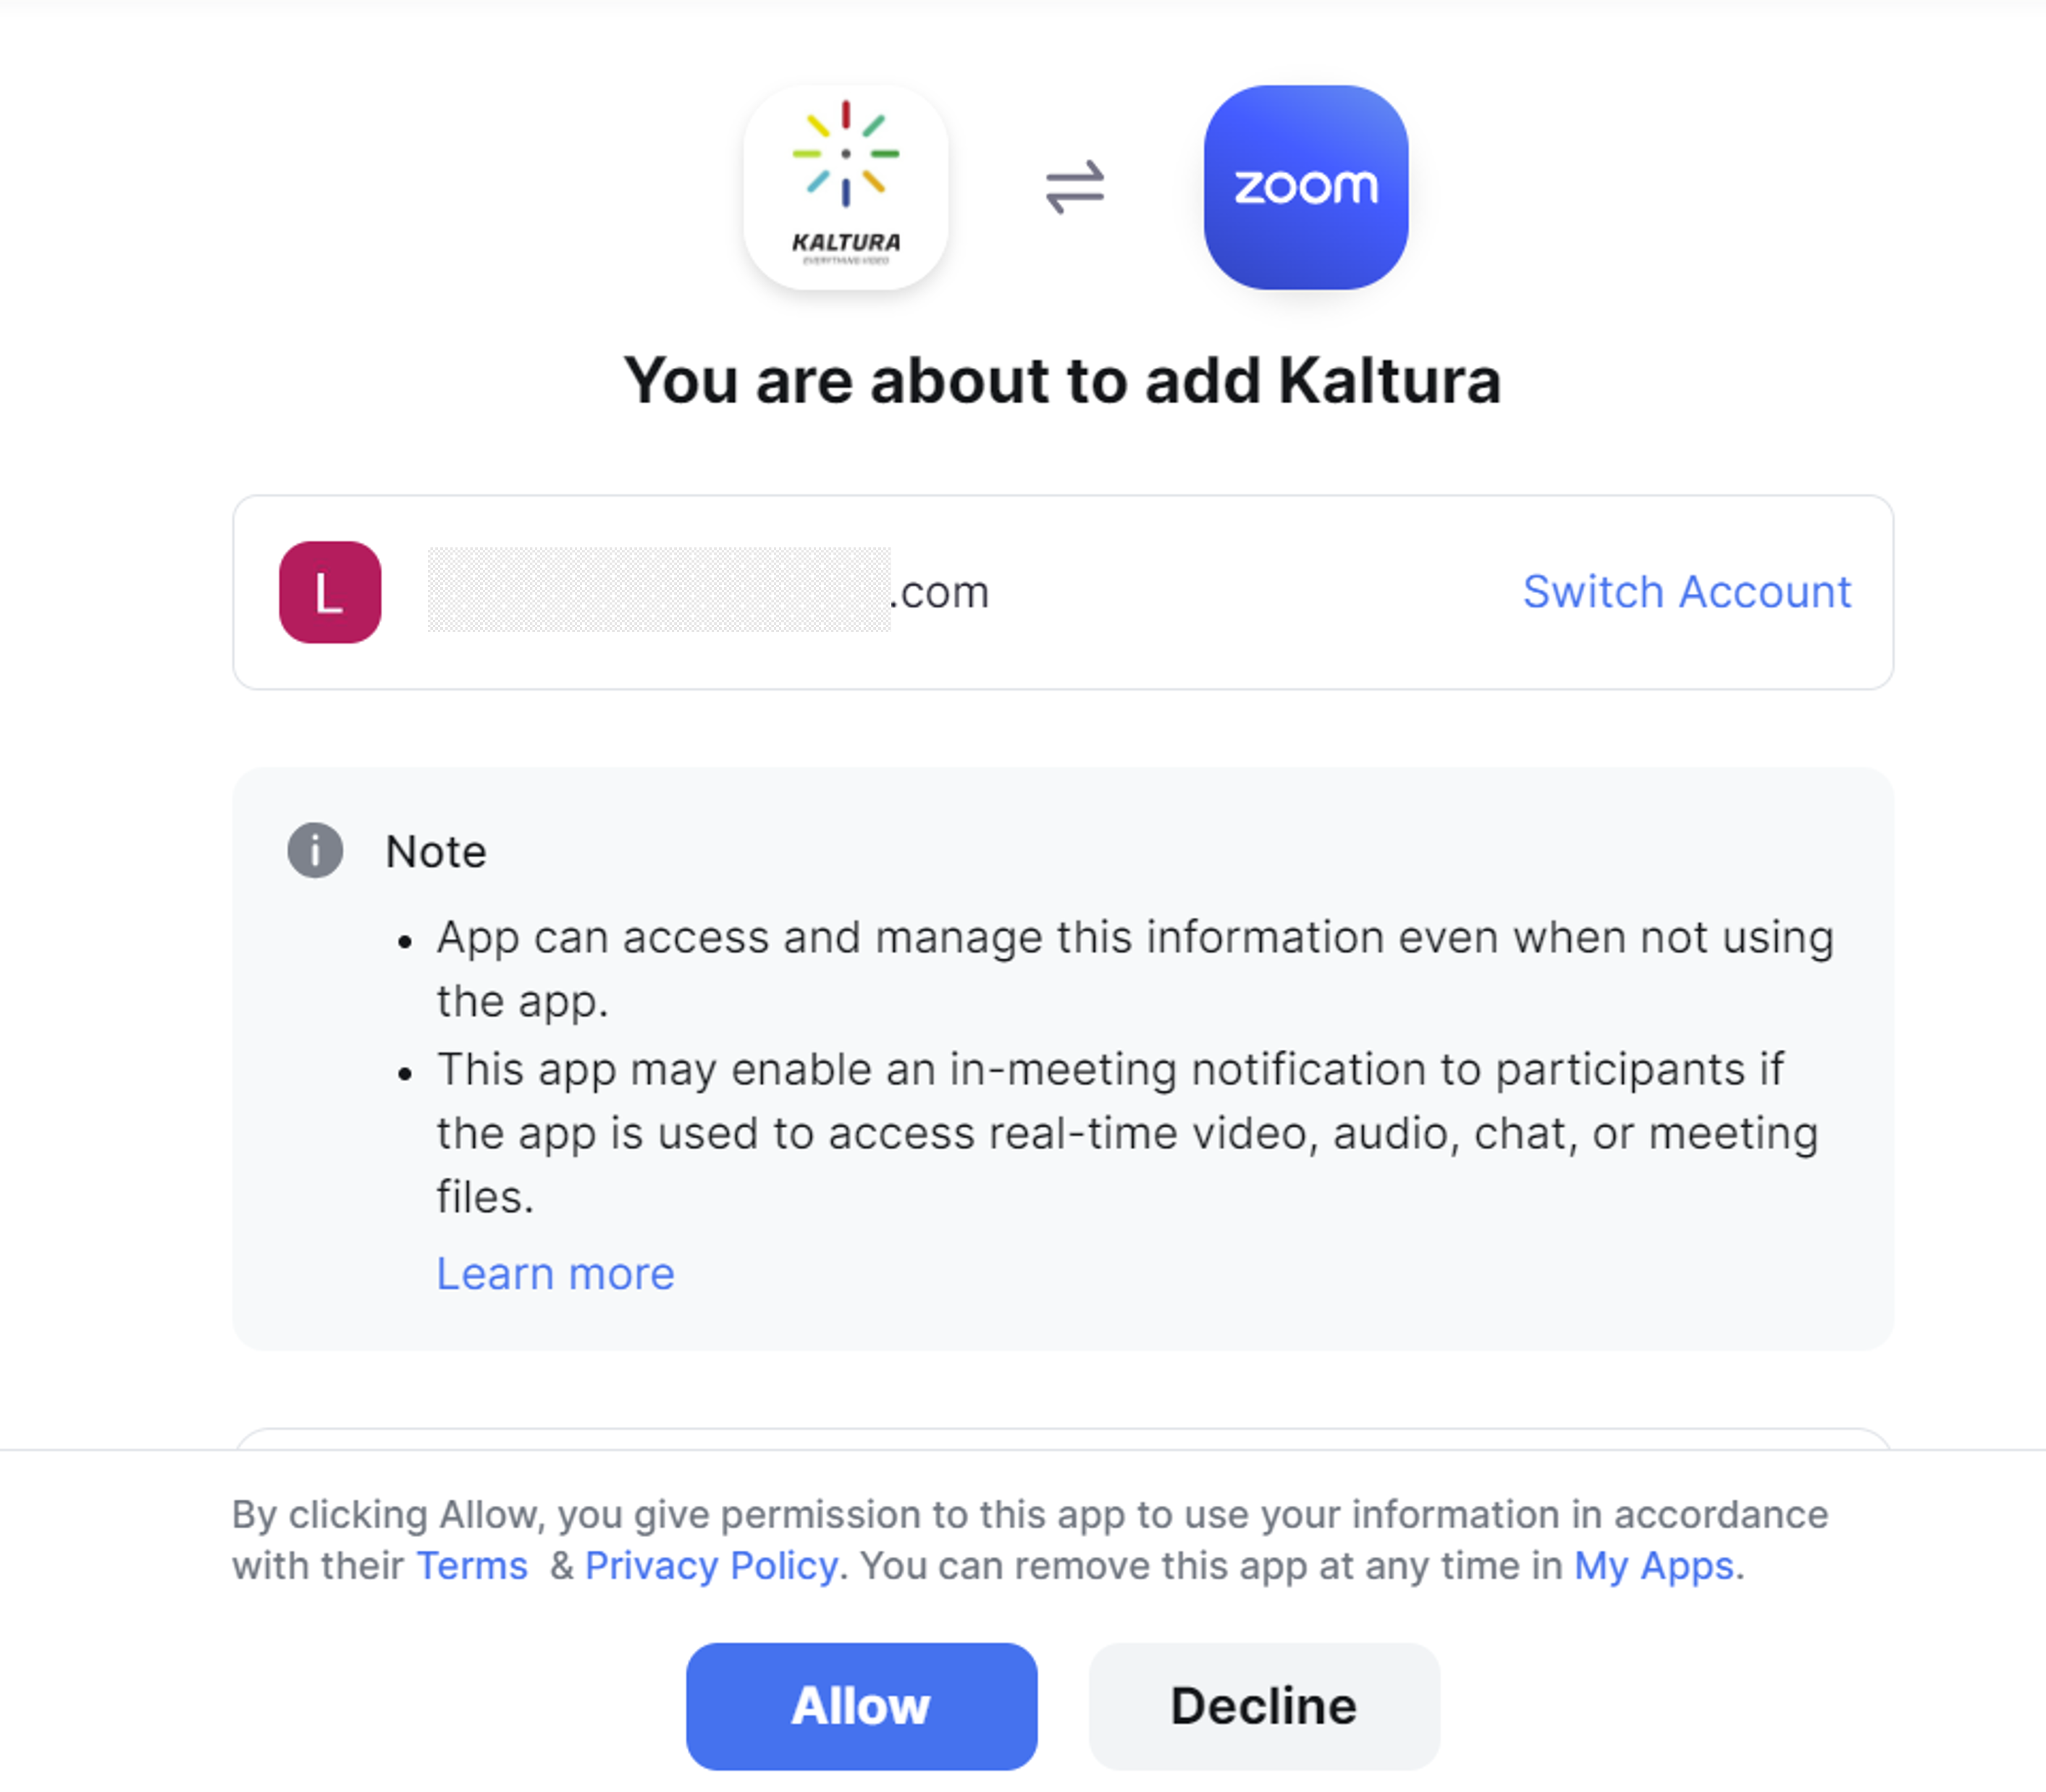
- Click Allow to add the application to your account.
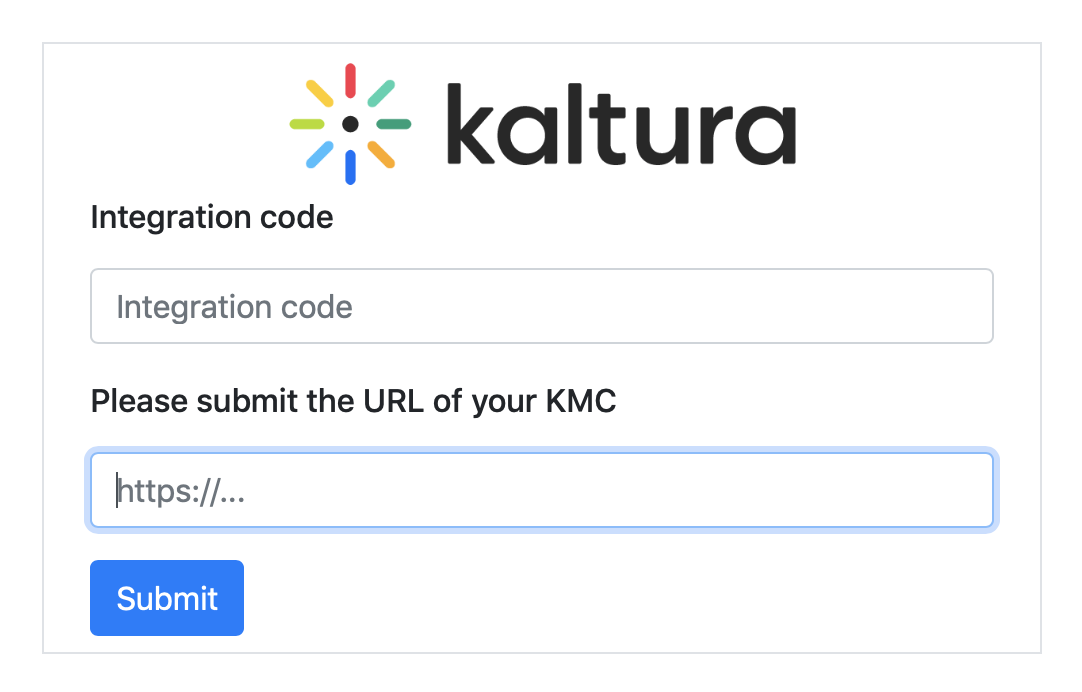
- To identify a user, you'll need to generate the integration code within the Rich Media Content Management System and then paste it onto your Zoom initial setting page.
- Go to your Rich Media CMS to get the Integration code.
The Authentication Screen displays.
Authenticate/authorize with your Kaltura account credentials. For SaaS installations, the URL is https://kmc.kaltura.com/index.php/kmcng/login.
Get integration code
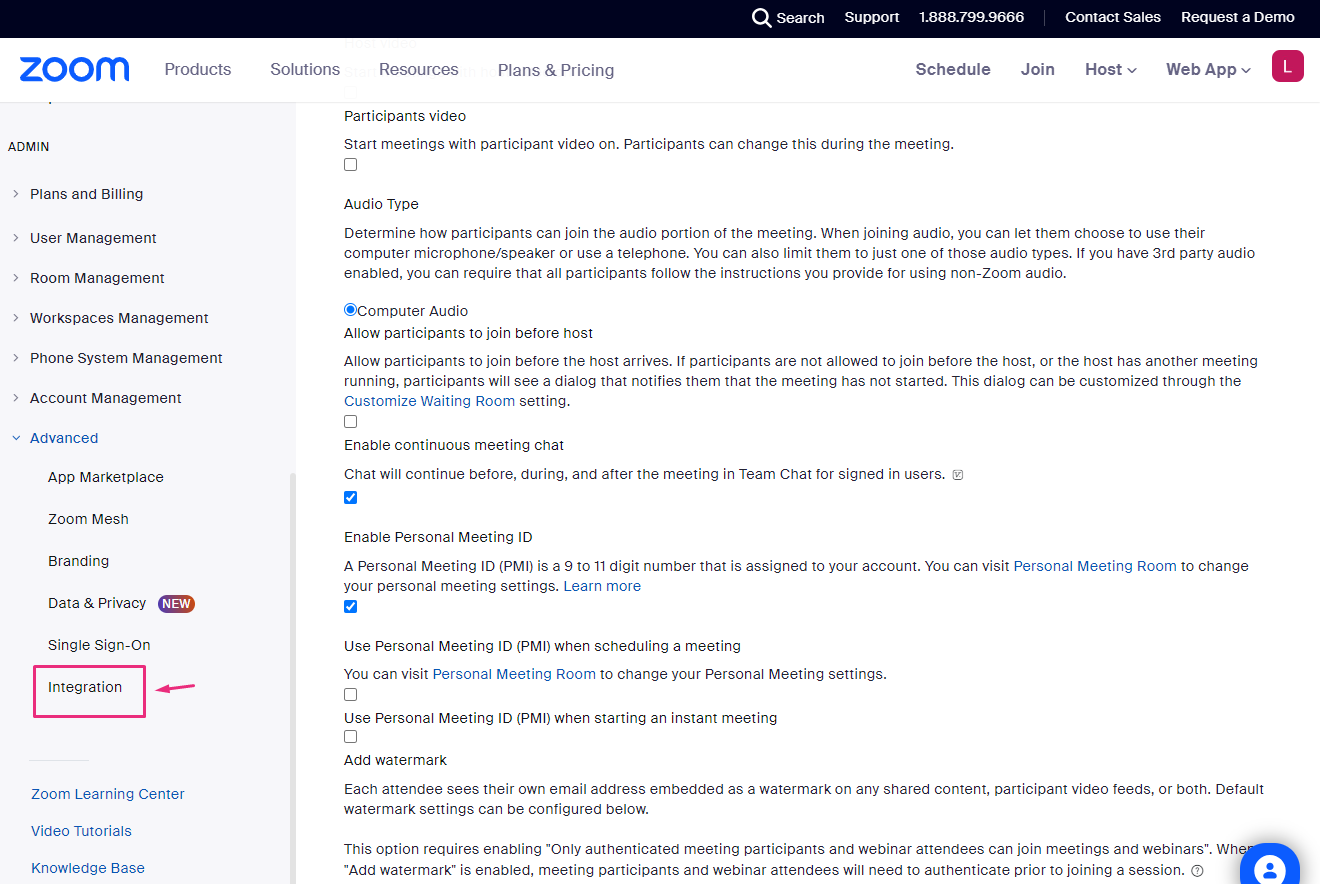
- Log into the Rich Media CMS and click the settings icon at the far right.

- Click the Integration tab.
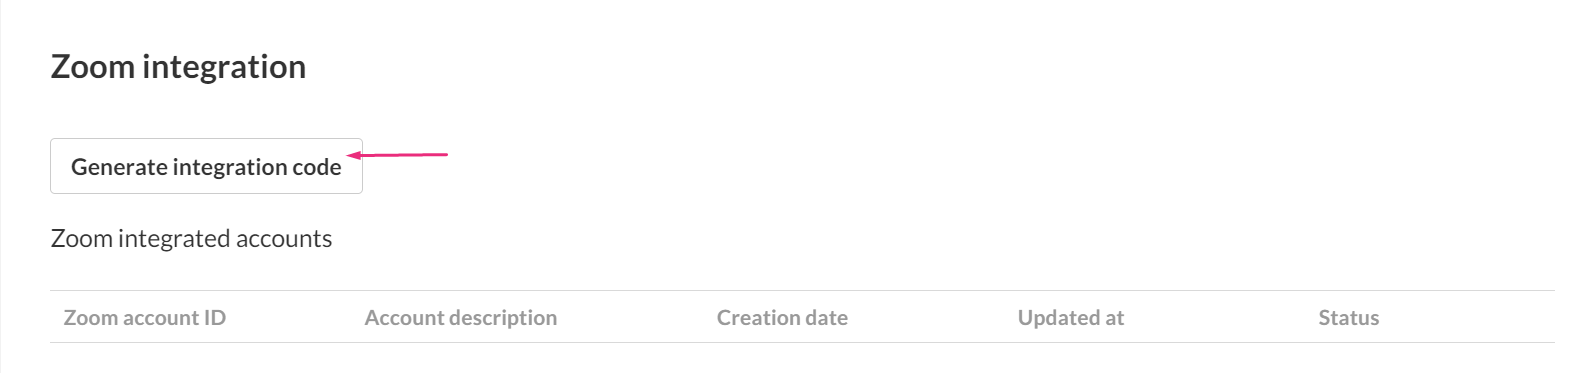
- Scroll down to Zoom integration and click Generate Integration code.
- Click Copy and Close.

The settings page displays.

The integration code is generated.
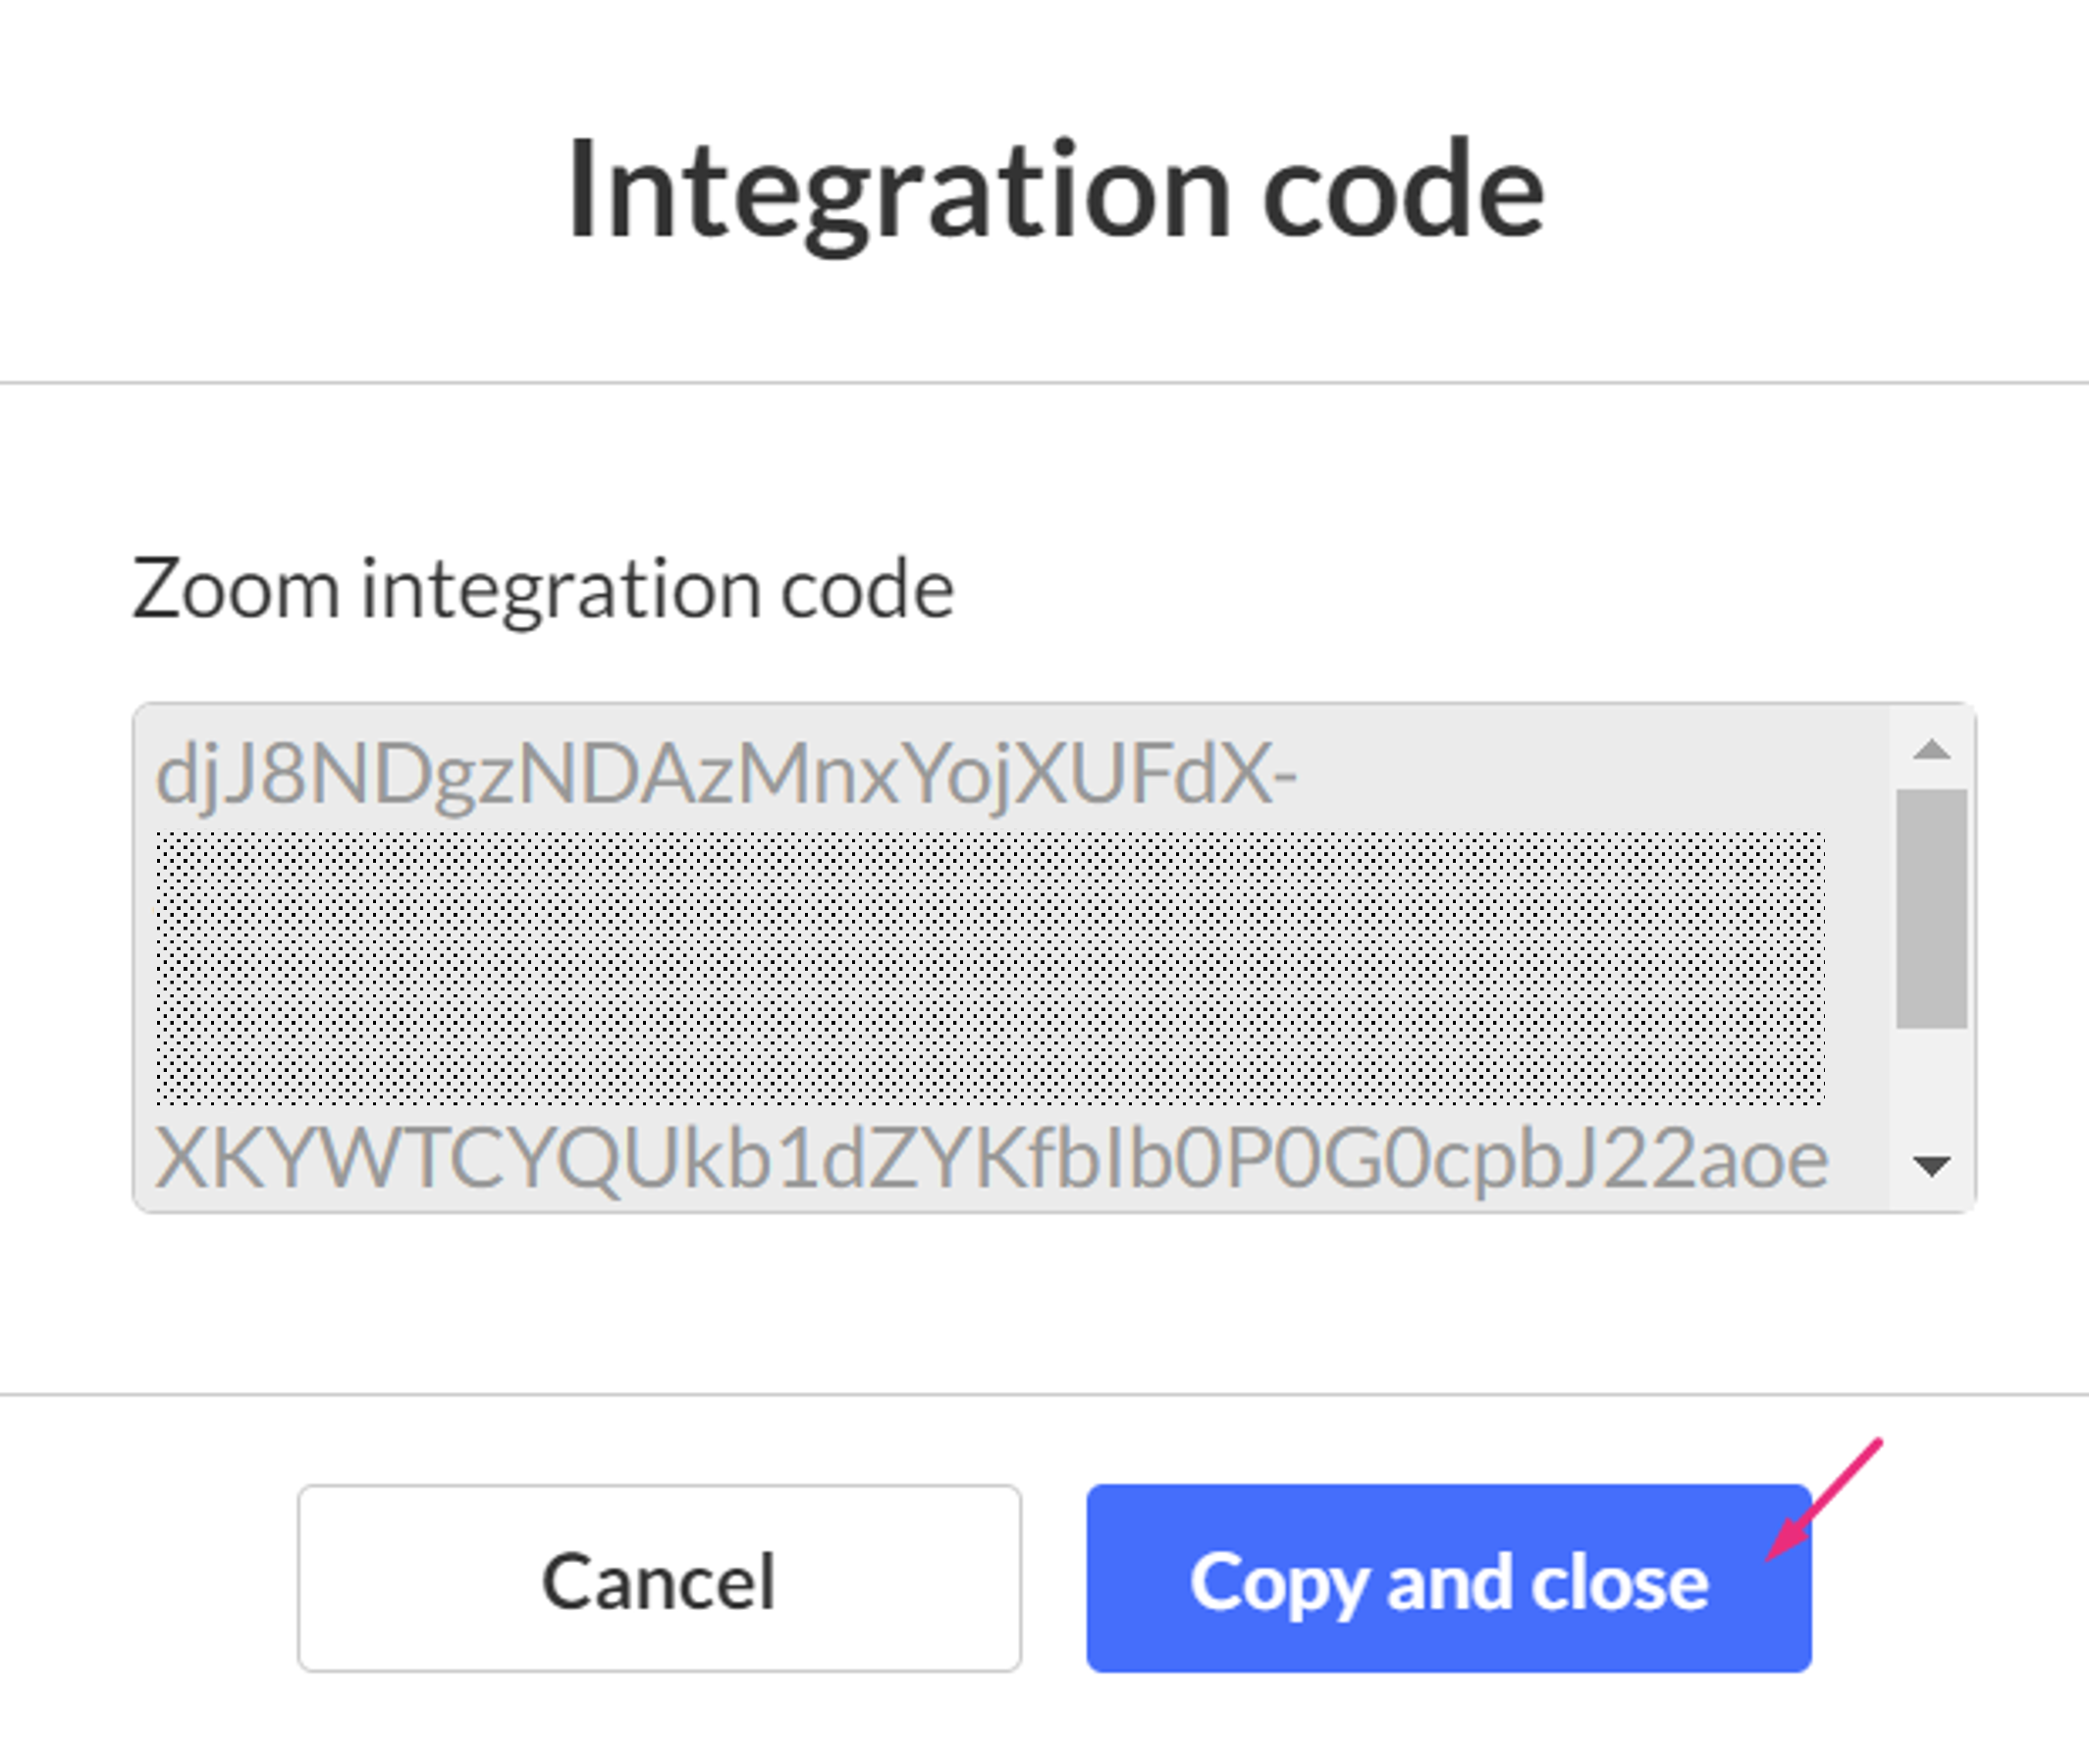
Once the code is copied, it's saved to the clipboard, and you'll see a confirmation message: 'Copied to the clipboard.' (For security, the code is intentionally blurred in this article.)
This code is temporary, generated per Partner ID, and can be used only once to complete the Zoom integration setup.
Once you've entered the copied code into the authentication screen or initial settings page on Zoom, you can proceed to configure the integration settings in the Rich Media CMS.
Edit Zoom account information
In Zoom integration, you'll see a list of all Zoom integrated accounts.

1. Click on the relevant Zoom integrated account to open the Zoom account window where you can configure the settings.

2. Enter the settings information:
Default User ID - This User ID will be used if the Zoom host user ID does not exist in Kaltura and will become the default owner for uploaded recordings.
Zoom Category - Enter one or more categories for Zoom meeting recordings. Begin typing to search and select from existing categories using the auto-complete dropdown. Multiple categories are supported.
Different categories may be selected for meeting recordings and webinar recordings. To publish Zoom recordings to an LMS category, see our article Zoom Integration - Publish Zoom recordings to LMS categories.
Zoom Webinar Category - Enter one or more categories for Zoom Webinars. These recordings will be assigned to all selected categories. Auto-complete is available, and existing categories will remain visible as you type.
Settings - Toggle the desired settings:
- Enable Integration - Toggle onto 'Yes' to enable the integration.
- Enable Meeting Upload - When set to 'Yes', Zoom meeting recordings will be uploaded and automatically placed in the Zoom Category defined on this screen.
- Enable Webinar Upload - When set to 'Yes', Zoom webinar recordings will be uploaded and automatically placed in one of the Zoom Webinar category defined in this screen.
Setting Owner for Recordings - Setting the owner of the recording can be done in two ways: based on Zoom user ID or based on CMS mapping (SAML mapping):
- Create a new user if no match is found
- Enable automatic deletion of files - Select whether to delete the content from Zoom after uploading to Kaltura.
- Enable transcriptions - Select whether to use Zoom transcription when uploading the content.
When enabled, the content will be deleted after one day. The delay time can be updated in the Zoom drop folder, via the Admin Console.
Based on Zoom user ID - How matching Zoom users should be handled:
- Do not modify
- Add postfix
- Remove postfix
When choosing the Zoom User ID, it's matched to a Kaltura user ID, and as a fall back, Kaltura also tries to match the user's email address. In some cases, users are defined in Zoom differently than they are in Kaltura. For example, Zoom may transfer the entire email address (e.g. first.last@company.com), or in some cases only the user name (e.g. first.last). This setting enables sync between Zoom users and Kaltura users by adding or removing a postfix (e.g. @company.com) or maintaining the same user ID as in Zoom.
Based on cms_user_id (SAML mapping) - Select this option if you're using SAML mapping in Zoom and want Kaltura to match users based on the CMS user ID provided by Zoom.
Find users by ID and - Choose how Kaltura should continue matching if no direct match is found by user ID:
- external ID (use with SSO)
Kaltura will first attempt to match the Zoom user ID (including any prefix/postfix rules) to a Kaltura user ID. If no match is found, it will look in the selected secondary field - either the user’s email or external ID.
How meeting participants should be handled - Choose whether to:
- Add as co-publishers
- Add as co-viewer
- Ignore participants
These settings apply to all meeting recordings and are only available when mapping user names via Zoom User ID.
3. After all the settings are defined, click Save to apply your configuration.
For the first phase of the Kaltura Integration with Zoom you will need to:
- Disable the integration and then re-enable it.
- Review and update the integration settings and click 'Save' to apply them.
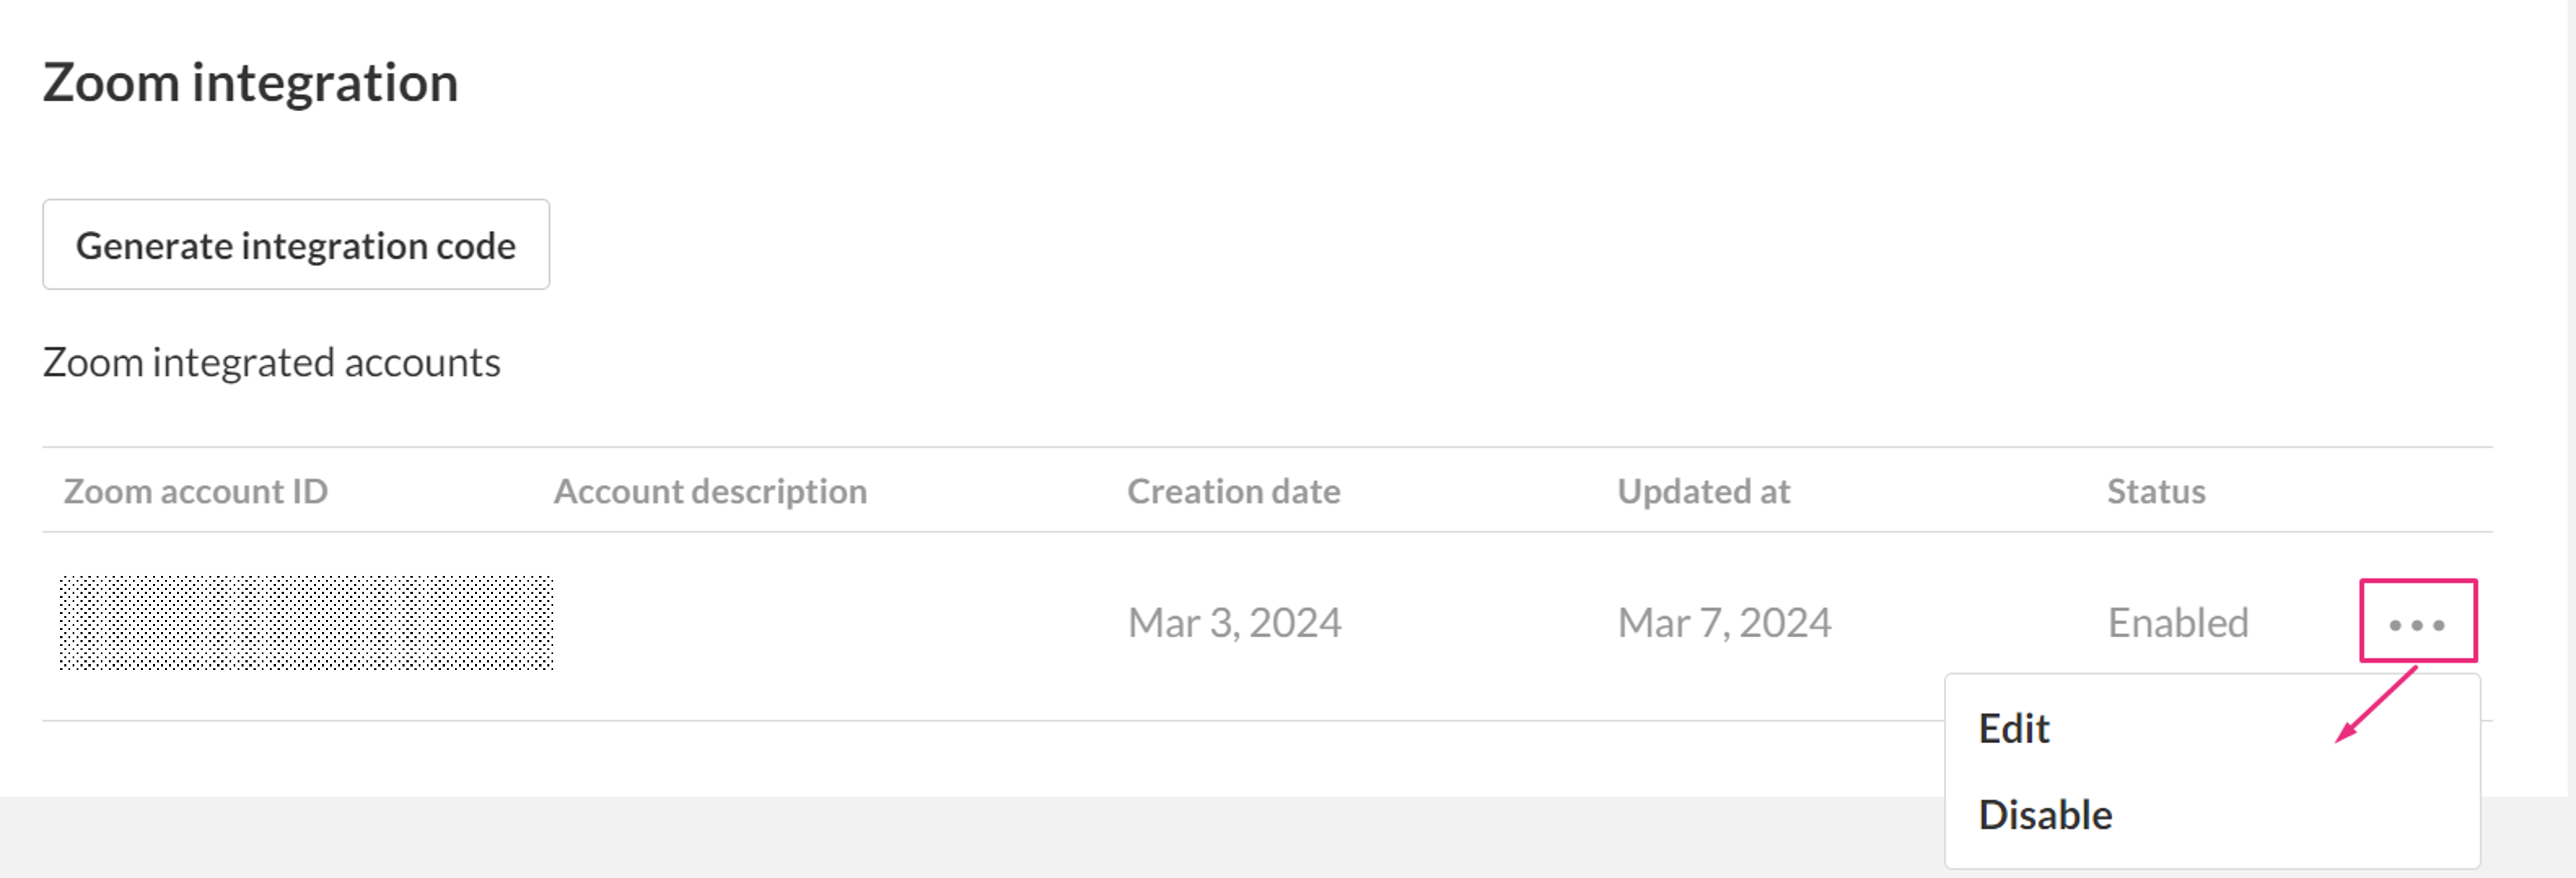
You can use the three-dot menu next to the relevant integration to:
- enable / disable the integration
- edit the settings (as shown below)

Auto-ingest based on groups
- In the Edit Zoom account screen, choose one of the following:
- Upload All Recordings (default)
- Opt-in Groups
- Opt-out Groups
- If you choose Opt-in Groups or Opt-out Groups, an additional field displays where you must enter at least one group. If the user is a member of the configured group(s), the recording will be ingested.

-
If you choose Opt-out Groups, an additional field displays where you must enter at least one group. If the user is a member of the configured group(s), the recording will not be ingested.

A Zoom-integrated account can be either opt-in or opt-out. Both configurations in parallel are not supported.
For information on how to create groups and assign users to groups, see Manage groups in the Configuration Management console. After the creation of a group, admins can find the groups in the Rich Media CMS (by auto-completion).
When setting a user, if the user doesn't exist and you choose to use the default user, @defaultUserID@ must be changed to assign the user to a group.
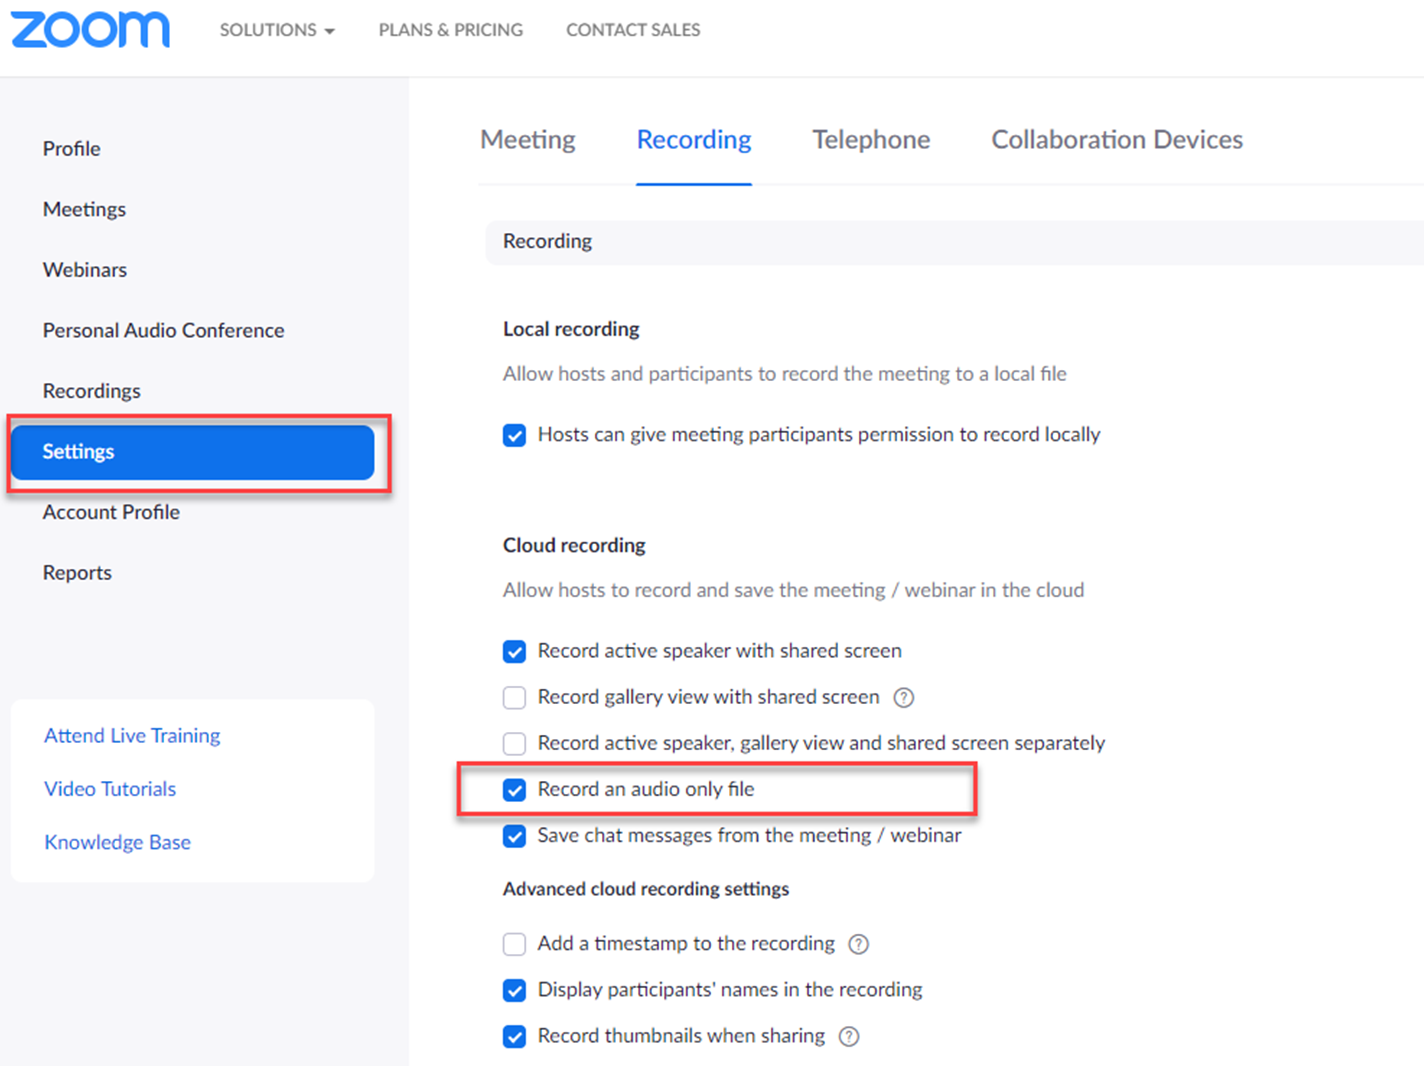
Handling audio files
If your Zoom account is configured to record an audio-only file, Kaltura will assign that recording as the parent video in a dual stream recording from Zoom. If you don't want this to happen, we recommend turning off audio-only recordings in Zoom (uncheck the box next to Record an audio only file, then click Save).
Create Zoom recordings
Users in the configured account can now record their Zoom sessions, and the recordings will be seamlessly uploaded to Kaltura. Once the meeting concludes, the recording is automatically processed and synced to Kaltura, adopting the name "Zoom" followed by the Zoom ID for easy identification.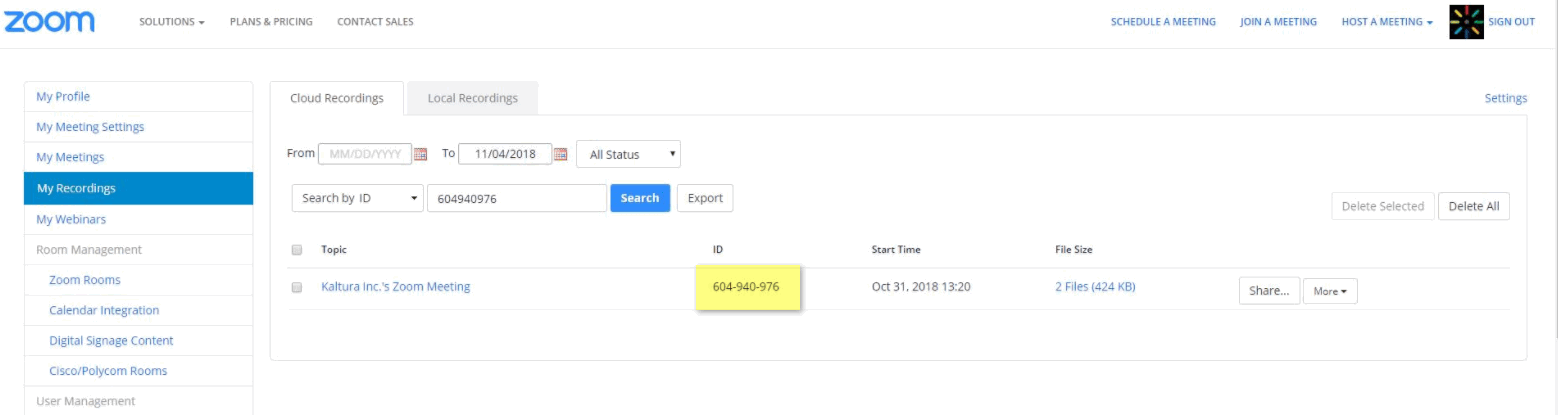
Recording layouts
Zoom allows admins to choose the recording layout for each session. If multiple layouts are selected, Zoom generates multiple recordings for the same session. In Kaltura, these recordings are automatically grouped together, appearing as a multi-stream recording in the interactive player. Check out our article Dual screen plugin for more details.

For more information, see our article Understanding parent-child entries.
To manage your Zoom recordings, go to Manage and view Zoom recordings in Kaltura.
