About
This article explains how to set up the Kaltura LMS Video integration for Canvas with LTI version 1.3 at the sub-account level.
The integration uses a set of LTI external tools, manually added through LTI Developer Keys in Canvas. The keys are configured using a JSON block to enable the LTI Tool Provider and configure tool placements within Canvas.
For more information on hierarchical structure of Canvas accounts, visit this Instructure article What is the hierarchical structure for Canvas accounts?
Canvas LTI tool placement restrictions
When adding third-party applications at the sub-account level, the following restrictions apply:
- Global navigation placement is not available for sub-account-level applications.
- A Canvas LTI Developer Key supports only one tool placement.
These limitations affect the placement of Kaltura's My Media and Media Gallery tools in Canvas. This guide outlines Kaltura's recommended approach to address these restrictions, which includes creating two LTI Developer Keys and one Scoped API Developer Key in Canvas.
Prerequisites
- Kaltura administrator account
- Kaltura LMS Video integration for Canvas, version 5.99.46 or later
- Canvas administrator account
Step 1 - Backup your configuration
- Log into your Configuration Management console (https://{your_KAF_base_URL}/admin).
- Under Server Tools, click Backup Configuration.
- On the Backup Configuration page, click Save Backup.
- Click Yes, Save.


A confirmation message displays: Are you sure you want to save current configuration? Remember that previous backups will be deleted.

Once the backup is complete, you'll see a confirmation message: Configuration file was saved successfully.
The backup page will display the 'last configuration save date', which reflects the date when the configuration settings were last modified, not the date the backup was performed.
Step 2 - Enable LTI 1.3
- In your Configuration Management console, navigate to the Hosted module.
- On the Hosted module page, locate the authMethod field and select lti1.3 from the dropdown.
- Configure the following fields:

An additional section displays exposing the Kaltura LTI 1.3 configuration settings.

The value for “your_Canvas_Domain” will be the domain displayed when a user is working in your Canvas instance, for example, canvas.myuniversity.edu.
- lti13PlatformOidcAuthUrl = https://{your_Canvas_Domain}/api/lti/authorize_redirect
- lti13AuthTokenUrl = https://{your_Canvas_Domain}/login/oauth2/token
- lti13KeysUrl = https://{your_Canvas_Domain}/api/lti/security/jwks
4. Scroll down to the LTI3service section and click Generate key pair here to generate private and public keys.

5. In the Certificate Generator window, click Use to save the key pairs to the lti13ServicePrivateKey and lti13ServicePublicKey fields.

6. Scroll to the bottom of the Hosted module page and click Save.
Step 3 - Generate the Canvas LTI developer key JSON
If you are using a KAF domain other than .kaltura.com, such as a vanity domain or alias, make sure to use it as the input for your_KAF_URL.
- Enter the following URL in your browser: https://{your_KAF_URL}/canvas/config/create-json-for-instance. Example: https://12345.kaf.kaltura.com/canvas/config/create-json-for-instance
The JSON that is displayed will be used in the next steps to populate the LTI 1.3 Configuration field in the LTI developer keys.
Step 4 - Create a Canvas LTI developer key for all Kaltura tools except My Media
- Log into your Canvas instance as an administrator.
- Click the Admin tab.
- In the Admin navigation panel click on the top-level account for your Canvas hierarchy.
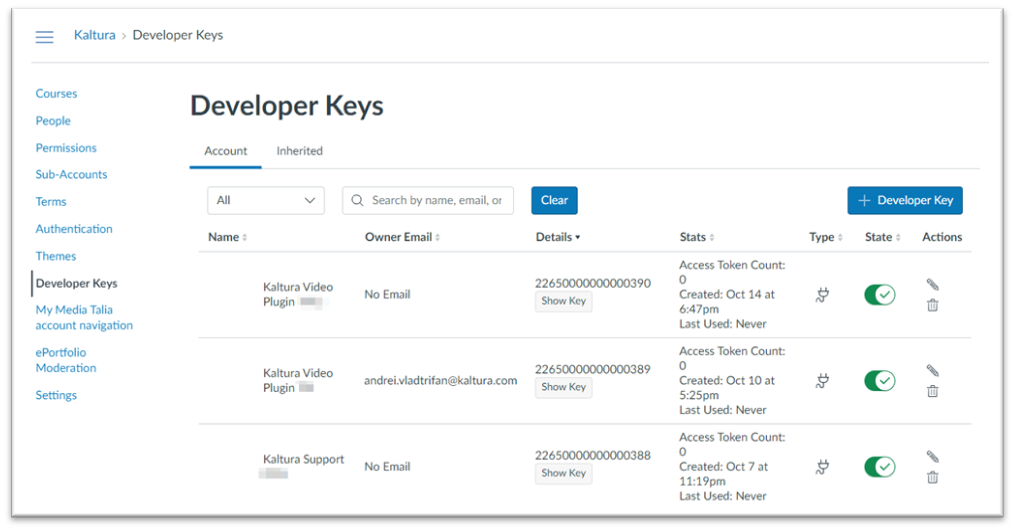
- In the Account navigation panel click the Developer Keys tab.
- Click +Developer Key and select + LTI Key from the drop-down list.
- Configure the following:

The Developer Keys page displays.


The Key Settings page displays.

- Key Name - Enter the key name. Example: Kaltura LTI 1.3 – no My Media.
- Owner email – optional
- Redirect URIs -Enter https://{your_KAF_URL}/hosted/index/oauth2-launch. Example: https://12345.kaf.kaltura.com/hosted/index/oauth2-launch
If you are using a KAF domain other than .kaltura.com, such as a vanity domain or alias, make sure to use it as the input for your_KAF_URL.
- Notes - optional
- Method - Select Paste JSON from the drop-down list.

7. For the LTI 1.3 Configuration field, go to the browser tab used in Step 3 - Generate the Canvas LTI developer key JSON, and copy the JSON code between the first and last brackets { }, then paste it between the brackets in the LTI 1.3 Configuration field.

8. Scroll to the bottom of the page and click Save.
The new LTI developer key will now be listed on the Developer Keys page. If the State is set to off (red), it means the key is disabled. To enable the key, click the toggle (green).

Step 5 - Configure the Kaltura LTI 1.3 – no My Media LTI developer key
- Edit the LTI developer key you created in Step 4 by clicking on the pencil icon to the far right of the key.
- In the Method field, change to Manual entry
- Update the Title field.
- Update the Description field.
- Scroll down to the LTI Advantage Services section and click to expand the section.
- Make sure the following LTI Advantage Services are turned on in addition to others that are enabled:

The Key Settings page displays.

- Can create and view assignment data in the gradebook associated with the tool.
- Can view assignment data in the gradebook associated with the tool.
- Can view submission data for assignments associated with the tool.
- Can create and update submissions for assignments associated with the tool.
- Can retrieve user data associated with the context the tool is installed in.
- Can update publish jwk for LTI services.
7. Click Additional Settings to expand the section.

8. Review the following fields:
- Domain - your KAF domain without https://
- Tool Id - your KAF URL including https://
- Icon Url, Text, Selection Height, Selection Width – leave blank
- Custom Fields - Include the following three custom parameters
- custom_canvas_user_id=$Canvas.user.id
- custom_canvas_course_id=$Canvas.course.id
- custom_canvas_user_login_id=$Canvas.user.loginId
9. Remove the Global Navigation Placement by clicking on the Global Navigation bubble.
10. Review and edit the Text field for each tool placement as needed:
- Link Selection: For the Kaltura Browse Search and Embed tool, used to create video pages.
- Course Navigation: For the Kaltura Course Media Gallery.
- Editor Button: For the Kaltura Browse Search and Embed tool in the Canvas Rich Content Editor.
- Assignment Selection: For the Kaltura Interactive Video Quiz in the Canvas Assignment tool.
11. Scroll to the bottom of the page and click Save.
Step 6 - Create a Canvas LTI developer key for My Media
- Log into your Canvas instance as an administrator.
- Click the Admin tab.
- In the Admin navigation panel click on the top-level account for your Canvas hierarchy.
- In the Account Navigation panel click the Developer Keys tab.
- Click +Developer Key and select + LTI Key from the drop-down list.
- Configure the following:

The Developer Keys page displays.


The Key Settings page displays.

- Key Name - Enter the key name, Example: Kaltura LTI 1.3 – My Media only).
- Owner email – optional
- Redirect URIs - Enter https://{your_KAF_URL}/hosted/index/oauth2-launch
Example: https://12345.kaf.kaltura.com/hosted/index/oauth2-launch
If you are using a KAF domain other than .kaltura.com, such as a vanity domain or alias, make sure to use it as the input for your_KAF_URL.
- Notes - optional
- Method - Select Paste JSON from the drop-down list.

7. For the LTI 1.3 Configuration field, go to the browser tab used in Step 3 - Generate the Canvas LTI developer key JSON, and copy the JSON code between the first and last bracket { } and paste it between the brackets in the LTI 1.3 Configuration field.

8. Scroll to the bottom of the page and click Save.
The new LTI developer key will now be listed on the Developer Keys page. If the State is set to off (red), it means the key is disabled. To enable the key, click the toggle (green).

Step 7 - Configure the Kaltura LTI 1.3 – My Media only LTI developer key
- Edit the LTI developer key you created in Step 6 by clicking on the pencil icon to the far right of the key.
- In the Method field, change to Manual entry
- Update the Title field.
- Update the Description field.
- Scroll down to the LTI Advantage Services section and click to expand the section.
- Make sure the following LTI Advantage Services are turned on in addition to others that are enabled:

The Key Settings page displays.

- Can create and view assignment data in the gradebook associated with the tool.
- Can view assignment data in the gradebook associated with the tool.
- Can view submission data for assignments associated with the tool.
- Can create and update submissions for assignments associated with the tool.
- Can retrieve user data associated with the context the tool is installed in.
- Can update publish jwk for LTI services.
7. Click Additional Settings to expand the section.

8. Review the following fields:
- Domain - your KAF domain without the https://
- Tool Id - your KAF URL including https://
- Icon Url, Text, Selection Height, Selection Width – leave blank
- Custom Fields - include the following three custom parameters
- custom_canvas_user_id=$Canvas.user.id
- custom_canvas_course_id=$Canvas.course.id
- custom_canvas_user_login_id=$Canvas.user.loginId
9. Remove all the Placements except the Global Navigation Placement by clicking the placement bubbles.
10. Review and edit the Text field for the Global Navigation placement as needed:
- Global Navigation: For the Kaltura My Media tool in the global left-hand navigation.
11. Scroll to the bottom of the page and click Save.
Step 8 - Create a Scoped API Developer Key
- Log into Canvas as an administrator.
- Navigate to the Developer Keys page.
- On the Developer Keys page, click + Developer Key and select + API Key from the drop-down menu.
- Configure the following:

The 'Key Settings' page displays.

- Key Name - Kaltura Scoped API Key
- Owner Email - Optional
- Redirect URLs - Enter the following four KAF URLs:
- For {your_KAF_base_URL}, use your PID-based KAF domain or your KAF domain alias or vanity domain, if applicable.
- Make sure there is no / (slash) at the end of the URL.
- https://{your_KAF_base_URL}/canvas/index/create-token-from-code/target/browseandembed
- https://{your_KAF_base_URL}/canvas/index/create-token-from-code/target/browseandembed?type=quiz
- https://{your_KAF_base_URL}/canvas/index/create-token-from-code/target/course-gallery
- https://{your_KAF_base_URL}/canvas/index/create-token-from-code/target/my-media
- Vendor Code (LTI 2) - Leave blank
- Icon URL - Optional
- Notes - Optional
- Test Cluster Only - Leave unchecked
- Client Credentials Audience - Select Canvas
Your Key Settings will now look similar to the following:

5. Scroll to the top of the page. If Enforce Scopes is not enabled (the toggle is not green and checked), click the toggle to enable it.

The 'Enforce Scopes' section expands.

Leave Allow Include Parameters unchecked.
6. Scroll down to Courses and click to expand.
7. Check the following scopes:
- url:GET|/api/v1/courses
- url:GET|/api/v1/courses/:id

8. Scroll down to Users and click to expand.
9. Check the following scope:
- url:GET|/api/v1/users/:user_id/profile

10. Click Save.
The 'Developer Key Created' message displays:

11. Copy the API Developer Key secret and store it in a secure location.
Make sure to copy the API Developer Key secret before closing the dialog box. After the dialog box is closed, the secret can no longer be viewed.
12. Click Close.
The 'Developer Keys' page displays.
13. Select the Account tab.

14. Locate the Scoped API Developer Key you created and click the State toggle to turn on the key.
A confirmation message appears.
15. Click Switch to On.
When enabled, the toggle turns green.
Step 9 – Add the LTI Developer Keys to your KAF
- In Canvas, navigate to the Developer Keys page (https://{your_Canvas_base_URL}/accounts/1/developer_keys) .
- On the Developer Keys page, locate the listing for the developer key you created in Step 4 - Create a Canvas LTI developer key for all Kaltura tools except My Media and copy the Client ID from the Details column.
- Log into your KAF Configuration Management page (https://{your_KAF_base_URL}/admin).
- Navigate to the Hosted module (https://{your_KAF_base_URL}/admin/config/tab/hosted).
- Scroll down to the lti13ClientID field and paste in the Client ID.
- Scroll down to the ltiAdditionalIntegrations section and click on + Add “ltiAdditionalIntegrations”
- Configure the following fields within the ltiAdditionalIntegrations section:


The value for “your_Canvas_Domain” will be the domain displayed when a user is working in your Canvas instance. Example. canvas.myuniversity.edu.
- lti13PlatformOidcAuthUrl = https://{your_Canvas_Domain}/api/lti/authorize_redirect
- lti13AuthTokenUrl = https://{your_Canvas_Domain}/login/oauth2/token
- lti13KeysUrl = https://{your_Canvas_Domain}/api/lti/security/jwks

8. Return to the Canvas Developer Key page and locate the listing for the developer key you created in Step 6 - Create a Canvas LTI developer key for the Kaltura My Media tool and copy the Client ID from the Details column.
9. Return to the Hosted module's ltiAdditionalIntegrations settings and paste in the Client ID to the lti13ClientId value.
10. Scroll to the bottom of the Hosted module and click Save.
Step 10 - Set API Developer Key in Canvas module
- Log into your KAF Configuration Management console and open the Canvas module. You can also navigate directly: (https://{your_KAF_base_URL}/admin/config/tab/canvas).
- Scroll down to the useScopedKey field and set it to 'Yes'.
- Set the enableUserProfileScope field to 'Yes'.
- Fill in the customAppId and customAppKey fields using the Client ID and API Developer Key secret you created for the Scoped API Developer Key above:

The 'Canvas' page displays.

This exposes the Canvas Account API Developer Key settings.

This setting works with the Canvas user profile scope configured when creating the Scoped API Developer Key and helps prevent repeated authorization prompts when users switch between Canvas environments or Kaltura tools.
- In Canvas, navigate to the Developer Keys page and locate the Canvas API Developer Key you created.
- Copy the Client ID and paste it into the customAppId field in the Canvas module.
- Copy the API Developer Key secret that you saved when creating the Scoped API Developer Key and paste it into the customAppKey field in the Canvas module.

The Canvas module useScopedKey section should now look like this:

5. Scroll to the bottom of the Canvas module and click Save.
Step 11 – Add the Kaltura Apps in your Canvas sub-account
- Log into Canvas as an administrator and navigate to the Developer Keys page.
- On the Developer Keys page, locate the Kaltura LTI 1.3 – no My Media LTI Developer Key you created and copy the Client ID from the Details column.
- In the Account navigation panel select Sub-Accounts, and then click on the Sub-account you want to add the Kaltura Apps to.
- In the Sub-Account navigation panel scroll to the bottom and click on the Settings tab (https://{your_Canvas_base_URL}/accounts/1/settings#tab-settings).
- On the Settings page, click the Apps tab.
- Click View App Configurations.
- Click +App.
- Click on the Configuration Type drop-down menu and select By Client ID.
- Paste the Client ID copied in Step 4 - Create LTI developer key into the Client ID field.
- Click Submit.
- Return to the Canvas Developer Keys page, and locate the Kaltura LTI 1.3 – My Media only LTI Developer Key you created and copy the Client ID from the Details column.
- Repeat steps 3-10 of Step 11.


The Settings page displays.

The External Apps page displays.

A list of apps displays.

The Add App page displays.


Step 12 - Configure the Kaltura user ID value
The default Kaltura User ID is your Canvas User ID, which is often the same as the user’s email address. If your organization uses a different value for User IDs, please refer to Configuring the Kaltura User ID Value to Use with Your LMS Integration before proceeding.
With the Kaltura LMS Video integration, user ID records are passed from the LMS to Kaltura during the LTI Launch. When using LTI 1.3 authentication, admins can configure which LTI attribute to use for the user ID in the Hosted module.
Kaltura uses a custom parameter in Canvas to store the User ID value. To set this up:
- Log into your KAF Configuration Management page (https://{your_KAF_base_URL}/admin).
- Navigate to the Hosted module (https://{your_KAF_base_URL}/admin/config/tab/hosted).
- Scroll down to the ltiUserIdAttribute setting.
- Set ltiUserIdAttribute to custom_canvas_user_login_id.

- Scroll to the bottom of the Hosted module and click Save.
- For roles and permissions, see Manage roles and permissions in LMS Video integrations.
- For account-level setup, see Kaltura LMS Video integration for Canvas - Installation and setup (LTI 1.3).
