About
This article describes how to troubleshoot common issues and questions on Kaltura Virtual Events.
This article pertains only to multi-session events.
Types of users
There are three types of Kaltura Events users - Admin, Organizer, and Content manager.
Admin is the platform admin; the one who has access to all configurations and events created for this account, adds/removes team members, and manages their user type.
Organizer manages specific event(s). The Organizer has full access only to events they manage and within them can manage and configure all the different capabilities, settings, content, and people. Organizers are also assigned as moderators on their events.
Content manager manages content of specific events. The Content manager is responsible for curating, organizing, and managing the content that will be presented during the event. Content managers cannot create events and do not have access to the full user list, analytics, and reports.
Event roles
In addition to Admin, Organizer, and Content manager user types, there are also event roles such as Session Moderators and Speakers which have additional permissions on the event/session level.
Session Moderators moderate the chat on live sessions. For Interactive webinars and Live DIY sessions, they act as the Interactive Room Host, are allowed to launch the room, and moderate the chat.
Speakers are users with added "speaker" metadata. They can enter the room prior to the session once the Moderator has launched the session.
Finally, we have Attendees.
Attendees are users with viewing permission only for a specific event. They can access the event site after registration.
Below are some common questions a Tier One Support Team member may receive from Organizers and Session Moderators.
I'm a moderator. Why can't I moderate and manage the Chat and Collaboration activity?
Moderators must be assigned at both Event Level and Session Level in order to moderate and manage the Chat and Collaboration activity.
The team member who created the event (AKA "Event Organizer") is automatically assigned as "Moderator" to both the event they created (at the "Event Level") and the first session that was created as part of the event (at the "Session Level"). However, the team member who created the event (AKA "Event Organizer"), as well as any other moderators must be manually assigned to all subsequent sessions that are added to the event.
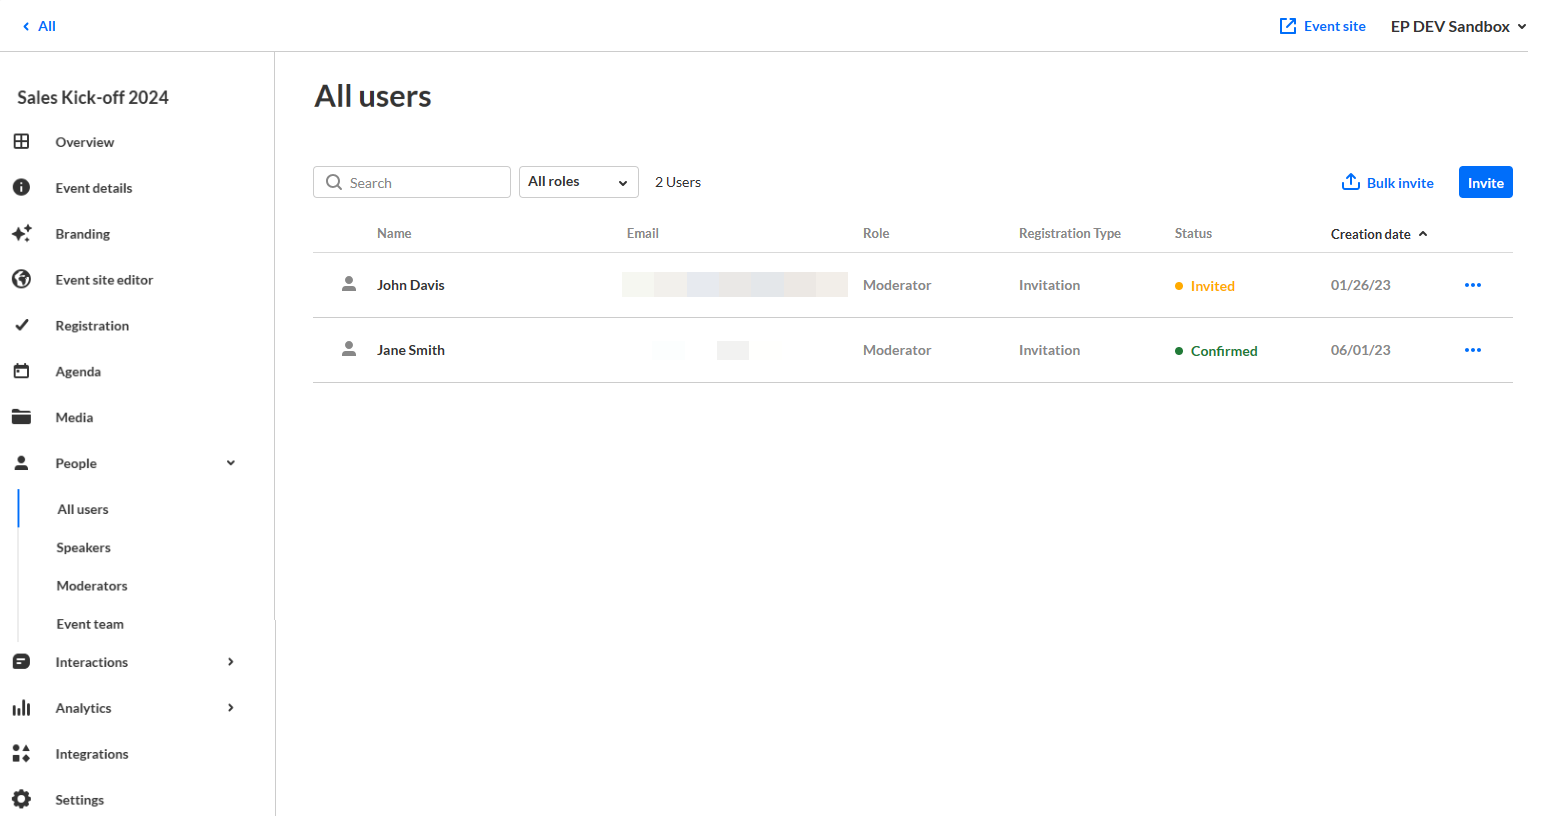
Check to ensure the user is assigned as moderator at the event level
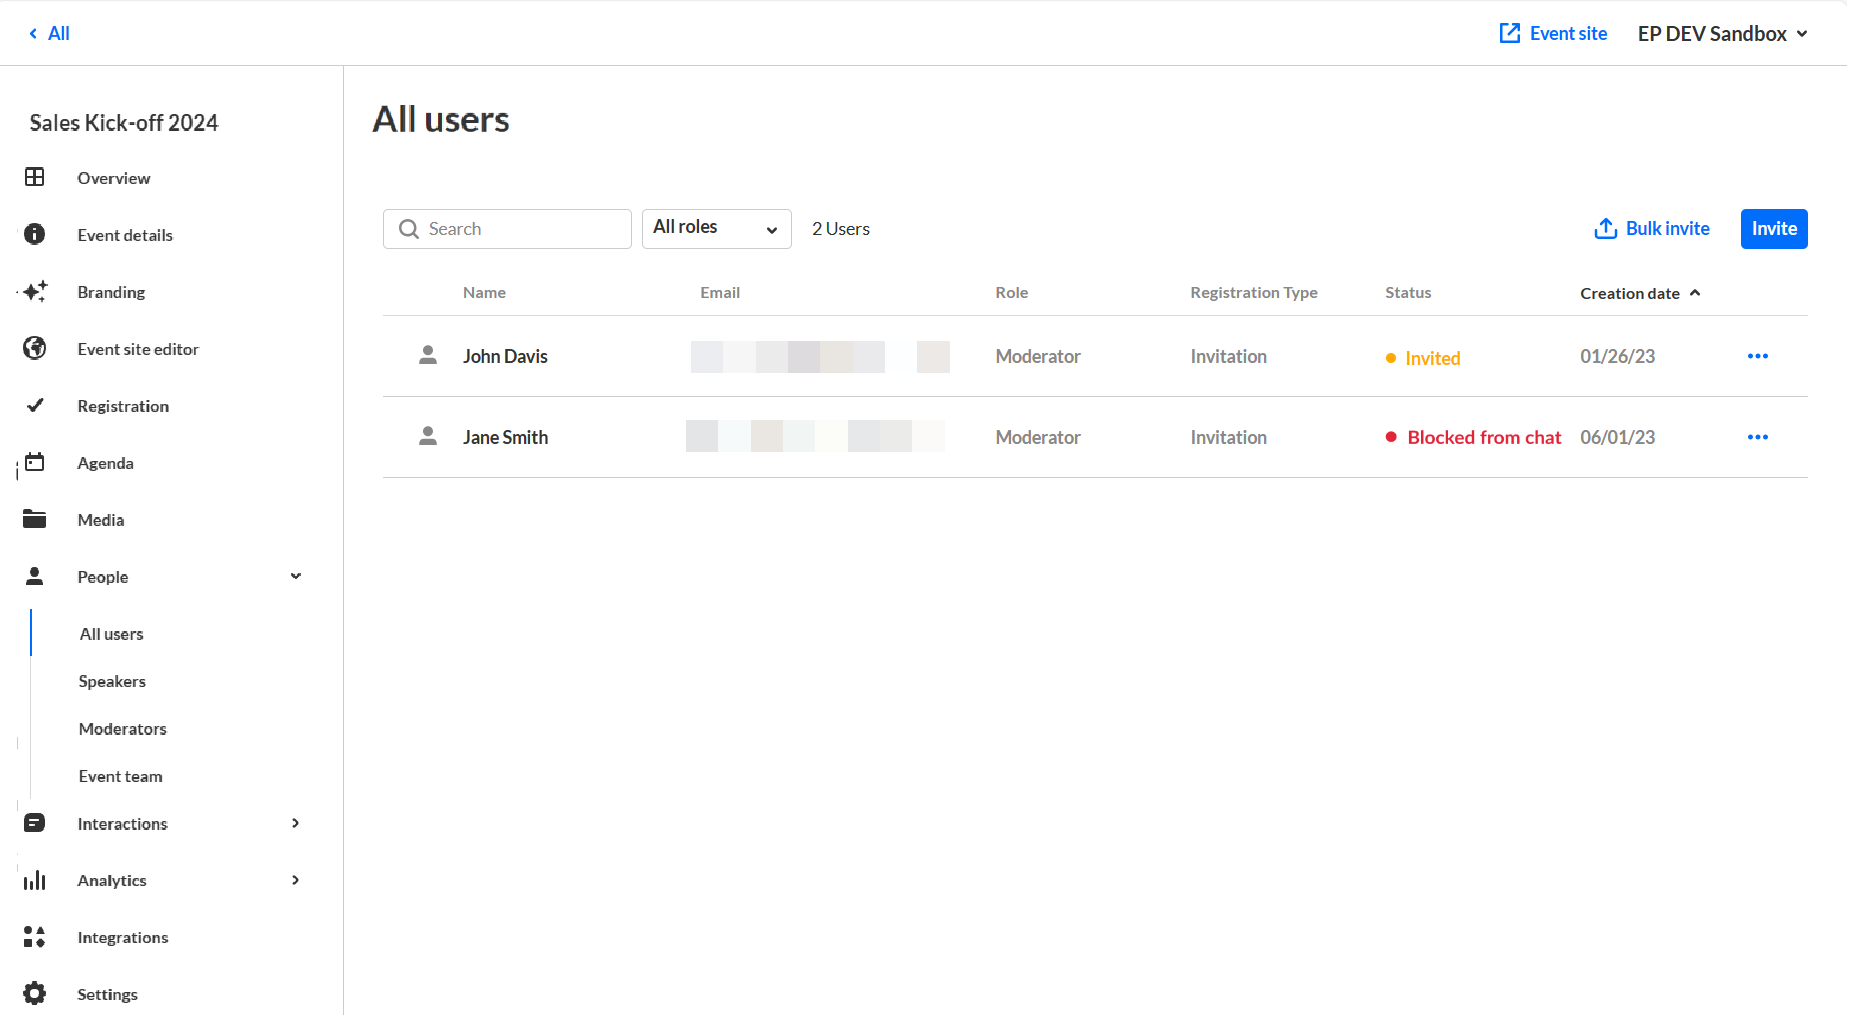
- Navigate to the Users page; from the Event page, click the People tab > All users.
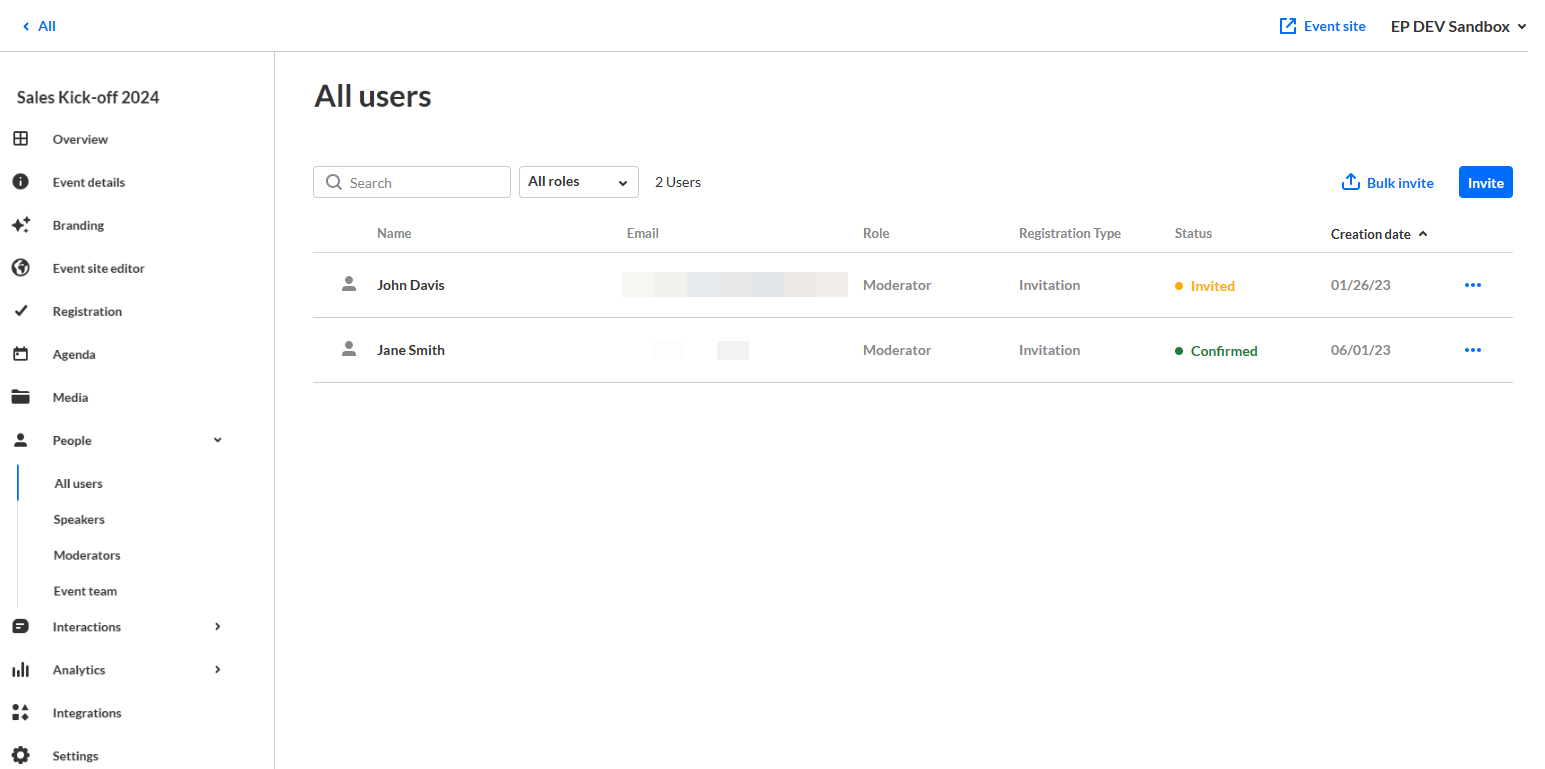
- Click the three blue dots to the right of the user you wish to moderate the session and select Edit.
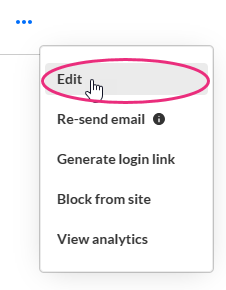 The Edit User window displays.
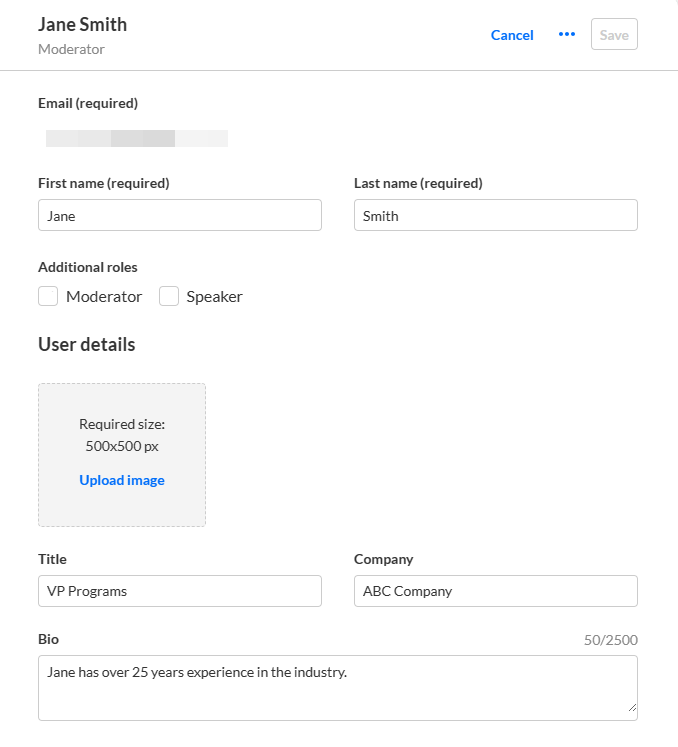
- Ensure the user is marked as Moderator in the Additional roles section (the checkbox next to the user's name must be checked). If not, click the checkbox next to the user's name and then click Save.

 The Edit User window displays.

Check to ensure the user is assigned as moderator on the relevant session (session level)
- Navigate to the Agenda page; from the Event page, click the Agenda tab.
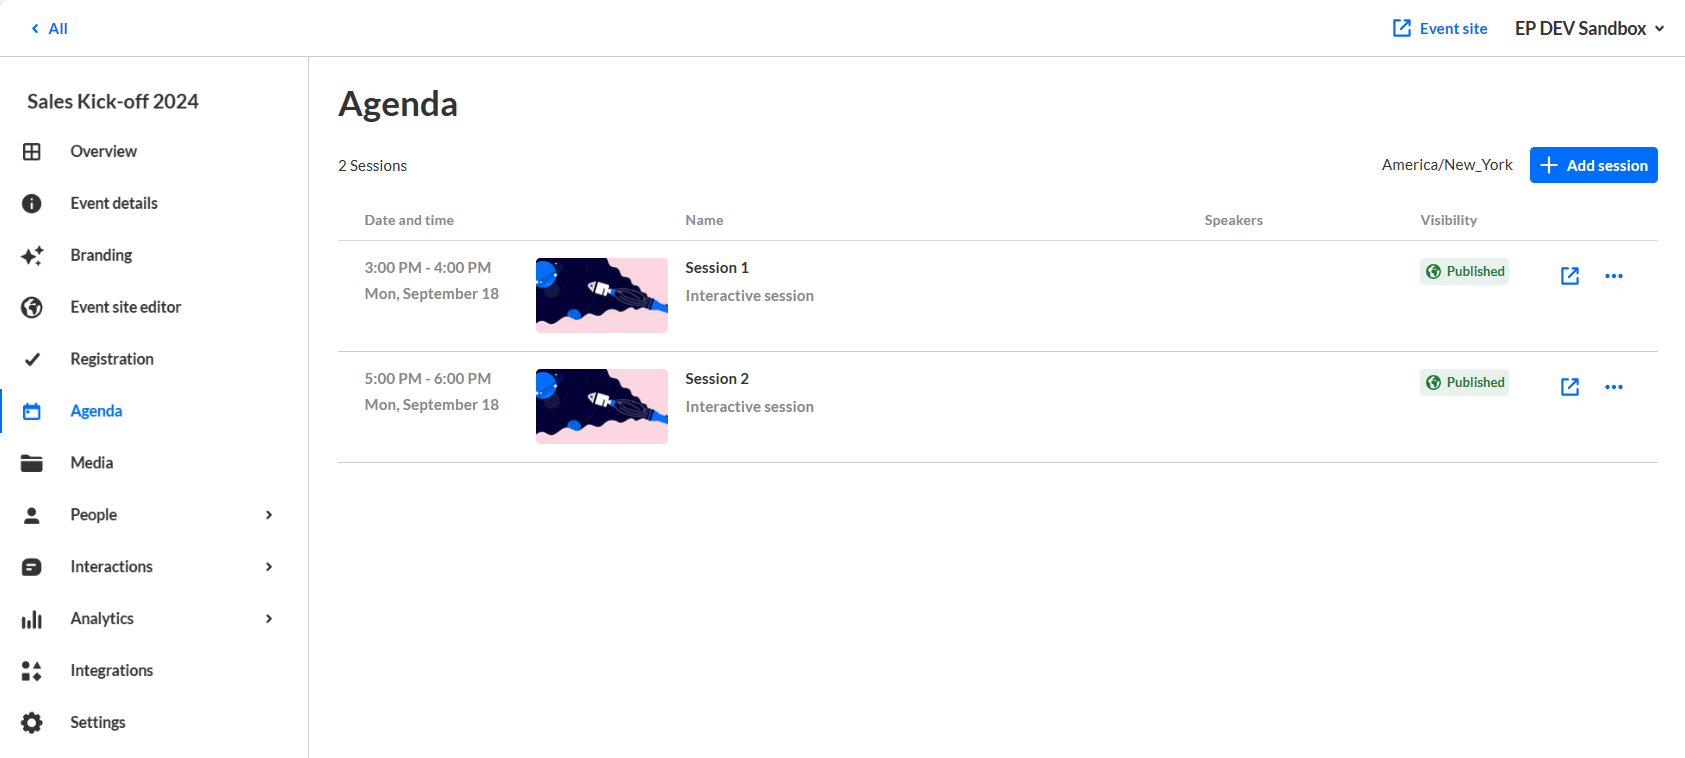
- Click the three blue dots to the right of the session the user wants to moderate and select Edit.
 The Edit Session window displays.
- Scroll down and click the down arrow to the right of the Moderators (required) section.
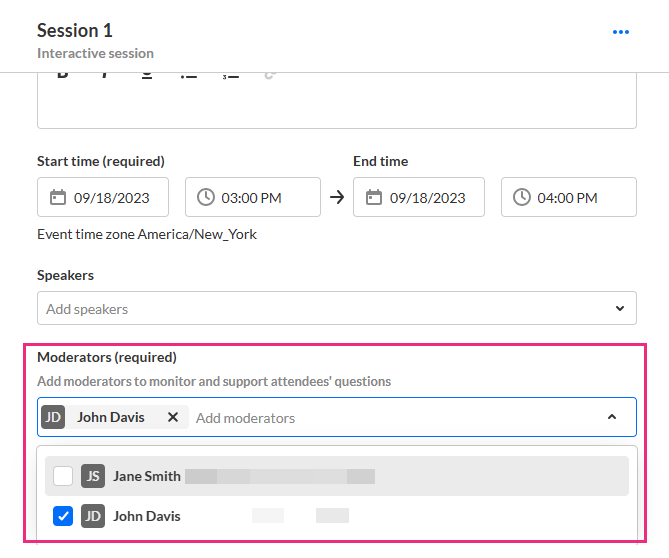
- Ensure the user is marked as Moderator on this session (the checkbox next to the user's name must be checked). If not, click the checkbox next to the user's name and then click Save changes.

 The Edit Session window displays.


Why can't registered attendees access the event via the login link that was sent via email?
Why did the status of the user who was invited to the event never change from "Invited"?
The login link does expire after a certain amount of time. The user will not be able to use the link after expiration. It is recommended that you re-send the email invitation to the user, thus re-launching the registration process, providing them the opportunity to attain a new login link.
This function is available only for non-SSO users.
Re-send the email invitation to the user
- Navigate to the All users page; from the Event page, click the People tab > All users.
- Click the three blue dots to the right of the user and select Re-send email.
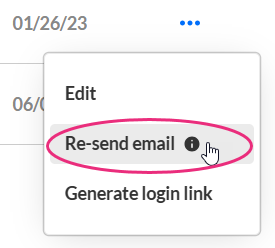
- You receive confirmation that the invitation email was sent successfully.


How do I unblock users from the event site?
How do I unblock users from sending messages in the Chat and Collaborate widget?
Users who have been previously blocked from the event site and/or blocked from sending messages in the Chat and Collaborate widget can be "unblocked" via the Users page.
- Navigate to the All users page; from the Event page, click the People tab > All users.
 In our example, above, the user has been previously blocked from sending messages in the Chat and Collaborate Widget (including Group chat, Q&A, and Private chat).
 - Click the three blue dots to the right of the user and select Unblock from chat.
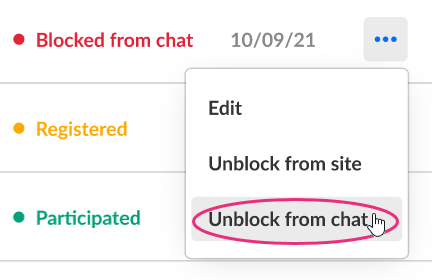 Likewise, if the user had been previously blocked from the Event site, you can click on Unblock from site.
 - You receive confirmation that the user was successfully unblocked from sending messages in the Chat and Collaborate Widget.
 In our example, above, the user has been previously blocked from sending messages in the Chat and Collaborate Widget (including Group chat, Q&A, and Private chat).
  Likewise, if the user had been previously blocked from the Event site, you can click on Unblock from site.
Why can't my attendees access the event site before the event date and time?
The event site may be accessed prior to the event start date/time only when early access is enabled.
If early access is not enabled, attendees remain in the "Lobby Page" and are not permitted to access the event site until 5 minutes before event start time.
Enable early access
- Navigate to the Event details page; from the Event page, click the Event details tab.

- In the Early access section, click the toggle switch to enable the feature. This will give attendees access to the event site before the event starts.
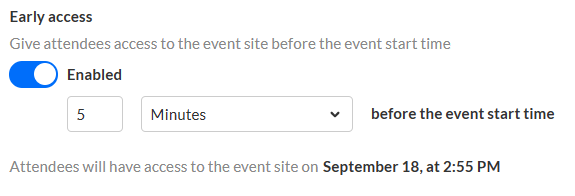
- Use the field and pull-down menu to select the minutes, hours, days, or weeks ahead of start time that your attendees will be able to access the event site.
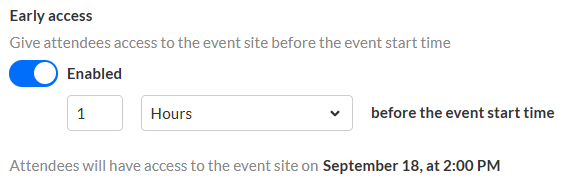
In the example above, we are allowing our attendees to access the Event site one hour before event start time. - Click Publish changes.


Why aren't my attendees able to ask the Moderator questions via the Q&A tab of the Chat and Collaborate widget before the event date and time?
You can define your live session's moderation schedule in Chat settings. If you want your attendees to be able to ask questions of the moderator before the event starts, you must set the moderation to begin before the session starts.
- Navigate to the Chat Settings page; from the Event page, click the Interactions tab > Chat settings.
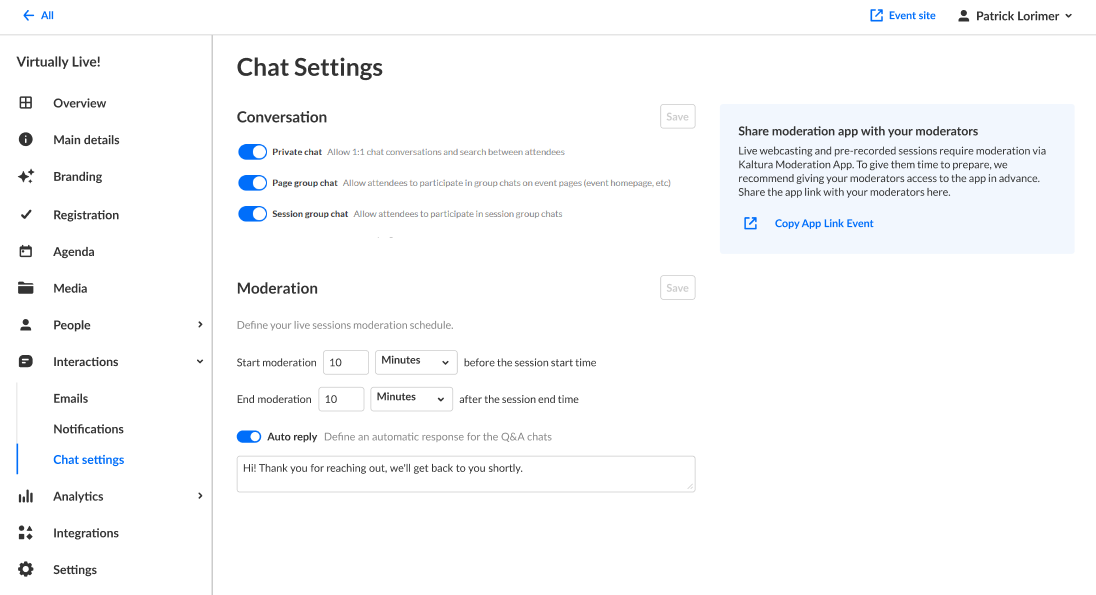
- In the Moderation section, set when you would like moderation to start and end for your live session.
In the example below, we are starting moderation 1 hour before the session start time and ending moderation 15 minutes after the session end time. That means attendees can ask questions of the moderator 1 hour before the session all the way until 15 minutes after the session has ended.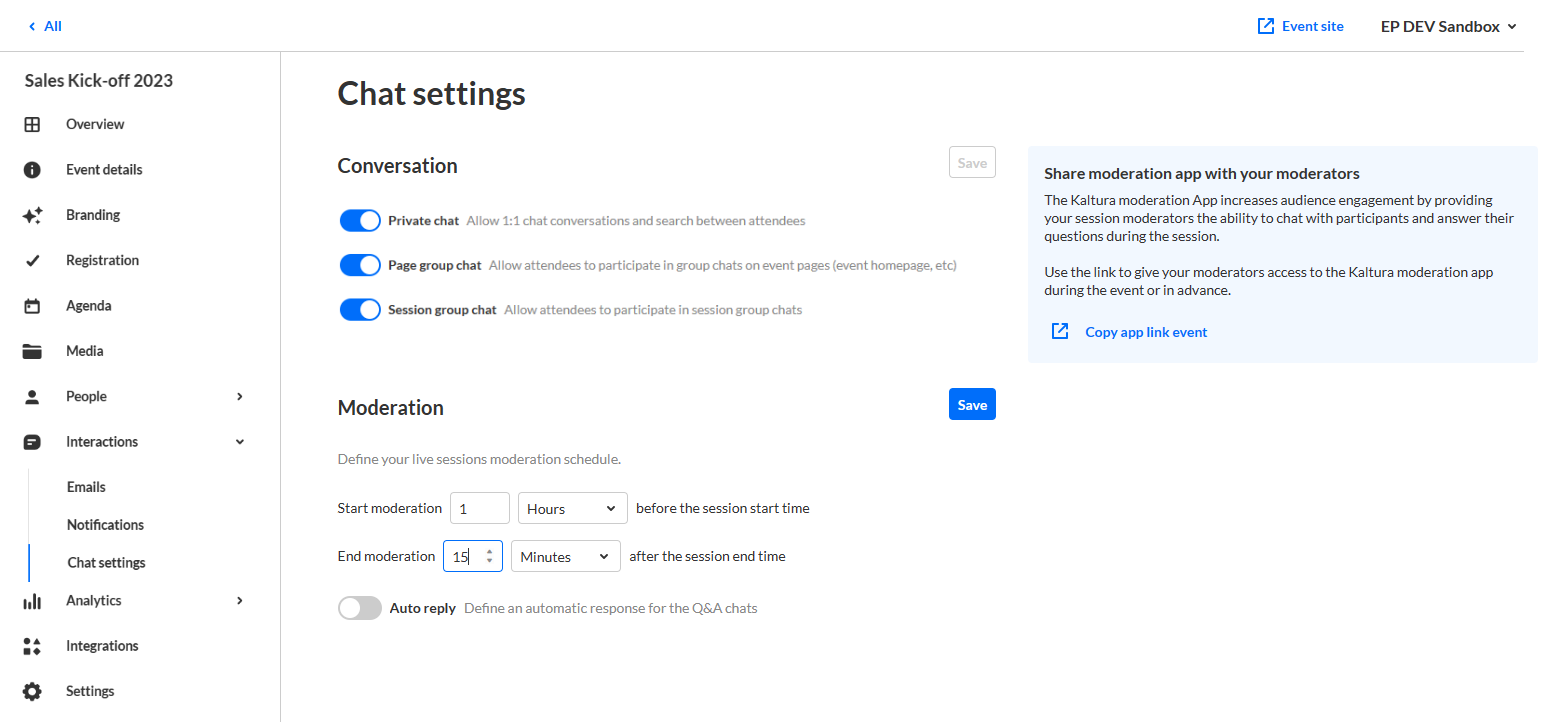
- Once you are finished setting your moderation schedule, click Save.


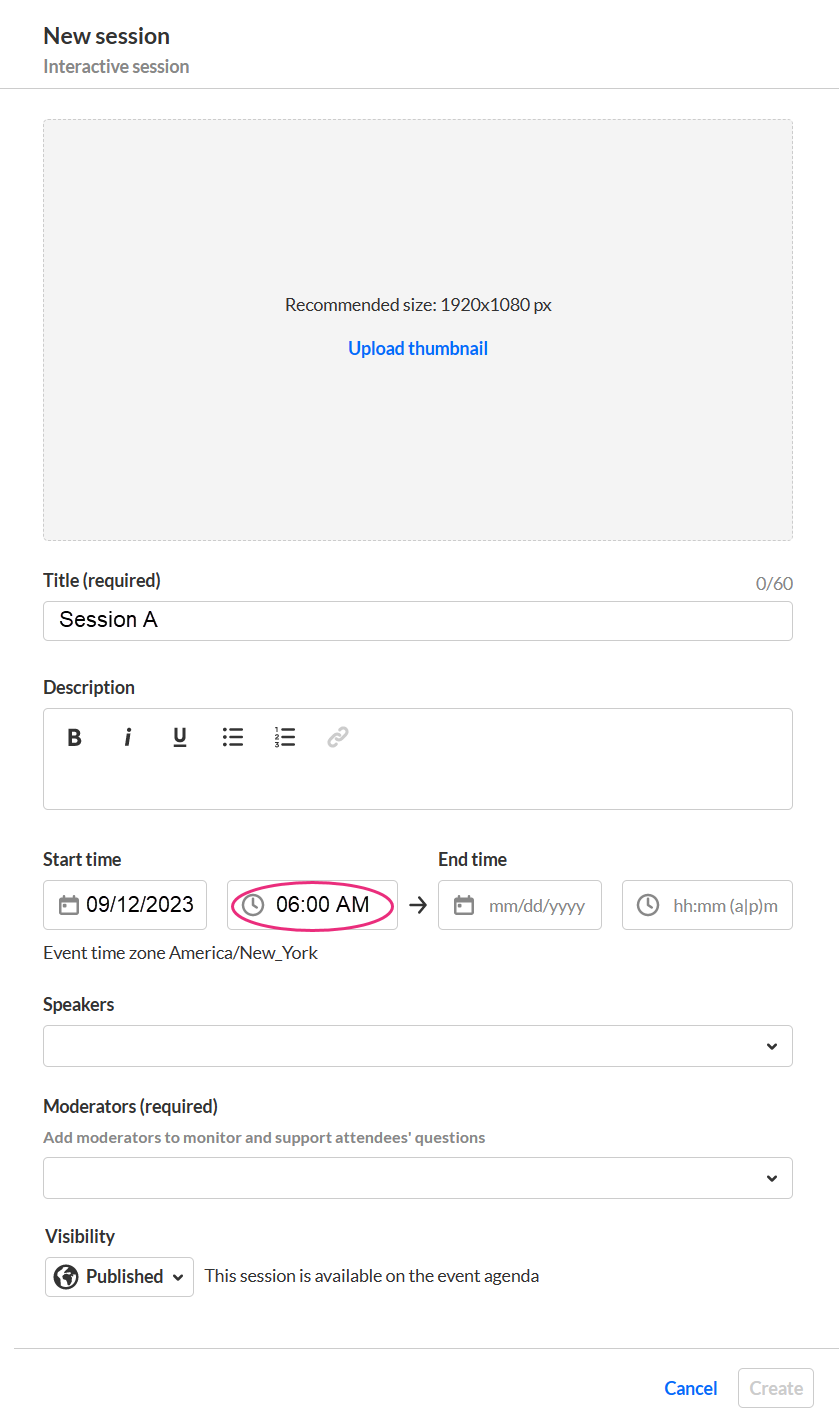
Why doesn't my session start time match the event hours?
If you are creating an event that contains a session in a time zone other than the one stipulated during event creation, be sure the details of that session reflect the time for that region.
The time zone stipulated at event creation is not editable per session.
Use case:
When creating an event, I choose "EDT America/New_York" time zone.
I want to add a session to my event for a group of attendees in Israel. Because Israel is 7 hours ahead of New York, I must factor that in when entering details for this session. So, if I want this session to start at 1:00 PM in Israel, I need to enter a start time of 6:00 AM in the session details because 6:00 AM in New York is equivalent to 1:00 PM in Israel.
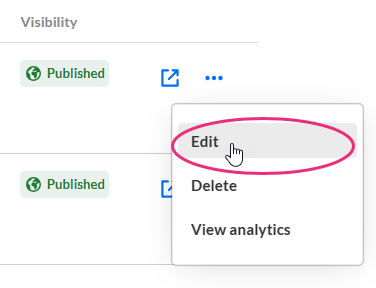
How do I control visibility for sessions as part of an on-going event?
You can control your session's visibility in the Edit Session page.
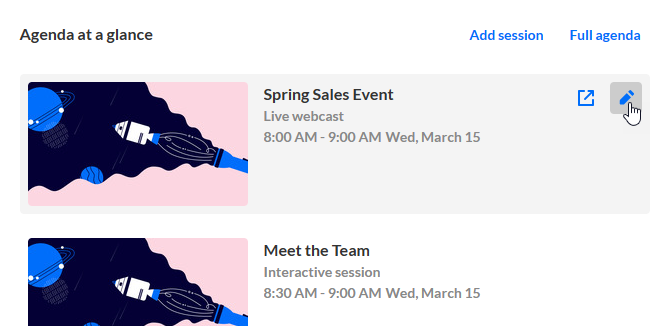
- Navigate to the Edit Session page. On the Event Overview page, in the Agenda at a glance section, hover over the session you would like to edit, then click the blue pencil (edit) icon.
OR
On the Event Agenda page, click the name of the session, or the three blue dots to the right of the session and choose Edit.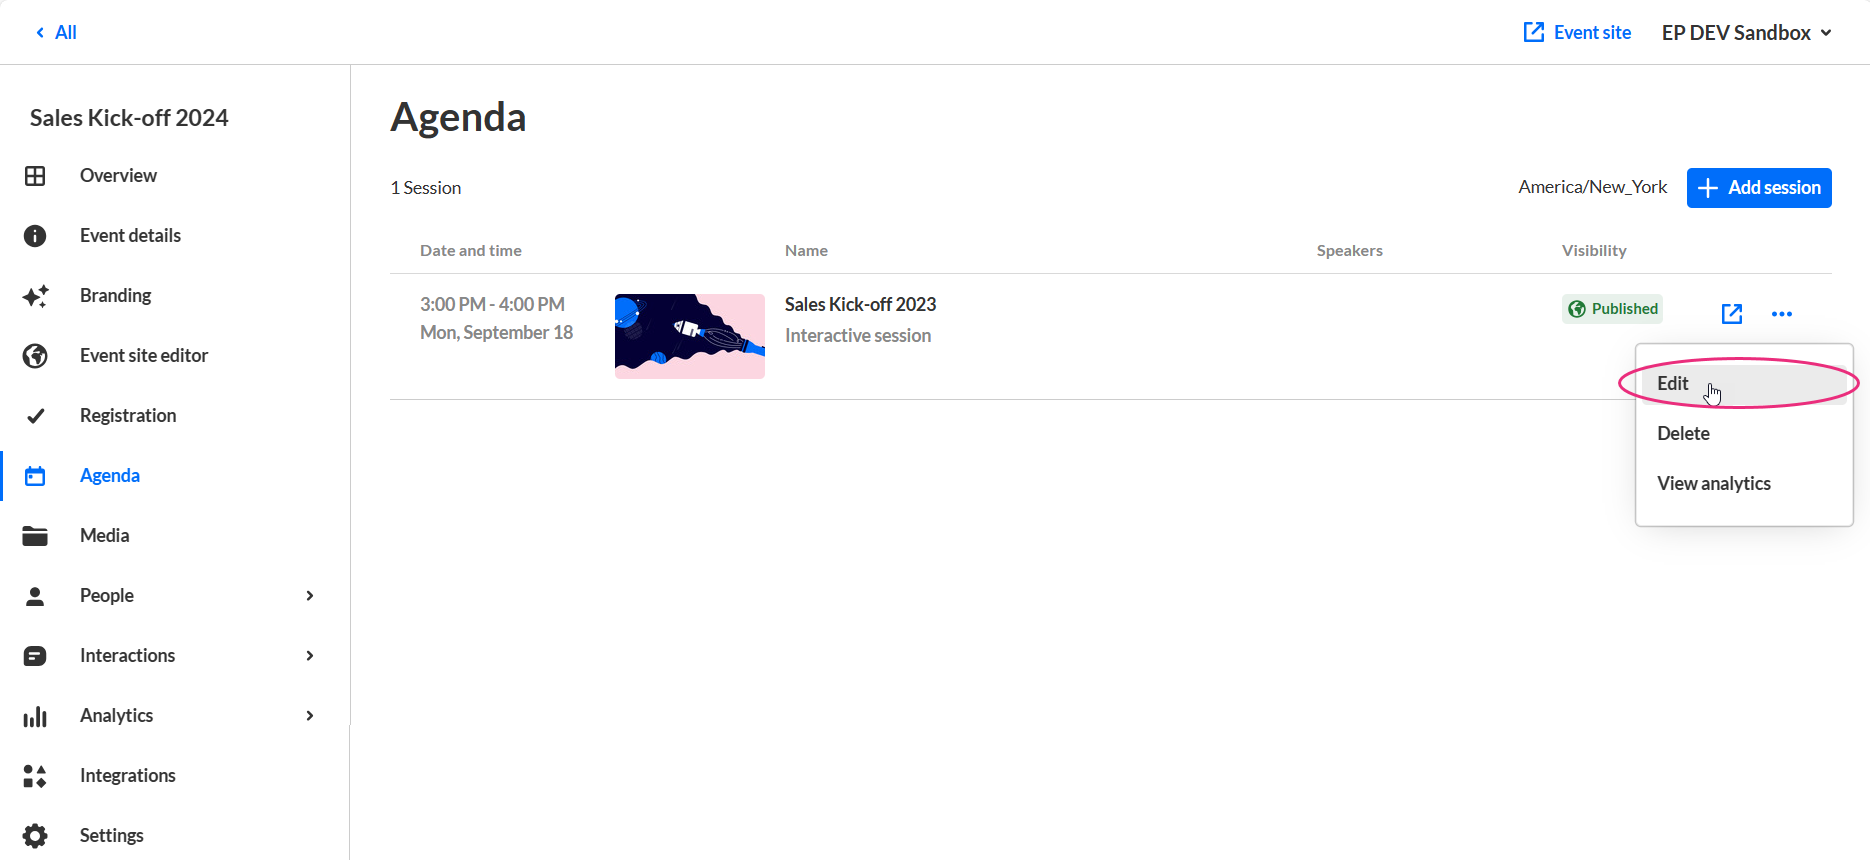 The Edit session page displays.
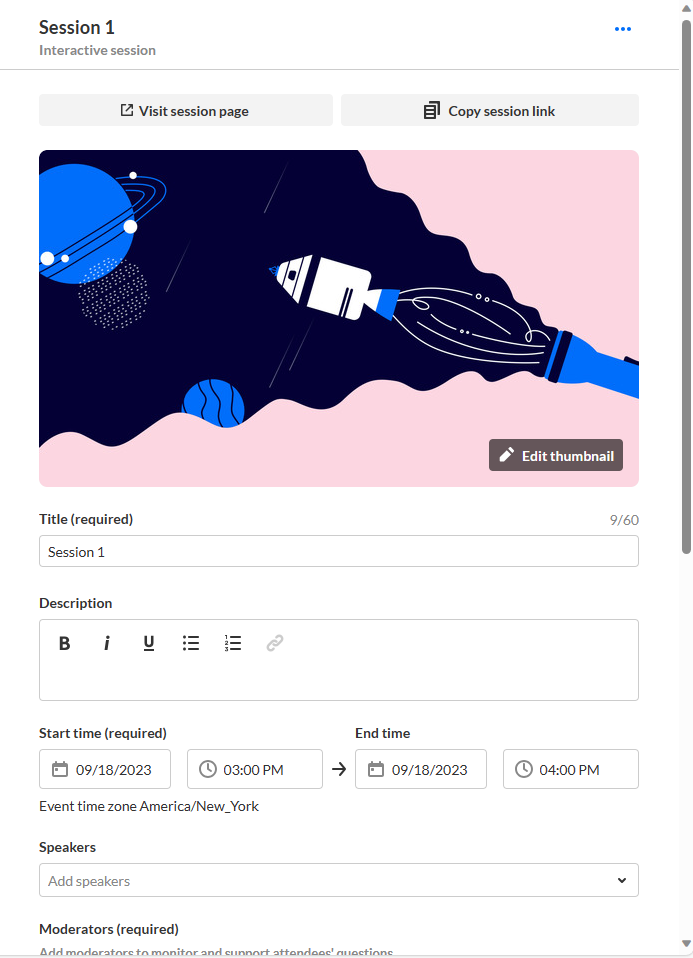
Fields in the Edit session page differ according to the session type. Below is an example of an Edit Session page for a DIY live webcast, therefore the fields relevant to a DIY live webcast session are displayed.
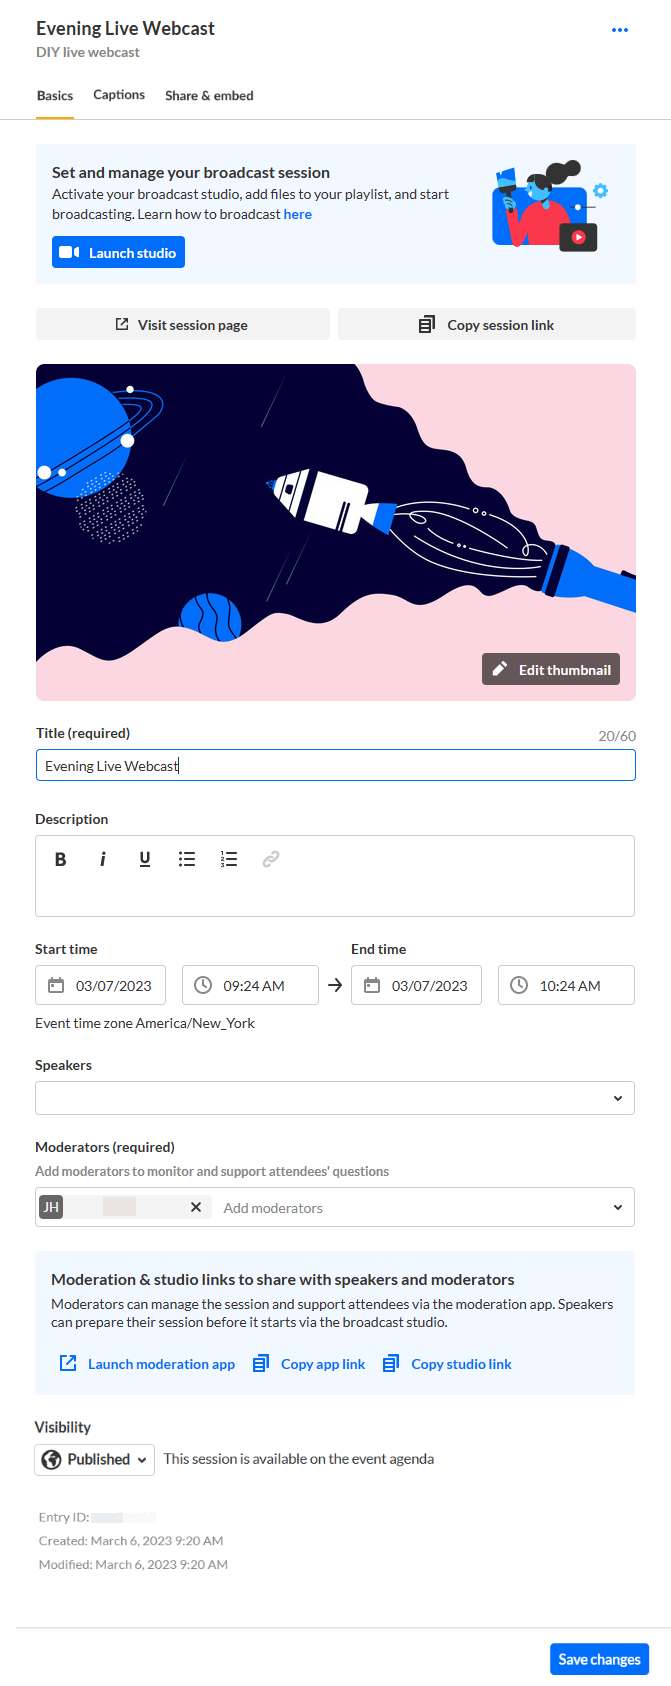
- In the Visibility section, use the pull-down menu to choose visibility of the session.
Private - The session will be available only for team members, not for attendees. It will not be visible on the event site and cannot be accessed outside of the event platform.
Unlisted - The session will be reachable via direct link only (for all authenticated users on the event site).
Published - The session will be available on the event agenda, and accessible to all on the event site. - Click Save changes.

 The Edit session page displays.

I am a team member who created the event (AKA "Event Organizer"). Why can’t I see the analytics of past events?
Be sure to apply the proper time frame when pulling reports and filtering dashboards.
For our example below, we will access user analytics and demonstrate how to apply filter for a certain time frame.
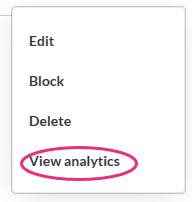
- Navigate to the Users Analytics page; from the Event page, click Users tab then click the three blue dots to the right of the creation date and choose View analytics.
 The User Analytics page displays.
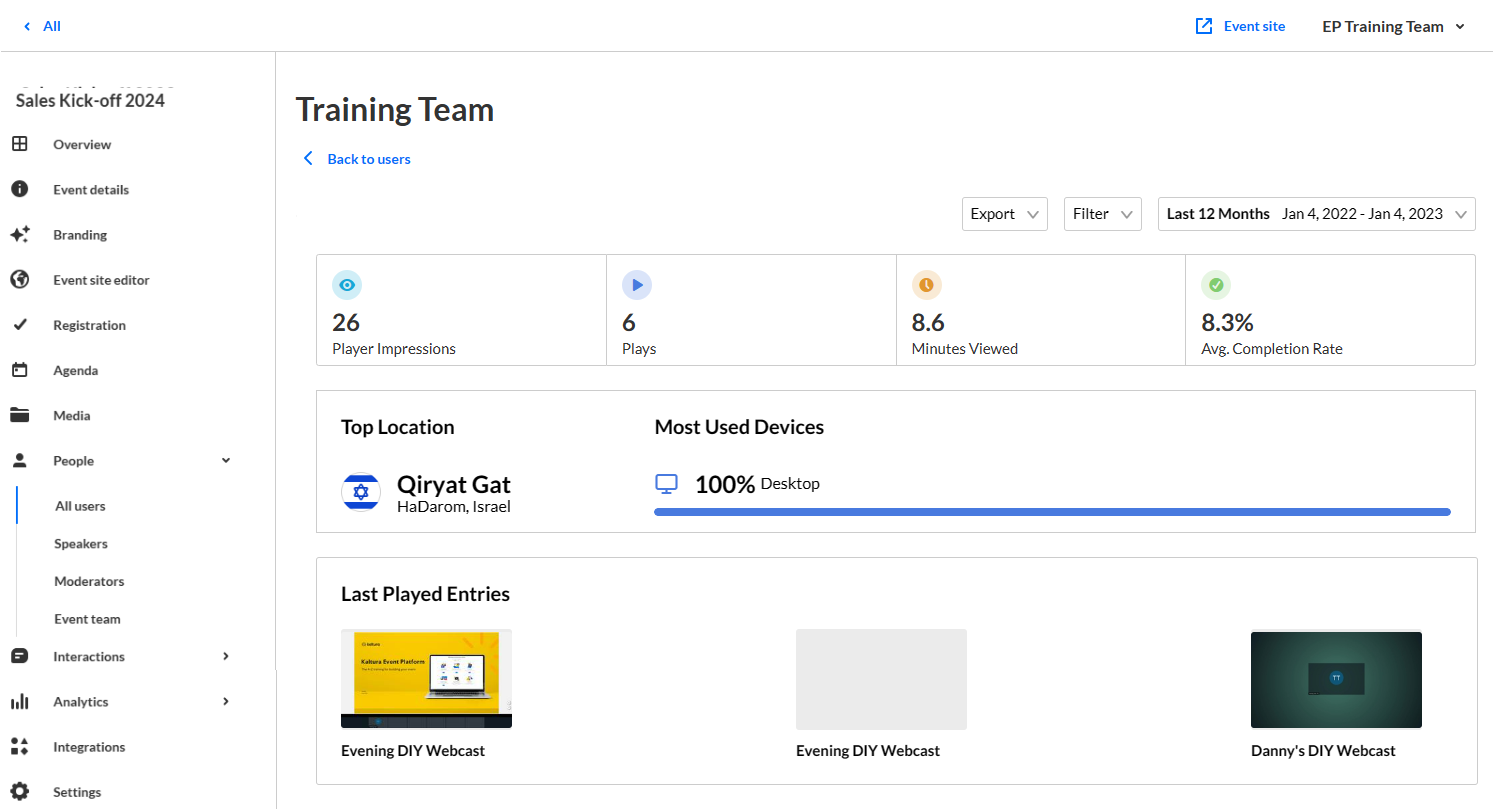
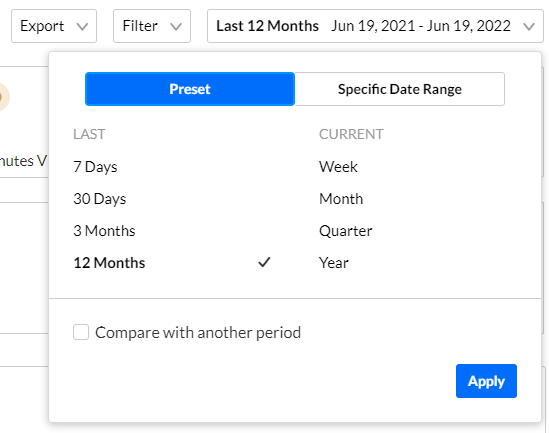
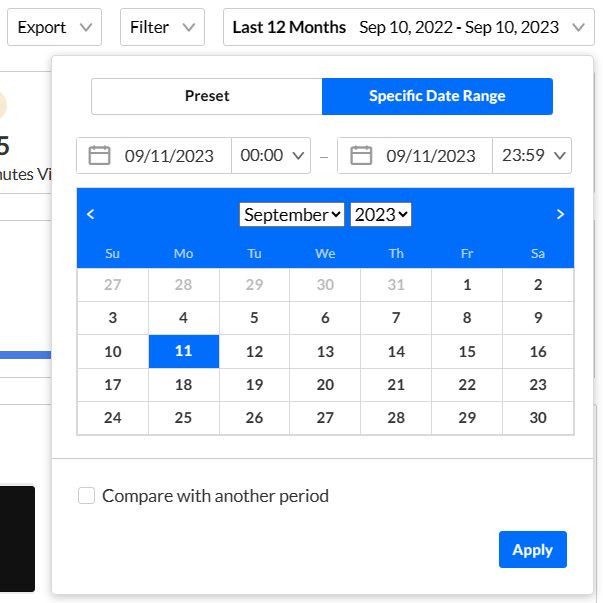
- Click the third pull-down menu on the right side of the page (Last 12 Months) and choose from a Preset list or a Specific Date Range.
 The User Analytics page displays.
 |
 |
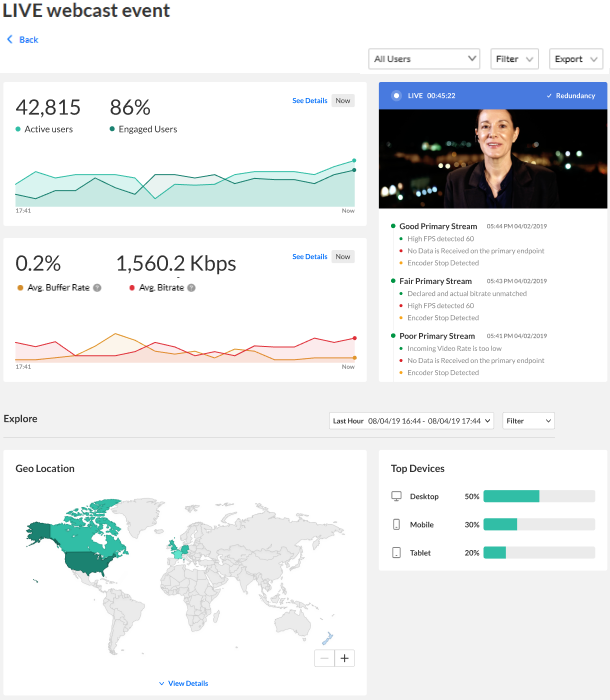
I am a team member who created the event (AKA "Event Organizer"). Why can’t I see the real time dashboard data?
Real-time analytics are available on your live session during the session and data is saved for 7 days after the broadcast. As a best practice, make sure to export data and save it locally during this time frame.
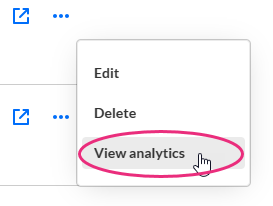
- Navigate to the Session Analytics page; from the Event page, click Agenda tab then click the three blue dots to the right of the session and choose View analytics.
 The Session Analytics page displays.
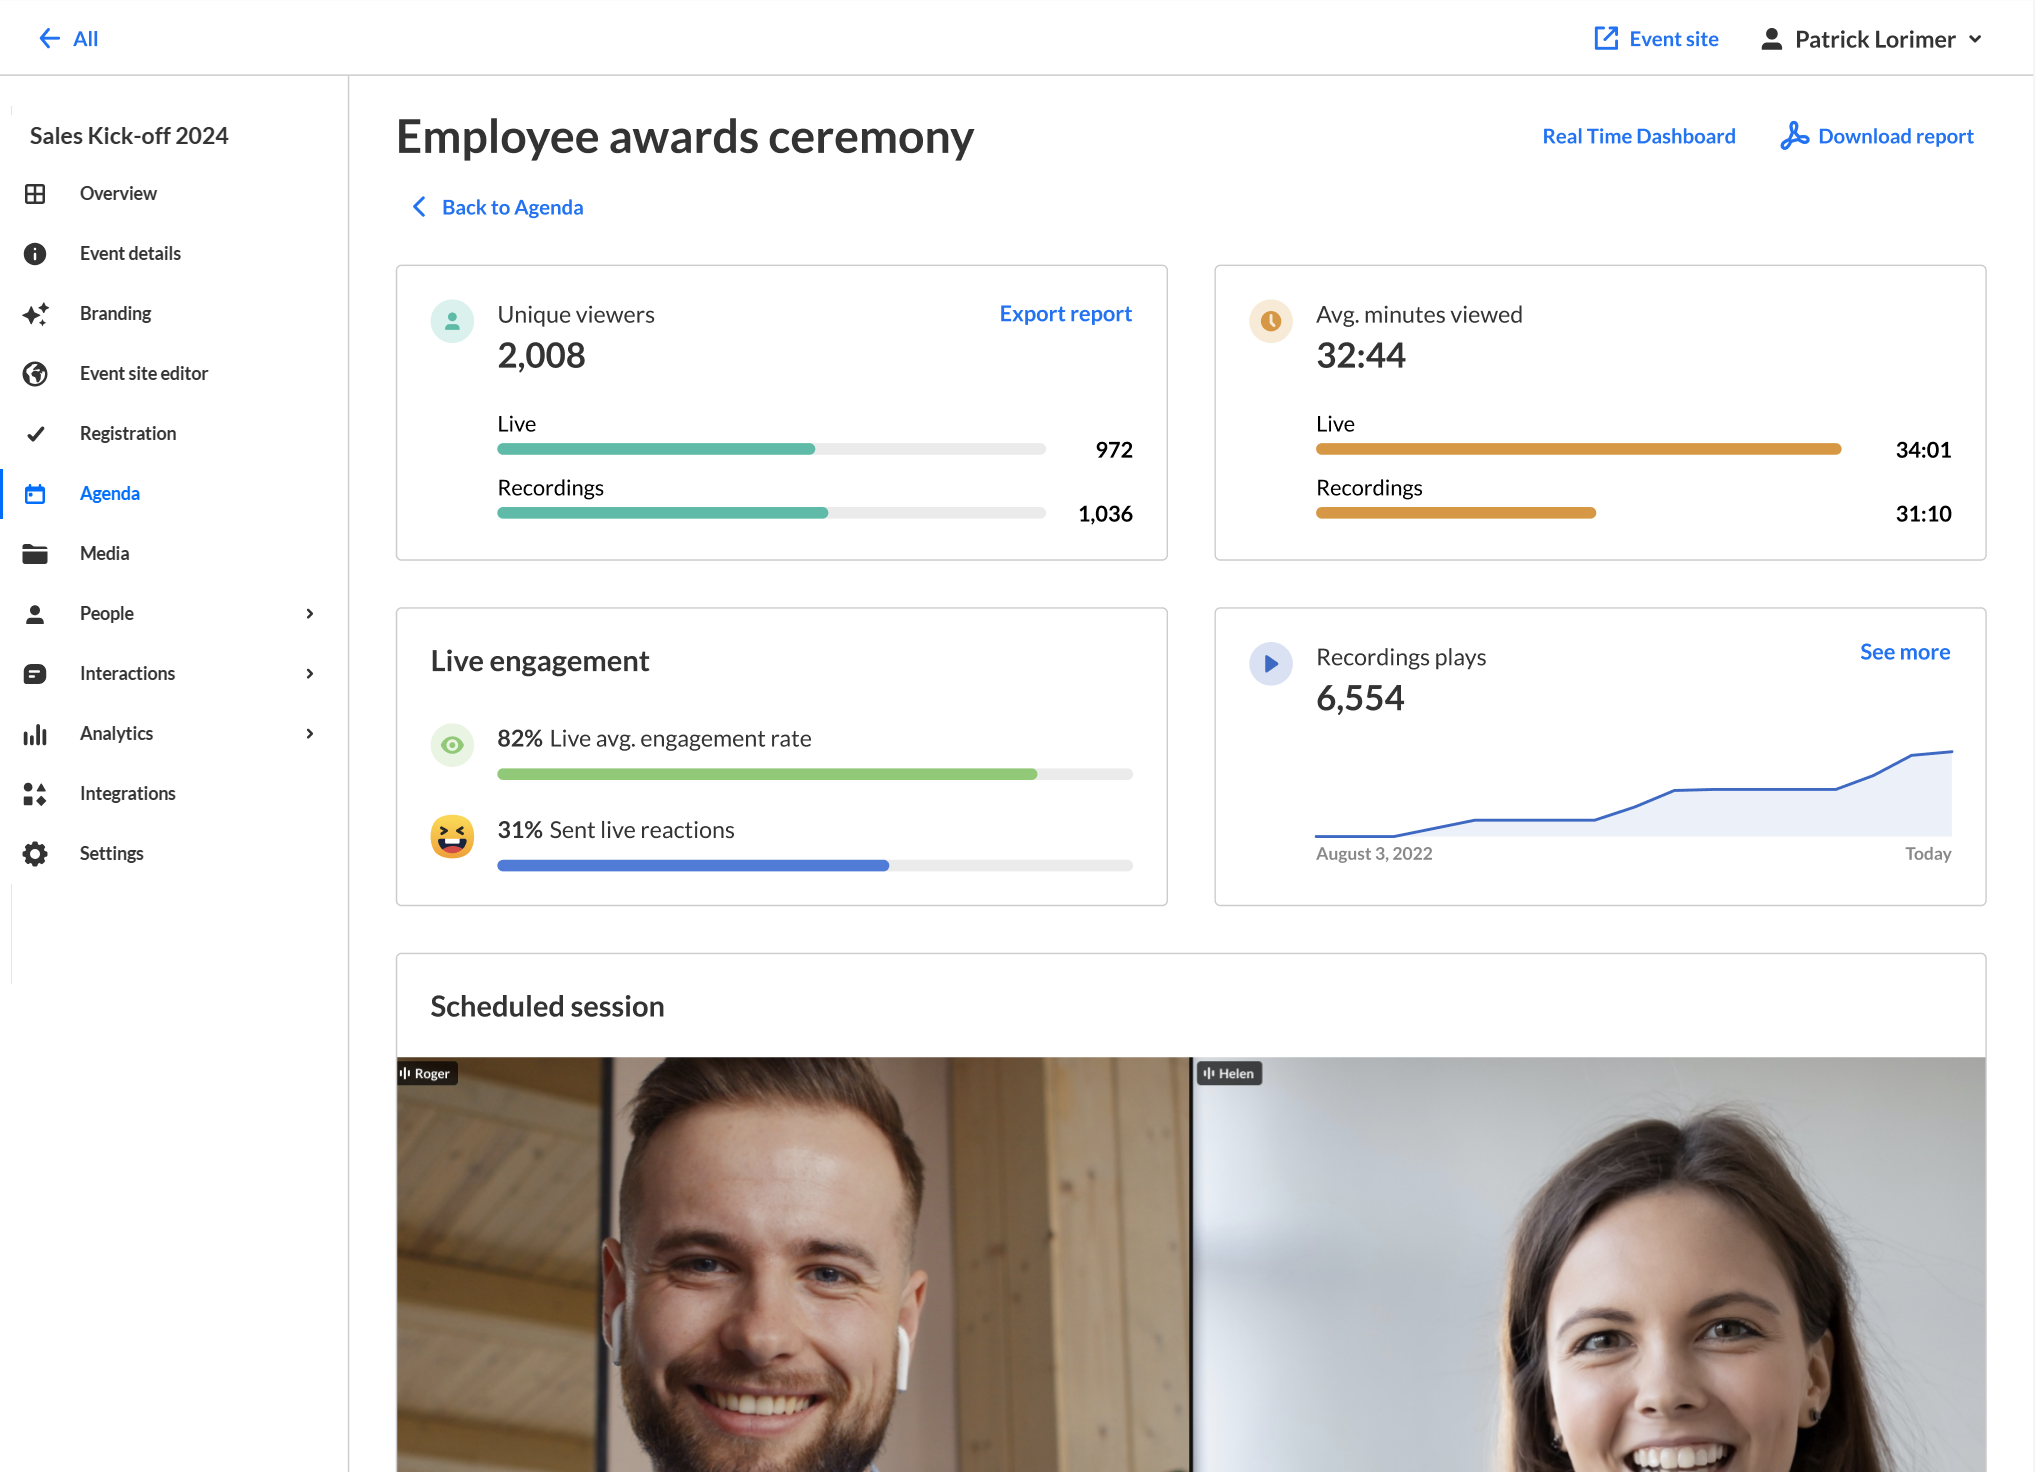
- Click Real Time Dashboard. The Real Time Dashboard displays.
- Click the Export pull-down menu, choose your report, then click Export Reports.
 The Session Analytics page displays.


