- Login to your InPlayer dashboard.
- Click on the Assets button on the left side of your screen.
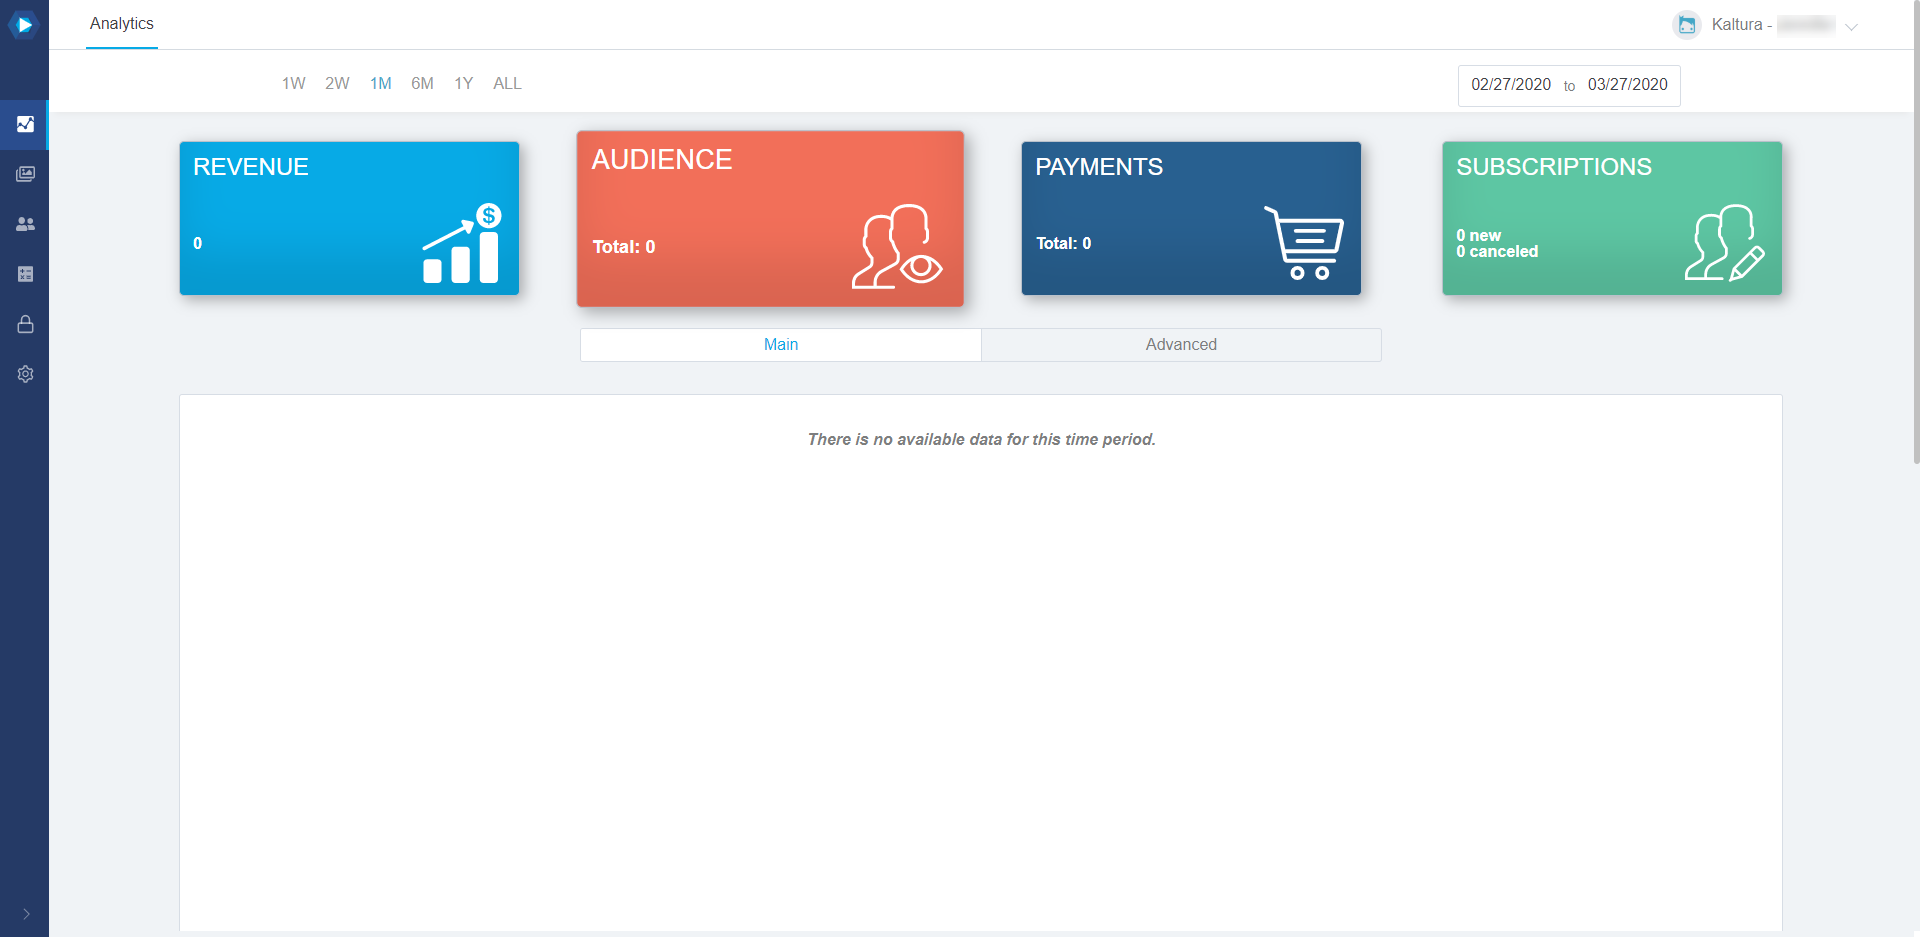
 Your assets screen displays.
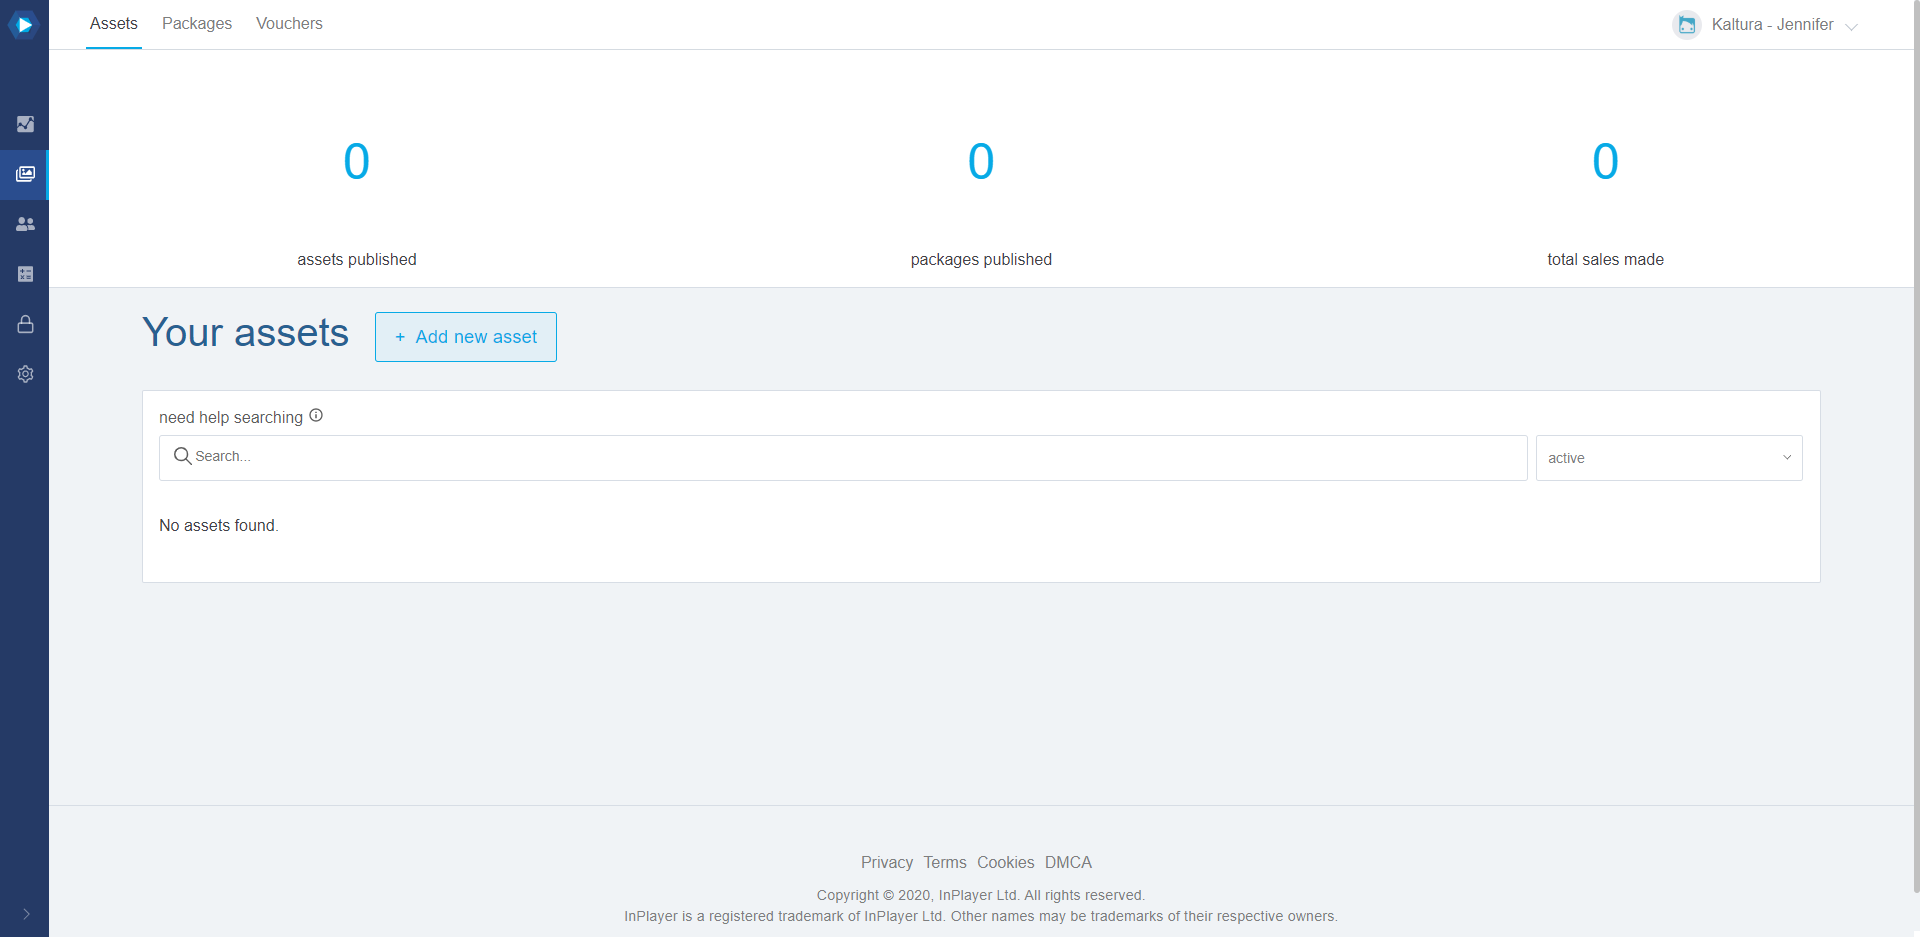
- Click on + Add new asset. The Create asset screen displays.
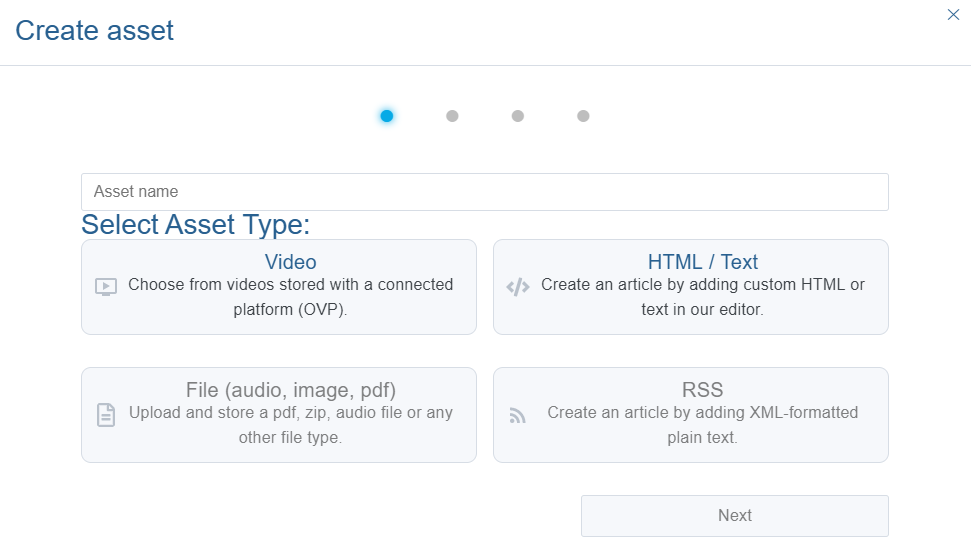
- Type an asset name in the Asset name field. This will be the name of the asset in your InPlayer Dashboard. Customers will not see this.
- Click on Video as the asset type.
- Click Next. The Choose pricing type screen displays.
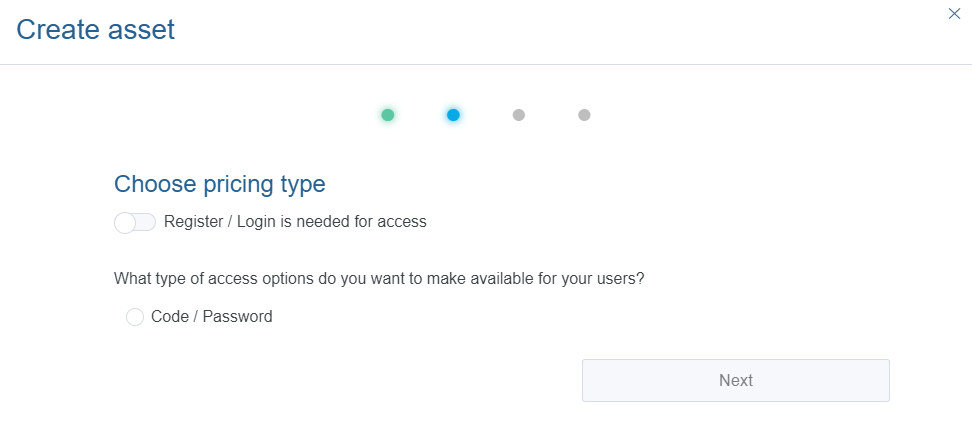
- Choose pricing type:
- If Register/Login is needed for access is enabled, customers will have to register an account before they can access the content. With this login type, the following two pricing types are available:
- Paid - Customers will have to register an account, and they pay so they can see the content.
- Data Capture - Customers will have to register an account, but will not have to pay anything. They will be granted access to the content as soon as they complete their registration.
- If Register/Login is needed for access is disabled, customers will not have to register an account. Instead, they will login with a password or code that they have received or purchased beforehand. The way in which you distribute or sell codes or passwords is up to you, but you must contact support@inplayer.com for management of the codes. With this login type, the only available option is to select Code/Password.
- If Register/Login is needed for access is enabled, customers will have to register an account before they can access the content. With this login type, the following two pricing types are available:
- Click Next. The Choose Ovp screen displays.
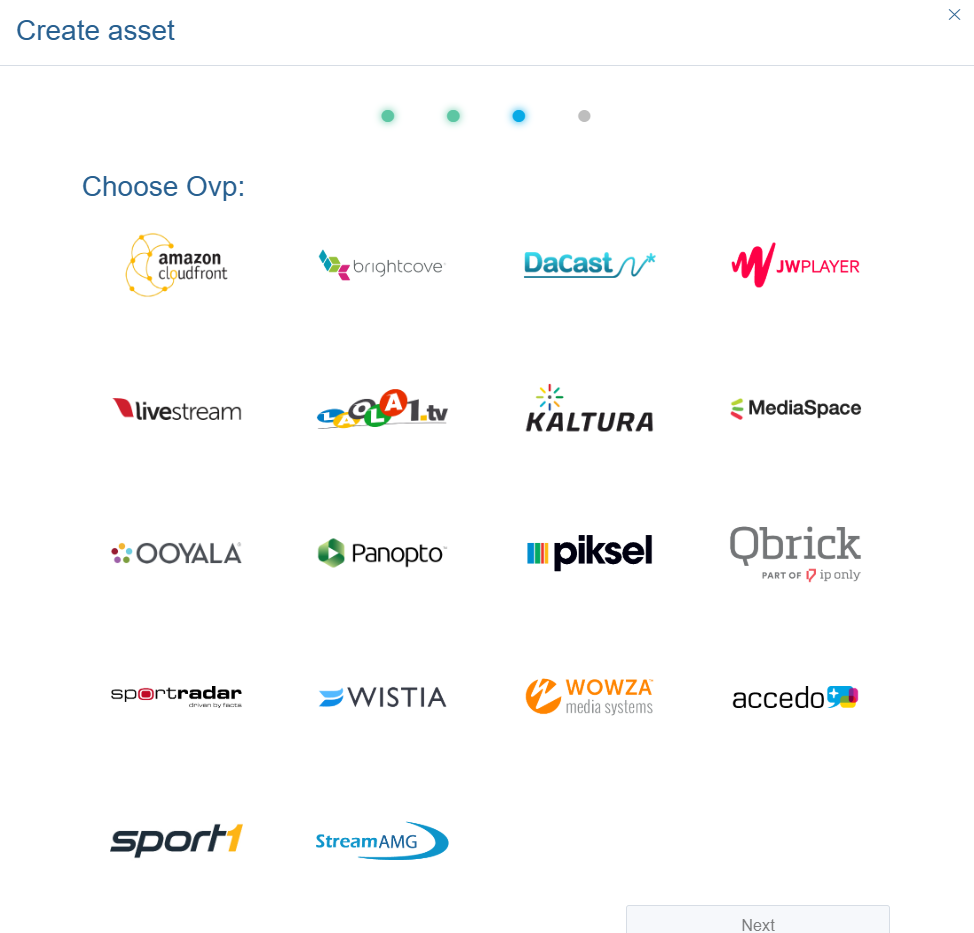
- Hover over MediaSpace and click on add one video.
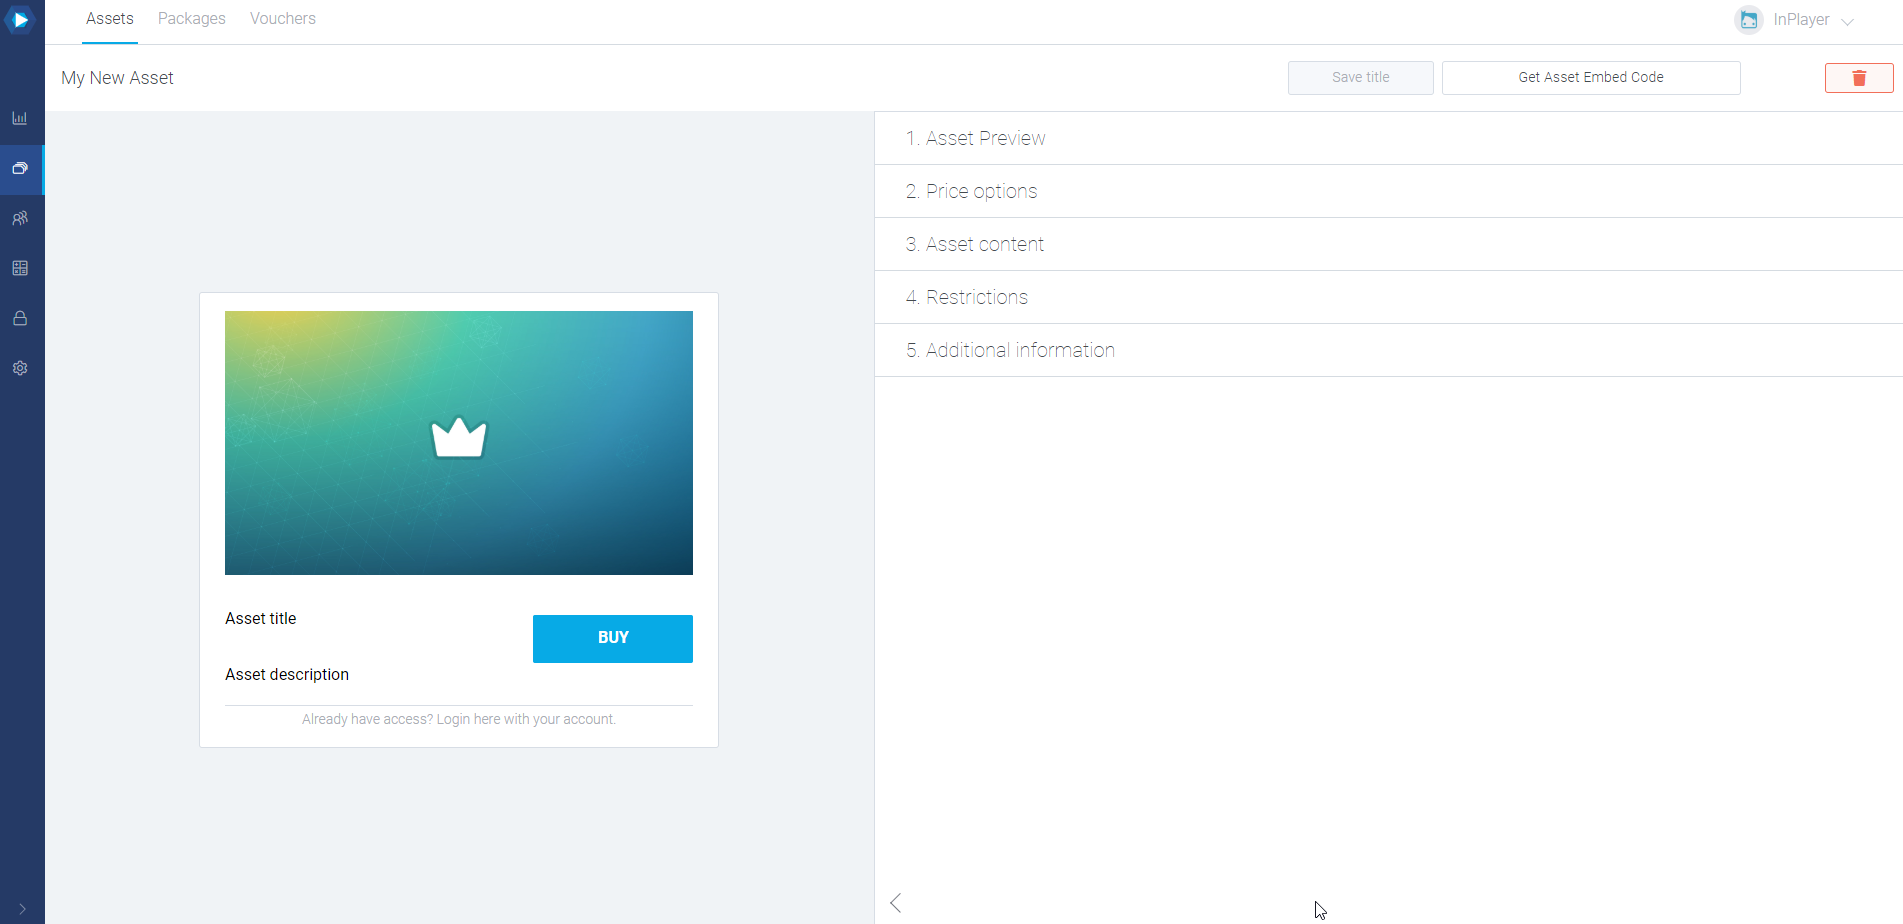
- Click Next. Your newly created asset now displays with additional configuration options on the right of your screen, and a preview pane on the left, showing how the asset will display on your web page.

 Your assets screen displays.


Asset Preview
Click on the 1. Asset Preview item to expand.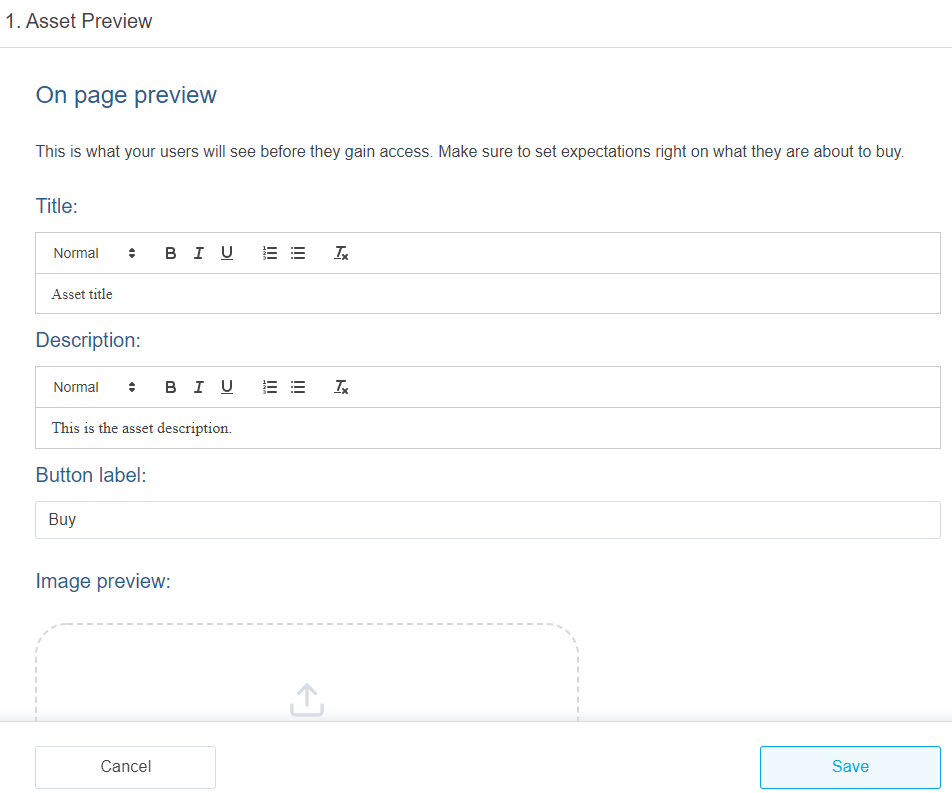 Here you may type a title, description, text for the Buy button, and add a preview image. These are the details that will appear on the actual asset preview when you embed it on your web page. Note that the Title will also display on the final payment form on the paywall, as well as the notification email that your customers receive. Click Save. The item collapses.
Price Options
Click on the 2. Price Options item to expand.
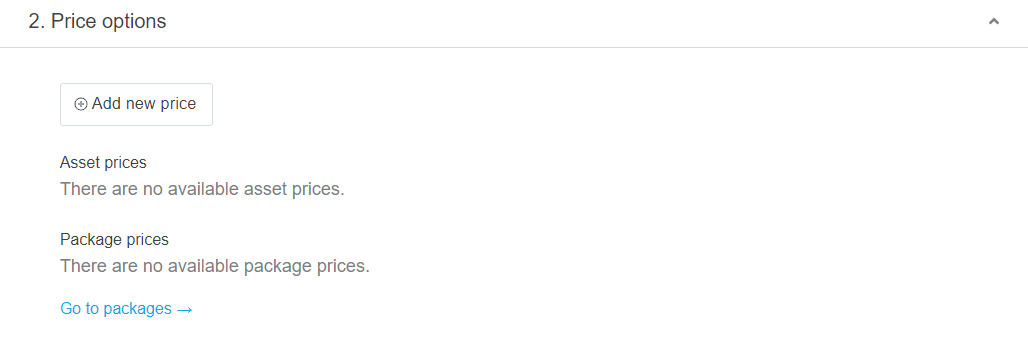 You can set up three different pricing types - ppv, subscription, and season.
Setting up a ppv price
This pricing type allows the customer to make a one-time payment and gain access for a limited time.
- Click Add new price.
- In the General Info tab of the price option, set up the following:
- In the Price description field, enter the price description that will appear on the paywall. Make it concise so your customers know exactly what they are buying.
- In the Payment type field, select ppv.
This is a one-time payment which grants access that expires after the end of the specified period counter either from the moment of purchase, or if using the Scheduled start feature, from the date set in the Scheduled start field. (More on this below.)
The access period can be selected from the drop down menu.
You can pick one of the pre-made periods, or use the custom period option.
When using the custom period option, you can specify the exact date and time at which the customers' access will expire. This is very useful for doing pre-sales since the customers’ access will expire on the date you have set up, regardless of when they have purchased their pass. An alternative way to set up pre-sales is by using the Schedule start option from the Additional Info tab. (More on this below.) - In the Amount field, enter the price.
The minimum price when using USD, EUR, or GBP is 1. When using all other currencies, the minimum is the equivalent converted amount of 1 USD.
The currency can be selected from the drop down menu. If you wish to use a currency that is not in the list, you can contact us at support@inplayer.com and we will make sure to add the currency for you as soon as possible. We support all currencies listed here.
- In the Additional Info tab, set up the following:
- Schedule start: This is the date and time at which the customers' access period will start after they have purchased the asset. Until that time, they will see a message informing them to come back on the scheduled date.
This is a useful option for setting up pre-sales. You can select the access period from the Payment type section in the General Info tab, and then set up when will that access period begin. It works for both the pre-defined access periods (24 hours, 48 hours, etc), and for the custom period.
If you leave the Schedule start field blank, the customers’ access will begin right after purchasing. - Geo-restriction: With this option, you can restrict the price option to specific countries.
You can choose to either include (whitelist) or exclude (blacklist) a single country, or use a country set you have created previously.
You can learn more about setting up country sets here. - Use external In-App IDs: With this option, you can connect the InPlayer system to monetize in-app content (Android, Apple, Roku, etc.).
- Schedule start: This is the date and time at which the customers' access period will start after they have purchased the asset. Until that time, they will see a message informing them to come back on the scheduled date.
- Click Save.
Once you set the payment type for an asset, you cannot change it. You can change the other payment fields (access period duration, price, etc.) but not the payment type. If you wish to set a new payment type, you will need to set up a new price option.
Setting up a Subscription Price
This pricing type allows the customer to incur a recurrent charge at regular intervals that can be cancelled at any time.
- Click Add new price.
- In the General Info tab of the price option, set up the following:
- In the Price description field, enter the price description that will appear on the paywall. Make it concise so your customers know exactly what they are buying.
- In the Payment type field, select subscription.
This is a recurring payment that is renewed automatically. Access is granted at each renewal. The renewal period can be selected from the drop down menu. - In the Amount field, enter the price.
The minimum price when using USD, EUR, or GBP is 1. When using all other currencies, the minimum is the equivalent converted amount of 1 USD. The currency can be selected from the drop down menu. If you wish to use a currency that is not in the list, you can contact us at support@inplayer.com and we will make sure to add the currency for you as soon as possible. We support all currencies listed here.
- In the Additional Info tab, set up the following:
- Free trial: With this, you can set up a free trial period.
- Additional fee: With this option, you can set up a one-time fee that will be charged when the customer purchases the subscription, as an addition to the regular subscription fee. The fee will only be charged once, together with the first subscription charge.
- Geo-restriction: With this option, you can restrict the price option to specific countries. You can choose to either include (whitelist) or exclude (blacklist) a single country, or use a country set you have created previously.
You can learn more about setting up country sets here. - Use external In-App IDs: With this option, you can connect the InPlayer system to monetize in-app content (Android, Apple, Roku, etc.).
- Click Save.
Once you set the payment type for an asset, you cannot change it. You can change the other payment fields (access period duration, price, etc.) but not the payment type. If you wish to set a new payment type, you will need to set up a new price option.
Setting up a Season Price
This pricing type allows the customer to make a payment and gain access for a limited period, but at the same time accept a recurrent charge for being able to watch during the next period. The date for the upcoming charge is determined by the merchant.
- Click Add new price.
- In the General Info tab of the price option, set up the following:
- In the Price description field, enter the price description that will appear on the paywall. Make it concise so your customers know exactly what they are buying.
- In the Payment type field, select season.
With this payment type, the customer purchases a season pass that lasts for a specific period, then expires, and is then renewed for a second period at a certain point in the future, upon which a new charge is taken from the customer. The payment will continue to renew in the same manner for as long as you keep scheduling upcoming seasons. A new season needs to be re-scheduled after the end of each one. You will get an automated email at the end of each season reminding you of this.The season payment type is best suited for seasonal content, like sports, where using standard back-to-back subscription payments might not be suitable, since content is only available during specific parts of the year, and in between there are periods with nothing or nothing new to watch.
A basic season cycle is represented here:
- In the Season start field, enter the start date and time of the season. This determines when the access for customers who purchase a pass will start. It is also possible for access to be granted to the customers from the moment of their purchase. This is accomplished with the Off-season access option. It will be discussed further below. Also, a season price option will not be available for purchase until the Season start has been set.
- In the Season end field, enter the end date and time of the season. This is the access cut-off date for the current season. Access will be re-granted upon the renewal of the payment for the next season. It is also possible for the access to continue beyond the end of the season, i.e. until the moment of renewal of the payment for the next season. This is, again, done with the Off-season access option, which we’ll see below. Also, a season price option will not be available for purchase until the Season end has been set.
- In the Anchor date field, enter the date and time for the renewal of the payment, i.e. the date and time when the payment for next season will be taken. Note that once you set up the first anchor date, the anchor date for the next season will be automatically set to one year after the first anchor date. You can always go back and change it if you wish.
- In the Seasonal price field, enter the amount that will be charged upon renewal for the next season, i.e. on the Anchor date. Note that this is not the price for the current season.
The minimum price when using USD, EUR, or GBP is 1. When using all other currencies, the minimum is the equivalent converted amount of 1 USD.
The currency can be selected from the drop-down menu. If you wish to use a currency that is not in the list, you can contact us at support@inplayer.com and we will make sure to add the currency for you as soon as possible. We support all currencies listed here. - In the Current price field, enter the account that will be charged for the current season. Whenever a customer goes to your page, they will see this price. You can change this price at any time. For example, you can have it be equal to the Seasonal price at the beginning of the season, and then reduce it as the season progresses.
The minimum price when using USD, EUR, or GBP is 1. When using all other currencies, the minimum is the equivalent converted amount of 1 USD.
The currency can be selected from the drop-down menu. If you wish to use a currency that is not in the list, you can contact us at support@inplayer.com and we will make sure to add the currency for you as soon as possible. We support all currencies that are listed here. - With the Off-season access option, you can decide whether the customers will only have access during a season (between the season start and end date), or also during the off-season period, so they can watch replays, for example. Note that once you set the Season start, Season end, Anchor date, and Seasonal price you cannot change them until the current season ends. You can only change the Current price amount.
- In the Additional Info tab, set up the following:
- Free trial: With this, you can set up a free trial period. If the Off-season access option is enabled, the free trial will begin right after the customer completes their purchase. If the Off-season access option is disabled, the free trial will begin on the Season start date.
- Additional fee: With this option, you can set up a one-time fee that will be charged when the customer purchases the subscription, as an addition to the regular subscription fee. The fee will only be charged once, together with the first subscription charge.
- Geo-restriction: With this option, you can restrict the price option to specific countries.
You can choose to either include (whitelist) or exclude (blacklist) a single country, or use a country set you have created previously. You can learn more about setting up country sets here. - Use external In-App IDs: With this option, you can connect the InPlayer system to monetize in-app content (Android, Apple, Roku, etc.).
- Click Save.

Once you set the payment type for an asset, you cannot change it. You can change the other payment fields (access period duration, price, etc.) but not the payment type. If you wish to set a new payment type, you will need to set up a new price option. You also cannot delete a season price option before the current season ends.
Asset Content
The instructions in this section are only applicable when monetizing channels. When monetizing a specific video, there is no need to configure the Asset Content section.
- Click on the 3. Asset Content item to expand.

- Type your MediaSpace domain URL, without the https:// or https:// part.
If you have set up a custom URL for your MediaSpace, as opposed to using the default 123456.mediaspace.com format, depending on your custom URL domain configuration, you might need to enter the full URL, along with the www. part. You can test whether you need to use the www. part by checking whether your web page is accessible without typing www. in front of it in Chrome’s guest mode. If it is, you do not have to add the www. in the MediaSpace set up, and if it is not, you do. - Click Save.

Restrictions
- Click on the 4. Restrictions item to expand.
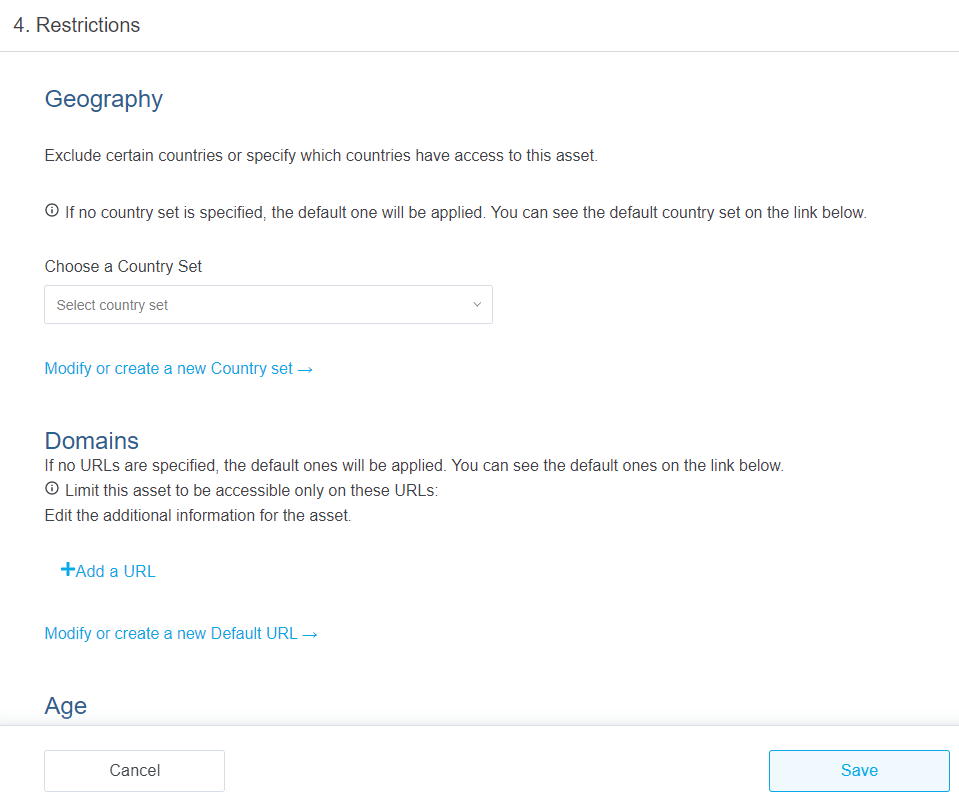
- Set up any geographic, domain, and/or age restrictions for the asset you wish to use. Click Save. The item collapses.

Additional Information
- Click on the Additional information item to expand.
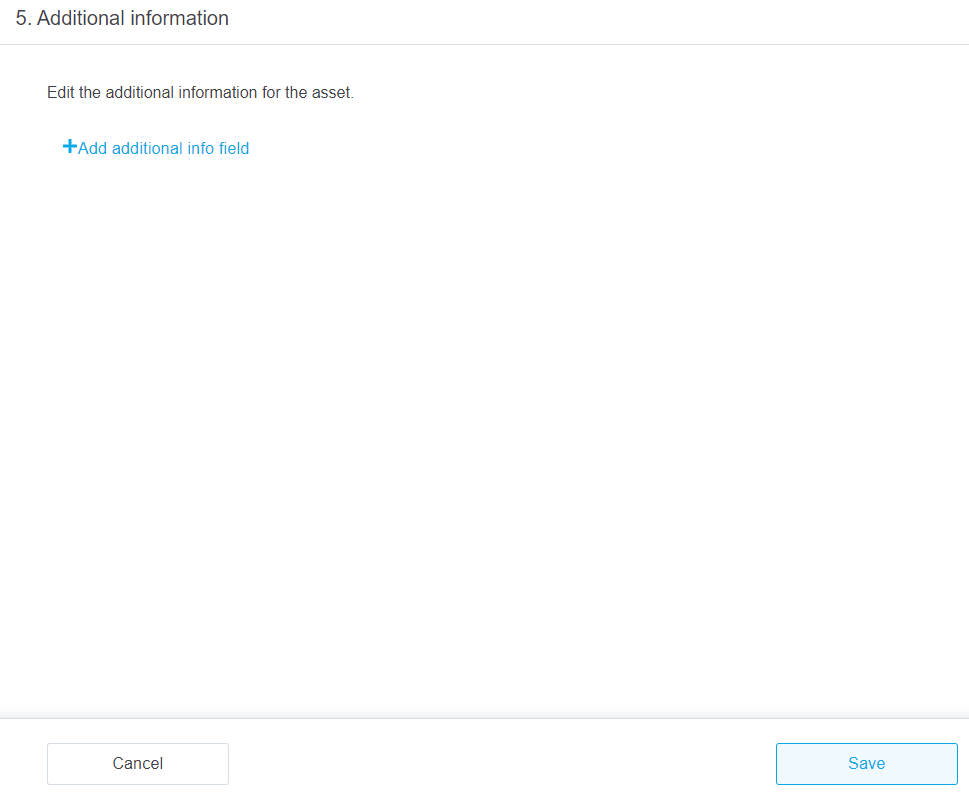
- Add additional information fields as desired.
- Click Save. The item collapses.

Preview Templates
- Click on the 6. Preview Templates item to expand.
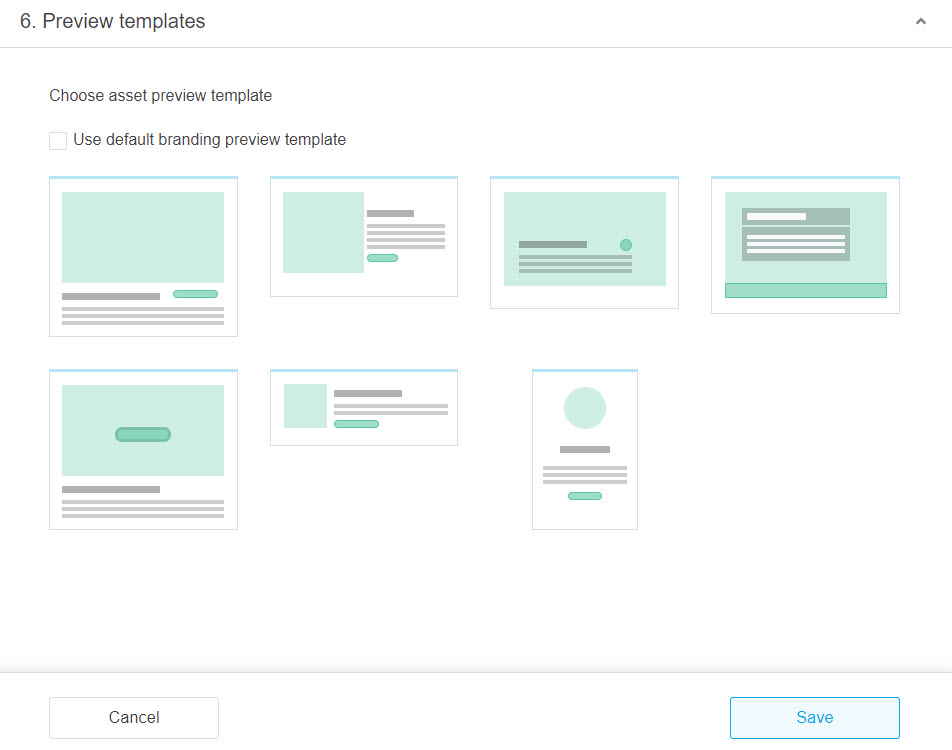
- Select a preview for your asset.
- Click Save. The item collapses.

