About
This article describes how to edit the event details and set a custom URL. Herein, we also direct you to an article about customizing your Landing page.
This article pertains only to single session events.
Looking for more information about single session events? Feel free to contact your Kaltura representative.
Navigate to the Event details page
After creating a new event, navigate to the Event details page; click the Event details tab.

The Event details page displays.
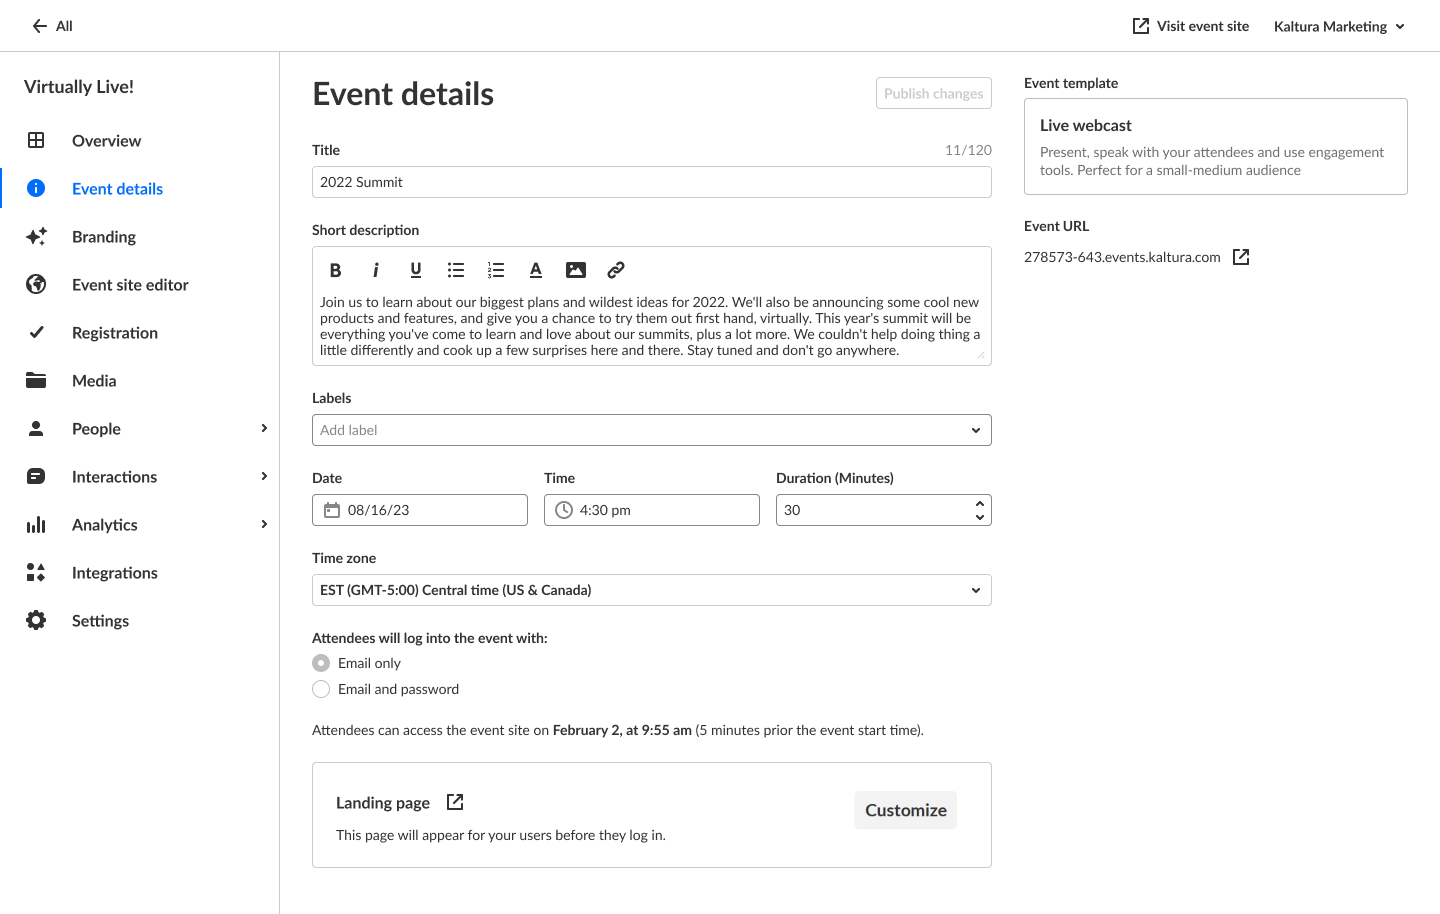
The Event details page lists the event template from which the event is created and the Event URL that was generated automatically when the event was created. This page also includes two ways to access the event site - an Event site button on the top right corner of the screen, and an up arrow next to the Event URL. It also includes a link to the Landing page at the bottom of the screen. The Landing page is the page that appears for your users before they log in.
Edit event details
You may edit the following event details:
Title - A title for your event.
Short description - A description of your event.
Labels - Attach labels to the event to categorize and enable filtering of events on Event list. For example, label the event as having to do with a specific theme, target audience, or department. To attach a label, click in the Labels field and choose from the list of available labels. You may also start typing the first few letters of a label and a list of matching labels will populate for you.
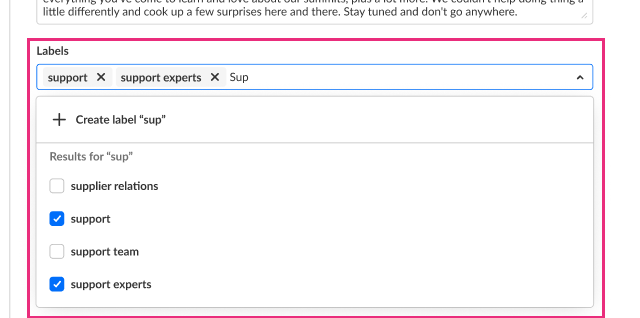
To create a new label, type your new label in the Labels field, then click Create label "[label name]".
Labels you've attached to this event will display on the account level Events list and on the Overview tab of the Event page. Labels are not visible to attendees and are for event management purposes.
To un-attach a label from the event, click "X".
Date - The day your event will start.
Time - The time your event will start.
Duration - The duration of your event.
Time zone - The time zone for your event. The list of time zones is organized in alphabetical order by time zone name, then city name. This list is searchable and as you start typing characters, a list of matching time zones will populate for you.
Attendees will log into the event with: - Choose whether attendees will enter the event with login link via email (AKA "Magic Link") or with email and password. Click XYZ for more information on Magic Link.
Customize the look of your Landing page - See Customize your Landing or Lobby page.
The ability to customize the look of your Lobby page must be enabled on your account. If it is not, please contact a Kaltura representative about enabling it.
Publish changes to the event
Once you are finished editing all the event details, click Publish changes.
The Publish changes button is grayed out/dimmed upon entering the page and only becomes 'clickable' after at least one edit is made to the page.
