This article is intended for admins
Notes:
This guide will walk you through the process of Installing & Configuring KAF support for Sharepoint Modern Experience.
You will need:
- A Sharepoint admin account
- A KAF instance of type “SharepointO365”.
A. Create the app as a Sharepoint Admin
Registering the app
- Go to your Sharepoint app registration endpoint:
https://{sharepoint-tenant-prefix}.sharepoint.com/_layouts/15/AppRegNew.aspx.The SharePoint tenant prefix is the text that is before "sharepoint.com" in the URL. For example, in the SharePoint URL "https://kaltura.sharepoint.com," the tenant prefix is "kaltura."
- You will see a form that looks similar to this:
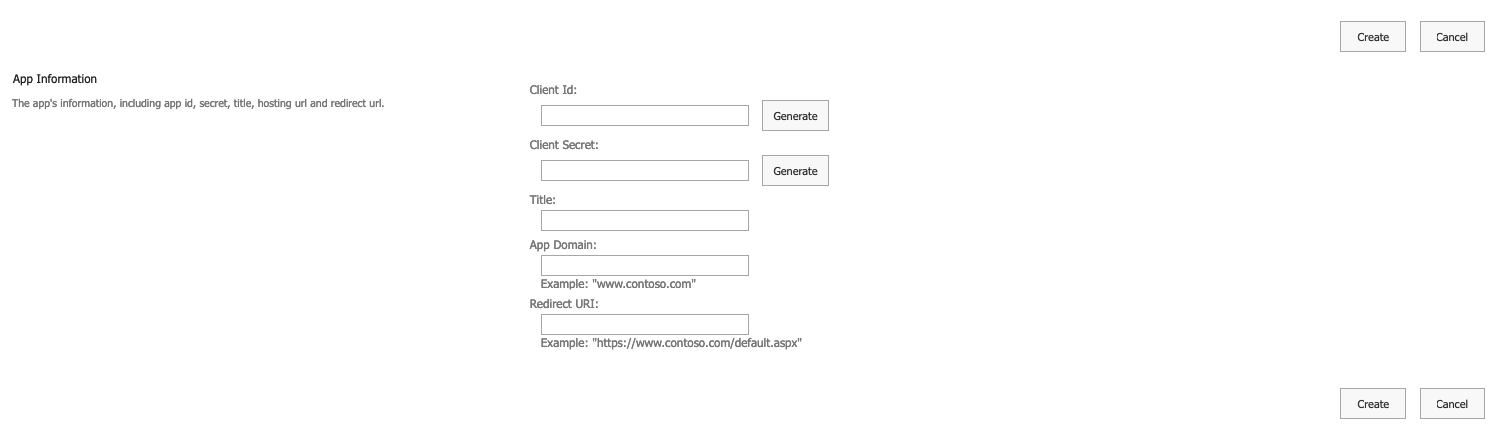
- You will see a form that looks similar to this:
- Click the Generate button in both the Client Id and Client Secret fields.
- In the Title field, type in any name you would like to call the app.For example: KalturaSharePoint, or KalturaSharePointApp, etc.
- In the App Domain field, type in your KAF instance "hostname."
For example, if your KAF instance URL is https://1234567-3.kaf.kaltura.com, then type in1234567-3.kaf.kaltura.com. - In the Redirect URI field, type in the same value as in step d, but with
https://in the beginning.
For example,https://1234567-3.kaf.kaltura.com. - Click Create.
You will be presented with the details that you just submitted.Note: make sure to copy and securely save the Client Secret somewhere. You will not be able to retrieve it through SharePoint’s user interface anymore.
- Go to your Sharepoint app registration endpoint:
Granting permissions to the app
- Go to the endpoint:
https://{sharepoint-tenant-prefix}.sharepoint.com/_layouts/15/AppInv.aspx. - In the App Id field, type in the Client Id of the app that we generated in the previous section.
- Click Lookup.
The application details (except the secret) should be populated. - In the Permission Request XML field, type in:
<AppPermissionRequests AllowAppOnlyPolicy="false">
<AppPermissionRequest Right="FullControl" Scope="http://sharepoint/content/sitecollection"/>
<AppPermissionRequest Right="FullControl" Scope="http://sharepoint/content/sitecollection/web"/
<AppPermissionRequest Right="Manage" Scope="http://sharepoint/content/tenant"/
<AppPermissionRequest Right="Manage" Scope="http://sharepoint/social/tenant"/>
</AppPermissionRequests> - Click Create.
You will be presented with a page that asks you whether you trust the application. - Click Trust It.
- Go to the endpoint:
Getting the Sharepoint tenant id
- Go to
https://{sharepoint-tenant-prefix}.sharepoint.com/_layouts/15/AppPrincipals.aspx.
You will see a table with the list of apps you have registered. - Locate the app that you just registered and granted permissions.
- In the App Identifier column of your app, copy the value after the
@sign.
Example: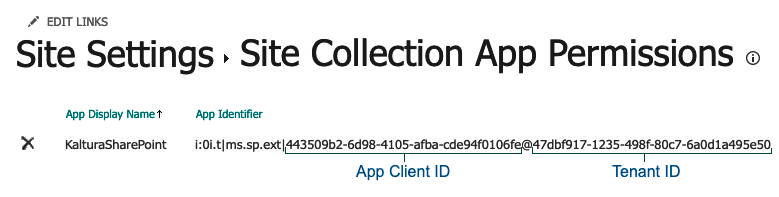
- Go to


B. Generate the app as a KAF Admin
- Go to your KAF admin site.
- Go to the Sharepoint module configuration.
- Fill in the
clientId,clientSecretaccording to the values we just generated - At the bottom of the module’s config page, in the
ModernSharePointAppFactorysection, fill in thetenantIdvalue as well. - Click the Generate App button. A file named KalturaModernSharePointApp.sppkg will be downloaded to your computer.
C. App Installation in Sharepoint
- Go to your SharePoint Admin Manage Apps page: https://{sharepoint-tenant- prefix}.sharepoint.com/sites/appcatalog/_layouts/15/tenantAppCatalog.aspx/manageA pps.
- Click Upload.
- Click the app bundle that you just downloaded to your computer (
KalturaModernSharePointApp.sppkg).
If you get a 404 error, it may be because the app catolog site was not yet created, since you haven’t installed any apps on your Sharepoint site. If so- you 'll need to generate the app _layouts/15/online/AdminHome.aspx#/classicFeatures, according to this. Doing so will then create a page to upload the app /sites/appcatalog/_layouts/15/tenantAppCatalog.aspx/manageApps?firstCreatedAppCatalog=1
Adding the App to One or More Sites
Targeted for: SharePoint Administrators, Site Administrators
Description: After the application is installed, this step is performed to allow site owners to add the application to their sites.
To add the app to a site:
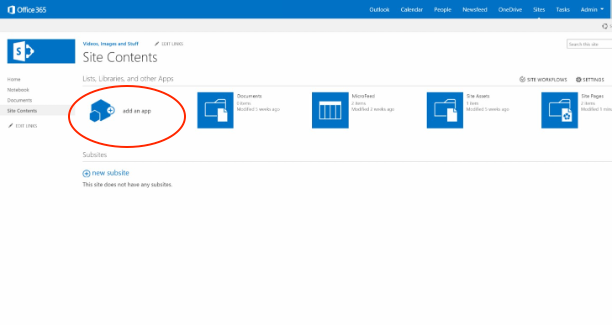
- Click on Site Contents to navigate to any site to which you'd like to add the app.
- Click add an app.
- On the side menu, click From Your Organization to display only apps from the App Catalog.
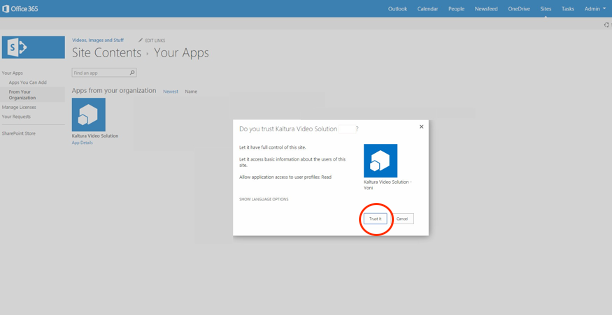
The Kaltura Video Solution application should appear on the list of available apps.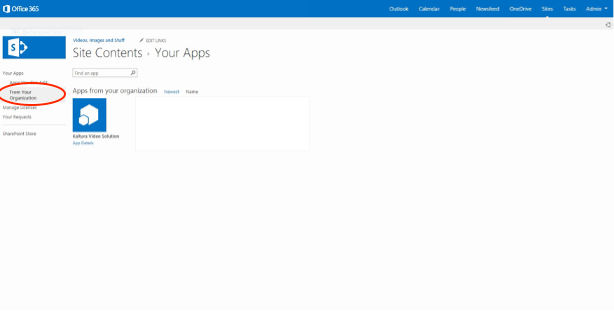
- Click Kaltura Video Solution application to install the application.
A modal window pops up, asking if you trust the application. - Click Trust it to install the app at the site.
- After few seconds, the application will appear in the site content.

You may now use the application in your site pages.


Next, to configure your user management, see Assign Permissions to Users.
