This article documents the legacy KME Room. For information on the new room, please visit the new Kaltura Room documentation.
Overview
With Kaltura Live Room cloud recording, you can record and archive your live sessions. Kaltura Live Room Cloud Recording is a premium feature available with any Kaltura Meetings Live Room plan.
- With Kaltura Live Room Cloud Recording, you can record and archive your live sessions.
- Completed recordings are automatically added to the Recordings folder in your room's FILES storage.
- Recordings are also uploaded to the moderator's personal media library in case of a MediaSpace room and are added to the relevant channel in case of channel rooms.
- Kaltura Live Room session recordings are standard 1080P MP4 video files.
- You can share your recordings in the on-demand course for on-demand viewing or download your recordings and publish them elsewhere.
- By default, the recording will not include the participant's names on the displayed webcams.
Start Recording
The recording option can be accessed by instructors or moderators.
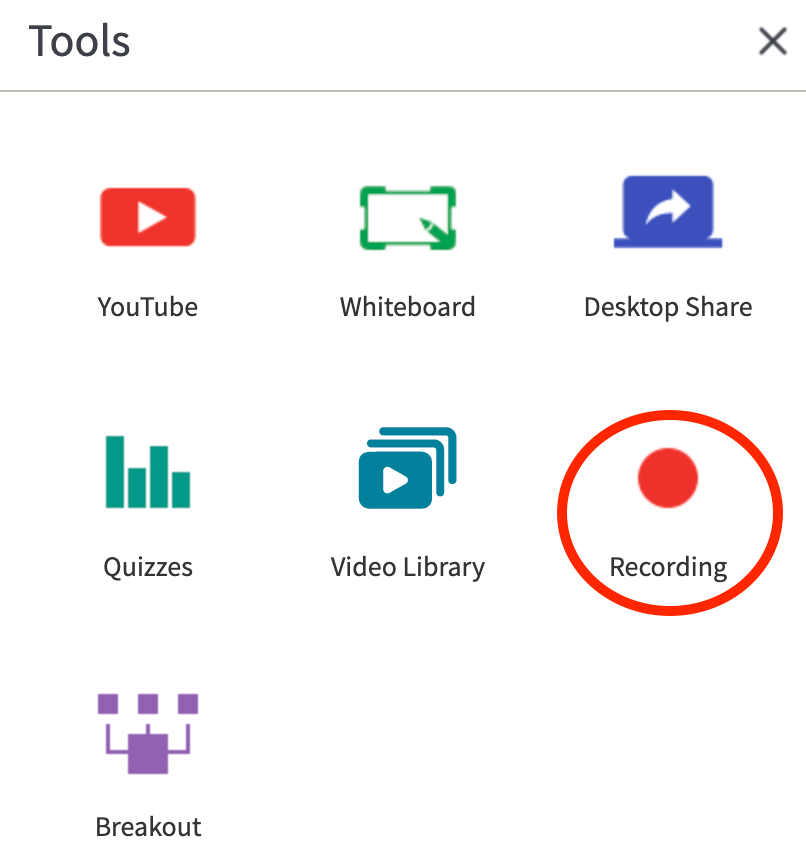
- Click Tools.
- Select the Recording option.
- Choose your preferred recording duration.
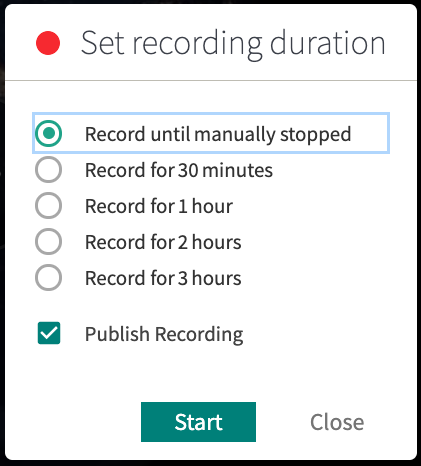
- Check “Publish Recording” to publish the recording on relevant channels.
Channel rooms will publish into the respective channel, while entry rooms' recordings will be published on channels where the original “meeting entry” is published. - Click Start.
A recording may take up to 1 minute to initialize. You will see an indication that recording is initializing and all participants are notified when the recording starts.
💡Recording automatically stops when the set duration expires, or, when the session ends. However, 2 minutes before your recording expires you will be prompted to see if you want to extend your recording time by 30 minutes.
When you select the "unlimited" recording option the recording will stop if :
- a moderator stops it from within the room.
- the session ends.
- the maximum recording length of 5 hours has been reached.
If needed, you can start a new recording immediately after stopping the previous one.
Stop Recording
Recording automatically stops when the set duration expires. You can choose to stop recording before the set duration expires.
- Click the recording indication in the upper bar or click Recording in Tools.
- From the confirmation pop-up, click the Stop Recording button. The recording is stopped and you will be notified when your completed recording file is available for viewing.
Delete Recording
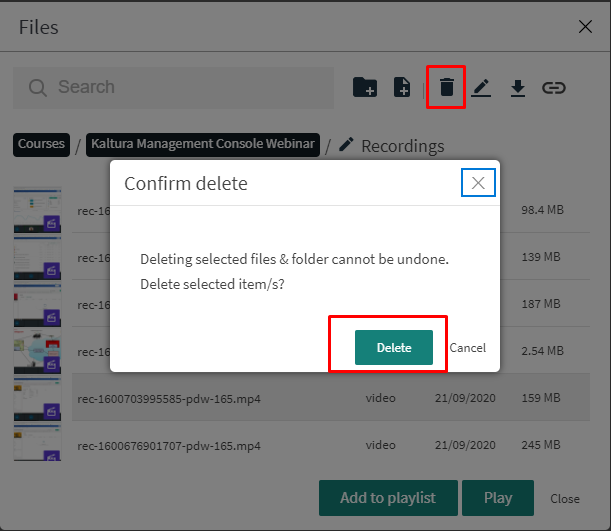
- Click Files.
- Click the Recordings folder.
- Select the recorded file you want to delete.
- Click the Trash icon.
- Click Delete to confirm the deletion action.
Deleting a file cannot be undone.
Download Your Recording
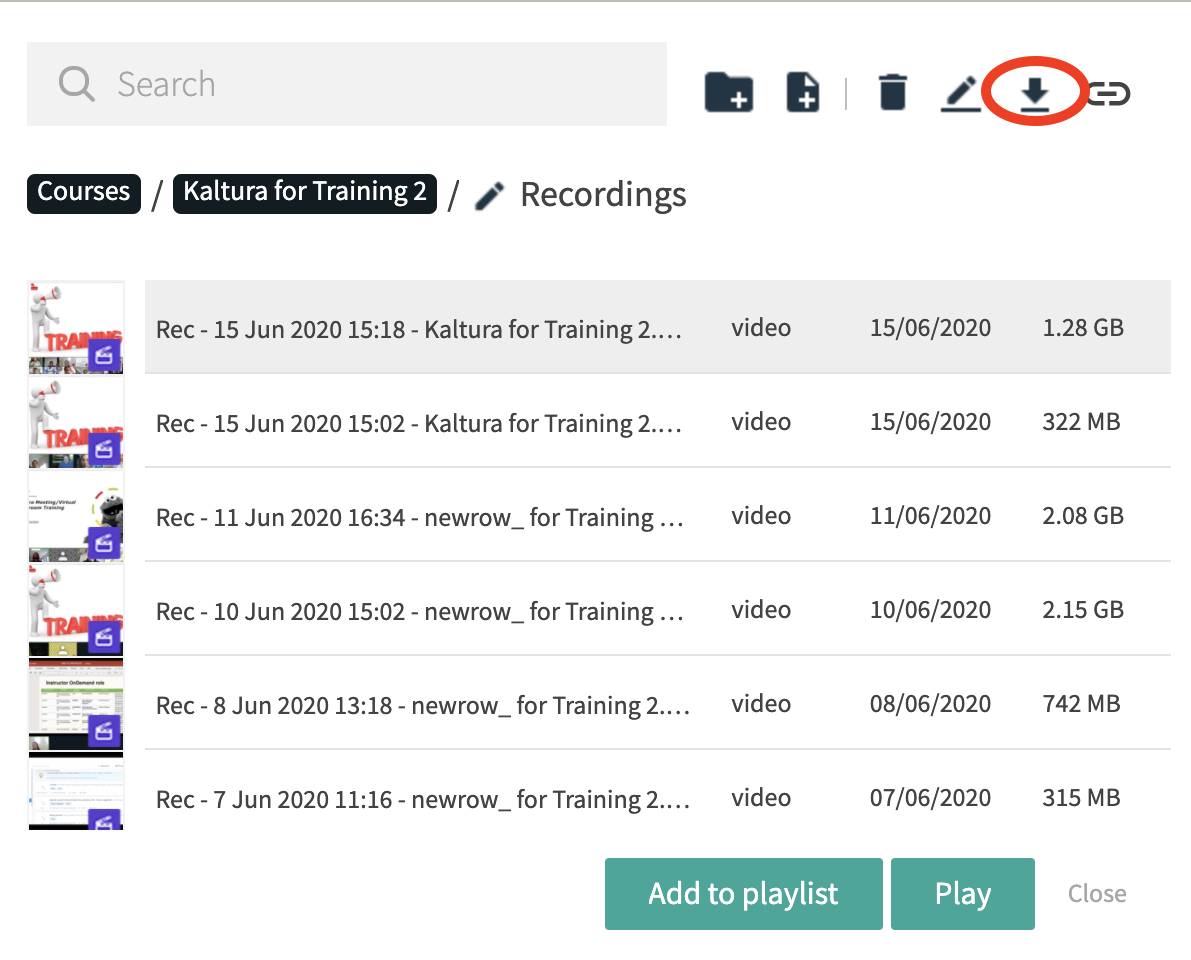
When recording stops, your recorded file is processed and automatically added to Files in a folder called Recordings. Each recording file is named by default with the following convention: Rec - DATE & TIMESTAMP - NAME OF COURSE. You are now ready to download your recording.
- Click Files.
- Click the Recordings folder.
- Select the recorded file you want to download.
- Click the Download icon that appears next to the search bar.
💡Recordings are download to an mp4 format.
Share a Link to Your Recording
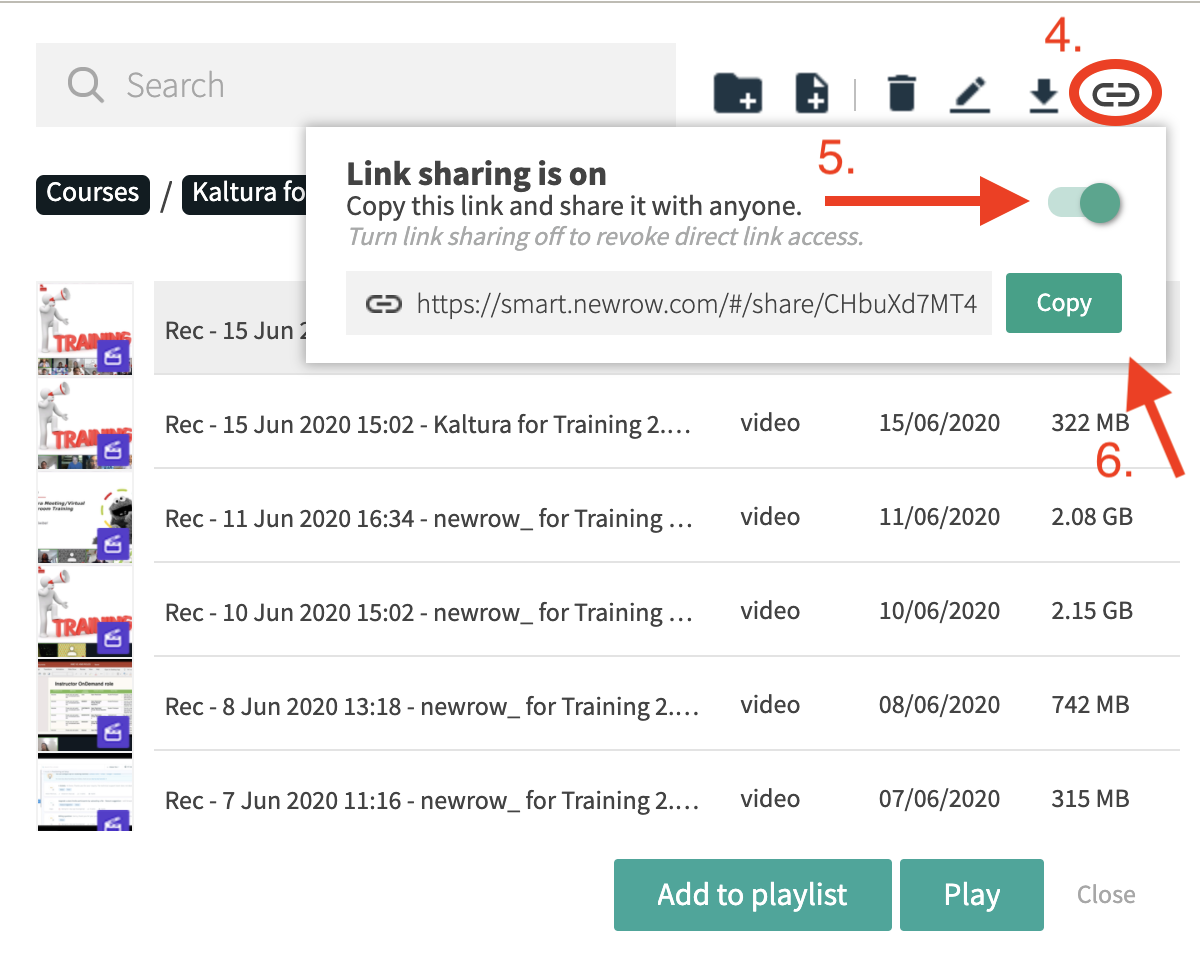
When recording stops, your recorded file is processed and automatically added to Files in a folder called Recordings. Each recording file is named by default with the following convention: Rec - DATE & TIMESTAMP - NAME OF COURSE. You are now ready to share a link to your recording.
- Click Files.
- Click the Recordings folder.
- Select the recorded file you want to download..
- Click the Link Sharing icon.
- Toggle link sharing to the right to reveal a web link.
- Click the Copy button to copy link to send to participants.
Share Your Recordings From Media Gallery
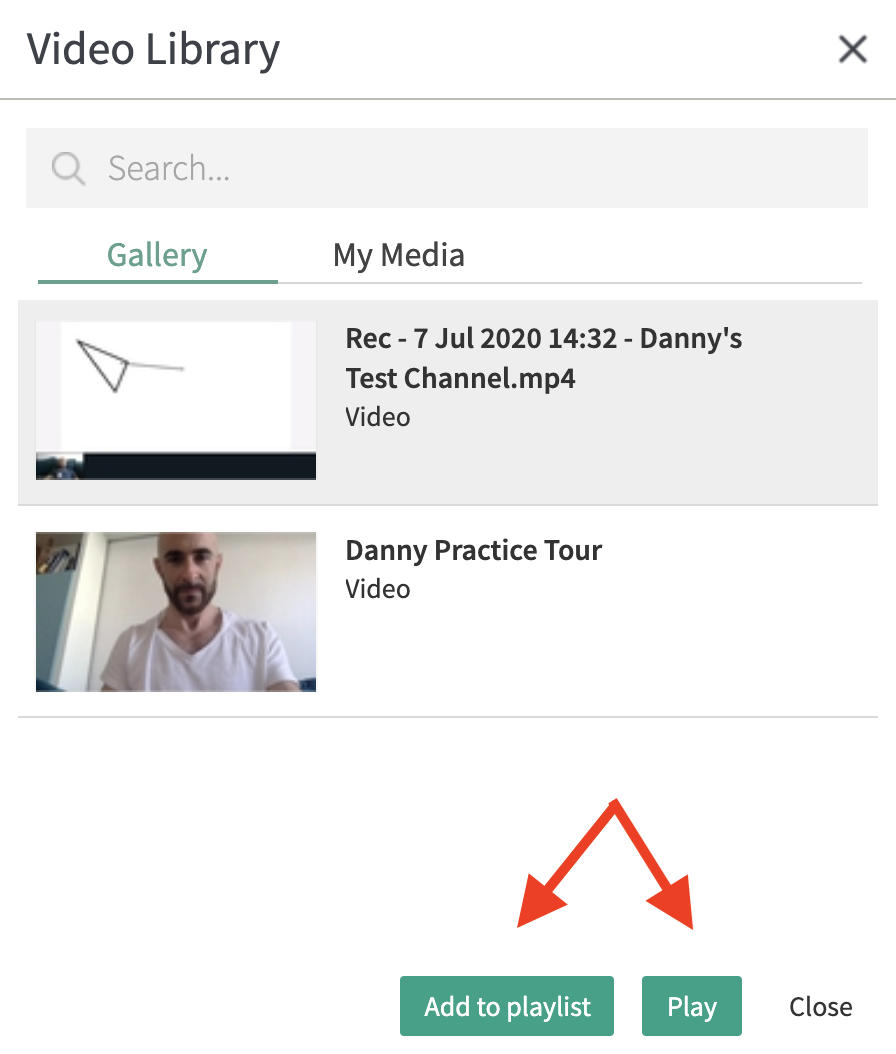
Completed recordings are automatically published to Media Gallery within 10-15 minutes after the live session.
- Click Tools.
- Click Video Library.
- Click on the recording.
- Click Add to playlist to play later or Play.
