About
This article describes how to:
- Invite moderators to your webinar via email.
- Add moderators to the event without sending them an invitation email.
- View a list of moderators for an upcoming event and monitor their progress through the registration process.
- Perform additional actions on moderators per registration status.
Invite moderators to your webinar
- Navigate to the Moderators page; from the site page, click the People tab > Moderators.
The Moderators page displays.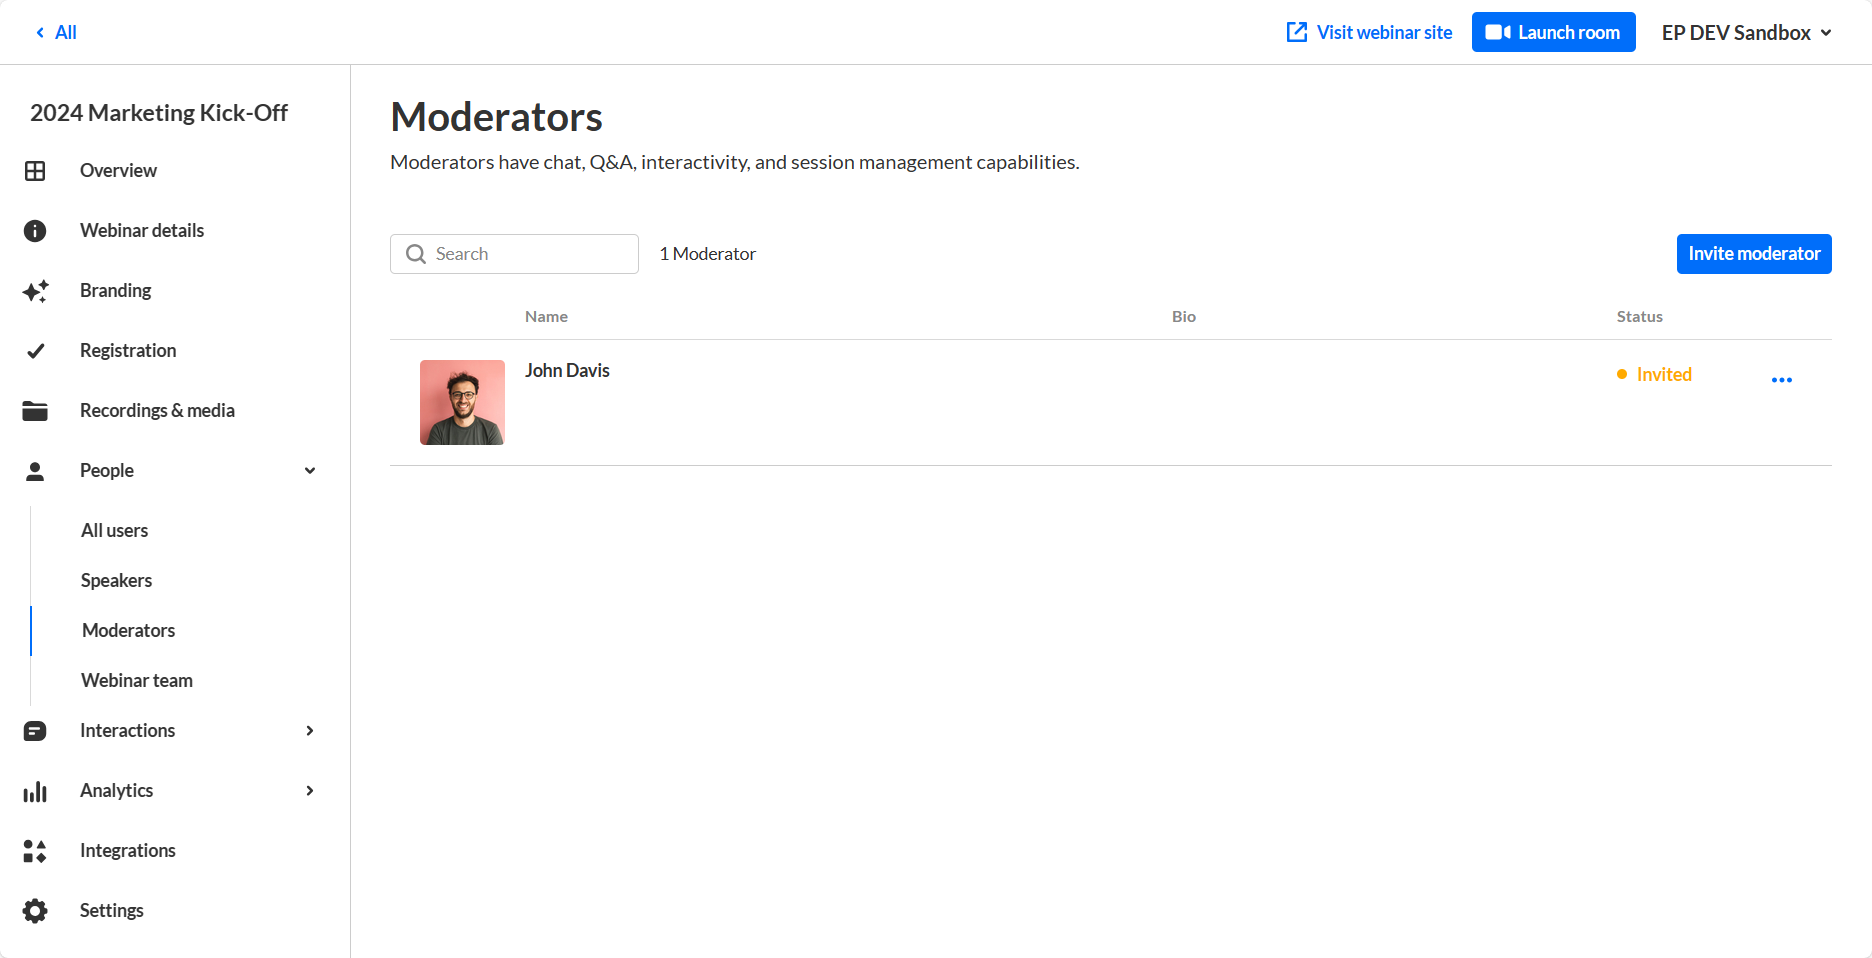
- Click the blue Invite moderator button in the upper right corner of the screen. The Invite screen displays.
- Type the moderator's email address (required), first and last names (required).
- Choose whether (in addition to having a Moderator role) they will have the additional role of Speaker.
- Add a profile image if desired (we recommend 500x500 px), title, company, and bio.
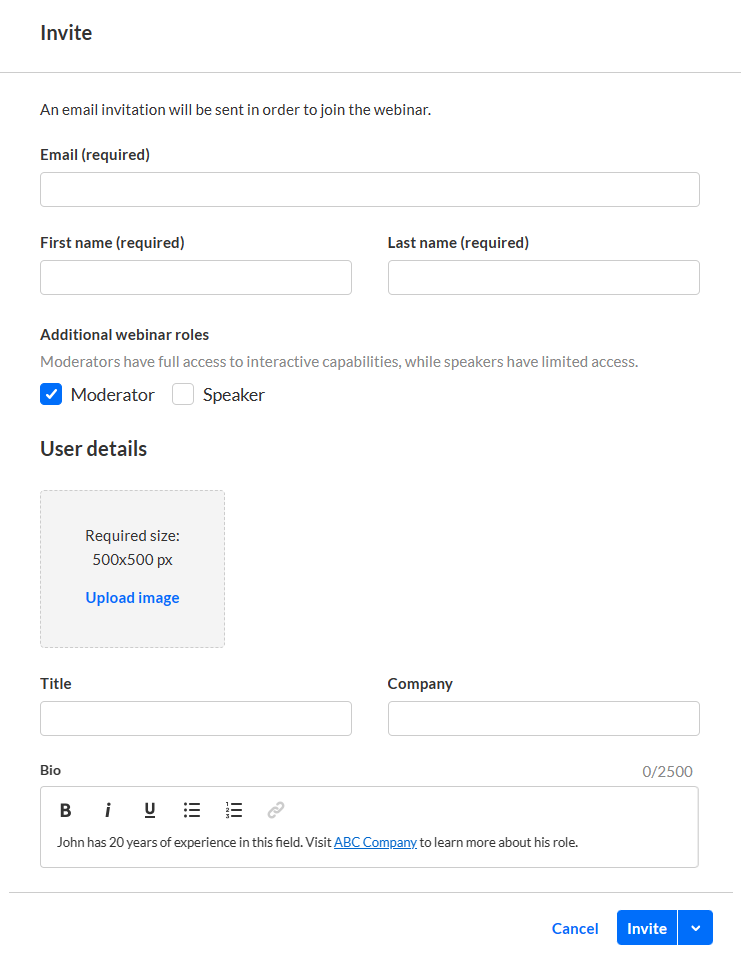
- Once finished, click Invite to send an invitation email, or click the down arrow to the right of the Invite button and choose Invite without an email to add this person to the webinar without sending them an invitation email. A notification asking you to confirm your action is displayed. Once the role is assigned, you cannot revert this action.
Once you are ready to send them the invite, you can click the three blue dots to the right of Status and select the 'resend email' option on the Moderators page.
- Click Invite to confirm or click Cancel to cancel the action.
If you clicked Invite, a notification that the invite was successfully sent is displayed and the invitation you created will be sent to participants to complete the registration. If you clicked the down arrow to the right of the Invite button and chose Invite without an email, a notification that the invite was successfully sent is displayed and the person is added to the Moderators list as "Registered".


View a full list of moderators and monitor their progress through the registration process
Once you have sent your invitations, you can use the Moderators page to view the full list of moderators for your upcoming webinar (including name, bio, and status) and monitor their progress through the registration process.

You can use the search option to locate specific moderators easily.
Perform additional actions on moderators per registration status
You can click the three blue dots to the right of Status to access additional options per registration status.

| Registration Status | Options | |
| Attended | Edit, View analytics, and Remove | |
| SSO login | Edit, View analytics, and Remove | |
| Invited | Edit, Re-send the email (invitation), and Remove | |
| Registered | Edit, Re-send email (registration confirmation), View analytics, and Remove | |
| Unregistered | N/A | |
| Blocked |
|
If a user has already accessed the Event site, opened the Chat and Collaborate widget, and agreed to the widget's terms of use, one additional option displays for Attended users in addition to those listed above - Block from chat. Using this option, you can block the user from sending messages in the Chat and Collaborate widget.
If you chose for your attendees to log into your event via email (AKA Magic Link), one additional option displays for Invited and Registered users in addition to those listed above - Generate login link. Using this option, you can copy and send attendees the login link.
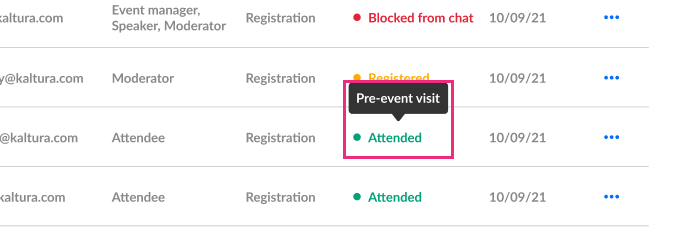
Hovering over the registration status in the Moderators page reveals a higher granularity of status which may include the following:
| Registration Status | Detailed Status |
| Registered | Registered |
| Invited | Invited by team member |
| Invited | Invited by team member to register |
| Registered | Confirmed email |
| Registered | Registered no confirmation required |
| Attended | Pre-event visit |
| Attended | During-event visit |
| SSO login | SSO login |
| Unregistered | Unregistered |
| Blocked | Blocked |
In our example below, the registration status is Attended, but when hovering over the registration status, we can see this participant visited the site before the event started (i.e., Pre-event visit).