About
You can manage who has access to your gallery and what they can do from the Roles & permissions tab.
The Roles & permissions tab is available for galleries only and appears if it’s enabled by your admin.
This feature requires the Theming module to be enabled, with the 'galleryedit' feature set to 'Yes'.
Who can use this
- Gallery owners
- Gallery managers
Access the Roles & permissions tab
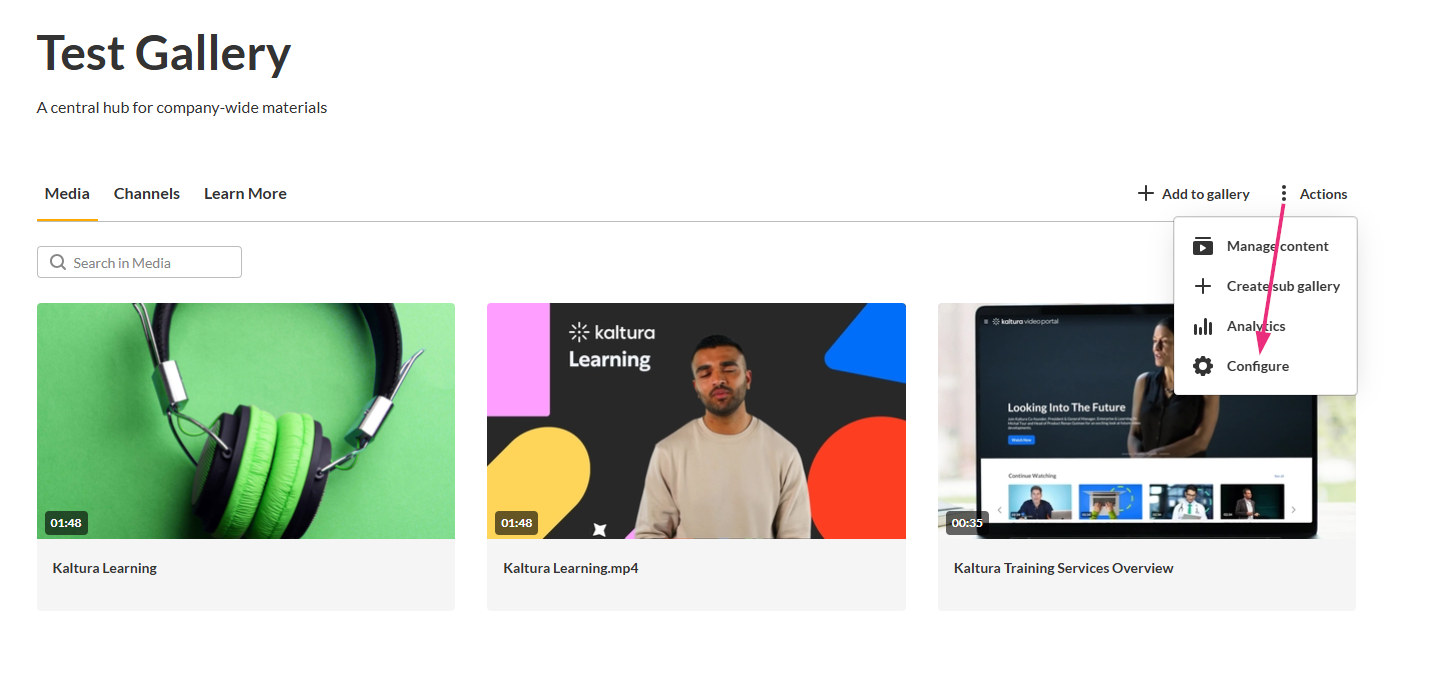
- From the top navigation bar, select the gallery.
- At the far right, click the Actions menu and select Configure.
- In the left navigation panel, click Roles & permissions.

The gallery page opens.

The configure page opens on the Details tab by default with a left-hand navigation.


The 'Roles & permissions' page displays.

The Roles & permissions page shows all users and groups that have access to the gallery.
For each user, you can see:
- Name (with profile image or initials)
- Email (depending on site configuration)
- ID (depending on site configuration)
- Permission (role assigned in the gallery)
The gallery owner is clearly marked with 'Owner' and 'You' labels (when applicable) and can’t be edited or removed.
Manage gallery users and permissions
Filter users by permission
Use the View all permissions drop-down menu to filter the list by role. This helps you quickly find users with a specific permission, such as managers or contributors.
The user count updates based on the selected filter.

Add users to a gallery
- Click Add users at the far right.
- Under Select permissions, choose the permission you want to assign:

The 'Add users' window opens.

- Member - Can view gallery content.
- Contributor - Can view content and add media to the gallery.
- Moderator - Can review and approve or reject content submitted to the gallery.
- Manager - Has full control of the gallery, including managing content, users, and settings.
For a detailed breakdown of permissions, see Gallery roles and permissions.
3. In the Search users field, start typing a user’s name, and select the user from the list and press 'enter' to add them.

Repeat to add additional users.
4. Click Add to confirm your selection.
All users added in the same action receive the same permission.
Update user permissions
- Click the three dots at the end of the user's row.
- Select Edit user.
- Under Select permissions, choose the new permission:

The 'Edit user' window opens.

- Member
- Contributor
- Moderator
- Manager
4. Click Update to save your changes.
The user’s permission is updated immediately.
Good to know
- You can’t edit permissions for the gallery owner.
- Permission changes apply only to this gallery.
- You can update one user at a time.
Remove users from a gallery
If a user no longer needs access, you can remove them from the gallery.
- Click the three dots at the end of the user’s row.
- Select Remove user.
- Confirm the removal when prompted.

Good to know
- Removing a user revokes their access to this gallery only.
- The user’s media and account aren’t deleted.
Download the user list
To download a CSV list of all users who have access to the gallery, click Download list.

The downloaded file includes user details and assigned permissions.
