This guide describes how to install, configure and upgrade the Kaltura Video Tool for Sakai V5. The Kaltura Video Tool for Sakai V5 supports Sakai version 11. If you are running a different version, please refer to the relevant information for that version.
Prerequisites
Before you being be certain that you have the following information for your Kaltura account:
- Partner id (PID) and Admin Secret for your Kaltura account. Alternatively, you can find this information in KMC under Settings and Integration Settings.
- A Kaltura Application Framework instance URL of type "SAKAI", for example, 12345678.kaf.kaltura.com
Installation Process
Installing the Kaltura Video Tool for Sakai Application
- Download the Sakai-extension from github to get the latest Kaltura package.
- Change the Kaltura version to match the Sakai version you are using. For example: "find ./ -type f -exec sed -i -e 's/11-SNAPSHOT/11.2/g' {} ;"
- Add the “My Media” tool (see additional instructions below)
- Build the Sakai extension project: mvn clean install.
- Shutdown your Tomcat server
- From the Kaltura Sakai extension run the following command to deploy to Sakai: mvn sakai:deploy -Dmaven.tomcat.home= <path to TOMCAT home>
- Add the following to your sakai.properties and restart your server:
Fill in your partner ID, Admin Secret and KAF instance in sakai.properties,as follows:kaltura.launch.key= ###CHANGEME### --> Your partner ID
kaltura.launch.secret= ###CHANGEME### --> Your admin secret
kaltura.host= ###CHANGEME### --> Your KAF instance hostname (ex: https://123456.kaf.kaltura.com)
kaltura.ckeditor.url= ###CHANGEME### -->https://<kaltura partner id>.kaf.kaltura.com/browseandembed/index/browseandembed
content.cleaner.default.low.security= ###CHANGEME### --> true
portal.include.extrahead= ###CHANGEME### --><script type="text/javascript" language="JavaScript" src="/media-gallery-tool/js/kaltura-upgrade.js"></script>
portal.iframesuppress= ###CHANGEME append tool ids kaltura.media and kaltura.my.media ### -->:all:kaltura.media:kaltura.my.media
auto.ddl= true ###only need to be on for the first server restart###
- Restart the Tomcat server.
Adding the CKEditor (Rich Text Editor) Integration
The following steps describe how to modify Sakai to allow the CK editor to integrate with the Kaltura Browse Search & Embed tool.
To integrate the CKEditor
Copy the "kaltura" directory into the {SAKAI_ROOT}/reference/library/src/webapp/editor/ckextraplugins
Example: cp -R {KALTURA_LTI_ROOT}/ckeditor/kaltura {TOMCAT_HOME}/library/editor/ckextraplugins
Edit {TOMCAT_HOME}/library/editor/ckeditor.launch.js
At about line 158, inside the definition of "toolbar_Full:", add 'kaltura' before the two references to 'Image' (these are the buttons in the toolbar):
(sakai.editor.enableResourceSearch? ['AudioRecorder','ResourceSearch','Image','Movie','Table','HorizontalRule','Smiley','SpecialChar','fmath_formula','FontAwesome'
: ['AudioRecorder','Image','Movie','Table','HorizontalRule','Smiley','SpecialChar','fmath_formula','FontAwesome']),
changes to:
(sakai.editor.enableResourceSearch
? ['AudioRecorder','ResourceSearch','kaltura','Image','Movie','Table','HorizontalRule','Smiley','SpecialChar','fmath_formula','FontAwesome']: ['AudioRecorder','kaltura','Image','Movie','Table','HorizontalRule','Smiley','SpecialChar','fmath_formula','FontAwesome']),
At about line 232, add the following additional line:
ckconfig.extraPlugins+="image2,audiorecorder,movieplayer,wordcount,fmath_formula,autosave,fontawesome,notification";
changes to:
CKEDITOR.plugins.addExternal('kaltura',basePath+'kaltura/','plugin.js');
ckconfig.extraPlugins+="image2,audiorecorder,movieplayer,wordcount,fmath_formula,autosave,fontawesome,notification,kaltura";
Adding the Kaltura Media Gallery to Sakai Sites
To add the Kaltura Media Gallery to a course/project
- Login as admin user or a user with maintain access permissions to a site.
- Enter the Sakai site and click on 'Site Info' from the left navigation pane.
- Click on 'Edit Tools'.
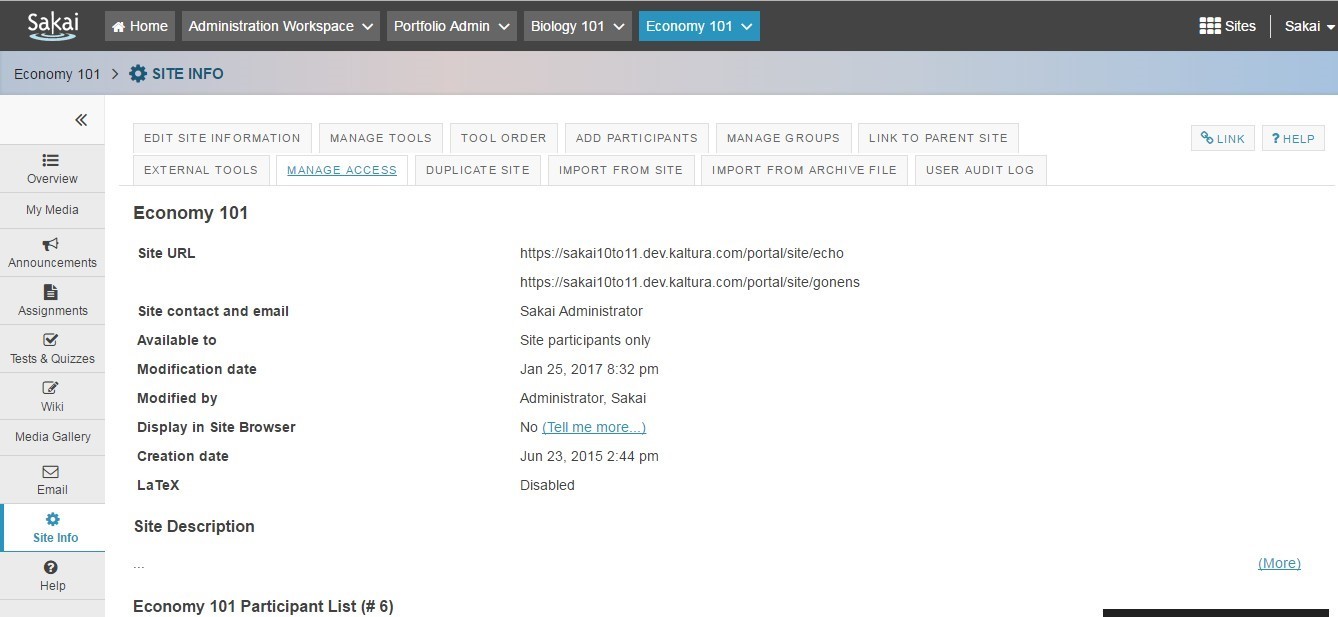
In the resulting page, you should see one new tools named 'Media Gallery’ available in the list.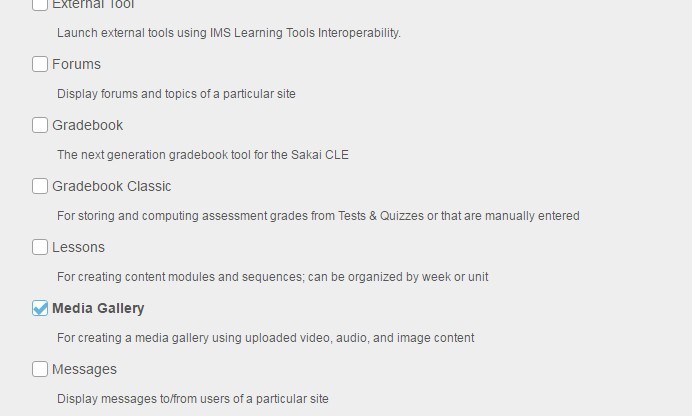
- Select the checkbox of the desired tool you want to add to your site and click Save.
If the Sakai site had an existing Media Gallery tool/page added to it, then no steps are required to update the Media Gallery tool.


Adding Kaltura My Media to Sakai My Workplace
The following tasks should be performed before you deploy the Sakai-extension. This step is not necessary if you want to add My Media to the workplace only, as this is the default.
To add the Kaltura My Media to the workplace or a Sakai site
- Login to the tomcat server, and edit the following XML:
“sakai-extension/my-media-tool/src/main/webapp/tools/kaltura.my.media.xml” - To the XML file: Add or remove the categories relating to the sites that you want to deploy the tool.
Adding each of these lines will add the “My Media” to the relevant Sakai part:Sakai home/workplace (default): “<category name="myworkspace" />”
Sakai courses: “<category name="course" />”
Sakai projects: “<category name="project" />”
- Build and deploy the sakai-extension.
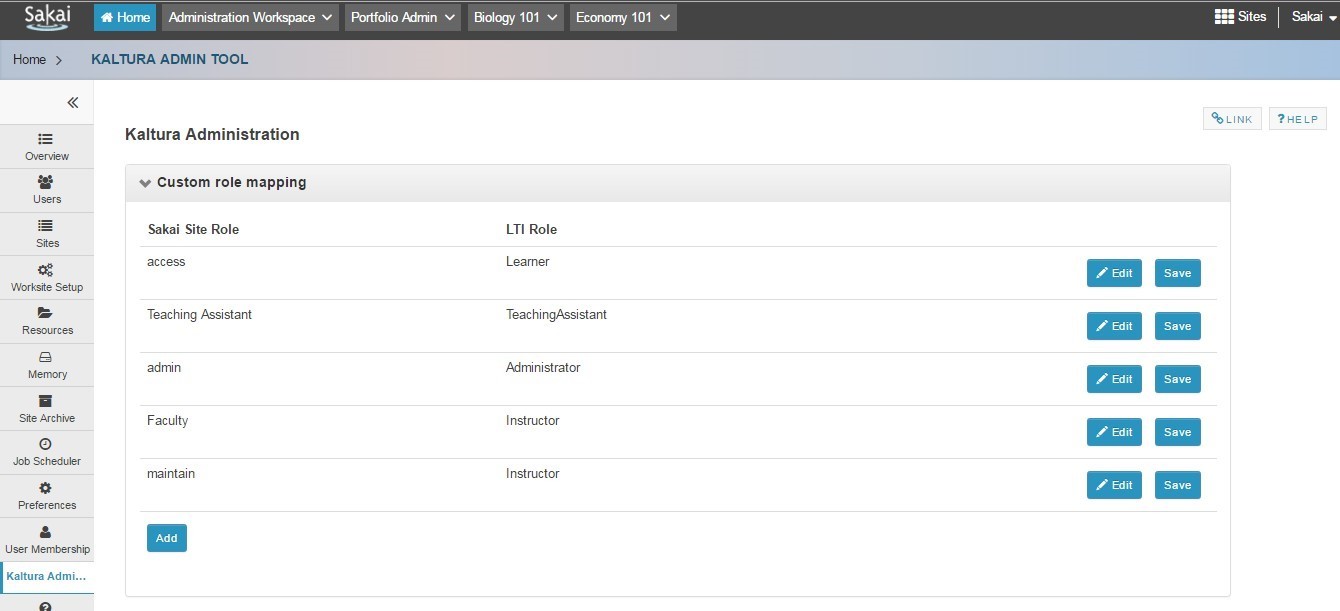
Verifying that the Kaltura Admin Tool is Available
To verify that the Kaltura Video Admin Tool is available
- Login as admin user or a user with maintain access permissions to a site.
- Click on 'Sites' tool from the admin user My Workspace.
- Search for “Admin” in the Site ID field and press Enter.
- In the resulting page, click on the Administration Workspace link.
- In the Edit Site admin page, click Add/Edit pages located toward the bottom of the page.
- Click New Page and enter the Title as Kaltura Admin and click Tools under Continue Editing.
- Click New Tool.
- Select the radio button next to Kaltura Admin Tool (kaltura admin) and click Save under Complete the Site Edit.
- Go to the Administration Workspace site and on the left navigation page the Kaltura Admin Tool should be available.

Upgrading from Kaltura Video Tool v3 to Kaltura Video Tool v5
Please coordinate with your Kaltura representative to schedule your content migration from previous versions.
You must have Kaltura release version 3 on Sakai version 2.9 and above to upgrade to Sakai version 11.x
The main updates post migration are as follows:
- If an entry was private in the site gallery it will be pending moderation in the Media Gallery post migration
- If an entry was private in a collection, it will not appear in the channel playlist
- Not all collections types must be migrated, You can decide which types of collection you would like to migrate to channel playlists. You will need to provide the list of collection types you would like to migrate from the following: Instructor, Community, Personal and Owner.
Upgrading from Kaltura Video Tool v4 to Kaltura Video Tool v5
Remove the existing Kaltura module from the Sakai codebase and follow the steps described in the installation process to upgrade to latest version.
You must have Kaltura release version 4 on Sakai version 10.x and ready to upgrade to Sakai version 11.x. No migration of content is needed.
