About
Want to automatically publish your Zoom recordings to specific LMS courses? This article will guide you through the setup. First, set up your categories in Zoom using the Kaltura Management Console - please see the Zoom Integration - Setup Guide for detailed steps.
With Zoom LTI Pro, scheduling meetings within your LMS course is simple. To ensure recordings are auto-published to the correct course, configure the LMS category in the Zoom Integration Edit Zoom Account settings. This setup enables seamless automatic publishing of recordings to LMS courses through Zoom and Kaltura integration.
When using Zoom LTI Pro, recordings are set to automatically publish based on the Tracking field to the designated category. Please note, this feature cannot be selectively disabled.
There are four key configuration steps required to enable automatic publishing:

Step 1: Set up the Kaltura-Zoom connector
Follow the steps in the Zoom Integration - Setup Guide to connect Kaltura with Zoom. This connection is essential to enable automatic publishing between the platforms.
Step 2: Configure tracking fields in Zoom account settings
- Enable tracking fields: Follow Zoom's guide on configuring Tracking Fields to activate this feature.
- Add tracking fields: Navigate to Admin > Account Management > Scheduling Tracking Field, add two fields, and make them optional:
- KalturaCategory (to assign your Zoom recording category)
- KalturaCategoryPath (to set the path of the category in Kaltura)
When setting up the KalturaCategory and KalturaCategoryPath tracking fields, avoid checking the “required” box. Checking this box will make these fields mandatory for all Zoom meetings, even those scheduled outside of the LMS. For example, meetings created via the Zoom web interface will also require the LMS course ID, which could lead to errors or unwanted limitations.
While optional, setting up these tracking fields is essential for automatic publishing. If these fields are not configured, auto-publishing will not work. Making the fields visible to end users is optional.

For further details, visit Using scheduling tracking fields.
Step 3: Set LTI variables in the LMS’s Zoom LTI Pro tool provider settings
- Configure LTI Pro: Visit Configuring LTI Pro for specific instructions. Note that the instructions differ for LTI 1.1 and LTI 1.3 depending on your LMS.
- For LTI 1.1 - Some LMSs like Canvas will automatically add “custom_” to variable names (for example, custom_canvas_course_id)
- For LTI 1.3 - Even if the ltiContextIdAttribute in KAF includes “custom_,” you must EXCLUDE “custom_” in the attribute names when setting up Zoom’s Tracking Field (for example, use canvas_course_id instead of custom_canvas_course_id).
Following the correct naming conventions for each version is essential for auto-publishing to work properly. For details on how each LMS handles these variables, see Examples of different LMS settings section below.
Step 4: Map LTI variables to tracking fields in Zoom LTI Pro configuration
In the Zoom Marketplace, open the Zoom LTI Pro configuration to map the tracking fields to the appropriate LTI attributes for your LMS. Navigate to App Marketplace > LTI Pro > Manage then select Configure in the browser tab that opens. Scroll down to Tracking Fields, enable it, and add the mappings as needed.

Ensure the LTI attributes mapped to the KalturaCategory and KalturaCategoryPath tracking fields match the attributes specified in your KAF application’s ltiContextIdAttribute (for example, canvas_course_id and kaltura_category_path for LTI 1.3). Consistent naming ensures proper alignment between Kaltura and Zoom.

See Using Scheduling Tracking Fields for more information.
Additional steps for multiple LMSs or courses with similar names
If you're working with multiple LMSs or have courses with identical category names, follow these steps for proper categorization:
- Add LTI Custom Parameter: Add a custom field (kaltura_category_path) in the LTI configuration to pass the base path for the category. Refer to the Examples of different LMS settings below for guidance.
- Set Category Path in Tracking Field: Assign the tracking field value for KalturaCategoryPath to match the custom field in the LTI configuration.


Examples of different LMS settings
Here’s how to configure the kaltura_category_path parameter for each LMS:
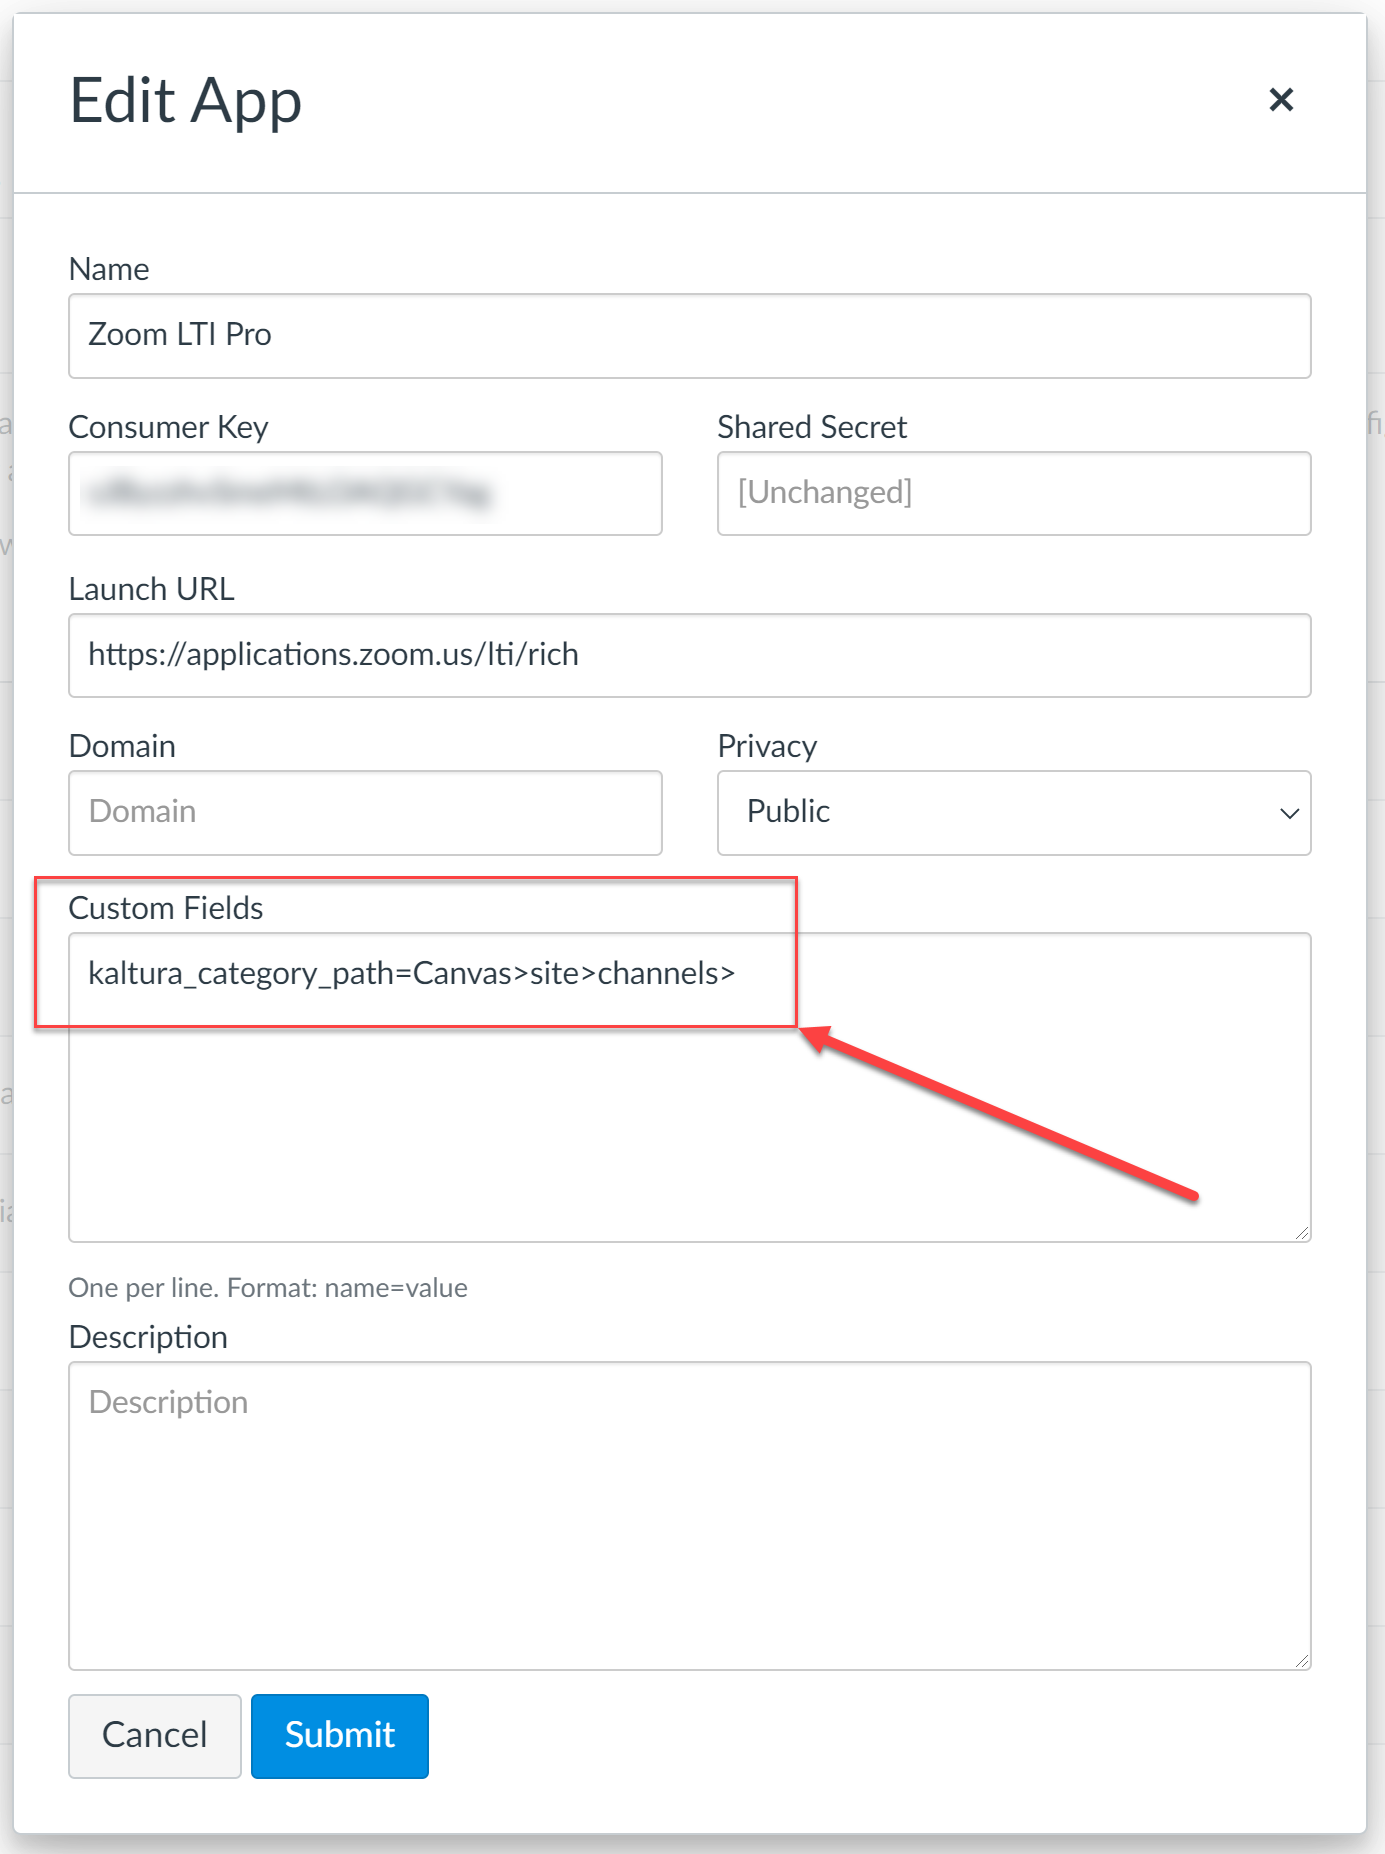
Canvas
Canvas uses the LTI attribute custom_canvas_course_id for course IDs. Add the category path in the LTI config and name it kaltura_category_path.
- For LTI 1.1, Canvas will add "custom_" to the field, so it appears as custom_kaltura_category_path.
- For LTI 1.3, use canvas_course_id and kaltura_category_path WITHOUT "custom_."
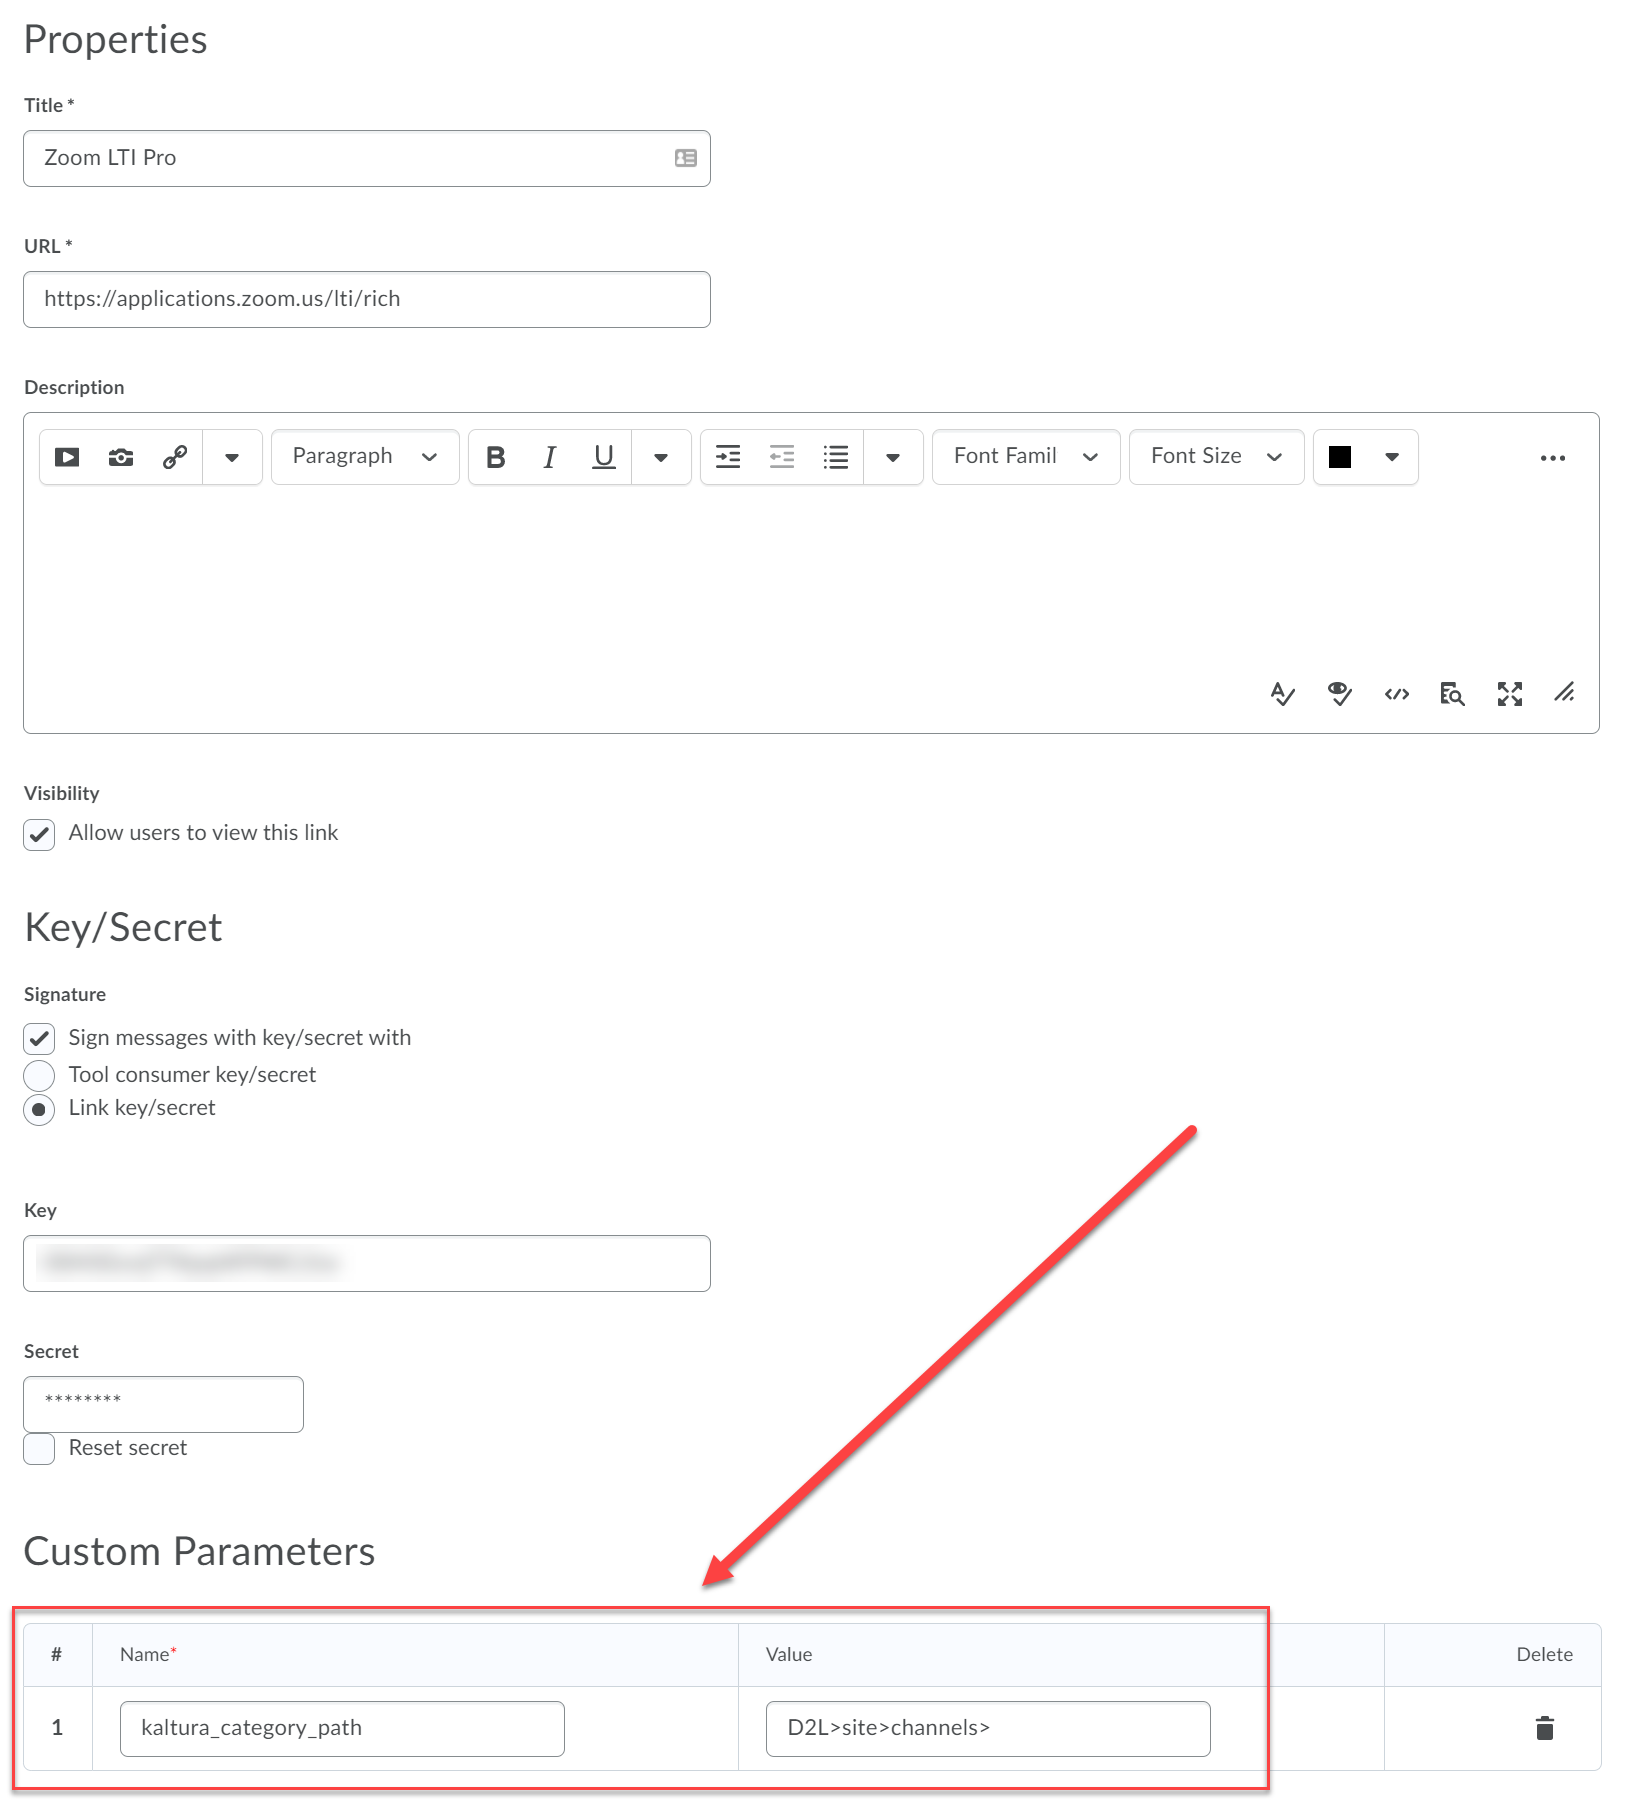
D2L
D2L uses the LTI attribute context_id for course IDs. Add kaltura_category_path in the Custom Parameters field of the LTI config. When passed to Zoom, it appears as custom_kaltura_category_path.
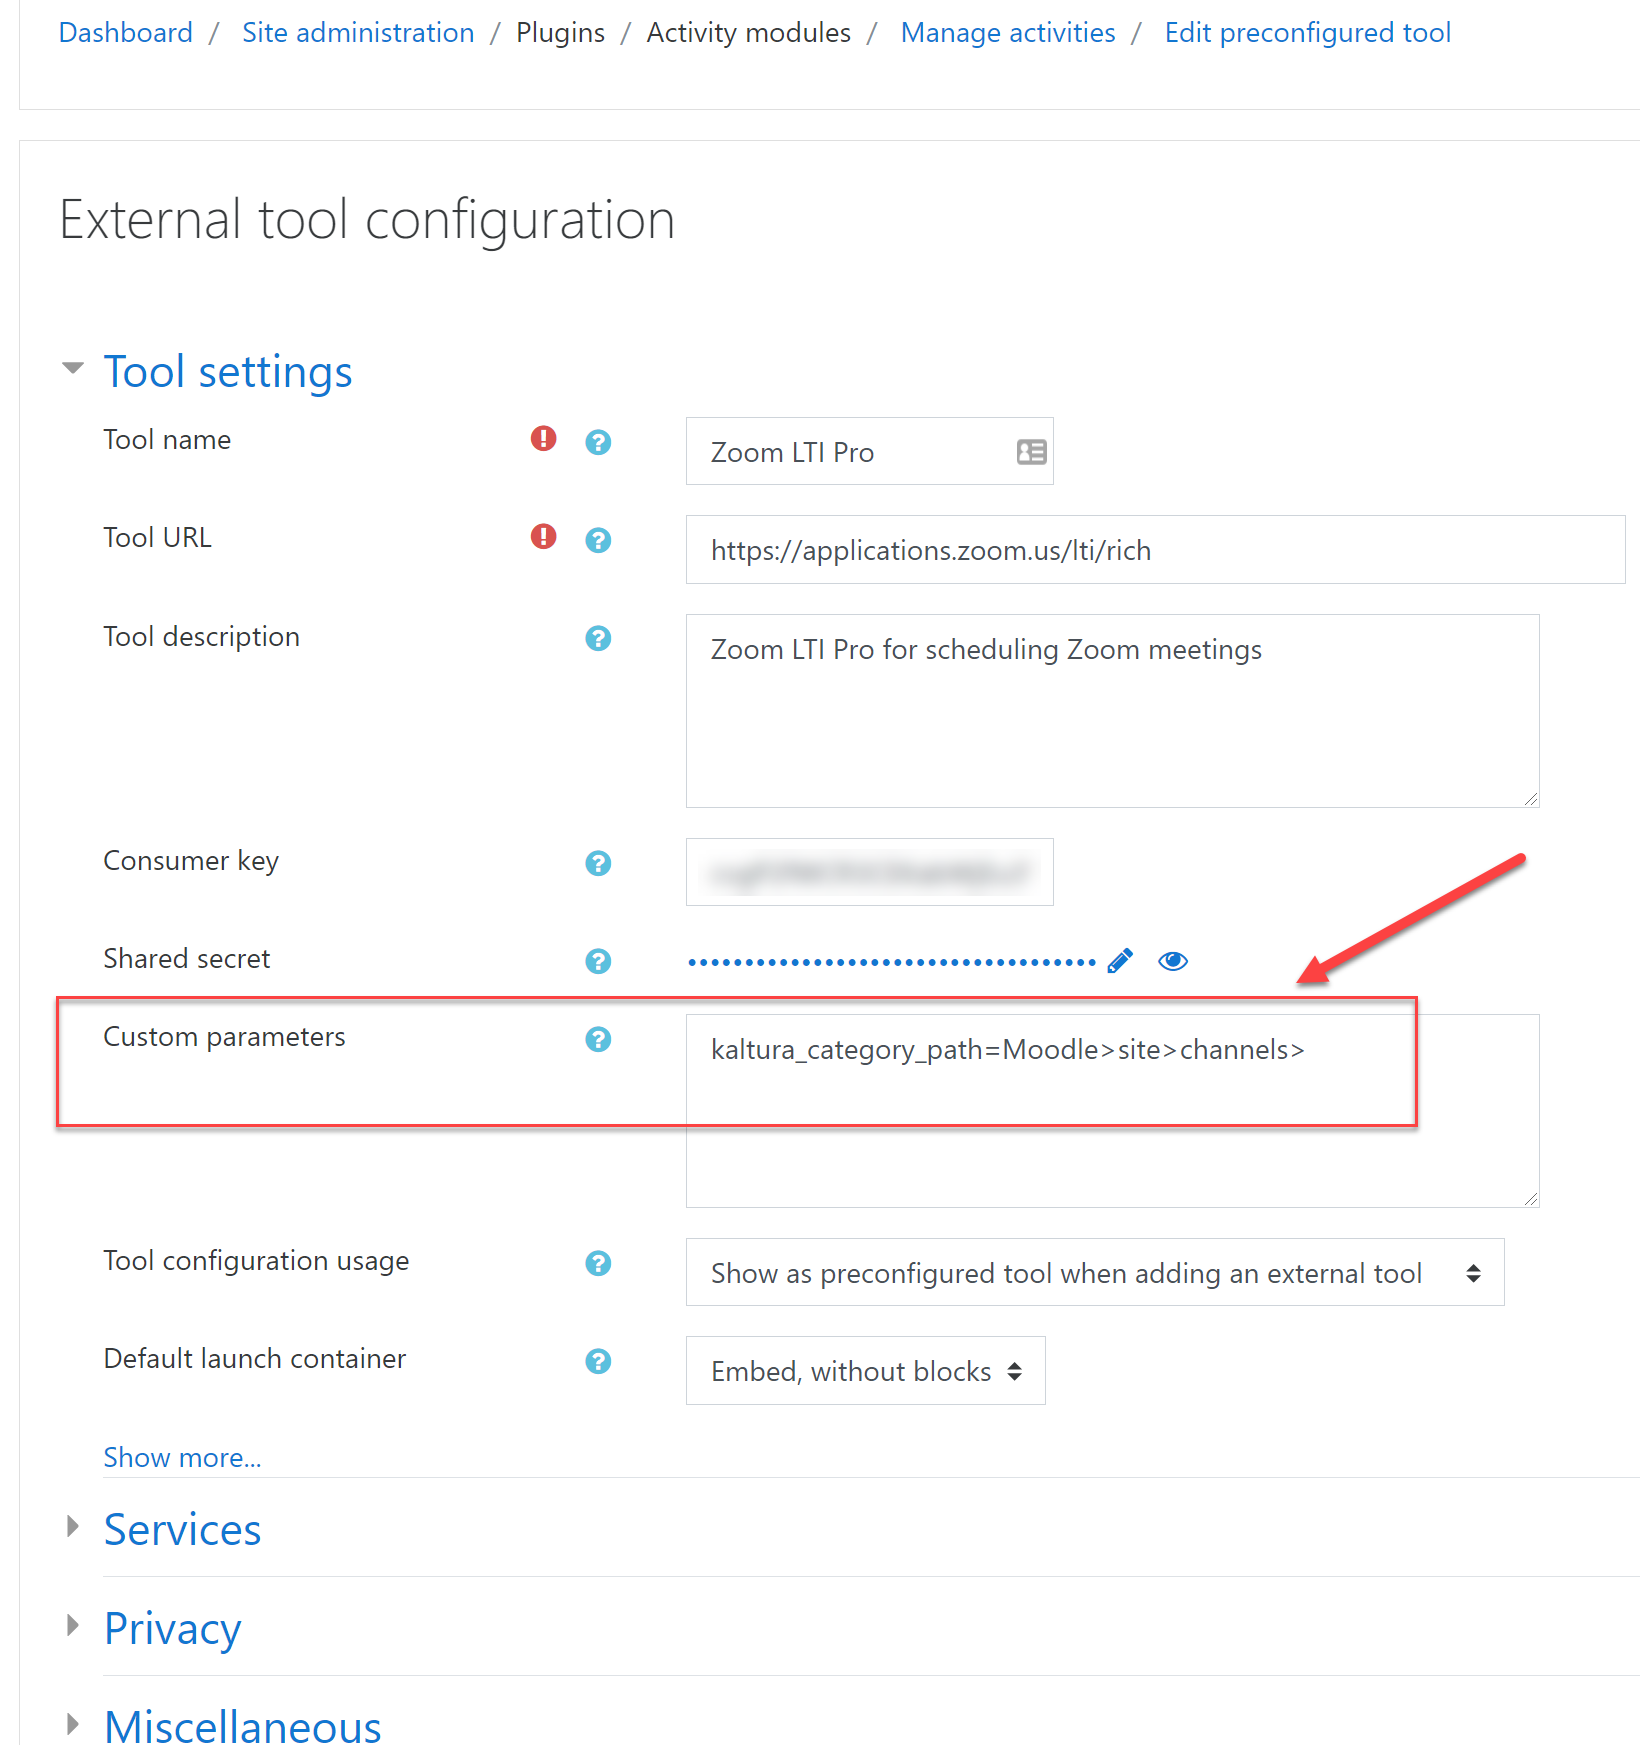
Moodle
Moodle also uses context_id for course IDs. Add kaltura_category_path in the Custom Parameters field, where it’s received by Zoom as custom_kaltura_category_path.
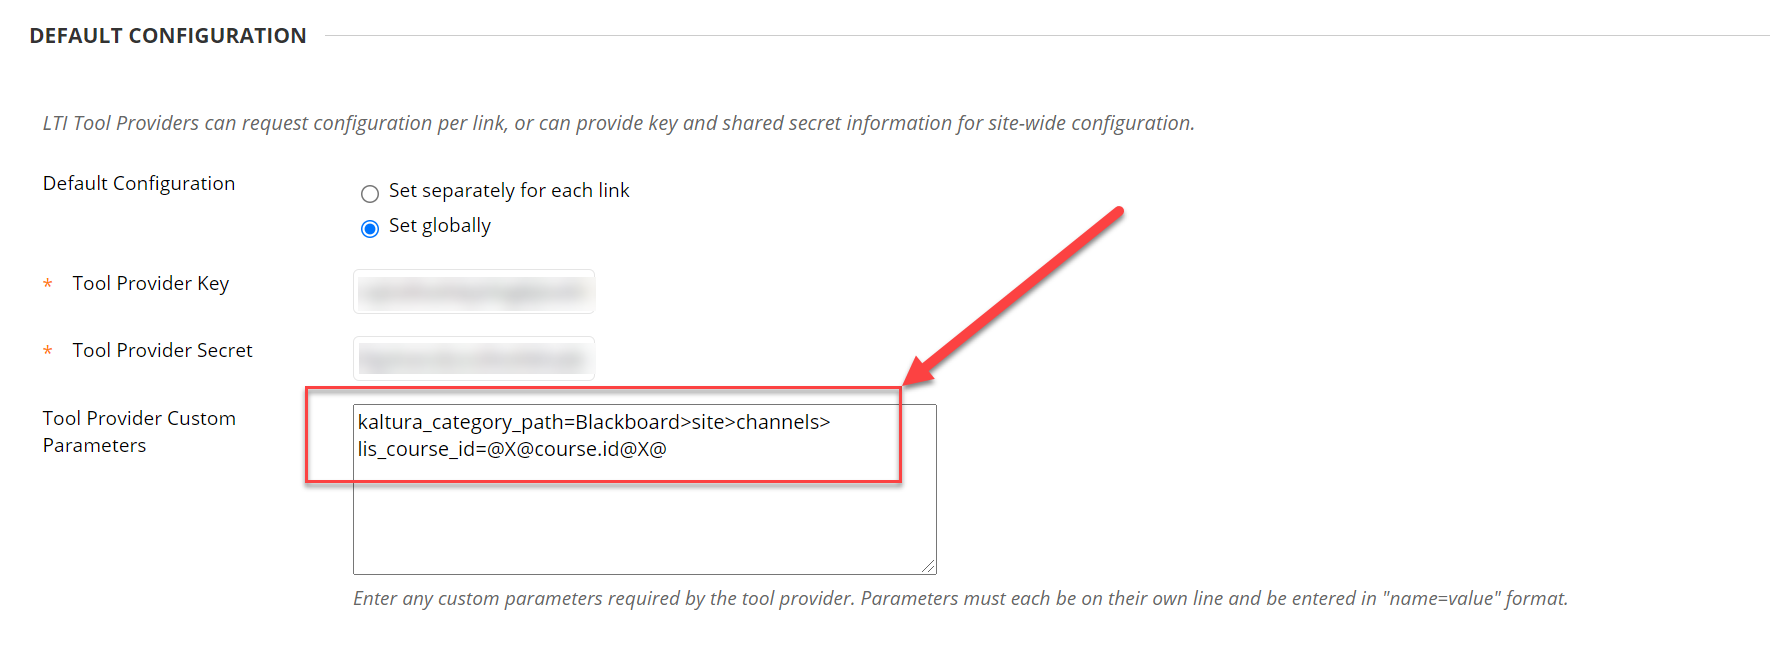
Blackboard
Blackboard passes the context_id attribute for course IDs, but some deployments may need an additional custom parameter for course IDs. Verify your Zoom LTI Pro configuration as needed.
Testing the setup
Look for the tracking field values in the scheduled Zoom meeting.
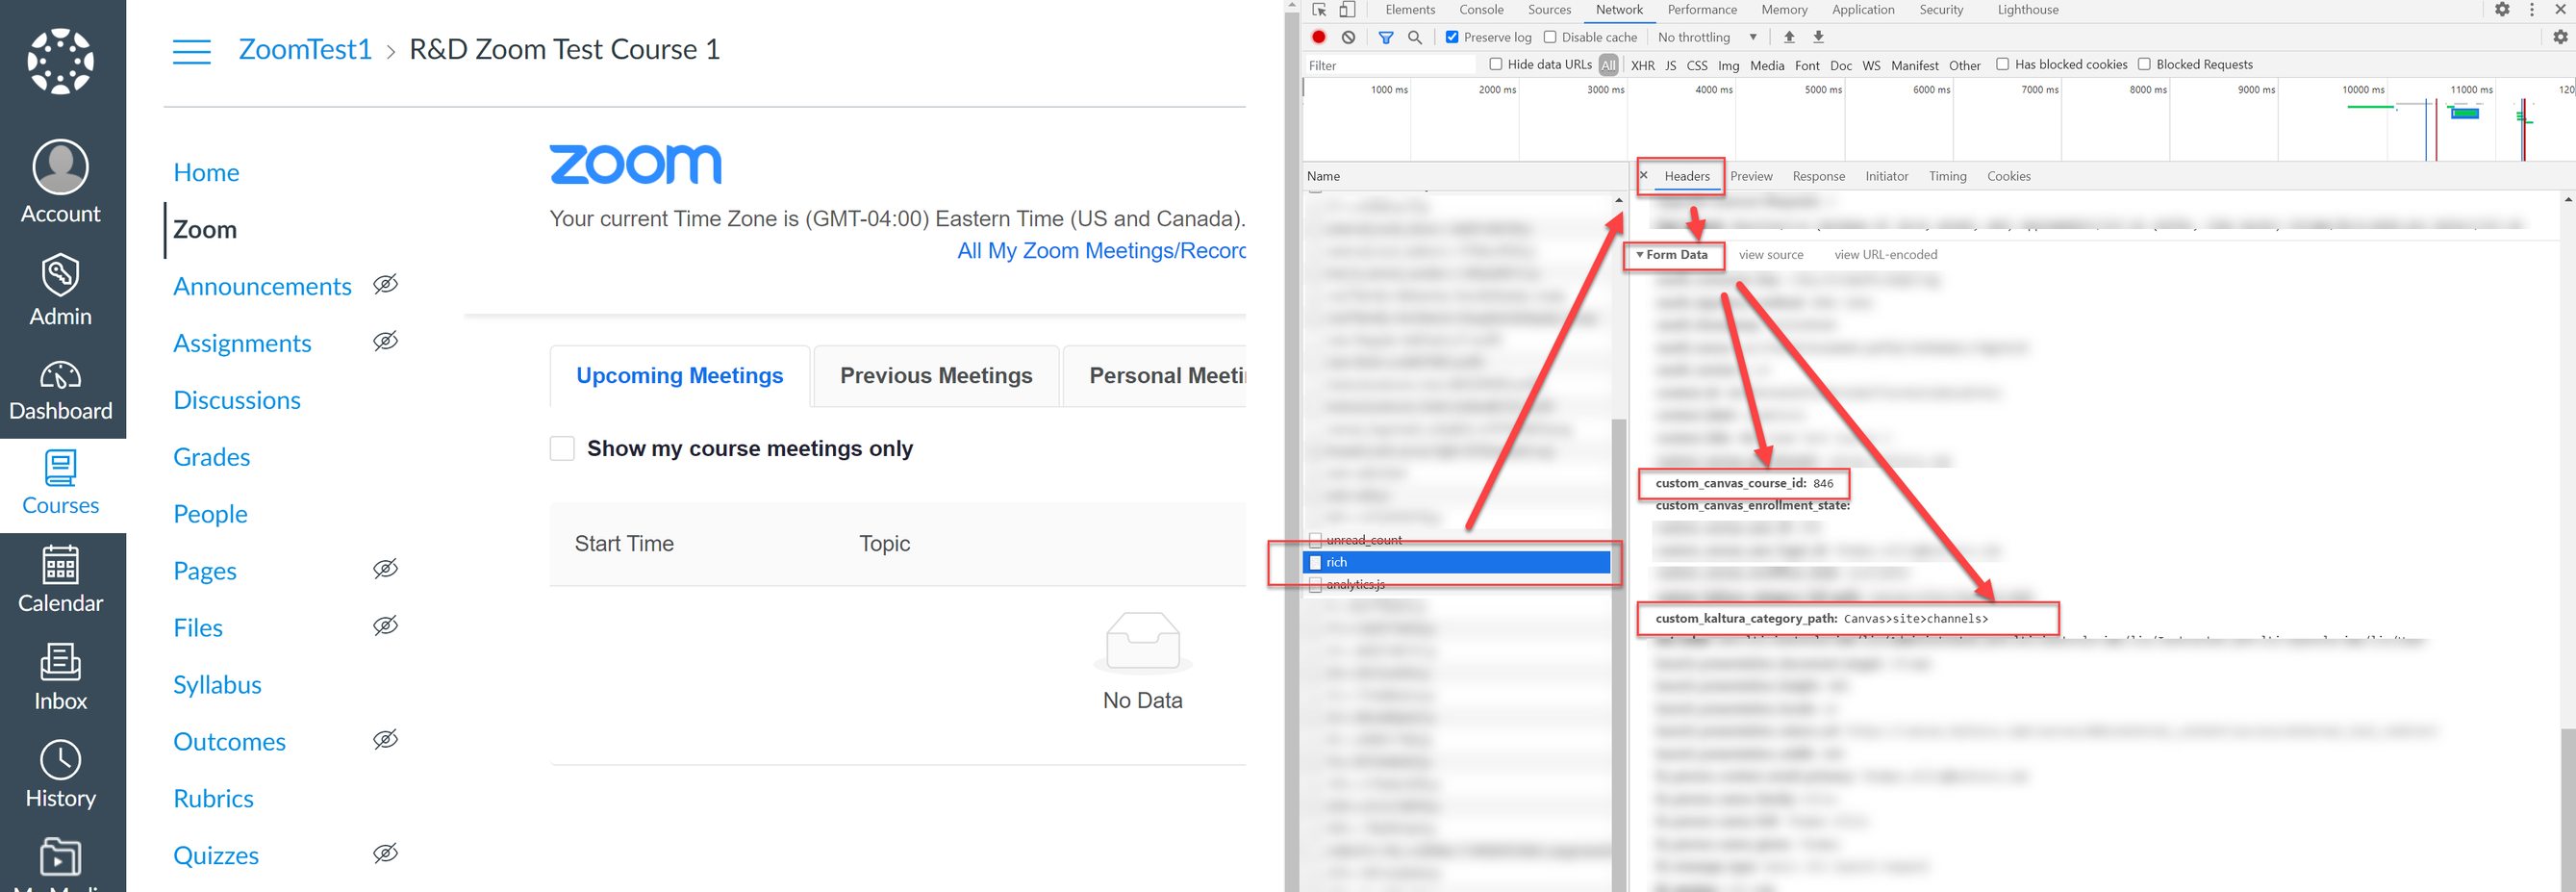
Verify LTI attributes using Network Console tools:
- Open your browser’s Developer Tools and navigate to the Network tab.
- In Chrome, check the Payload section under network requests if the Form tab isn’t available.
- Alternatively, try using Firefox or Edge Developer Tools, which might display form data

If values aren’t populating, check the Network Console in your browser upon launching Zoom LTI Pro to see if the expected LTI attributes are being passed.
- For LTI 1.3, look for 'advantage' instead of 'rich' in the Network Console.
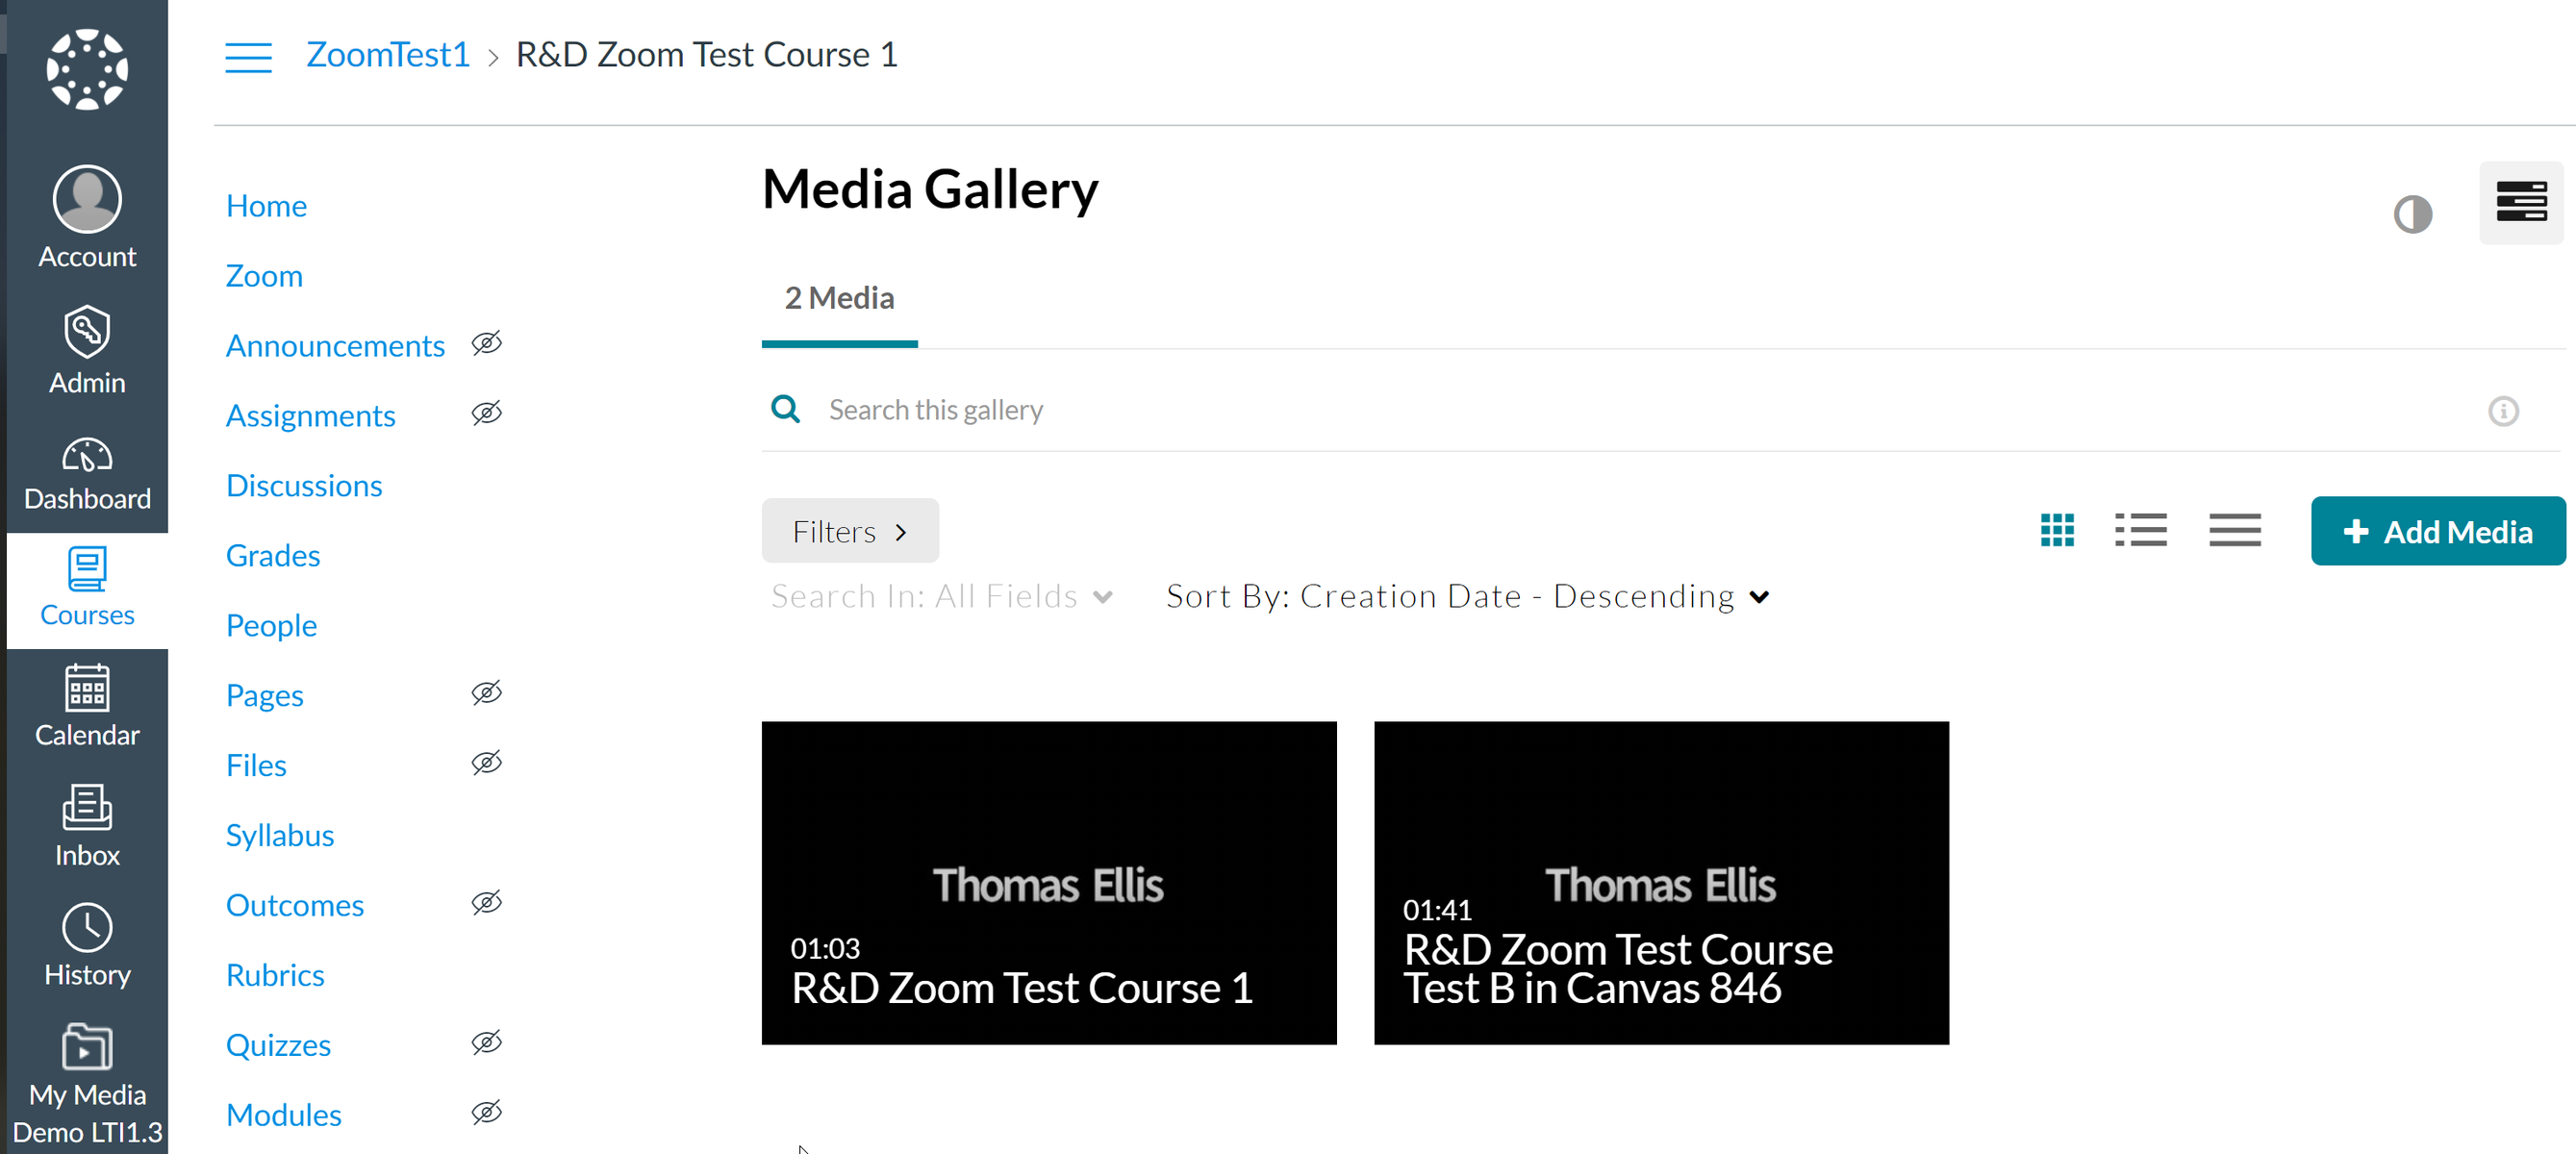
Verify that recordings automatically publish to the course’s Media Gallery in your LMS.
If tracking fields are visible to users, they can manually populate these fields when scheduling meetings outside the LMS. This can trigger automatic publishing if they know the correct category path and name, making it possible to publish to channels like the video portal.
