This guide describes how to add the Kaltura Video App for Canvas with LTI version 1.1 to your Instructure Canvas environment. This guide is intended for Canvas and Kaltura administrators.
Installation Overview and Requirements
The Kaltura Video App for Canvas is implemented as a set of LTI external tools. Each is added manually by a Canvas administrator. Please refer to the Canvas Admin Guide on how to manually configure an external tool on your Canvas environment.
Prerequisites
- A Kaltura account:
- Partner id (PID) and Admin Secret for your Kaltura account. Alternatively, you can find this information in the Rich Media Content Management System (Rich Media CMS) under Settings > Integration Settings.
- A Kaltura Application Framework instance URL, for example: 12345678.kaf.kaltura.com. If you do not have a KAF instance, please contact your Customer Success Manager to obtain one.
- The Kaltura inherit key must be turned on, or you may create and activate a scoped key. You are required to have one of either keys before beginning to deploy the Kaltura Video App for Canvas.
To activate the Kaltura inherit key, navigate to the Canvas Admin and select Developer Keys and then select the Inherited tab. Set the State to On.
To create and activate a scoped key, please see the deployment instructions section How to Deploy a Scoped Key.
Deployment Instructions
This section describes how to deploy the Kaltura Video App for Canvas.
Deploying the Kaltura Tools to Your Canvas Environment
The Kaltura Video App for Canvas includes an XML generator that generates the XML files required to deploy the Kaltura Application to Canvas.
The following configuration files are required to deploy the Kaltura Video App for Canvas:
- MyMedia.xml
- MediaGalleryandBrowseandEmbedwithCIM.xml
- KalturaVideoQuiz.xml
- KalturaVideoSubmission.xml
- KalturaQuickIngest.xml
These configuration files are used to connect your Canvas environment to your Kaltura Application Framework (KAF) instance. To create these xml files, navigate to your Canvas KAF - http://[your_KAF_base_URL]/canvas/config/create-xml-for-instance. The files are then auto-generated and will be used in the deployment process.
To deploy My Media
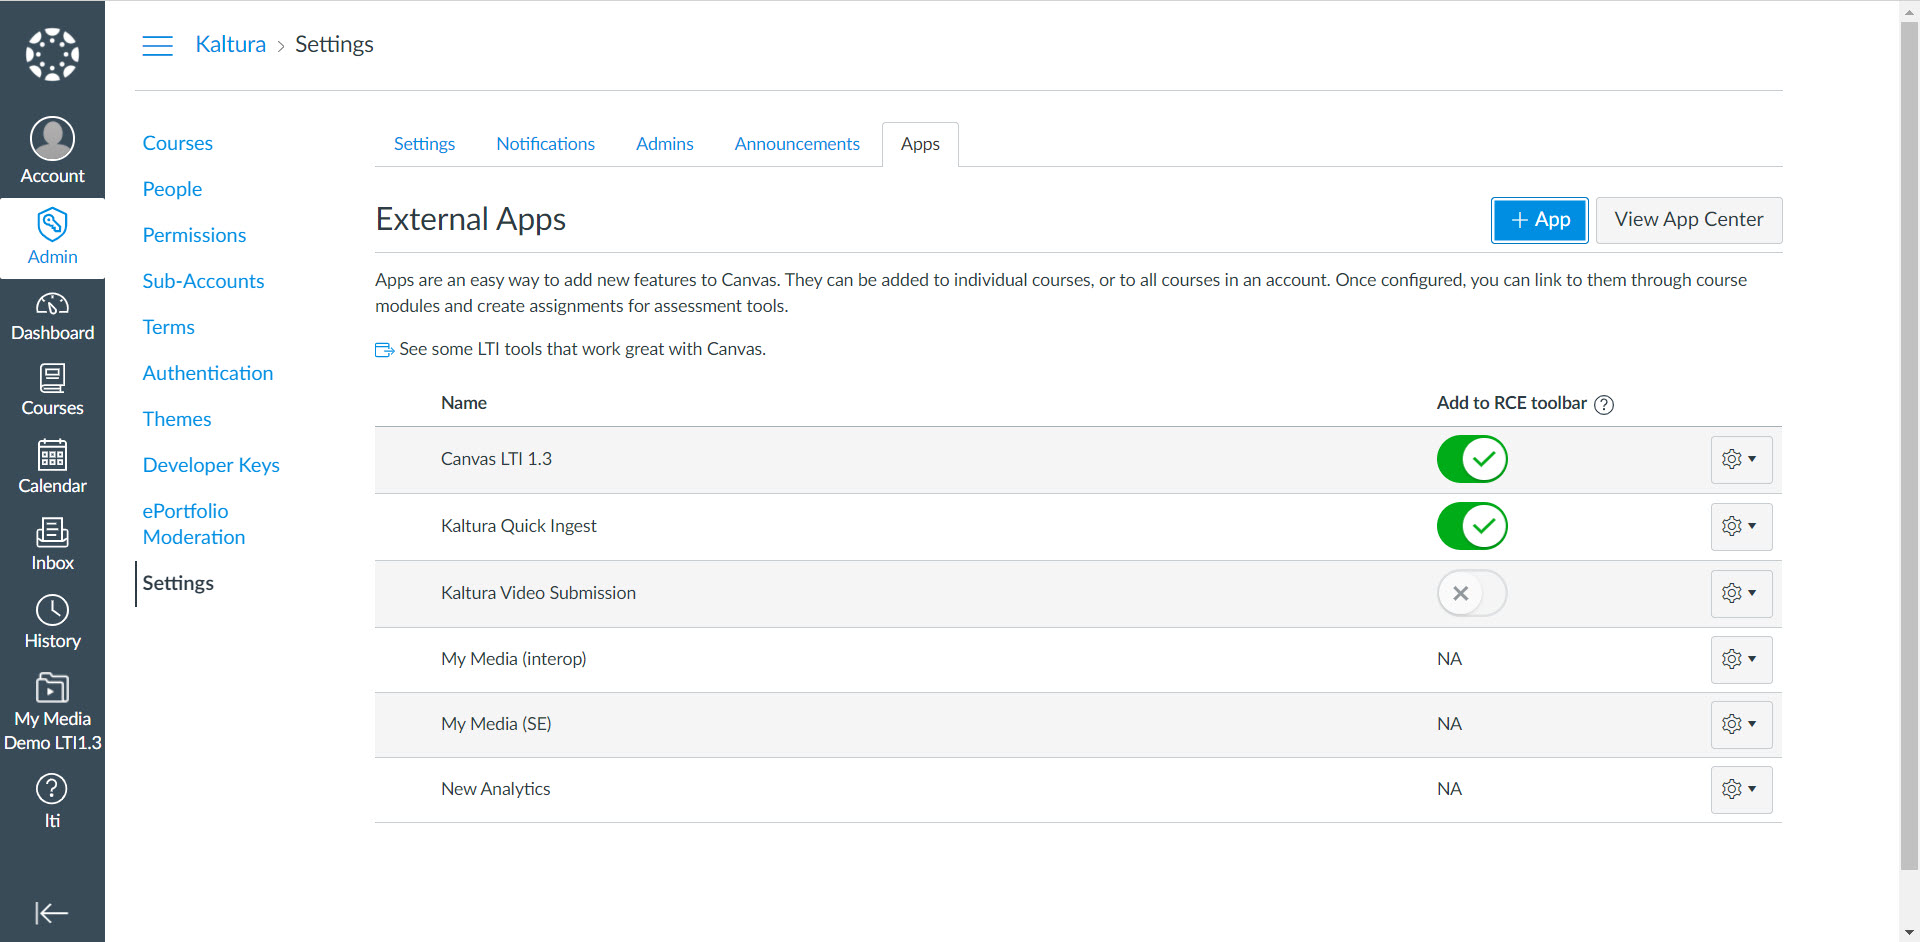
- In your Canvas environment, go to Settings and click Apps.
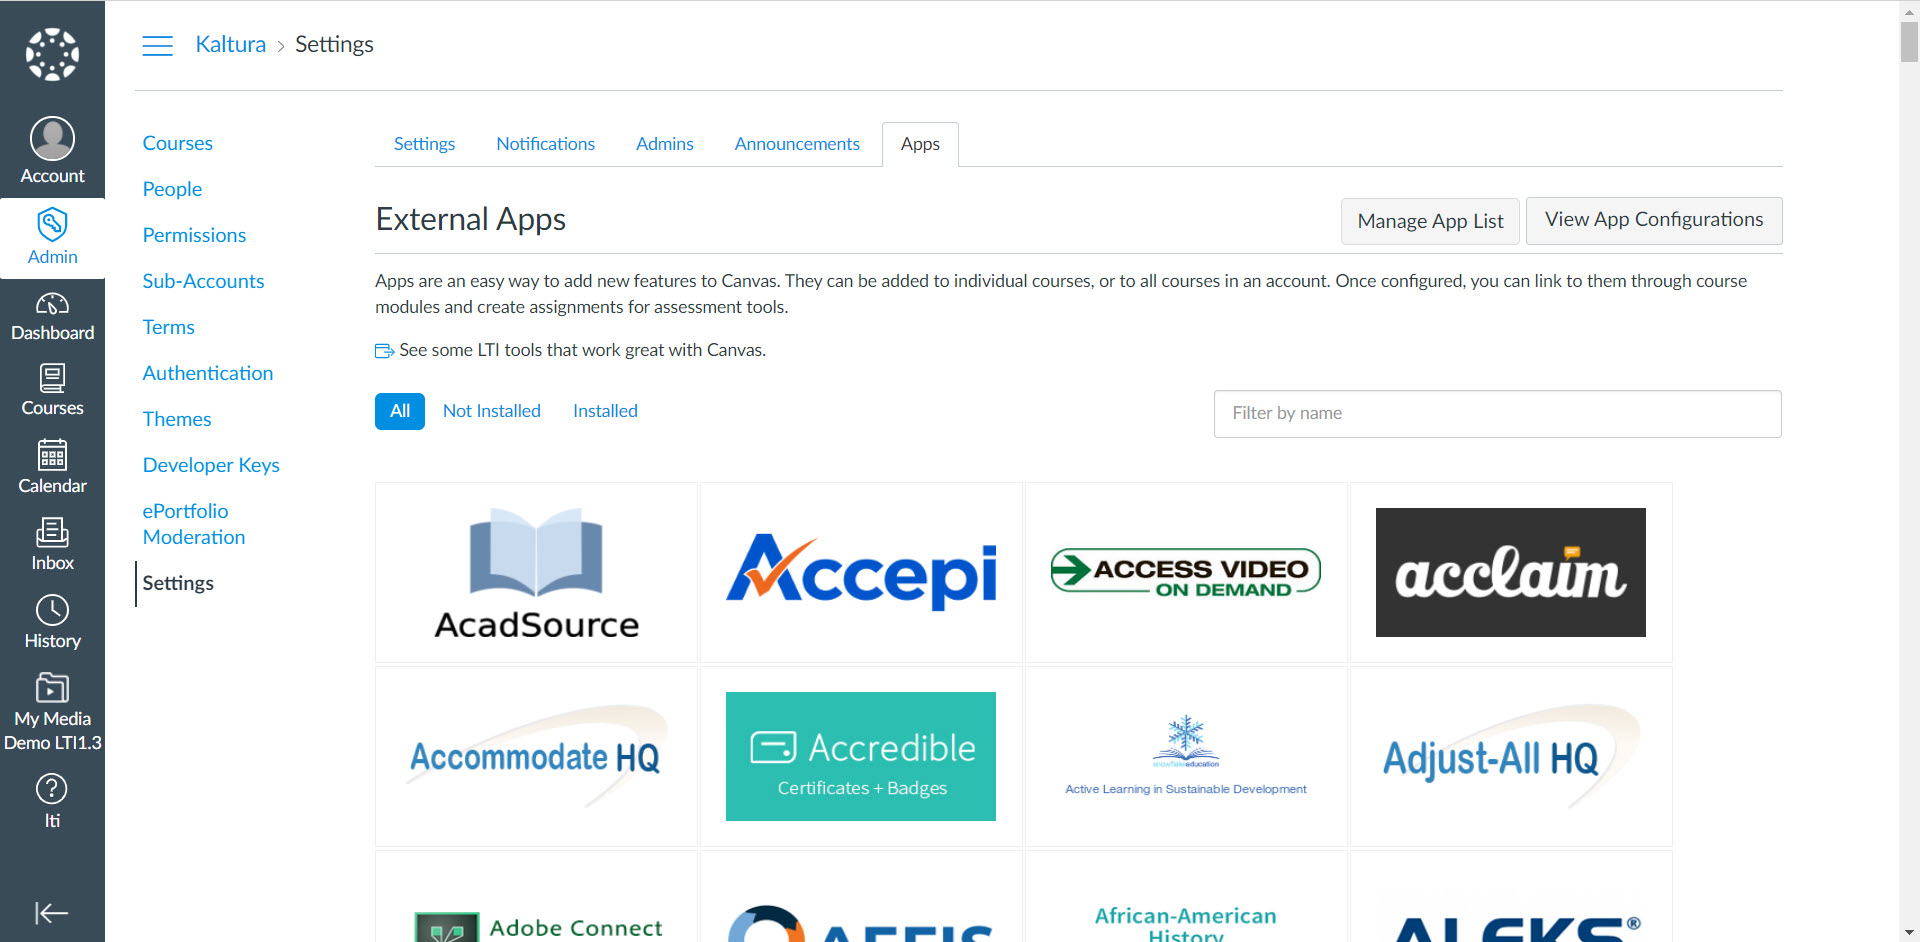
- Click View App Configurations to open the list of external apps. The External Apps list is displayed.

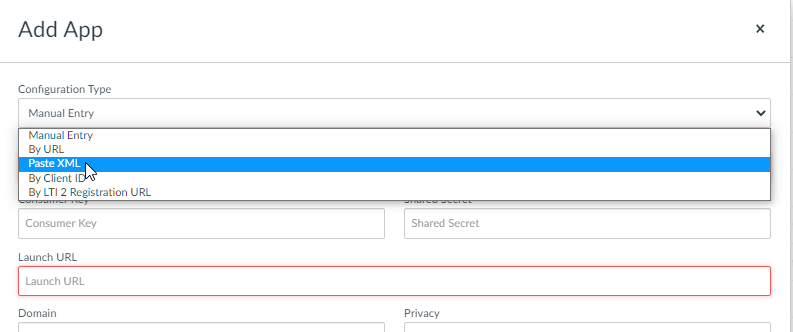
- Click + App to open the Add App window.
- In the Add App window, under Configuration Type select “Paste XML”.

- Enter the following information:
Field
Value
Name
Name ("My Media", for instance)
Consumer Key
Your Kaltura account Partner Id
Shared Secret
Your account administrator secret
XML Configuration
Paste the content of MyMedia.xml created by the XMLs generator.
- Click Submit.
The My Media tool is displayed in the list of external apps.
The My Media tool is also added to each course navigation menu.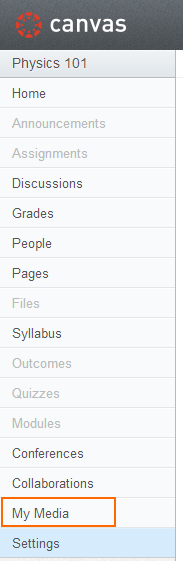


To deploy the Media Gallery
- In your Canvas environment, go to Settings and click Apps.

- Click View App Configurations to open the list of external apps. The External Apps list is displayed.

- Click + App to open the Add App window.
- In the Add App window, under Configuration Type select “Paste XML”.

- Enter the following information:
Field
Value
Name
Name ("Media Gallery", for instance)
Consumer Key
Your Kaltura account Partner ID
Shared Secret
Your account administrator secret
XML Configuration
Paste the content of MediaGalleryandEmbed.xml provided to you by your Kaltura representative.
- Click Submit. The Media Gallery tool is displayed in the list of external apps.

The Media Gallery tool is also added to each course navigation menu.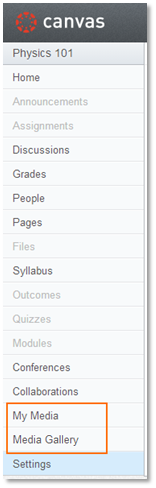


To deploy the Kaltura Video Quiz
- In your Canvas environment, go to Settings and click Apps.

- Click View App Configurations to open the list of external apps. The External Apps list is displayed.

- Click + App to open the Add App window.
- In the Add App window, under Configuration Type select “Paste XML”.

- Enter the following information:
Field
Value
Name
Name ("Kaltura Video Quiz", for instance)
Consumer Key
Your Kaltura account Partner Id
Shared Secret
Your account administrator secret
XML Configuration
Paste the content KalturaVideoQuiz.xml provided to you by your Kaltura representative.
- Click Submit.
Kaltura Video Quiz is added to the Assignment Submission Type external tools listing.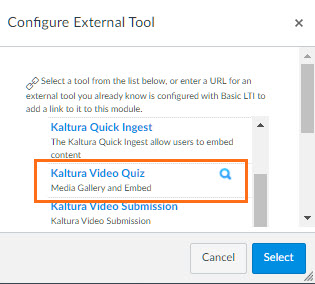


To deploy Kaltura Video Submission
- In your Canvas environment, go to Settings and click Apps.

- Click View App Configurations to open the list of external apps. The External Apps list is displayed.

- Click + App to open the Add App window.
- In the Add App window, under Configuration Type select “Paste XML”.

- Enter the following information:
Field
Value
Name
Name ("Kaltura Video Submission", for instance)
Consumer Key
Your Kaltura account Partner Id
Shared Secret
Your account administrator secret
XML Configuration
Paste the content of KalturaVideoSubmission.xml provided to you by your Kaltura representative.
- Click Submit. The Kaltura Video Submission tool is displayed in the list of external apps.
 The Kaltura Video Submission tool is also added to the Assignment Submission Type external tools listing.
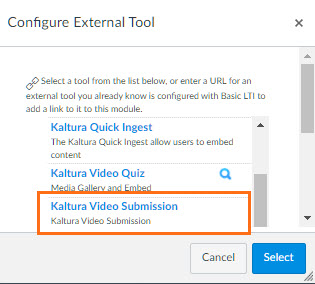


 The Kaltura Video Submission tool is also added to the Assignment Submission Type external tools listing.
To deploy Kaltura Quick Ingest
- In your Canvas environment, go to Settings and click Apps.

- Click View App Configurations to open the list of external apps. The External Apps list is displayed.
- Click + App to open the Add App window.
- In the Add App window, under Configuration Type select “Paste XML”.
- Enter the following information:
Field
Value
Name
Name ("Kaltura Quick Ingest", for instance)
Consumer Key
Your Kaltura account Partner Id
Shared Secret
Your account administrator secret
XML Configuration
Paste the content of KalturaQuickIngest.xml provided to you by your Kaltura representative.
- Click Submit. The Kaltura Quick Ingest tool is displayed in the list of external apps.
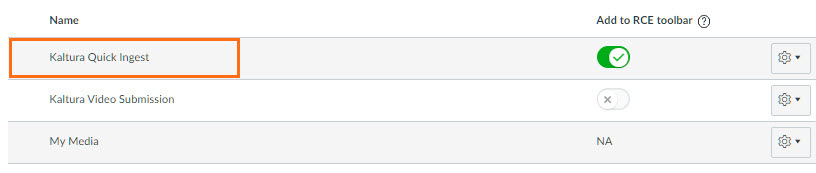 The Kaltura Quick Ingest tool is also added to the Rich Content Editor.
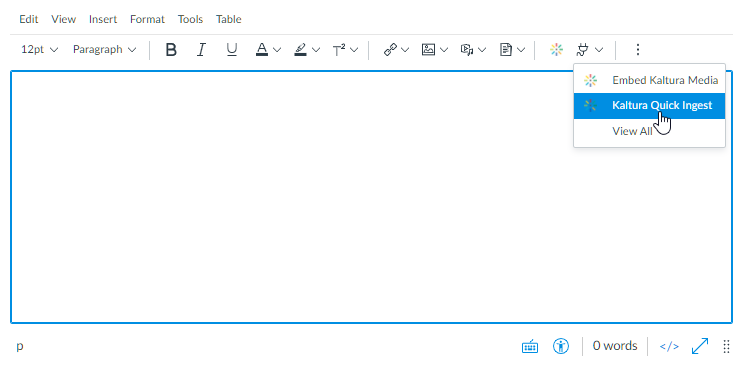


 The Kaltura Quick Ingest tool is also added to the Rich Content Editor.
To Deploy a Scoped Key
Kaltura uses API keys to retrieve information about course permissions to provide the "Publish to a Media Gallery from My Media" feature. If you would like to use a scoped key instead of a regular API key, please use the following steps.
- Log into Canvas to create the new key.
- Provide the key with the following permissions. (These are the scopes that Kaltura tools use.)
- url:GET|/api/v1/courses
- url:GET|/api/v1/courses/:id
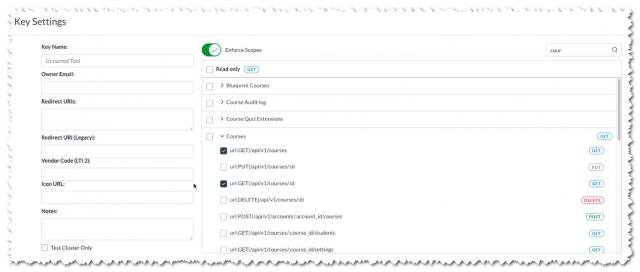
- Select a name and an owner email.
- Under the URIs ("Redirect URIs" and "Redirect URl (Legacy)") enter your KAF URL starting with "https://". e.g: "https://1234.kaf.kaltura.com/"
- Grab the app ID and key.
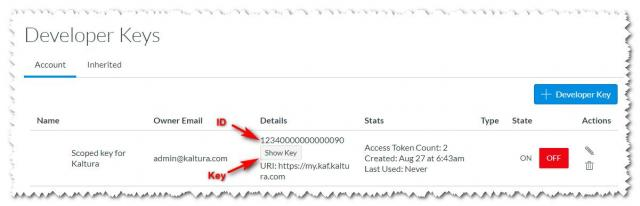
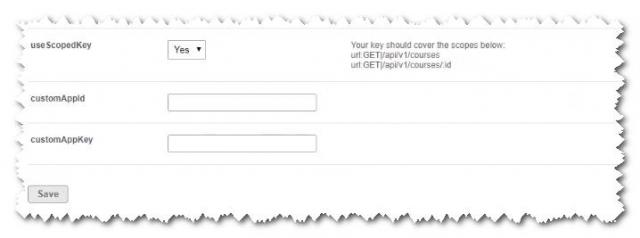
- Enter the information in the KAF Admin 'Canvas' module.
- Set "useScopedKey" to Yes.
- Fill in the customAppId.
- Fill in the customAppKey.