About
Categories help organize content in the Rich Media Content Management System (Rich Media CMS) and across front-end applications such as the legacy Video Portal, Events, and LMS sites.
This article explains how to edit categories, including updating metadata, reordering sub-categories, and moving categories within the hierarchy.
Access the categories page
- Log into your Rich Media Content Management System.
- Under the Content menu, click the Categories tab.

The Categories page displays.

Edit category metadata
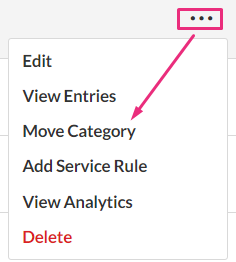
1. Click the three-dot menu next to the desired category and select Edit.
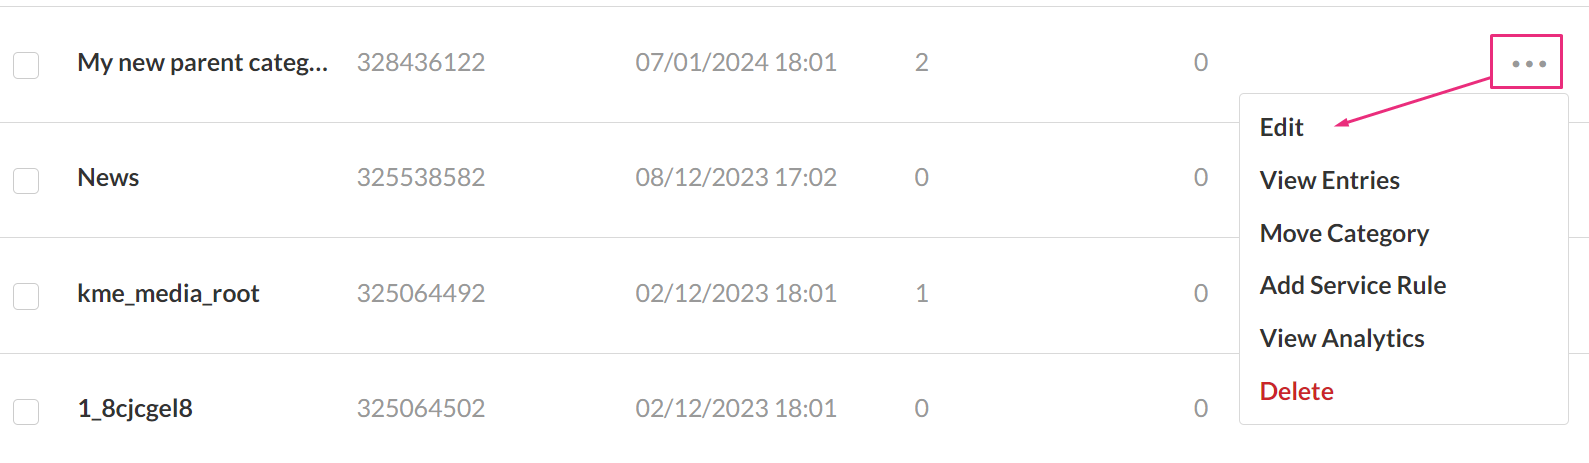
The Metadata page displays.
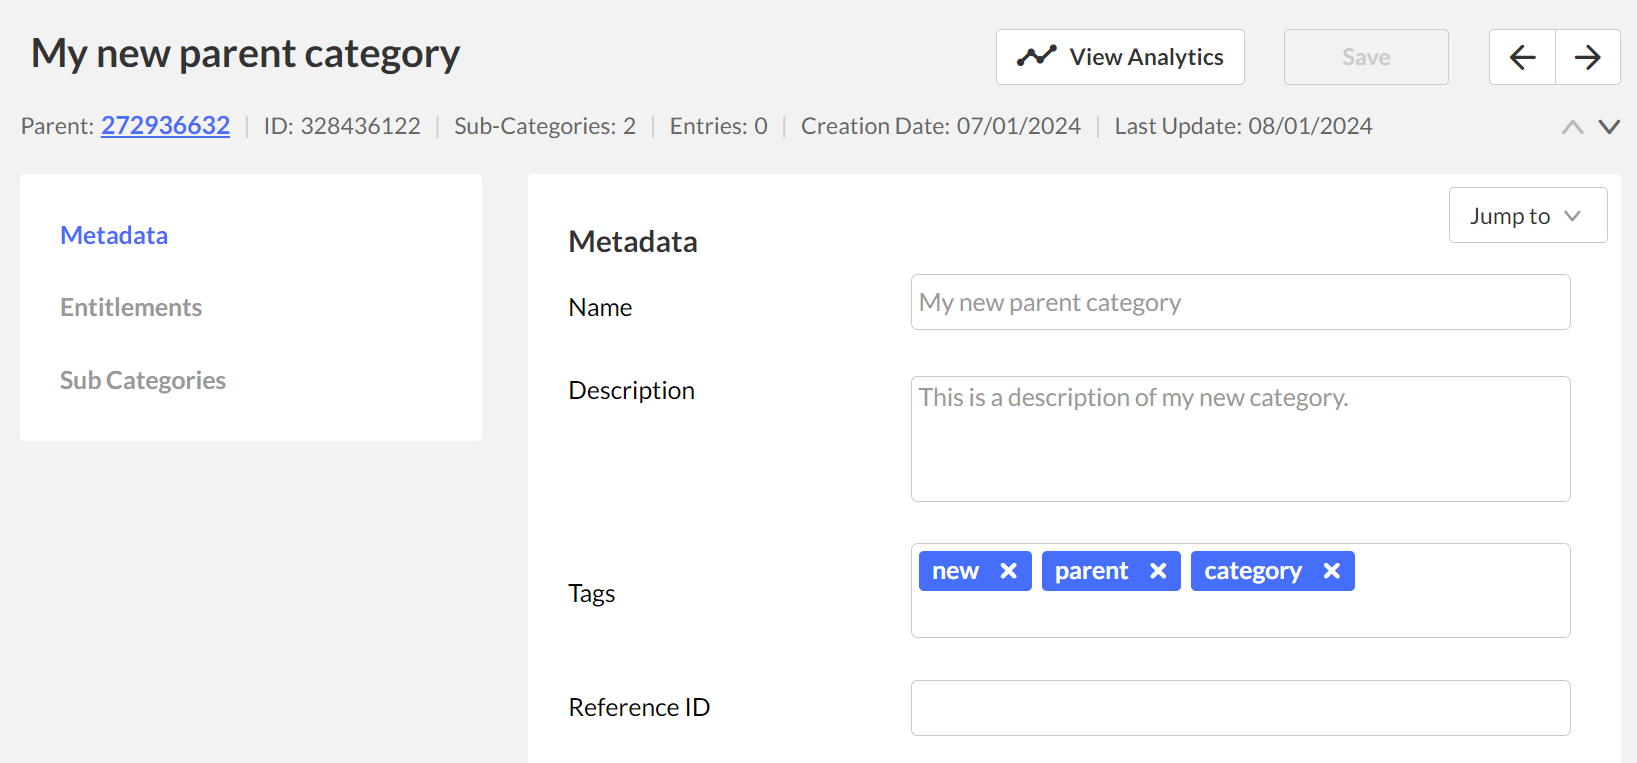
2. Here you can edit the following metadata details:
- Name
- Description (optional)
- Tags (optional)
- Reference ID (optional)
3. Click Save.
To learn about creating custom metadata, see our article Custom Data.
Change order of sub-categories
Sub-categories are displayed in front-end applications (for example, legacy Video Portal galleries) in the same order they’re arranged in the Rich Media CMS.
You can change this order if the category has 50 or fewer sub-categories.
For other applications, the ordering set through the Sub Categories tab can be used through the Kaltura API while ordering category lists based on the partnerSortValue category attribute.
- On the Categories page, click on a category name.
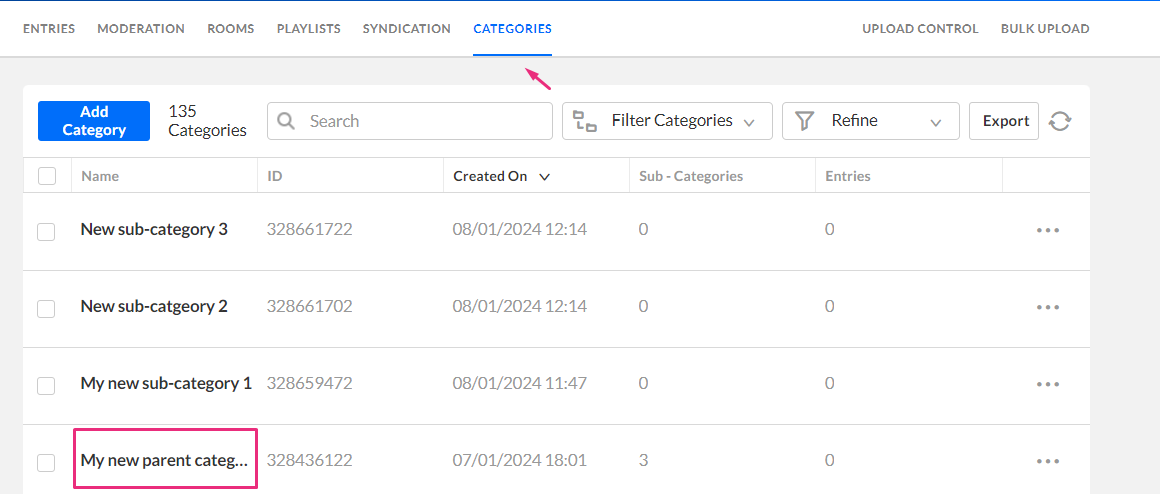 The Metadata page displays.
 - Select the Sub-categories tab.
 The sub-categories page displays.
 - Click the three-dot menu next to the sub-category you want to move, and select Move Up or Move Down to the change position.
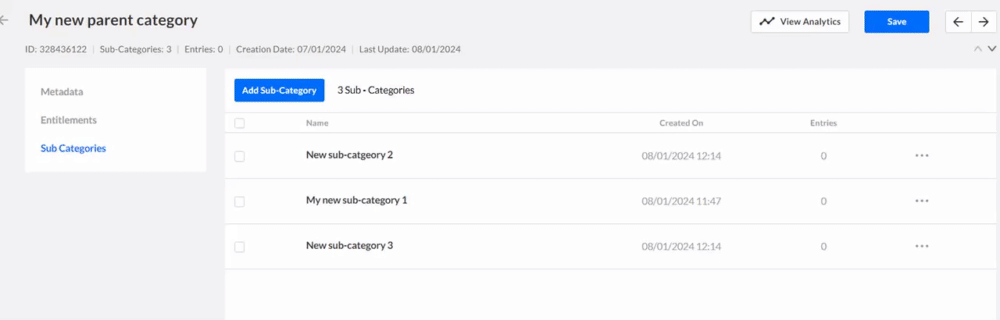
- Click Save.
 The Metadata page displays.
 The sub-categories page displays.
For other applications, the order set in the sub-categories tab can also be applied using the Kaltura API, based on the partnerSortValue category attribute.
Move a category
You can move categories from one level to another within the tree. Hovering over a category name displays its current location.
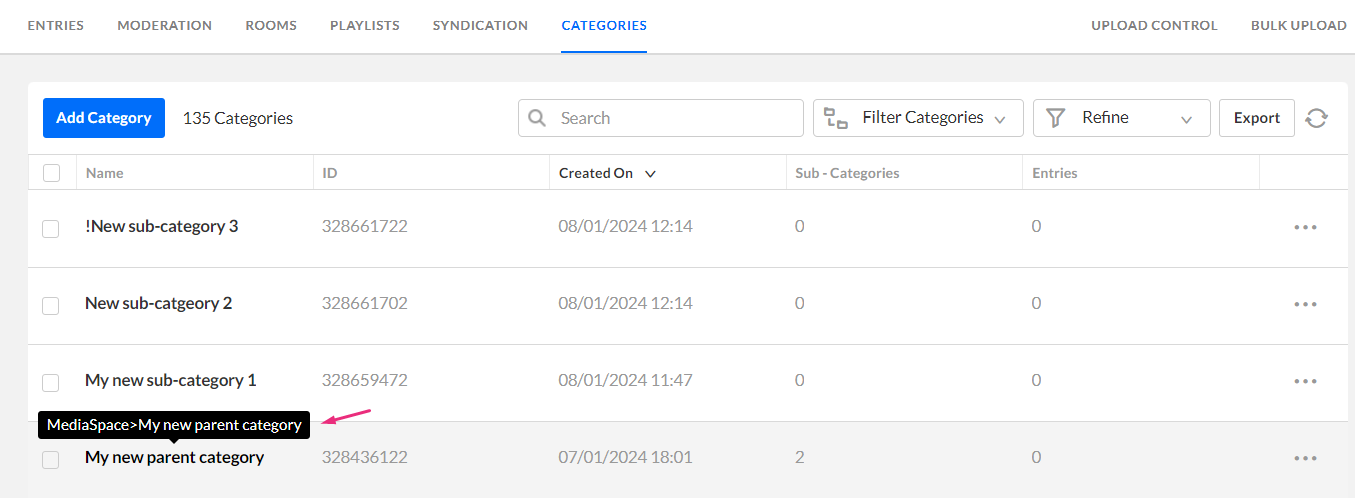
- On the Categories page, locate the category you want to move.
- Click the three-dot menu to the right of the category and choose Move Category.
 The Move Category window displays.
 - Select the desired new category or parent category to which you want to move the current category.
 A confirmation message displays: The category tree will be updated in an asynchronous process. This operation may take a few minutes. Category editing options will be released when the update is complete.
 - Click Yes.
 The Move Category window displays.
 A confirmation message displays: The category tree will be updated in an asynchronous process. This operation may take a few minutes. Category editing options will be released when the update is complete.
The category tree updates in the backend. If many categories are affected, this process may take a few minutes. During the update, editing options in the Categories page are temporarily disabled and become available again when the process is complete.
To learn how to assign entries to a category, visit our article Assign an entry to a category.
InContext category for LMS Video integration
The InContext sub-category is created when media is embedded in an LMS course using the Mashup tool. It doesn’t apply restrictions on the video and isn’t treated as a course category. Instead, it ensures that the embedded video displays inside the LMS course, outside of the Kaltura entitlement system.
If a student uploads media directly through Add New / Create > Media upload and publishes it to a course, the entry is listed under the courseId category and appears in the course Media Gallery.
We do not recommend touching these categories, as they represent a specific part of the Kaltura integration with LMS.
