This article documents the legacy KME room. For our next-generation virtual classroom and collaborative meeting solution, please visit the Kaltura Room documentation.
This article describes how to collaborate with your participants in real time on the Kaltura Live Room Digital Whiteboard.
The Kaltura Live Room Digital Whiteboard is a perfect tool for collaboration, brainstorming, and language learning.
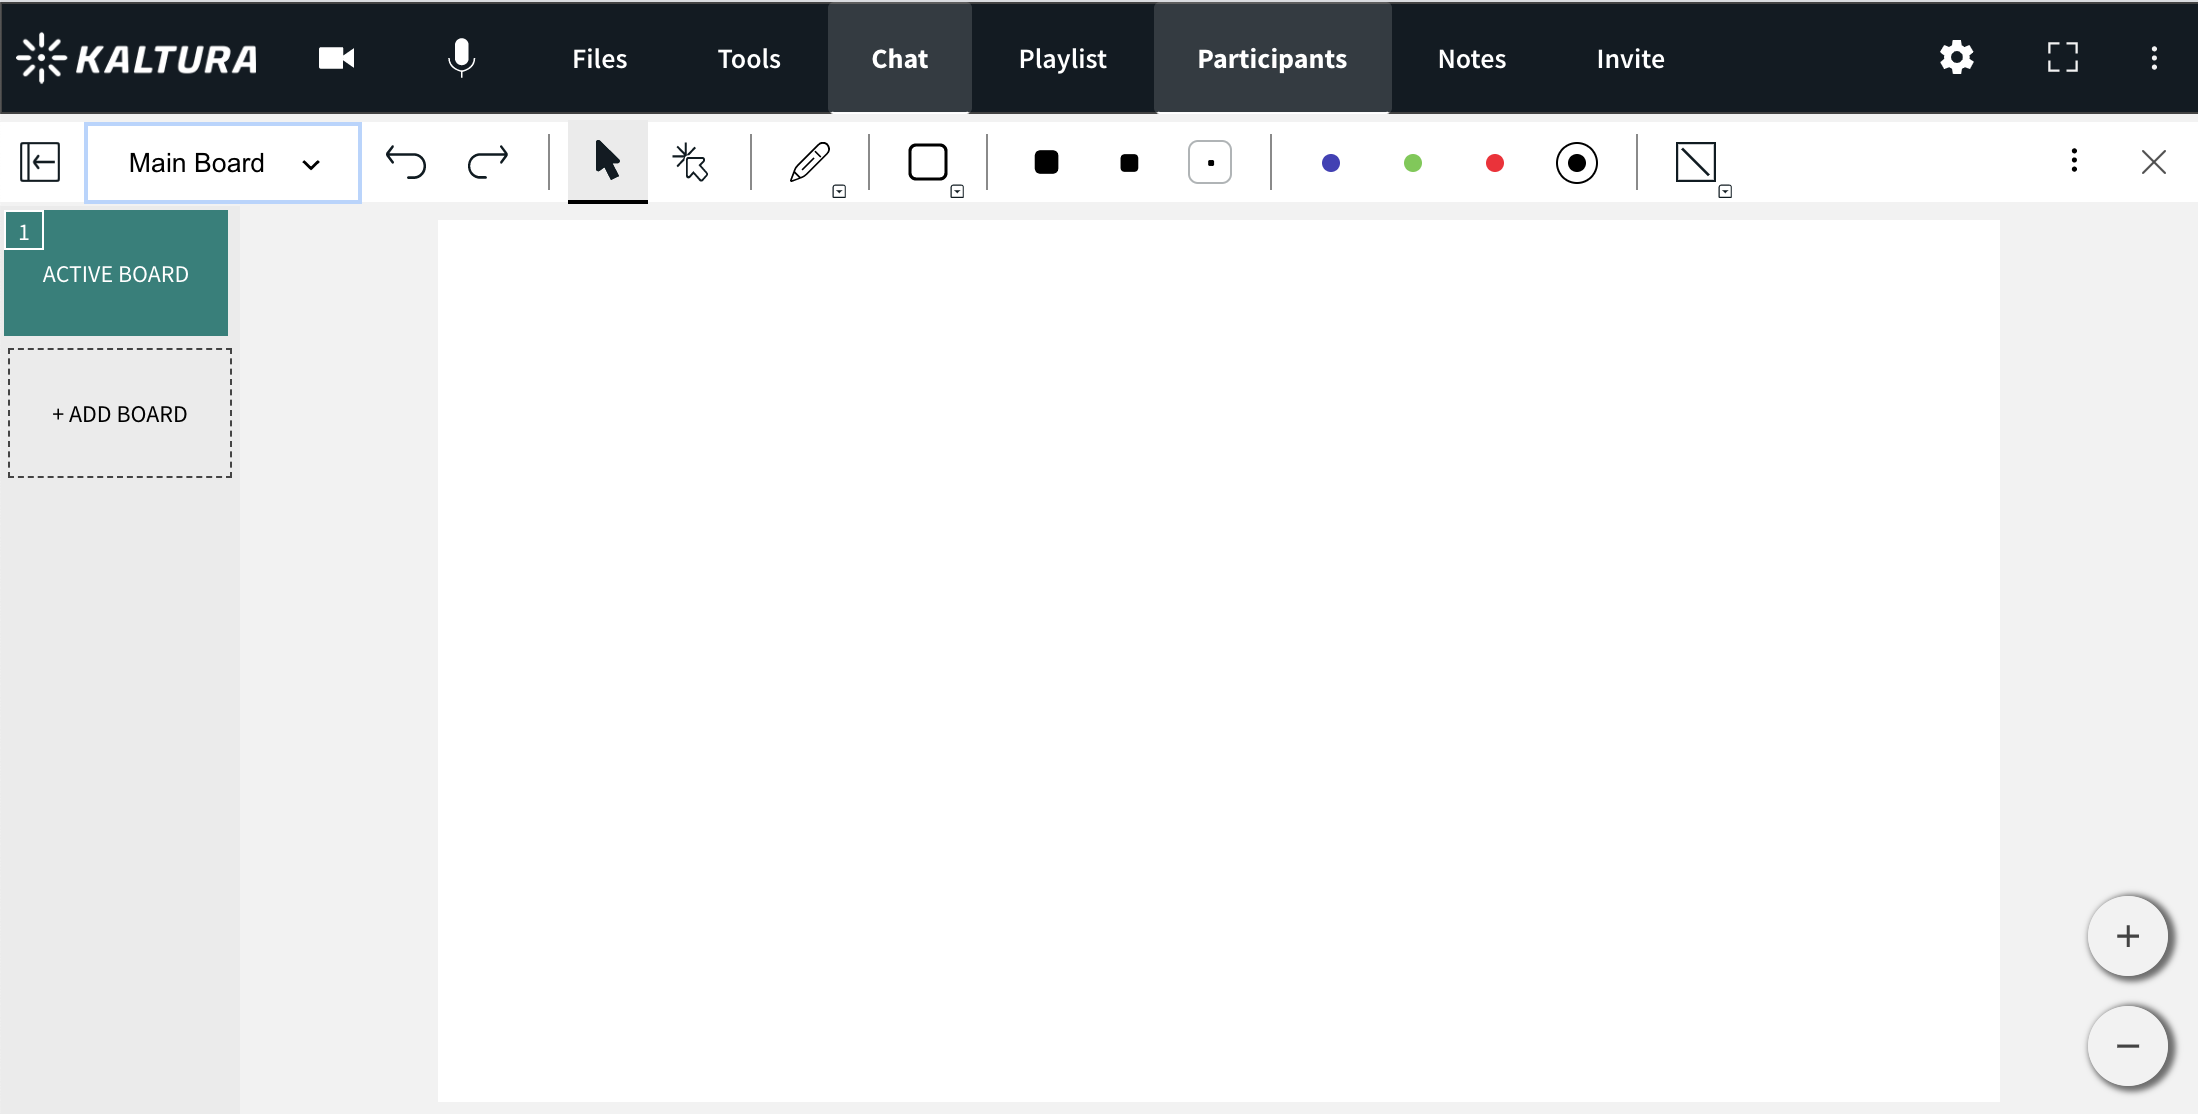
Display Your Digital Whiteboard
- Click Tools.
- Select Whiteboard.
💡Instructors/Moderators can add additional boards as needed by simply clicking +Add Board in the thumbnail tray to add a new board to the whiteboard.
Create Additional Whiteboard Pages
- Your whiteboard drawings are automatically saved and remain from session to session - unless you delete them.
- A room can have up to 20 boards, each whiteboard can support up to 50 pages.
- Use the right and left arrow keys to navigate to next or previous boards (available to Instructors/moderators only).
Whiteboard Tools
Use Cursor

Use Laser Arrow

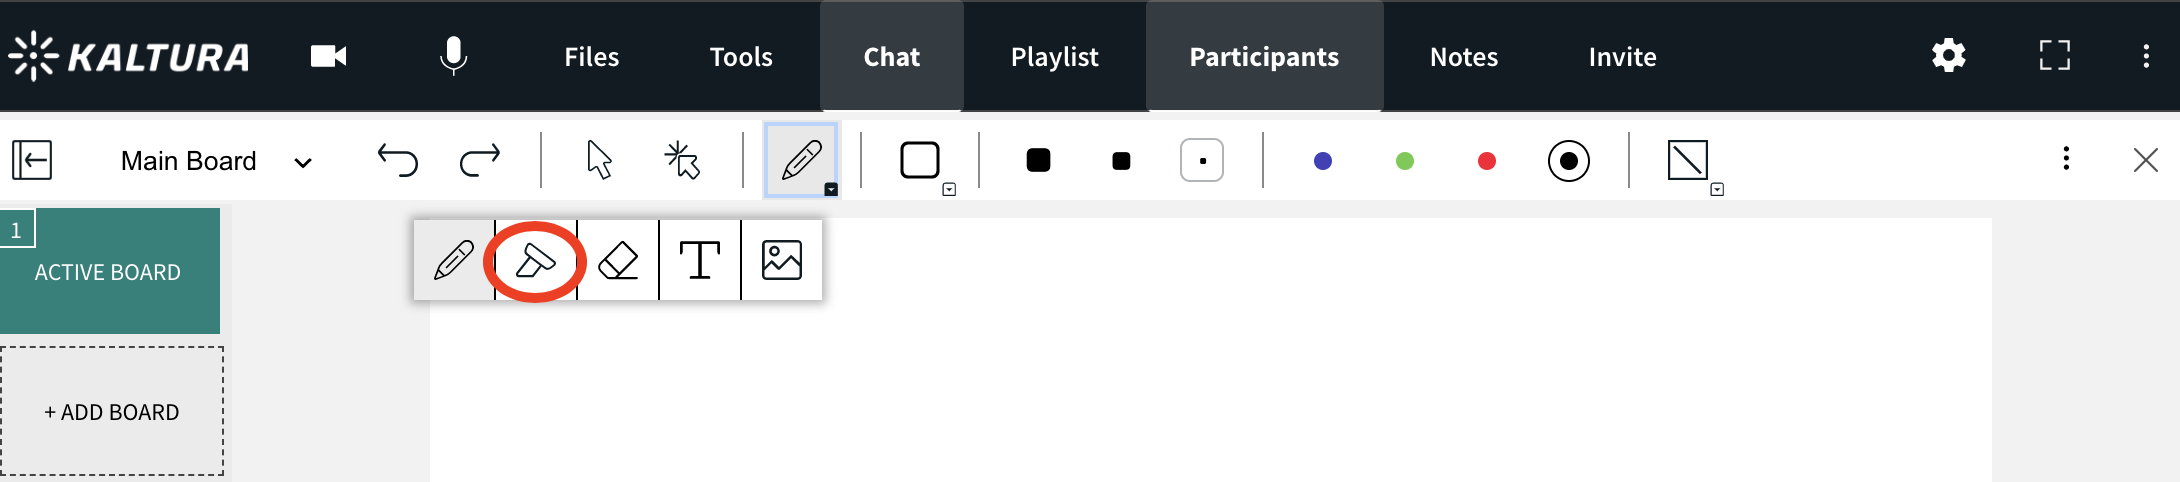
To Free Draw/Use Pencil
- Select the Pencil icon.
- Click & drag your cursor to draw.
💡Use a touch screen device or USB trackpad to more accurately write equations, music, and more.

To Highlight
- Click the Pencil icon to reveal a drop down.
- Select the Highlighter icon.
- Click & drag your cursor to highlight text on the whiteboard or slide.
To Type
- Select the Text icon.
- Click the whiteboard where you want your text box to be.
- Enter in your text.
- Click outside of the text box to post it.
💡Edit text by double clicking text you posted on the whiteboard.

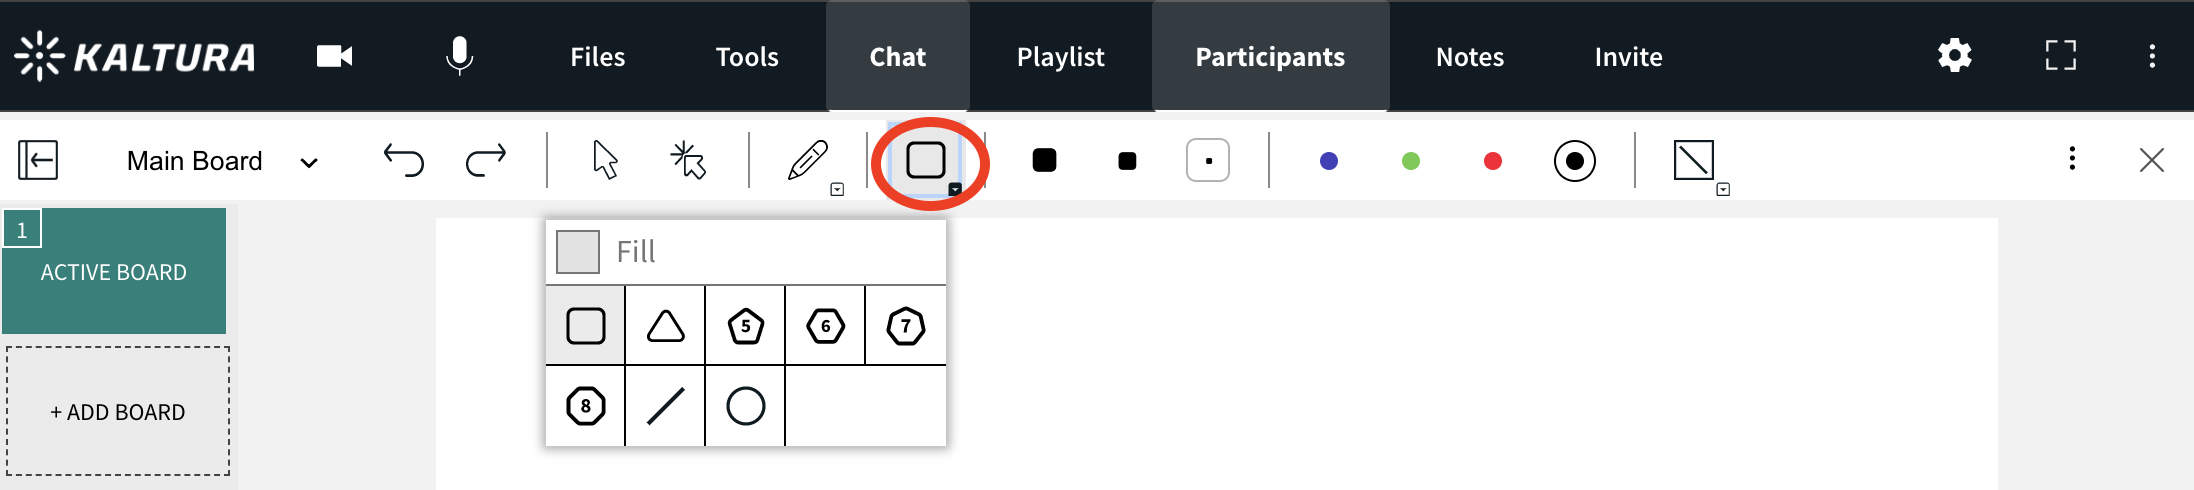
To Draw Shapes
- Select the Square icon.
- Click the selected Square icon to display a menu of shapes: Circle, Right Triangle, Equilateral Triangle, Square, Pentagon, Hexagon, Heptagon, Octagon, Polygon, Line, Single Headed Arrow, Double Headed Arrow.
- Click and drag your cursor to draw the shape.
💡To fill in a shape, click the Fill box before selecting the shape and the shape will be filled with color.
Undo or Redo
- Click the Undo or Redo arrows to undo or redo previous marks.
- Undo and Redo applies to up to the last 10 edits committed by you - not by others. Meaning, you cannot undo edits or actions by other participants.
- Undo and Redo apply to the current session only. You cannot undo or redo marks from previous sessions.

Set Backgrounds

Formatting Tools
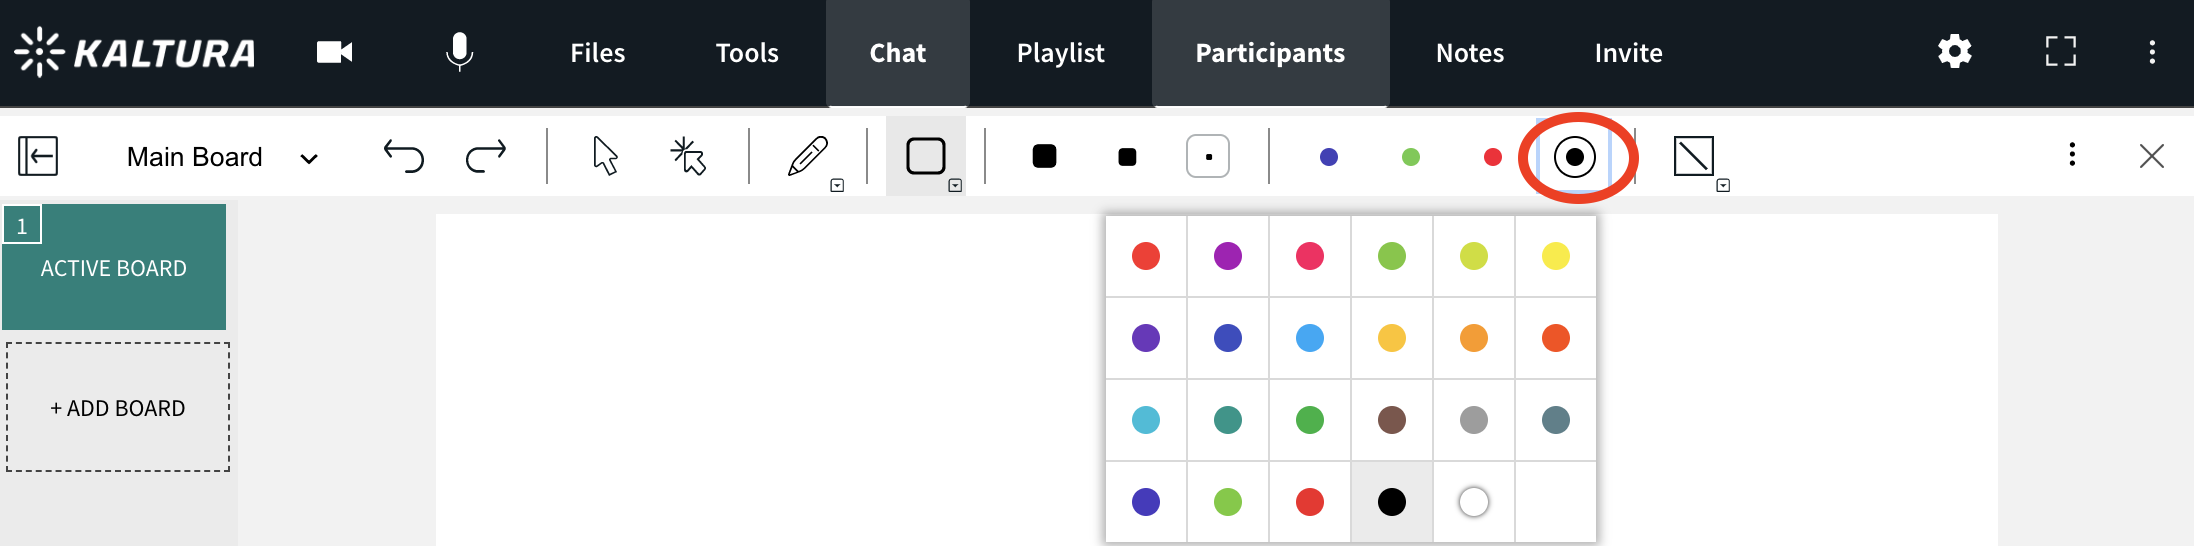
To Change Color
- Select the Cursor tool Or select the mark you want to change the color of.
- Click the color you want to apply.
To Adjust Line Thickness
Adjust the thickness of Free Draw, Eraser, Highlighter, Shapes by simply selecting the thickness to apply the thicker or thinner line.

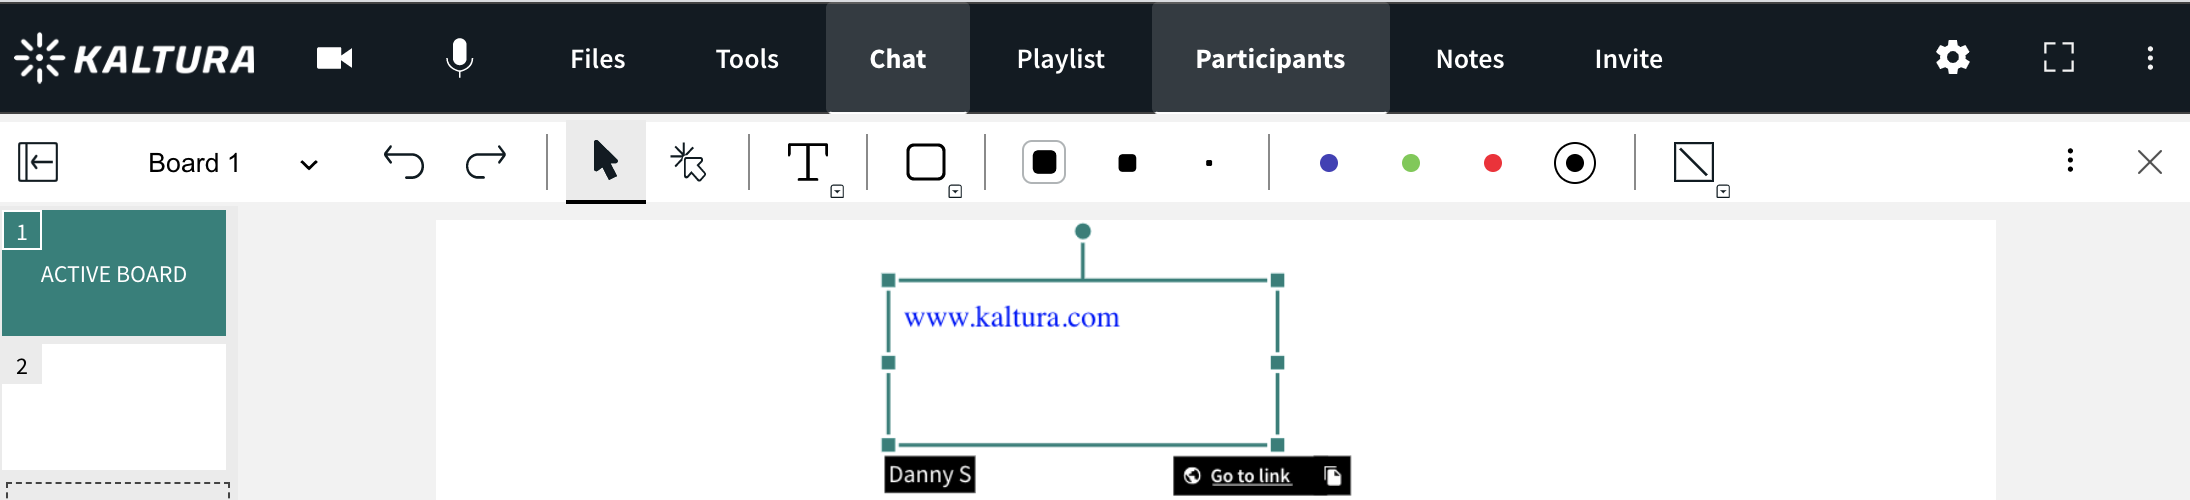
Create Clickable Links
- Select the Text tool
- Type in a web address OR Copy/paste a link
💡Participants will be able to click on the link and be brought to that page.
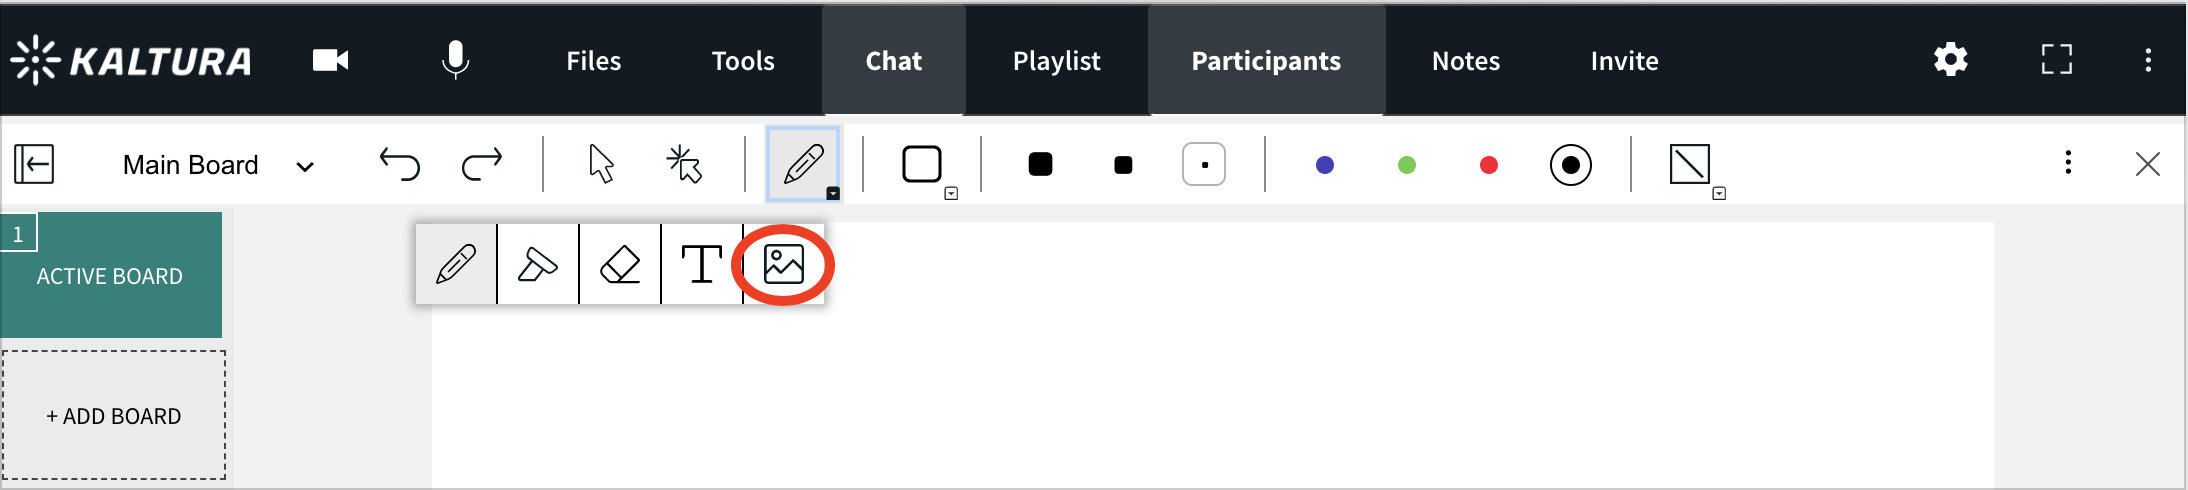
Add Images
Instructors/Moderators can upload images to their whiteboard.
- Click the Pencil Icon to reveal the drop down bar.
- Select the Image icon.
- Click an image or document previously loaded from your content management system or Click +Add Icon to search your desktop for a new image.
- Click Add.
Copy and Paste on Whiteboard
The whiteboard supports pasting images directly from your clipboard. Images copied from a web browser or using the OS snipping tools can be easily pasted on the whiteboard or on any document while being presented on stage.
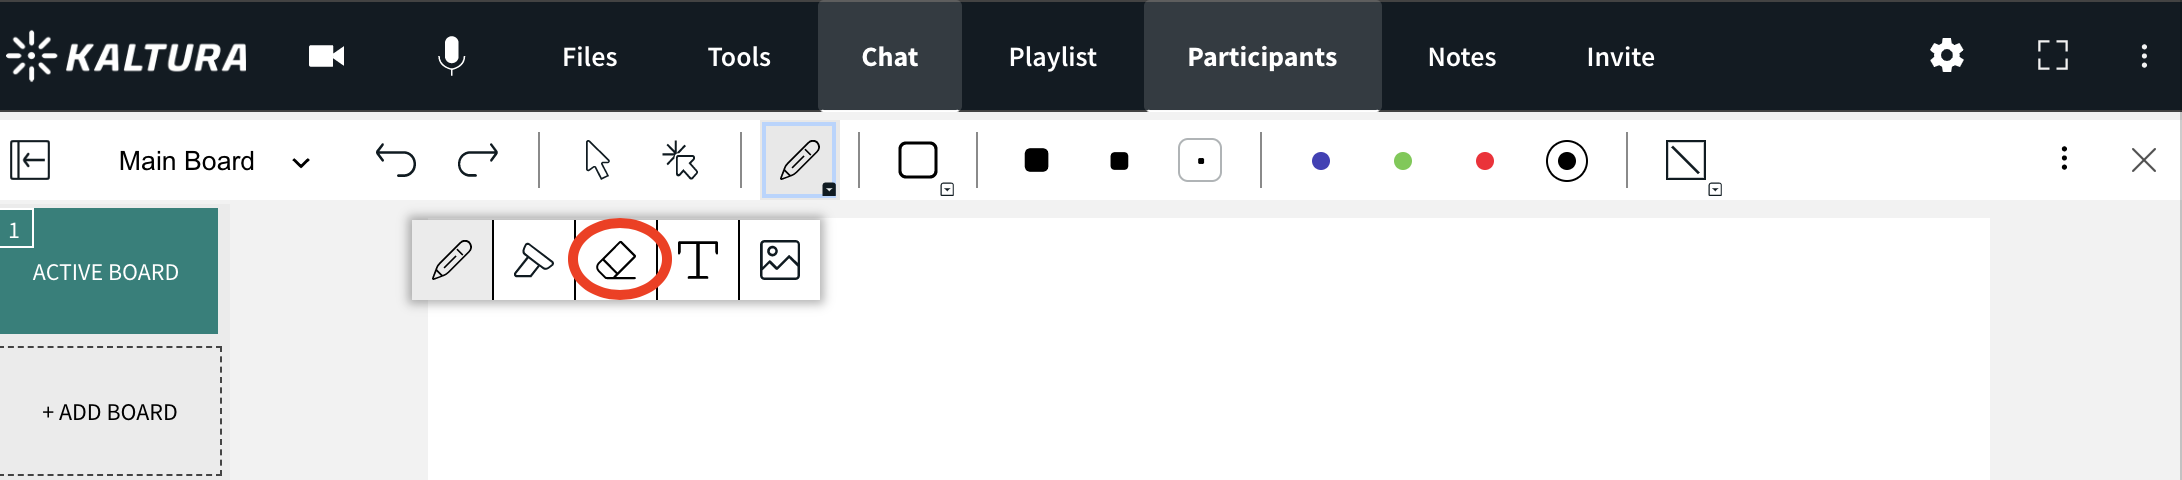
Delete or Erase Drawn Objects
To Delete Specific Marks
- Select the Cursor tool.
- Select the object you want to delete.
- Hit the Delete key on your keyboard.
To Erase Drawn Objects
- Select the Eraser icon,
- Click & drag the eraser over whiteboard marks you want to erase.
Exporting/Saving Whiteboards
1. Click the 3 dot dropdown in the top right corner of the whiteboard.
2. Click Export Whiteboard.
💡You can then upload the file to your File Management System from your desktop.

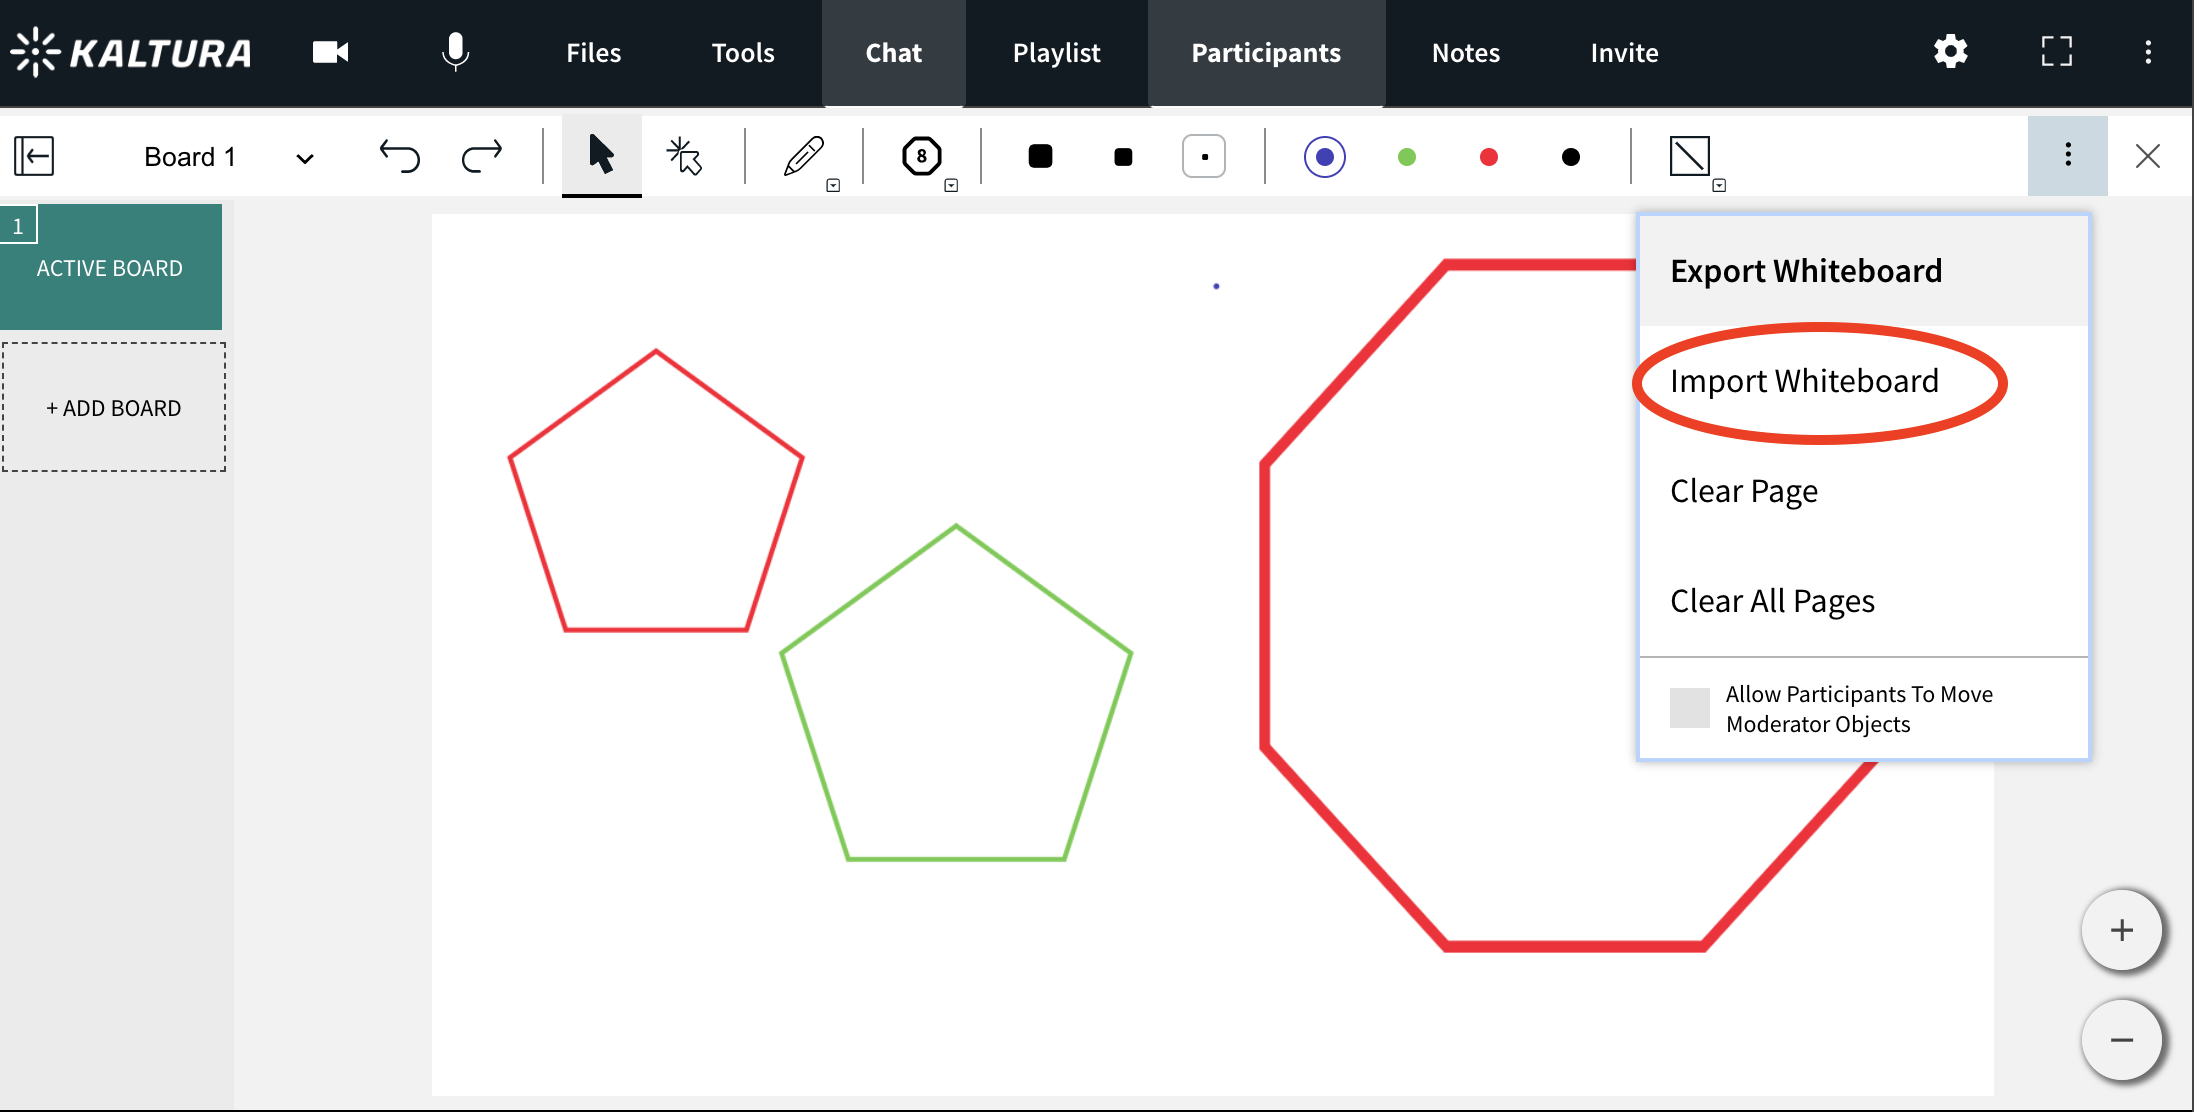
Importing/Uploading Whiteboards
- Click the 3 dot drop down menu in the top right.
- Click Import Whiteboard.
- Search your desktop for a previously saved Kaltura formatted whiteboard.
- Click Ok.
To Clear Page
- Click the 3 dot menu in the top right of the whiteboard.
- Select Clear Page.
- Click Ok to in the Confirm Delete pop-up.
![]()
To Clear All Pages
- Click the 3 dot menu in the top right of the whiteboard.
- Select Clear All Pages.
- Click Ok to in the Confirm Delete pop-up.
Allow Participants to Move Moderator Objects
Check to allow guests to move objects that the moderator draws on the whiteboard.
Dismiss/Close Whiteboard
