About
If your Kaltura Virtual Events account is configured with custom event templates, the Create Event page displays two tabs - one for Preset templates (Presets) and one for Custom event templates (Custom).
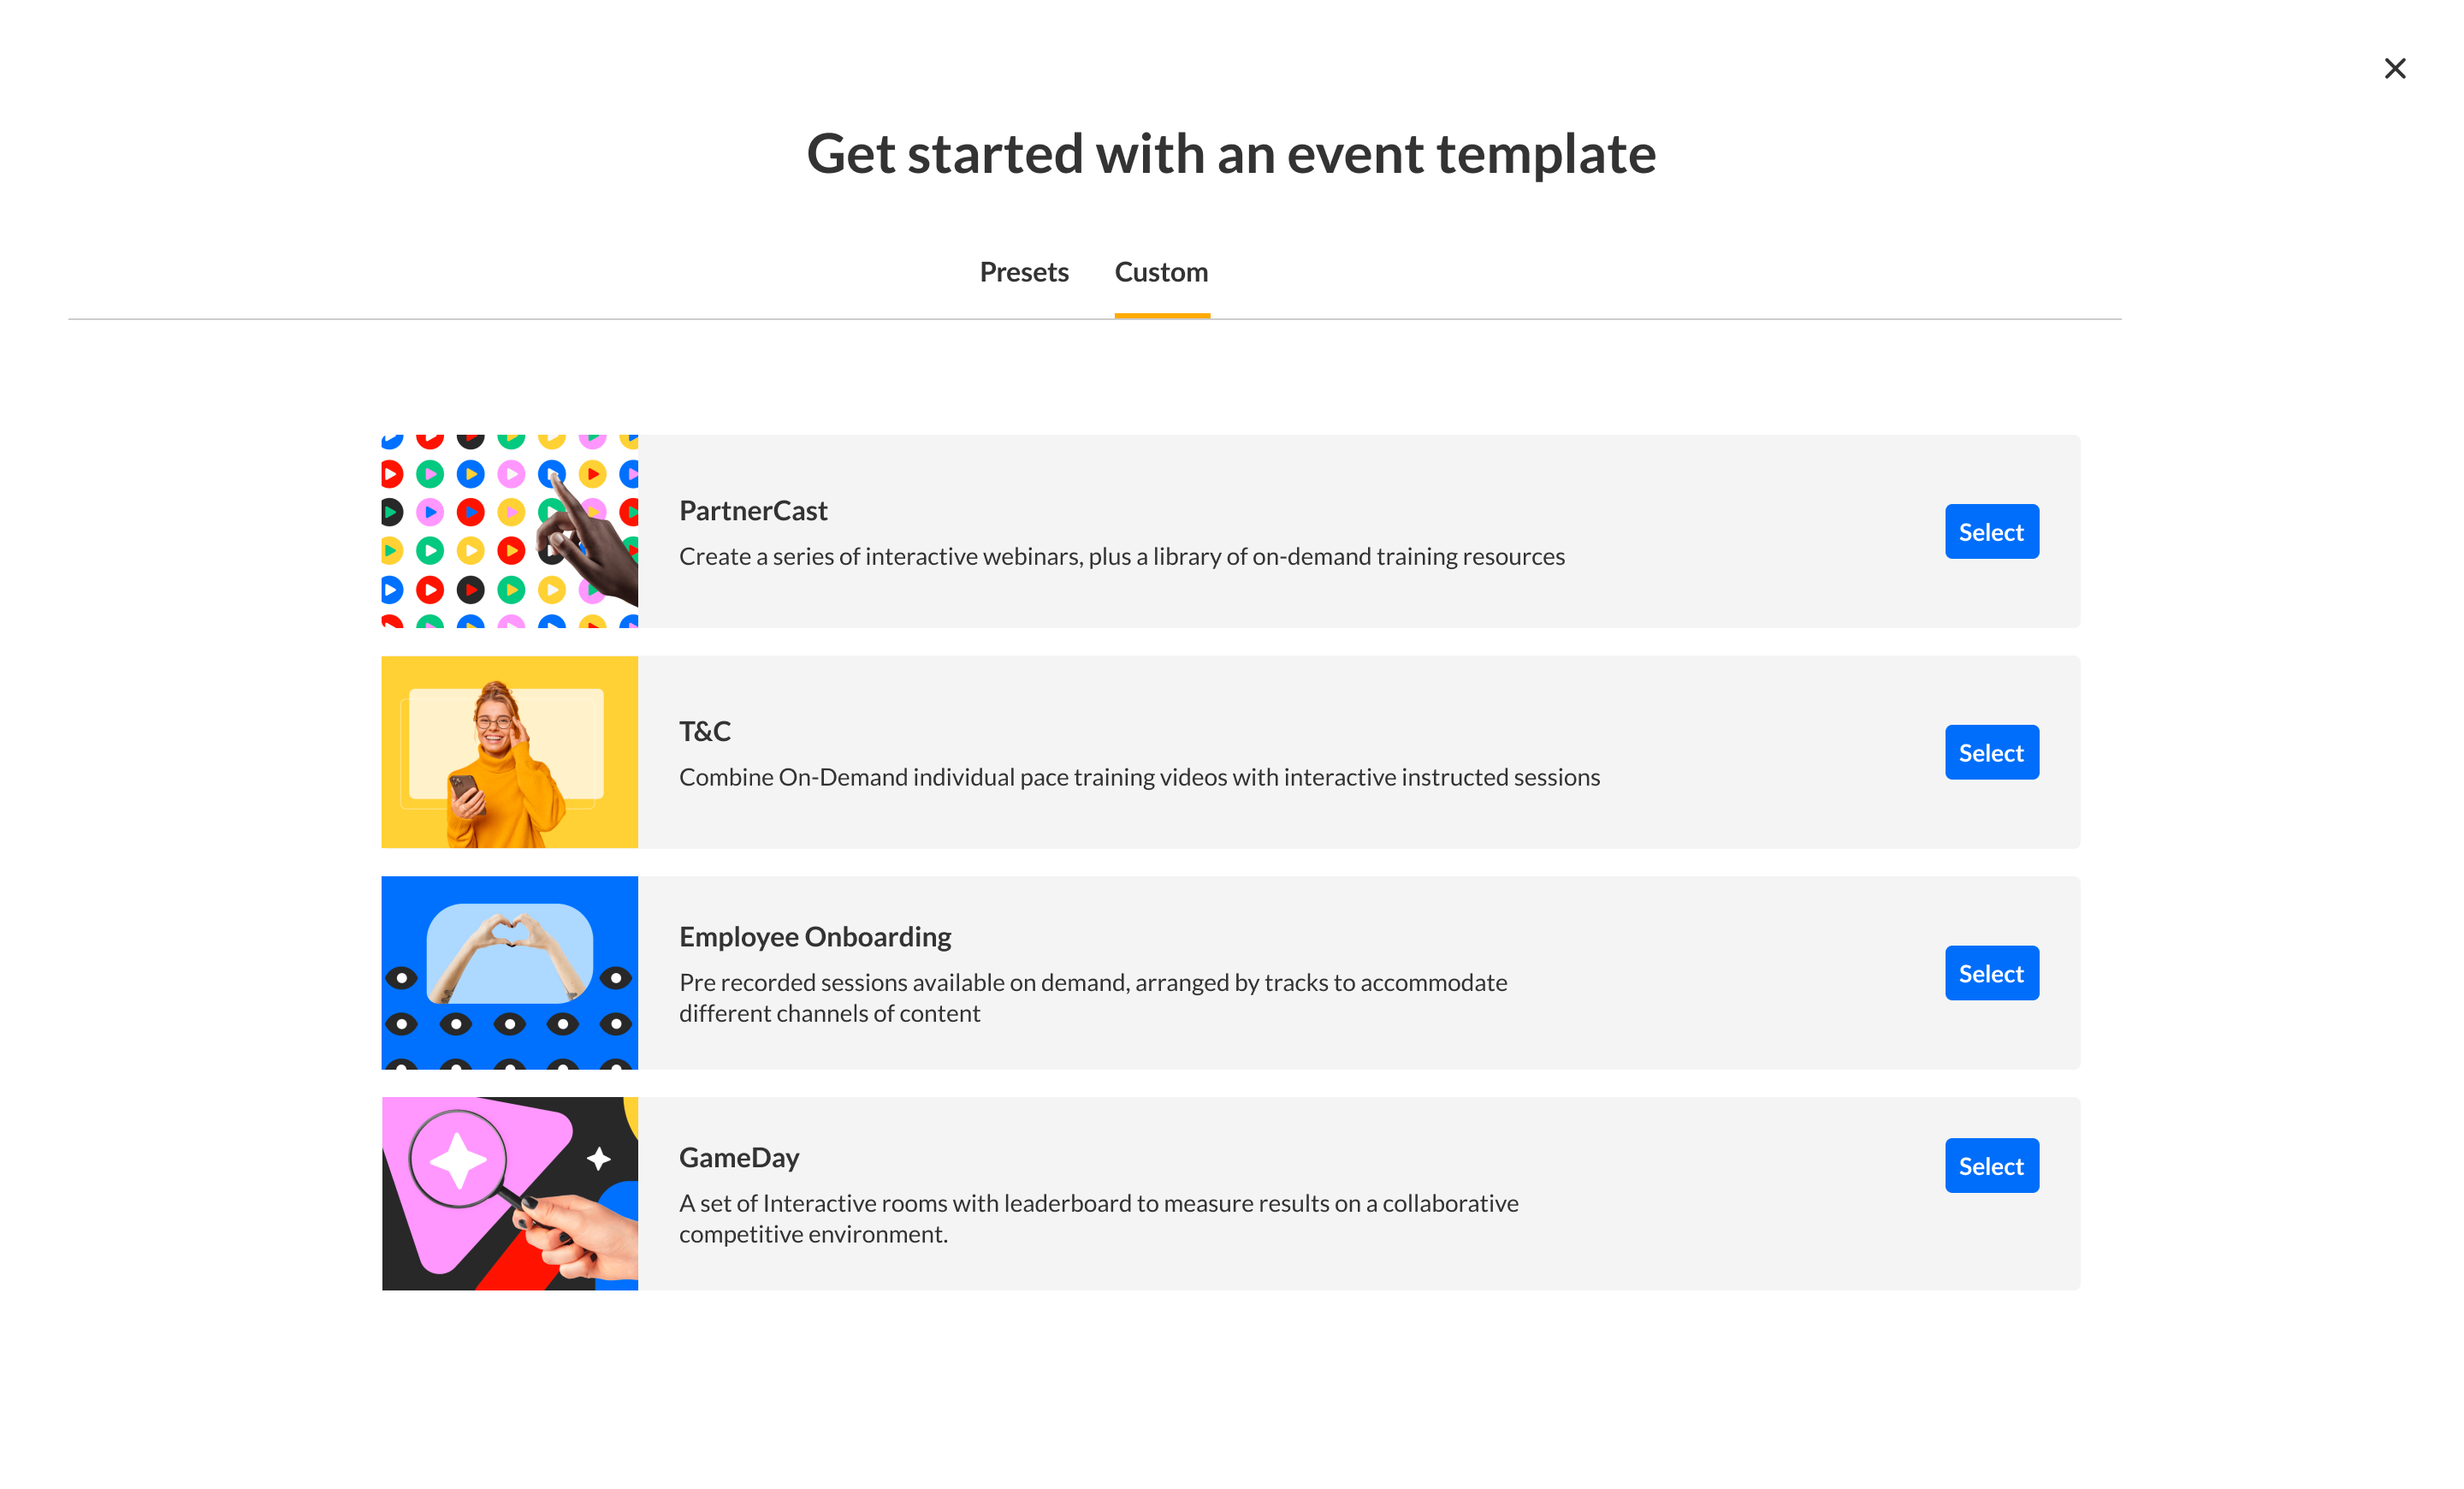
A custom event template puts your company's branding at the forefront and Kaltura works closely with you to customize your template in the following ways:
Branding:
- Mode color - Light or Dark
- Typography - Font family
- Colors - brand color and theme
- Elements style - Roundness of elements like buttons and form elements, input fields, etc.
- Images - Customization of logo, event banner, emails header banner, and registration login banner
- Fav icon - Choice of the icon that displays at the top of the browser window
- Custom footer - Dedicated logo, social media links, etc.
Functionality:
- Login with username and password, magic link
- Customization of the registration form
- Customization of 'system' emails such as registration confirmation and invite
- Preset custom templates such as reminder or thank you emails.
- Additional languages for 'system texts'
- Customization of chat settings, such as enabling single thread capability
- and more...
Kaltura offers even more advanced design options (such as custom fonts, font sizes and styles, inlaid shapes, footer color, button rounding, etc.) for those companies with more complex/advanced brand books.
Once your template has been customized, it is accessible via Kaltura Virtual Events. As you create your events, you can select to use it over and over again.
Create an event using a custom event template
- Click to select the desired custom event template.
The 'Let's get started' window displays.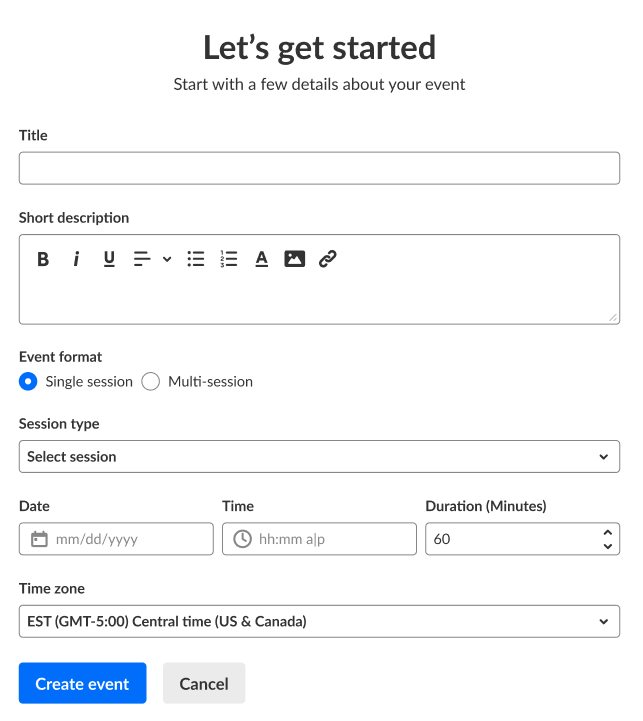
- Complete the following details:
Title - A title for your event (char limit is 120).
Short description - A description for your event.
Event format - Choose single session or multi-session. For information on these formats, see Single-session vs multi-session events.
If you chose single session, choose Session type - Live webcast, Pre-recorded live, or DIY live broadcast.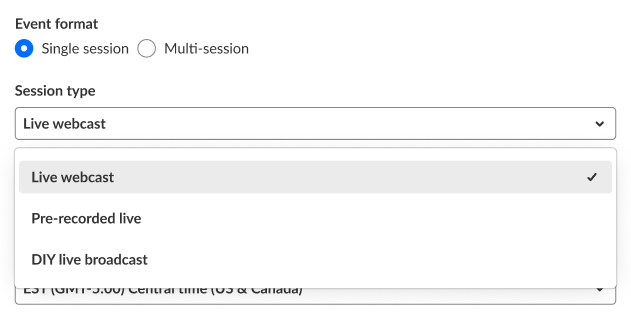
Looking for more information about the Single session event experience? Feel free to contact your Kaltura representative
- Set the event schedule:
If you chose Single session, enter a start date and time, duration, and time zone.
If you chose Multi-session, enter the event start and end times and time zone. - Choose whether attendees will log into the event with a login link via email (AKA Magic Link), or with an email and password.
This option is only available for Preset event templates and, after creation of event, can only be changed by Kaltura. On Custom event templates, this will be preconfigured by the template.
- Click Create event.
The building process begins, which may take a few minutes.


Looking for more information about custom event templates? Feel free to contact your Kaltura representative.
