This article provides instructions on inserting a previously uploaded 3D object as an overlay, uploading a new 3D object, deleting a 3D object, and editing a 3D object.

Two green tabs are displayed at the top of the tool - 3D Overlays Editor and 3D Objects.
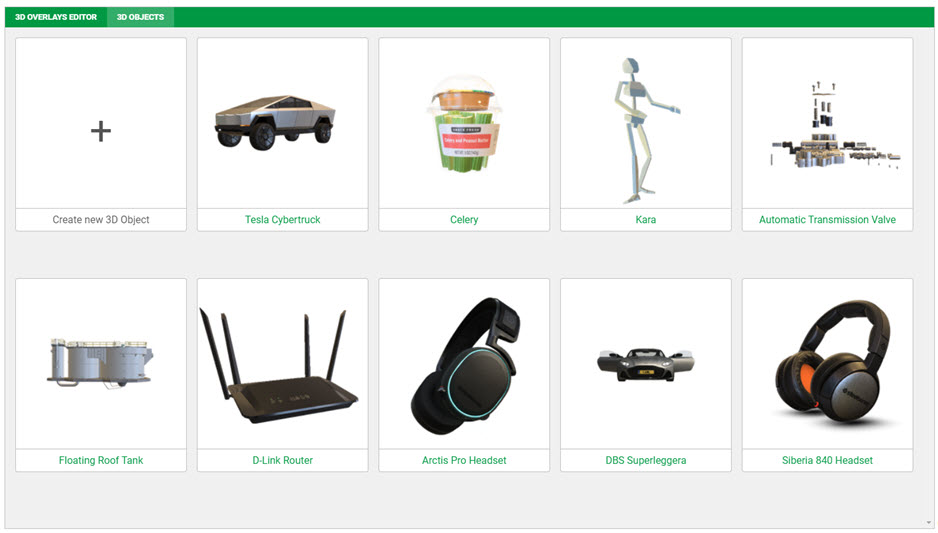
- The 3D Overlays Editor tab allows the user to insert 3D objects that have already been uploaded to Kaltura's cloud storage as overlays at certain time intervals in the video.
- The 3D Objects tab allows privileged users to edit existing 3D objects and upload new files to Kaltura's cloud storage.
To insert a previously uploaded 3D object as an overlay
- Click on the 3D Overlays Editor tab, if not already selected. (When you access the 3D Creator Tool, this tab is the default view.) The 3D Overlays window displays.
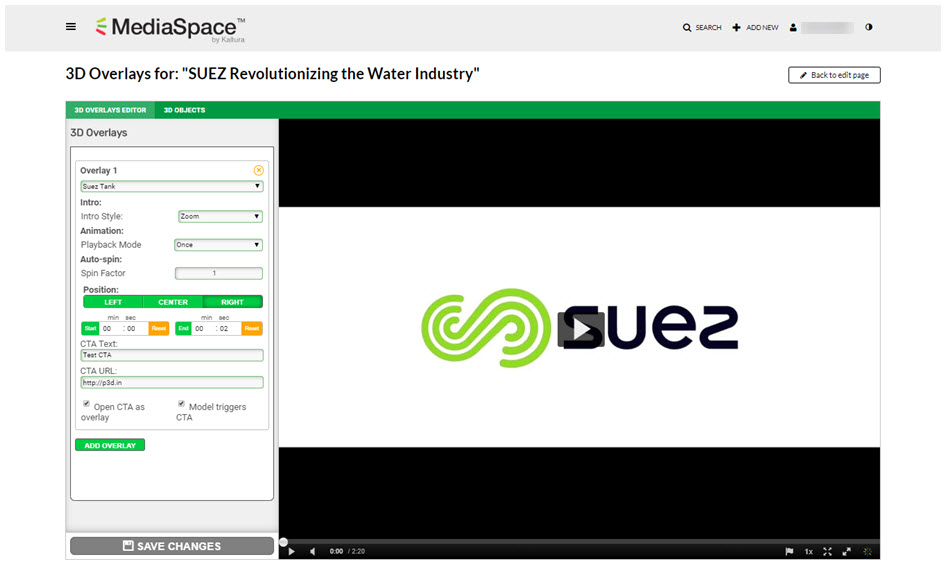
- Select an overlay from the drop down menu of 3D objects in your library.
- Select the style of the overlay.
- Intro > Intro Style - Choose Zoom to 'zoom' the camera in on the object, or choose Appear to have the object simply appear.
- Animation > Playback Mode - Choose Once to play the animation once, choose In a Loop to play the animation in a loop, or choose In Sync with the Video (requires an optional sync stream file which is not available by default).
- Auto-Spin > Spin Factor - Choose 0 for no spin, or 1-3 for increasing spin speeds.
- Position - Choose where on the lower third portion of the screen to position the overlay; left, center, or right.
- Start and Stop Times - Choose the time stamps in the video when the 3D overlay will appear and disappear.
- CTA (Call to Action) Text - Type the text that displays while the overlay is on the screen. You might type something like "Launch Interactive Experience".
- CTA (Call to Action) URL - Type the URL for loading the interactive experience associated with the overlay. In this way, the overlay is used as a hot spot to launch an interactive experience. When the user clicks on the overlay (or the 3D button), the video pauses in the background and the fully interactive experience launches. It is at this time that the user can experiment with more advanced features of the 3D object. For example, if the 3D object is a car, the user may be able to open and close doors, open and close sunroof, etc. When finished, the user can click Continue Video to resume the video.
- Open CTA as overlay - When checked, the 3D object loads as a separate overlay spanning the player window and optionally loads additional external HTML5 animation from Brand3D.com.
- Model triggers CTA - When checked, any click on the 3D object launches overlay (an alternative to actually clicking the CTA button).
- Add Overlay - Click if you would like to add an additional 3D overlay. If you add an additional overlay, you must perform steps 2 and 3 above for the additional overlay.
- Click Save Changes. This saves the changes made to the 3D overlay to the Kaltura MediaSpace server as a file asset.
- Click Back to edit page in the upper right hand corner of the screen to navigate to the to Edit Media page.
- Click the Play button to watch how your overlay behaves on the media. If you want to make additional changes, click the 3D Creator button again to access the 3D Creator Tool.


To upload a new 3D object
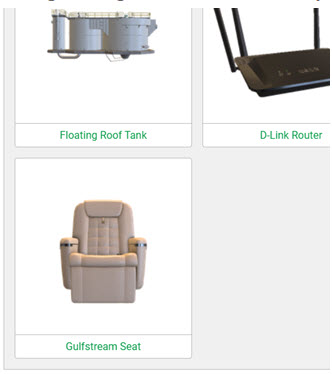
- Click on the 3D Objects tab. The 3D Object Library displays.
- Click the + Create new 3D Object button. The drag and drop (or file manager) interface for uploading 3D files displays. The following file formats are supported: OBJ, GLTF, FBX, and GLB.
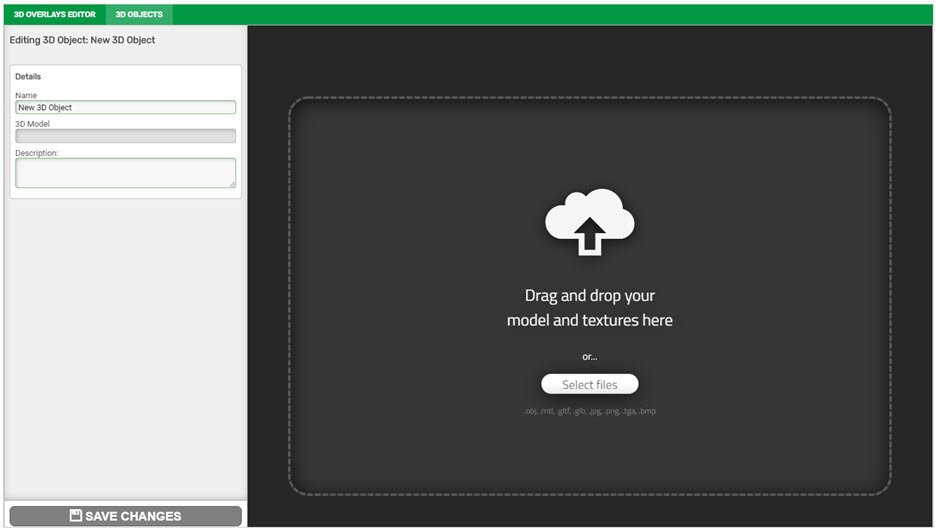
- Drag and drop your file(s) or click Select files to upload. Your new 3D object is displayed in the 3D Object Editor.
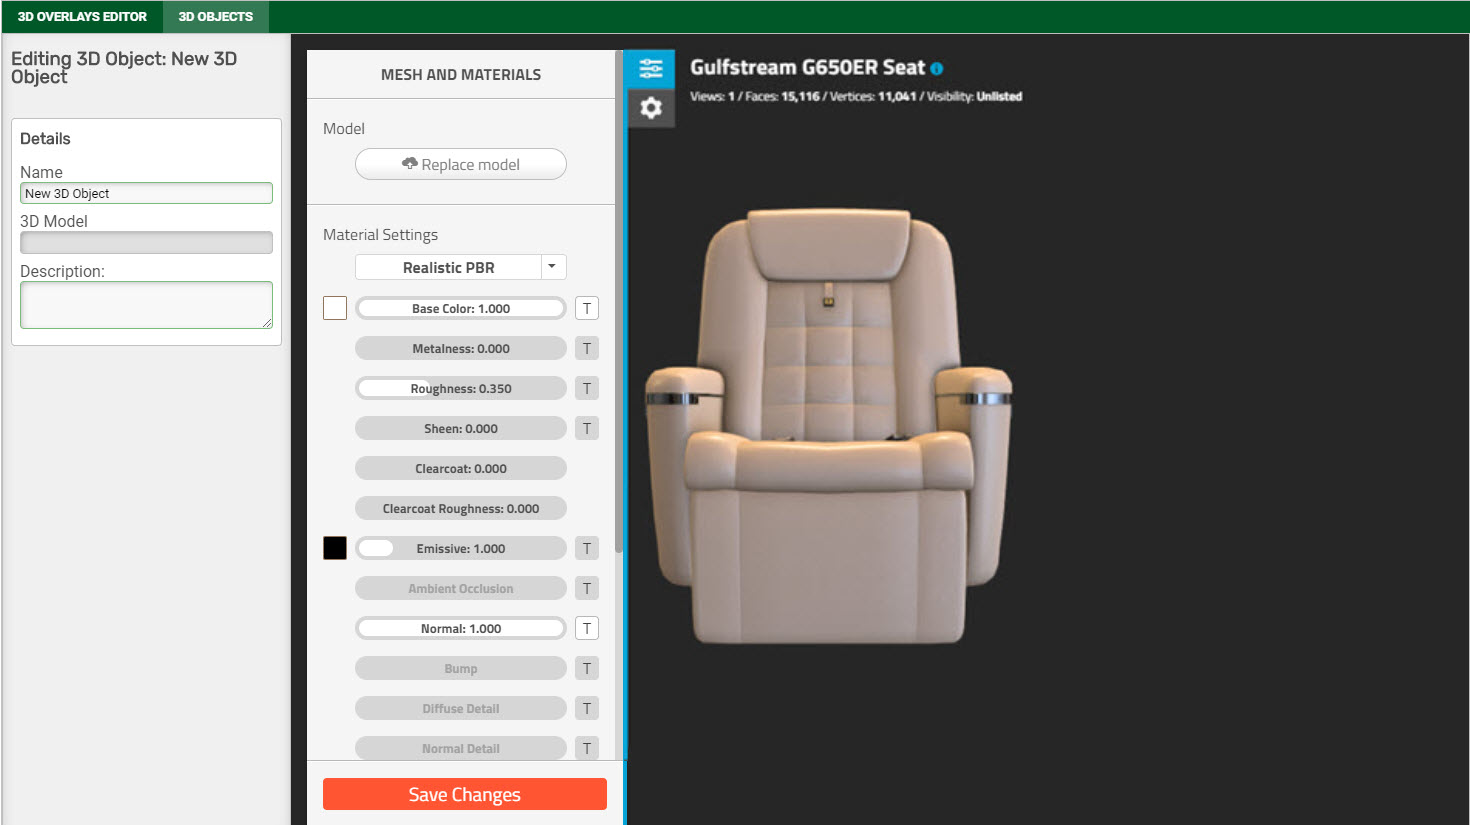
- In the Editing 3D Object: <file name> section, under 'Details', type a name for your object in the Name field and a description of your object in the Description field. The 3D Model field is automatically populated with a link to the 3D model after you save changes at the end of these instructions.
The 3D Object Editor (see MESH AND MATERIALS section) provides a feature-rich interface for modifying the 3D object features, such as color, material lighting, etc., very similar to what other 3D authoring tools provide. Having the editor built into the tool, however, makes it easy to make adjustments to the object on the fly before inserting it into the video. The full feature description of the 3D Object Editor is outside the scope of this article. For more information, see https://p3d.in/faq. - Click Save Changes. Saving is the process of uploading. Once uploading is finished, the new object displays in your 3D Object Library.


To delete a 3D object
- In the 3D Object Library, click the Delete button in the top right corner of an existing 3D model. A message displays letting the user know that deleted items are not recoverable and asking for confirmation.
- Click OK.
To edit a 3D object
- In the 3D Object Library, click on an existing 3D model.
The 3D Object Editor is displayed.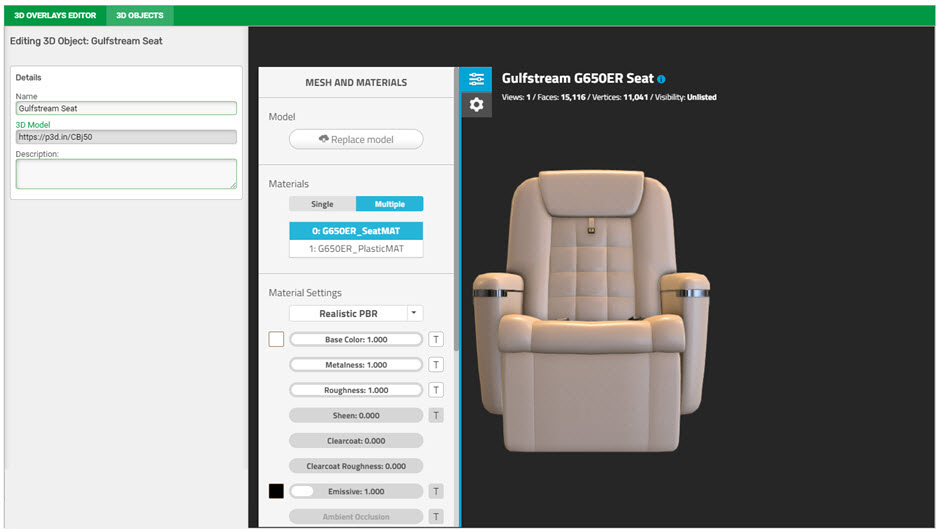
- In the Editing 3D Object: <file name> section, under 'Details', you can edit the name of your object in the Name field and edit the description of your object in the Description field.
The 3D Object Editor (see MESH AND MATERIALS section) provides a feature-rich interface for modifying the 3D object features, such as color, material lighting, etc., very similar to what other 3D authoring tools provide. Having the editor built into the tool, however, makes it easy to make adjustments to the object on the fly before inserting it into the video. The full feature description of the 3D Object Editor is outside the scope of this article. For more information, see https://p3d.in/faq. - Click Save Changes. The edits to your object are saved and the updated object displays in your 3D Object Library.


