About
The AHK General module is for AHK customization. Enabling this module simplifies and automates KMS workflows for end users. End users will be shown only the relevant options (metadata schema) when uploading new content based on the configuration in the module. Customizable messages are designed to appear on both the upload page and the entry edit page.
The sections herein will guide you through logging into the Configuration Management section of KMS and enabling and configuring the AHK General module.
This module is for both Theming and non-Theming users. For the purposes of this guide, we are showing screens for non-Theming users.
For technical support, contact Kaltura Customer Care. For all other inquiries, reach out to your Customer Success Manager.
Prerequisites
You must enable and configure the following modules first:
- Groupedcustomdata module - allows the use of multiple custom data profiles at the same time
- Entrysaveconfirmation module - displays a customizable confirmation dialog before saving an entry
Configure
1. Log into the Configuration Management console by going to your KMS URL and adding /admin at the end.
2. Enter your Kaltura user ID and password.
3. Click Sign In. The Configuration Management console displays.

4. In the list of configurable items on the left of your screen, locate and click on Ahkgeneral.
The Adhkgeneral item will be crossed out because it is disabled by default.
The Ahkgeneral window displays.

The Module Info box displays the module name, description (what enabling this module allows users to do), any notes on the module, and version number.
5. In the enabled pull-down list, select Yes to enable the Ahkgeneral module.
Other configurable items following the enabled pull-down list are as follows.
| Configuration Name | Options | Description | End user experience |
| entrySaveSummaryProfileId | Fixed/uneditable | Custom metadata profile to save media summary messages. | |
| changeOwnerWarning | Free text | A warning to display in the confirmation dialog to ensure the user is aware that the owner will be changed. Leave empty to hide this warning. |  |
| lostEditPermissionMessage | Free text | A message to display below a summary when, after assigning to a sub-group, the user loses the edit permission. Leave empty to hide this message. |  |
| publishDestinationNoticeMessage | Free text | A message to display in the publishing form about what to do when desired publishing destination not found. Leave empty to hide this message. |  |
| noPublishSelectedNoticeMessage | Free text | A message to display in the publishing form if the user did not select any publishing option. |  |
| notReadyToPublishNoticeMessage | Free text | A message to display in the save confirmation popup in case the user did not fulfill all required to publish fields. |  |
6. Click Save. You receive a notice that your configuration for Ahkgeneral was saved and the cache was cleared.
Additional functionality accessible via the Module Info box
The Module Info box provides two links in the 'note' section.

- The first link leads to the Groupedcustomdata admin page (<kms_domain>/groupedcustomdata/admin). It is the same admin form that can be accessed directly from Groupedcustomdata with the same options. Ahkgeneral enhances this form by adding the ability to configure the publishing destination as well as the ability to update entry's collaborators and ownership and apply specific publishing flows:
- Publish button removed from My Media
- Publish button removed on the Entry view page under Actions menu (and existing Edit button renamed to Edit & Publish)
- Publish tab removed from the Entry edit page
The user cannot publish anything directly (e.g., from My Media or Media view page) but only using specified metadata schemas.
- The second link allows the admin to generate summary messages reports per user.
Configure publishing destinations and collaboration options for the metadata groups
- In the 'note' section of the Module Info box, click the word 'here' in the first line.

If no groups have been created, a blank admin screen displays. Click the New Group button.

- You may begin configuring your metadata groups.
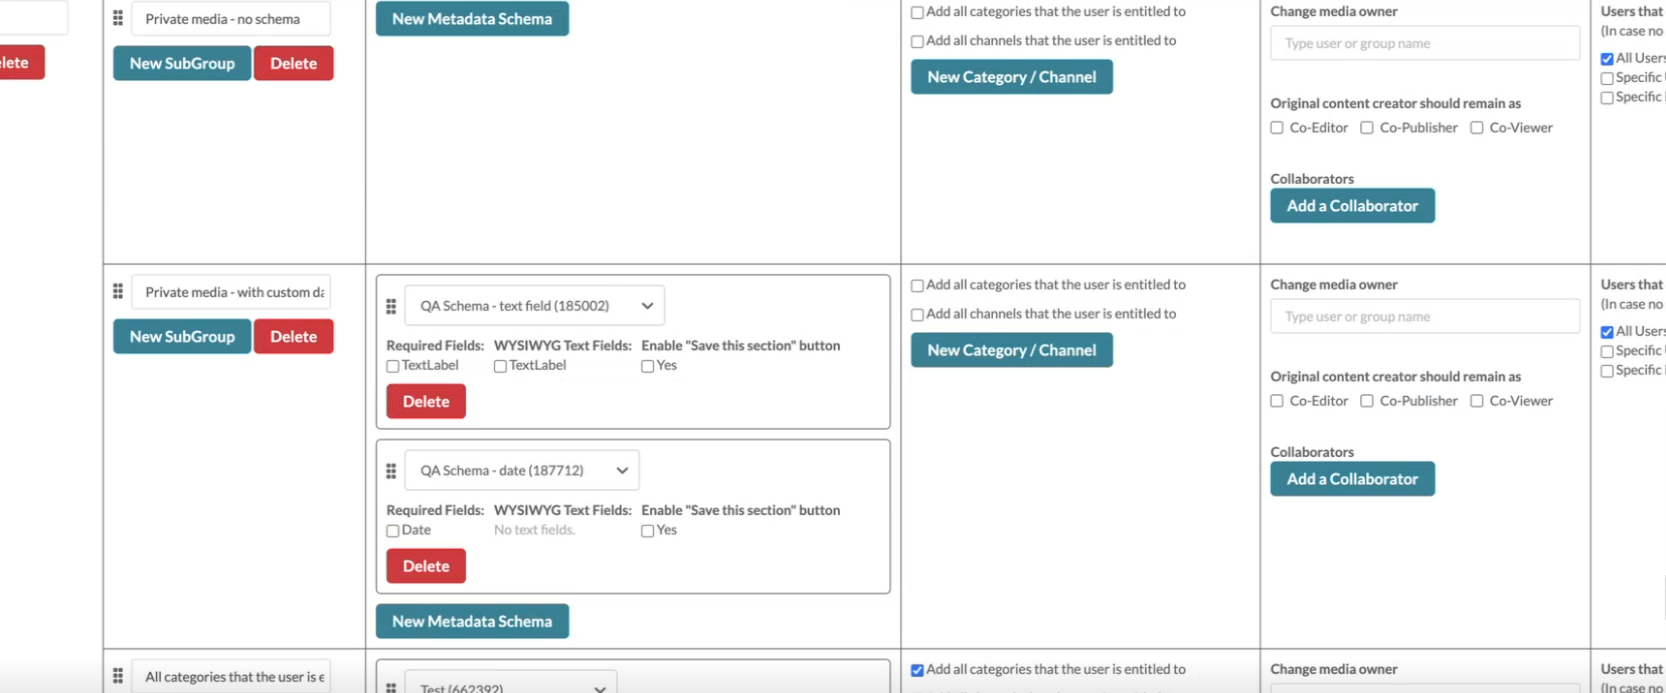
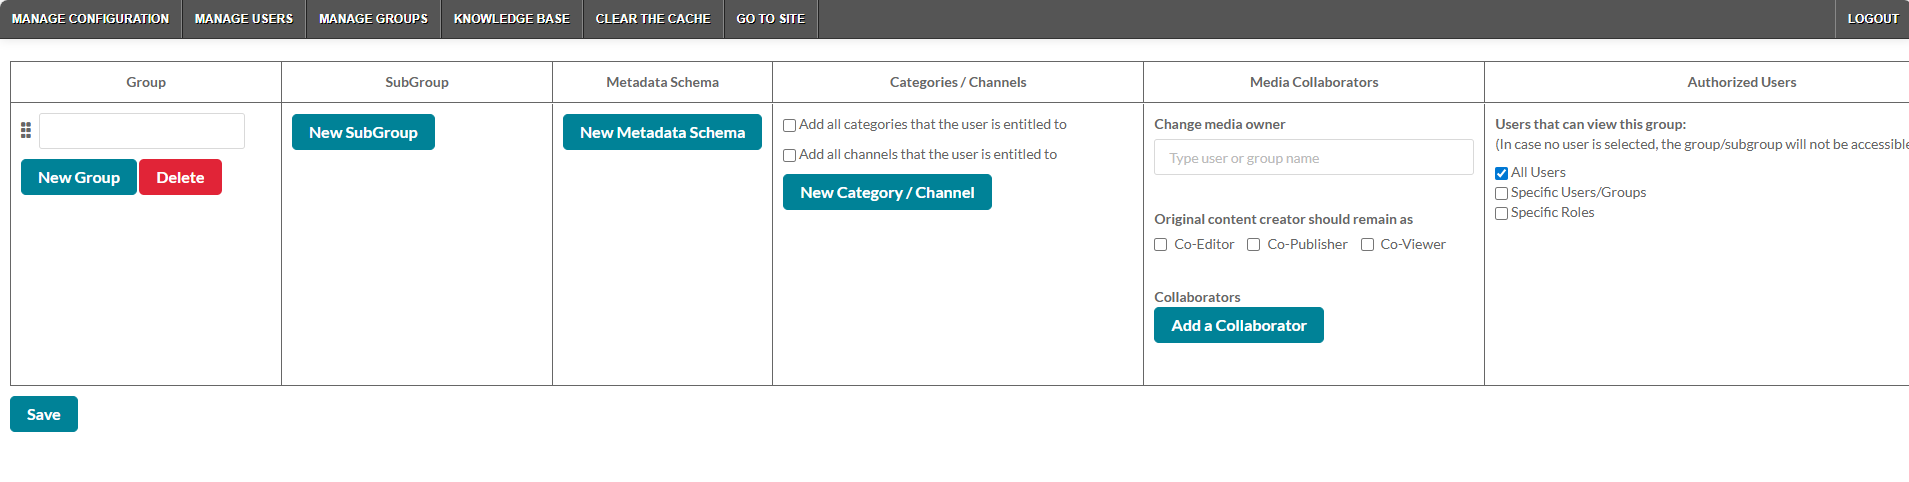 Pictured below is a portion of a sample admin screen that has been populated.
- Click Save when finished.

 Pictured below is a portion of a sample admin screen that has been populated.

Generate Summary Messages Report per user
- In the 'note' section of the Module Info box, click the word 'here' in the second line.

The Summary Message Report screen displays.
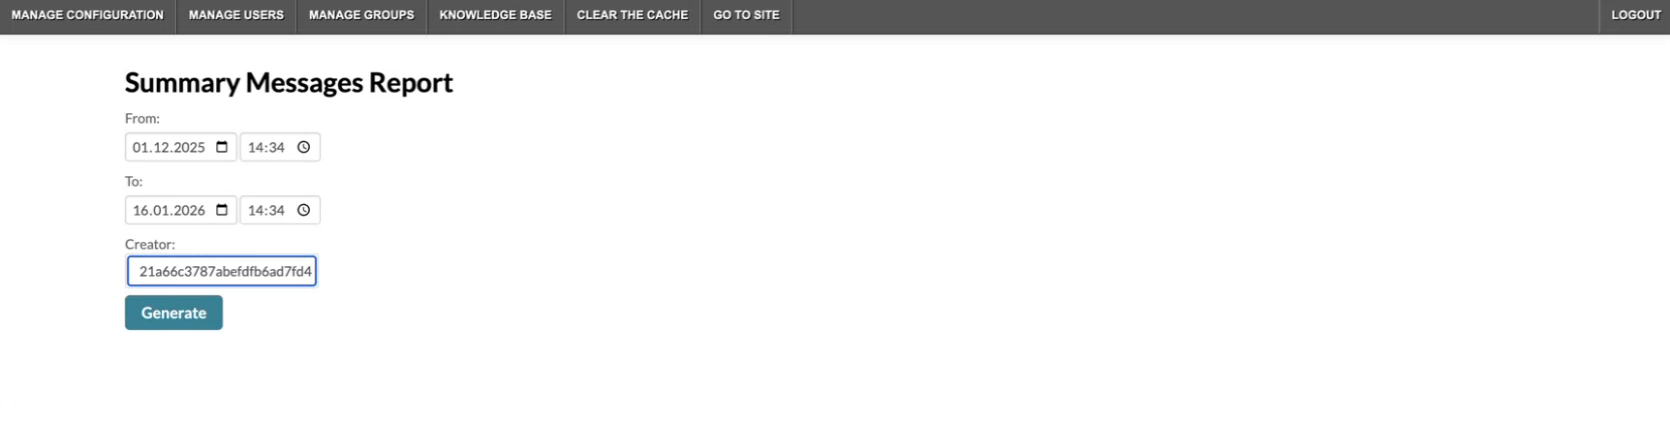
- Select the date range and time period to include in the Summary Message Report.
- Type the Creator.
- Click Generate. You receive notification of how many messages were found in that date range and time period.
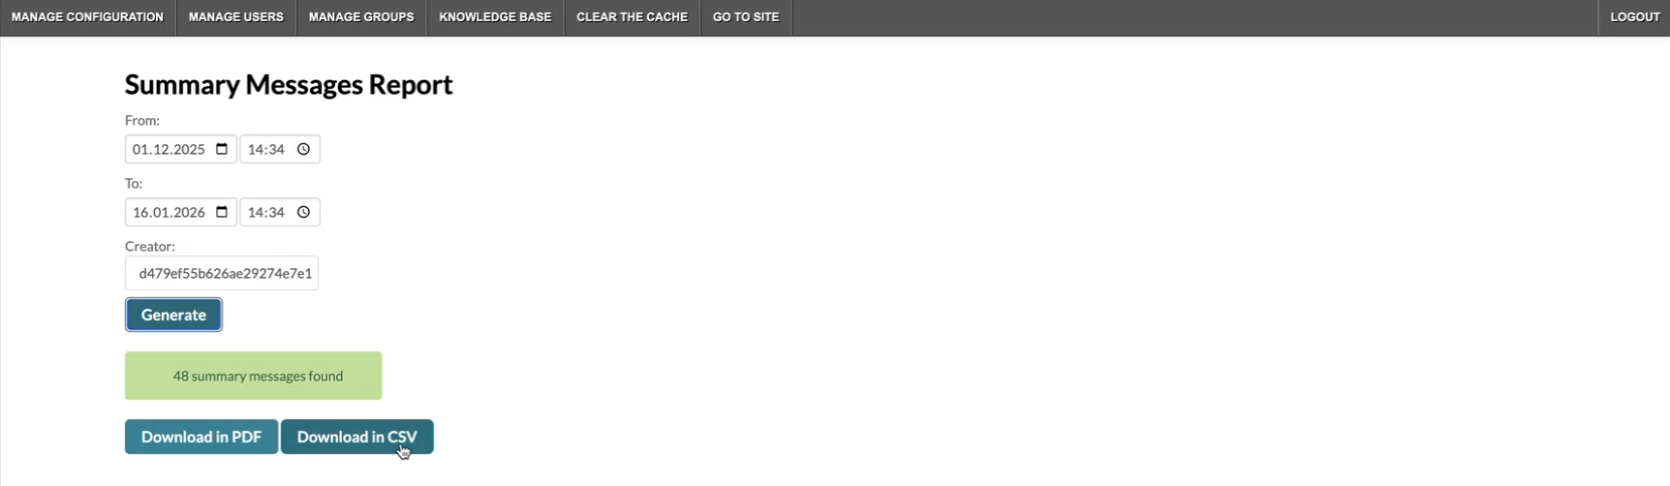
- Depending on how you would like to download the report, click Download in PDF or Download in CSV.


This document is maintained by Kaltura’s Professional Services team. Please send comments or corrections to your Customer Success Manager. Ask them to forward it to the Professional Services team. We are committed to improving our documentation and your feedback is appreciated.
