Gallery owners/managers can edit the gallery's details, theme, and manage users. Let’s navigate to the gallery's edit page and explore these capabilities!
To learn more about Kaltura's Video Portal galleries, visit Understanding galleries.
If you can't access your gallery's Edit page, ask your administrator to give you the required permission.
Navigate to the Edit page
- Log into your MediaSpace site.
- Find the gallery that you want to edit on the navigation bar and click on it.

The gallery page displays.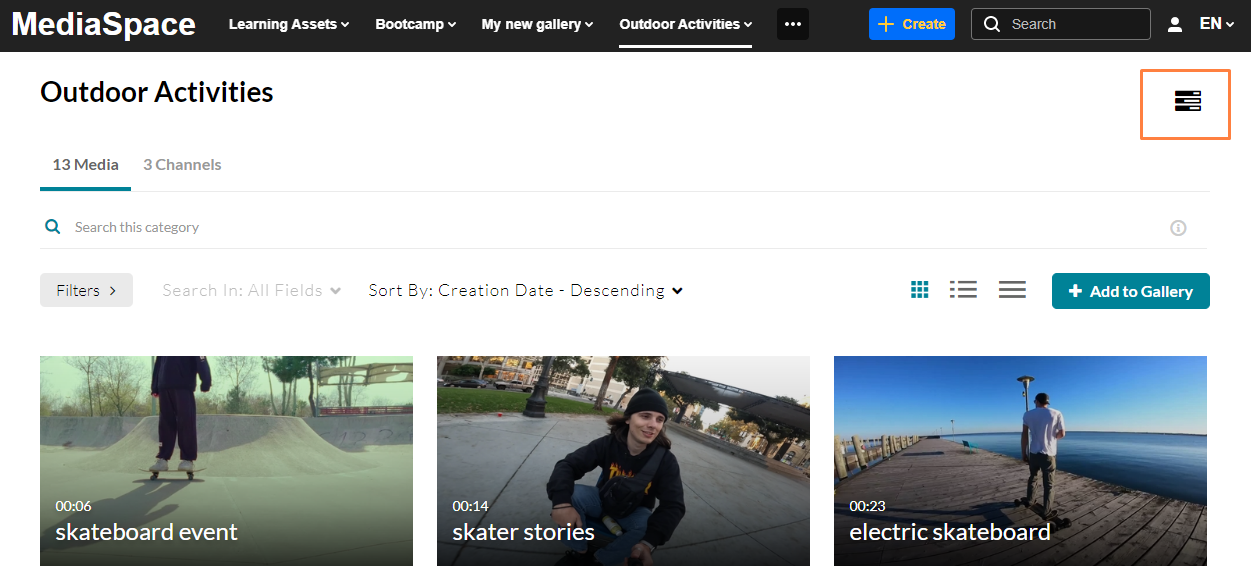
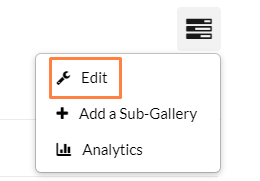
- Click the hamburger icon
 .
. - Choose Edit from the drop-down menu that appears.
The Details tab of the Edit page displays.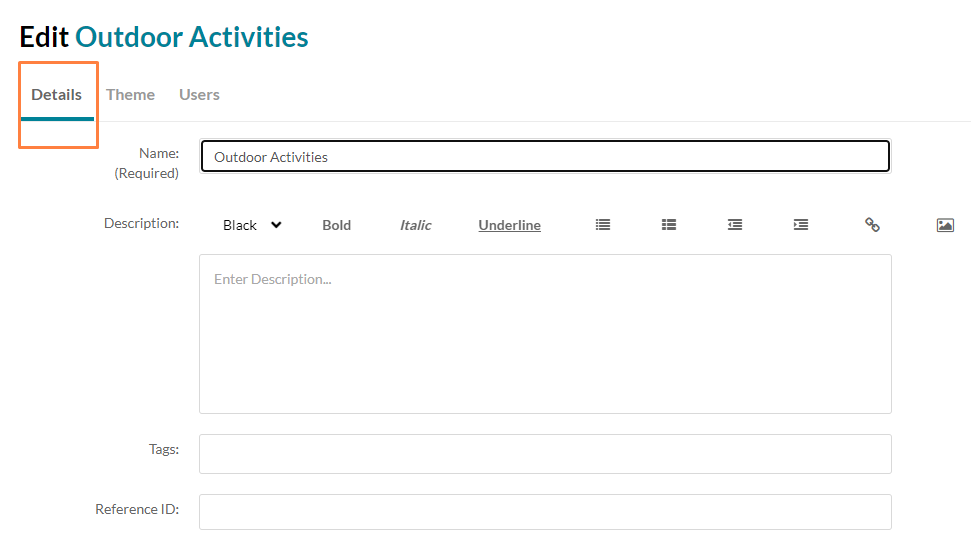


 .
.

Details
- Complete the following fields for your gallery:
Name – This is the name displayed on the navigation bar and was created when the gallery was created. If you'd like to change it, you can do so by deleting the name and typing a new one.
Description – Enter a summary of the gallery content which will display on the gallery page.
Tags – Enter a descriptive tag to use in searches.
Reference ID - (Optional) Enter an external identifier for supporting integrations with systems external to Kaltura. - Edit the Privacy settings:

Open - Anyone can view content (including anonymous users) but only administrators and category members can contribute content.
Restricted - All logged in users can view content but only category members can contribute content.
Private - Only category members can view and contribute content.
Note: Sub-categories under a private category will be visible only to members of those sub-categories. - (Optional) Edit the Options settings:

Moderate content (Media will not appear in category until approved by category manager.)
Enable comments in category.
Keep comments private to category. - Scroll down and click Save.
A success message appears: 'The information was saved successfully.'


Theme
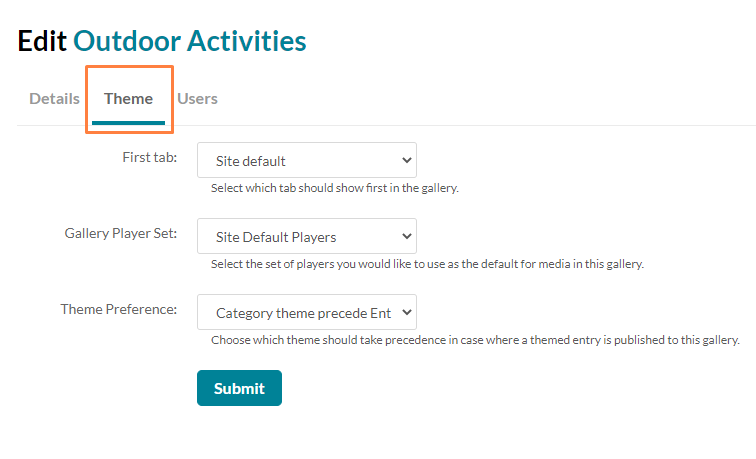
- Set the desired theme for your gallery:
First tab: Select which tab should show first when the gallery page opens: Media, Channels or Category moderation.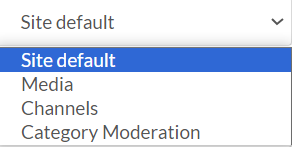
The Channelcategories module must first be enabled by the administrator.
Learn how to add channels to your gallery in our article Associate a channel to a category.
- Gallery Player Set: A player set contains a list of players, one for each type of media. Media with no player will use the default media player.
The player set must first be configured in the Categorytheme module by the administrator.

Theme Preference: Choose which theme should take precedence in cases where a themed entry is published in this gallery.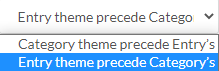
- Click Submit.


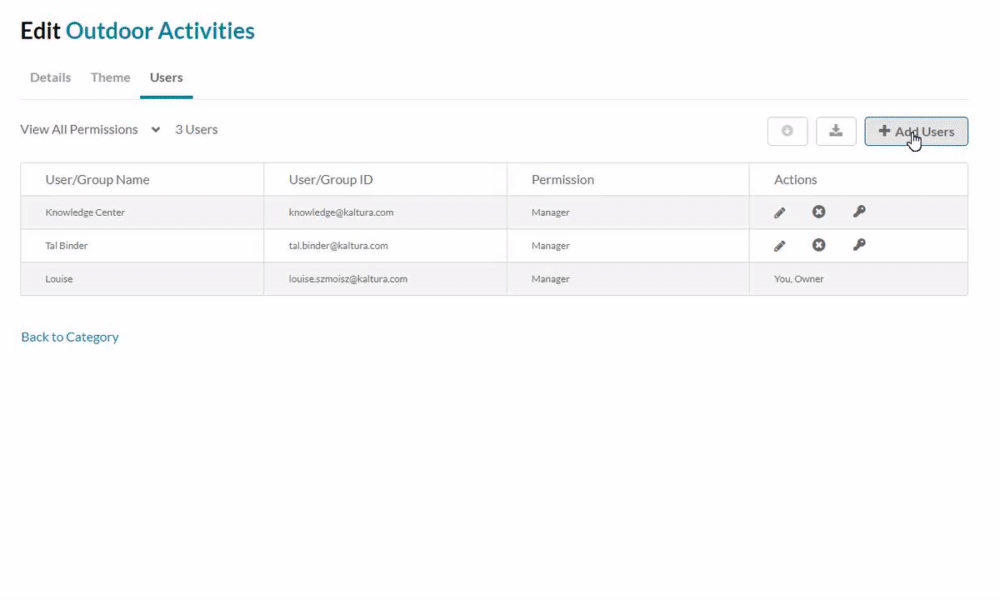
Users
Invite users / groups to your gallery and set their permissions.
The users that appear in the list are added by the administrator in KMC.
Number of users
The total number of users is displayed.

Filter
If you have a long list of users, you can use the filter to search for users by permission.

Add users
- Click the +Add Users button.
The Add Users screen displays. - Type in the user name.
- Select permission from the following options:
- Member
- Contributor
- Moderator
- Manager
- Click Add.
For guidance on permission types, see Understanding galleries roles and permissions.
Edit a user's permission status
- Click the pencil icon in the Actions column next to the user.
A drop-down list appears in the Permission column. - Choose the permission type from the drop-down.
- Click the save icon
 to save your changes.
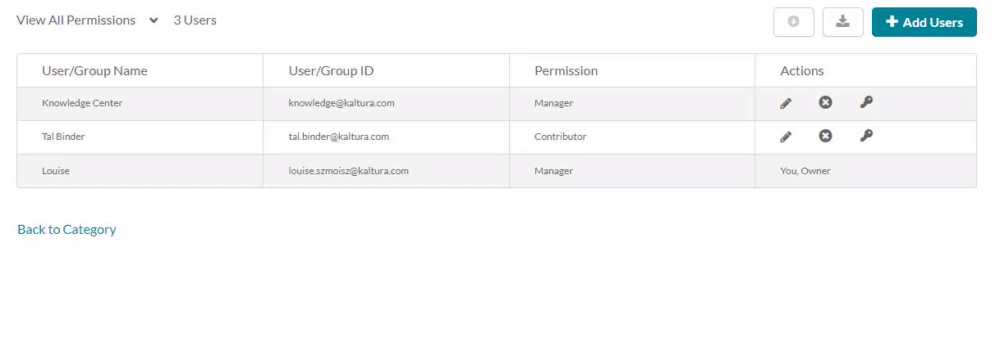
Delete a user
- In the list, locate the user you want to delete.
- In the same row, go to the Actions column and click the remove icon
 .
. The user is removed.
 The user is removed.
Set a user as owner
- Locate the user you want to assign ownership to on the list.
- In the same row, go to the Actions column and click the key icon.

If there is already an owner assigned, a warning message will display: 'Only one owner can be assigned. This change will make the selected user/group the new owner and you will be set as a manager for this category. Would you like to proceed?'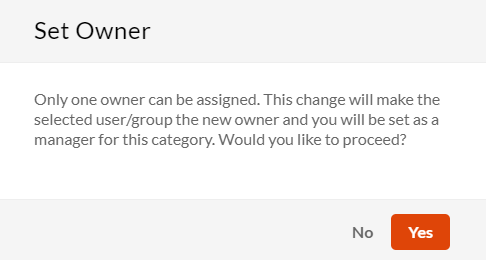
- Click Yes to proceed or No to cancel.


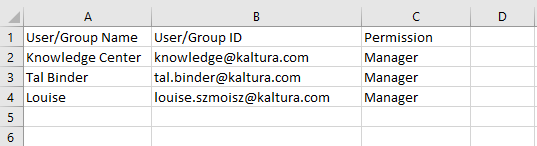
Download a list of users
Click the download icon .
.
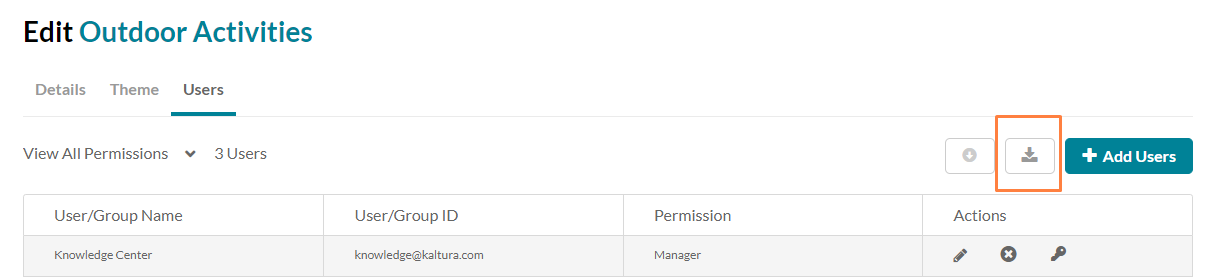
A CSV file is downloaded to your Downloads folder.