The Kaltura Video Building Block for Blackboard Learn Browse Search and Embed (BSE) tool can be used to embed Kaltura media content within Learn content items. With the BSE tool, users have the ability to add media anywhere they are allowed to publish text, for example, items, pages, discussion, and assignments.
Users can:
- Browse, Search, and Embed media from their Kaltura My Media
- Browse, Search, and Embed content from a single course or from multiple course Media Galleries
- Browse, Search, and Embed Content from a Shared Repository (available to Faculty only)
- Upload or create new content and embed on the fly
#1 - Blackboard Learn 3900.X includes an updated content editor, TinyMCE 5, in the Ultra Original Course View and Original Experience of Learn. This editor changes certain UI experiences for adding content within the editor. This article contains steps for A. Embedding Kaltura media with versions prior to Learn 3900.X and B. Embedding Kaltura media with Learn 3900.X. Please refer to the appropriate steps depending on your version.
#2 - Kaltura has implemented Kaltura Video Building Block for Blackboard Learn 5.4.4 to address changes with the Blackboard Learn 3900.X content editor which cause the display of an additional thumbnail and metadata to appear while adding Kaltura Media in the content editor. Your organization may decide that it cannot update to Kaltura Building Block 5.4.4 right away. This article contains steps for A. Embedding Kaltura media with Learn 3900.X and you have upgraded your Kaltura Building Block to 5.4.4 and B. Embedding Kaltura media with Learn 3900.X and you have not upgraded your Kaltura Building Block to 5.4.4. Please refer to the appropriate steps depending on your Kaltura Building Block.
Embedding Kaltura Media with Versions Prior to Learn 3900.X
For versions prior to Learn 3900.X, the Mashups button is used to embed media.
- In the navigation panel, click on Courses.
- Click on the desired course.
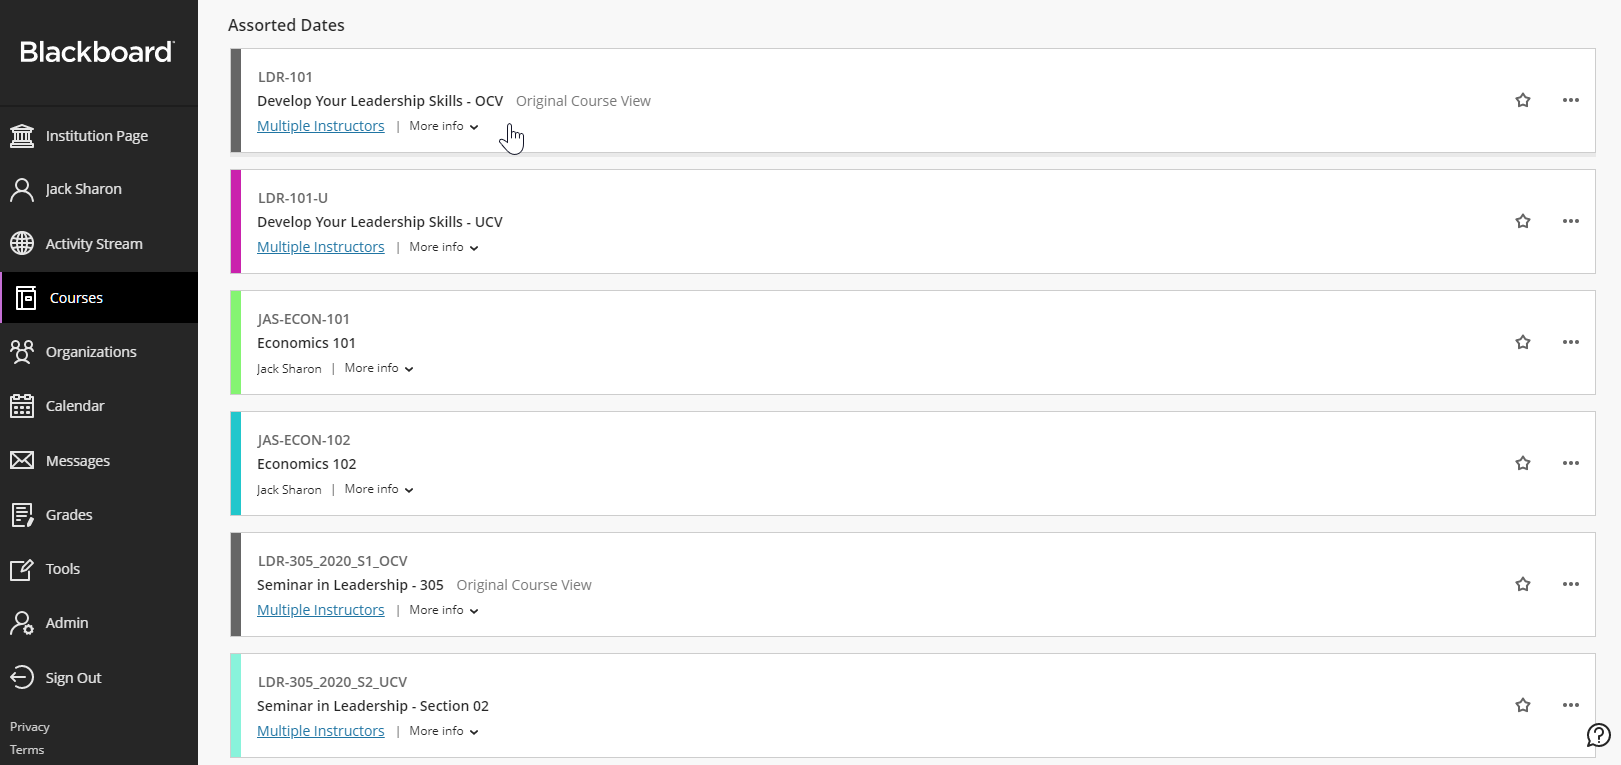
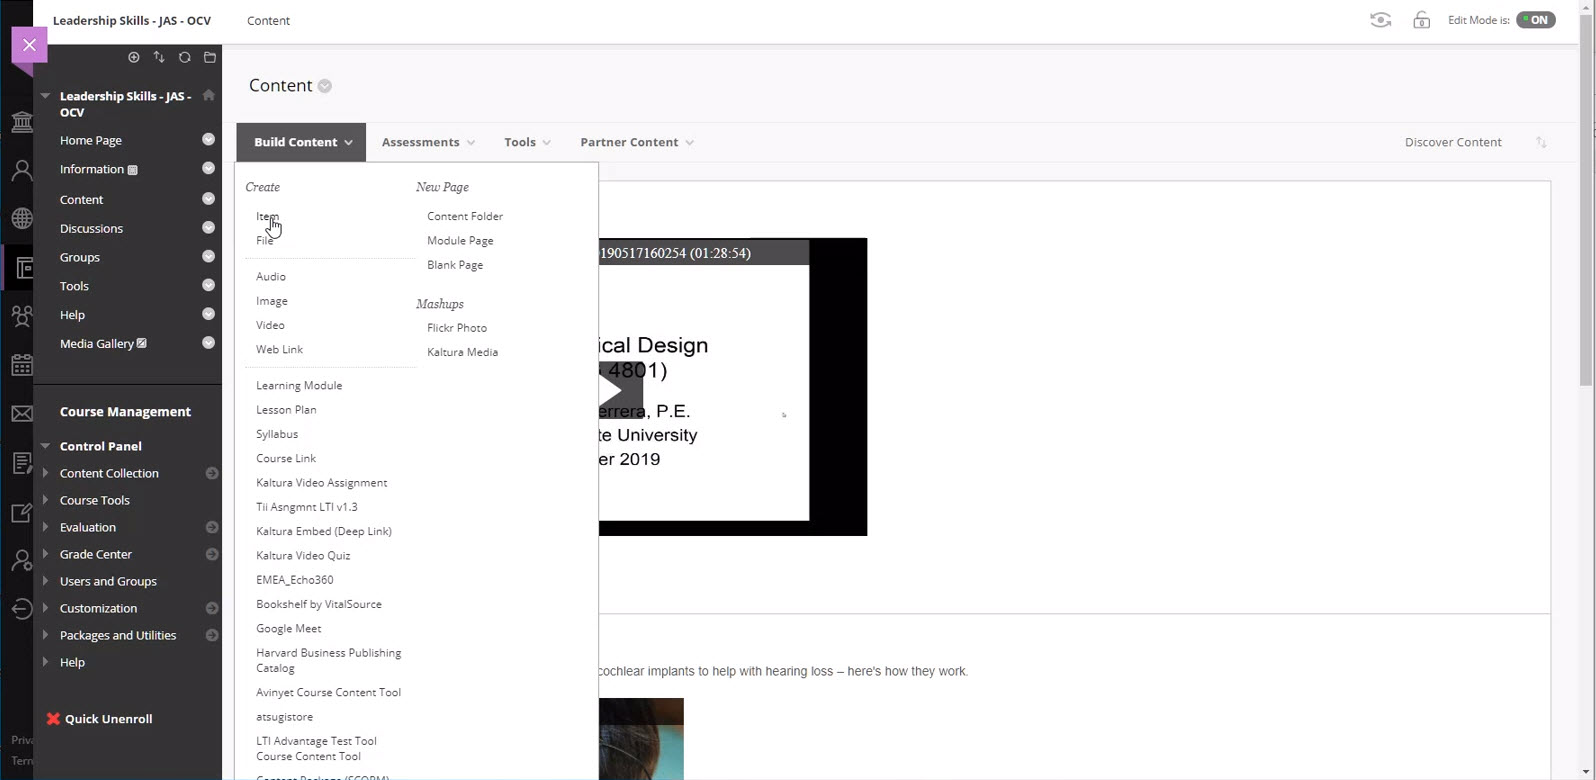
- In the navigation panel, click on the link to the course Content Page.

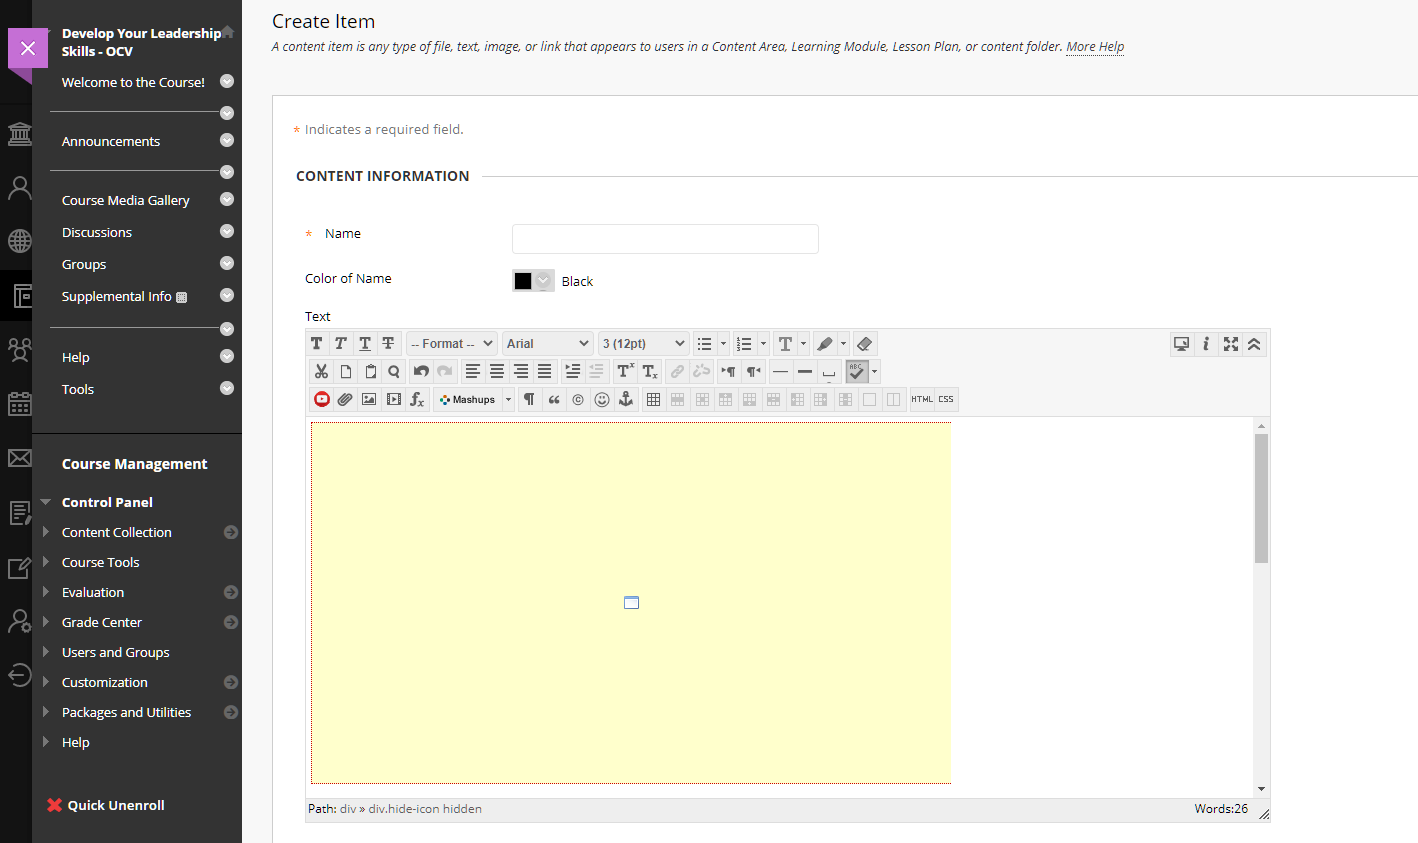
- Choose a Content Item from the Content pull down menus. In this example, we have selected the Item tool from the Build Content menu.
 The Content Editor displays on the page.
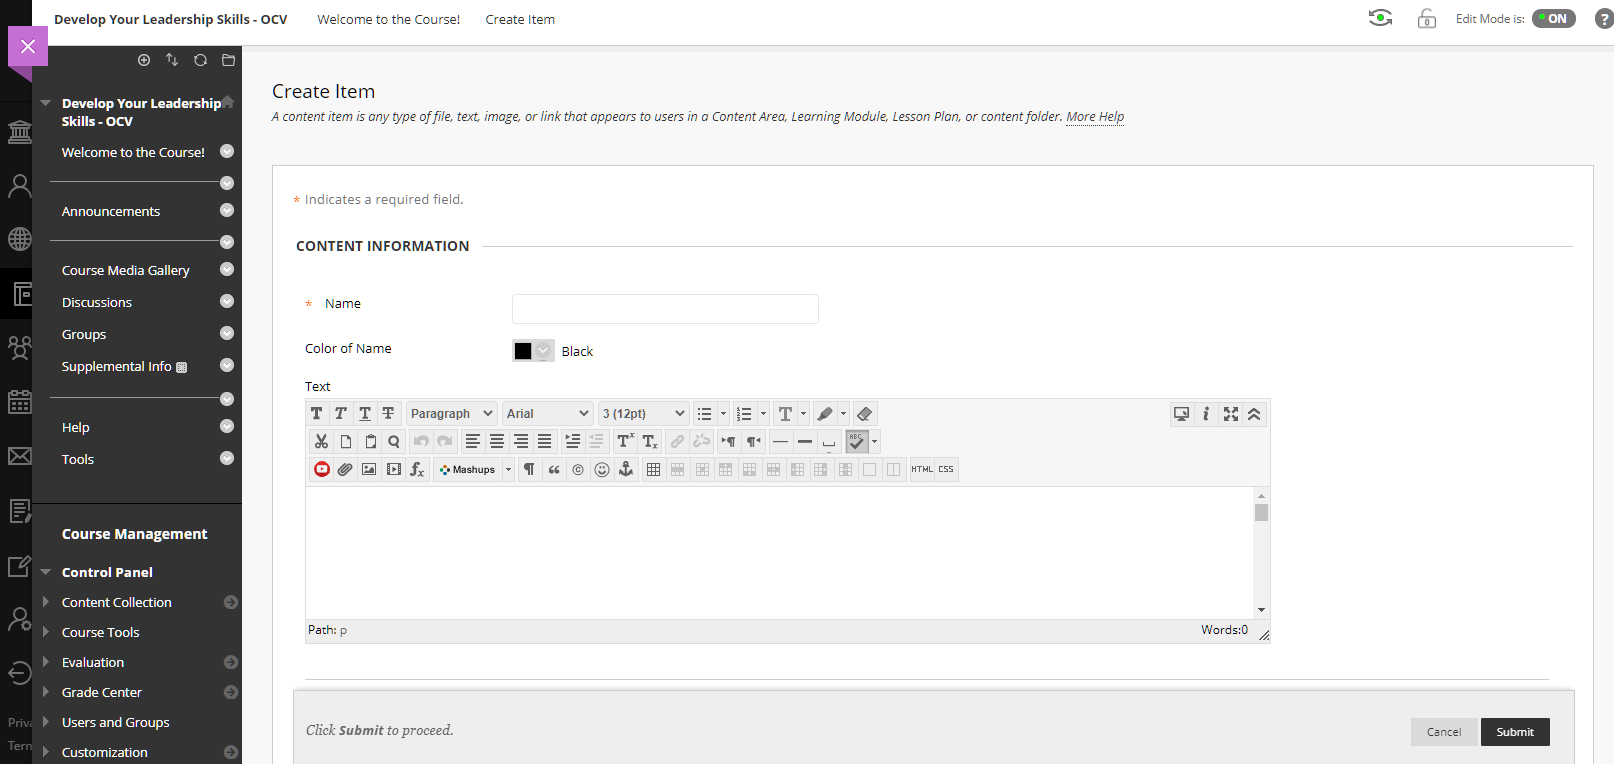
- Click on the Mashups button and then click Kaltura Media from the Mashups pull down menu.
 The Kaltura Browse, Search, and Embed dialog is displayed. The Browse, Search, and Embed window allows users to select content from a number of different Kaltura repositories. Depending on the configuration of your Kaltura account, you may see one or more of the following repository options: My Media, Media Gallery, Share Repository, and Media Gallery Playlists from which to add content. Users also have the option to upload and create new content on the fly by clicking on the Add New button.
Depending on the configuration for Kaltura at your organization your Browse Search and Embed page may appear different that what is pictured above. If your organization is running Browse Search and Embed Version 3 and has Settings enabled, your window displays as above (both the Settings and the Embed button are displayed). If your organization is running Browse Search and Embed Version 3 and does not have Settings enabled, your window does not display the Settings button. If your organization is running Browse Search and Embed Version 2, your window will not display the Settings button and will display a Select button where the Embed button is shown.
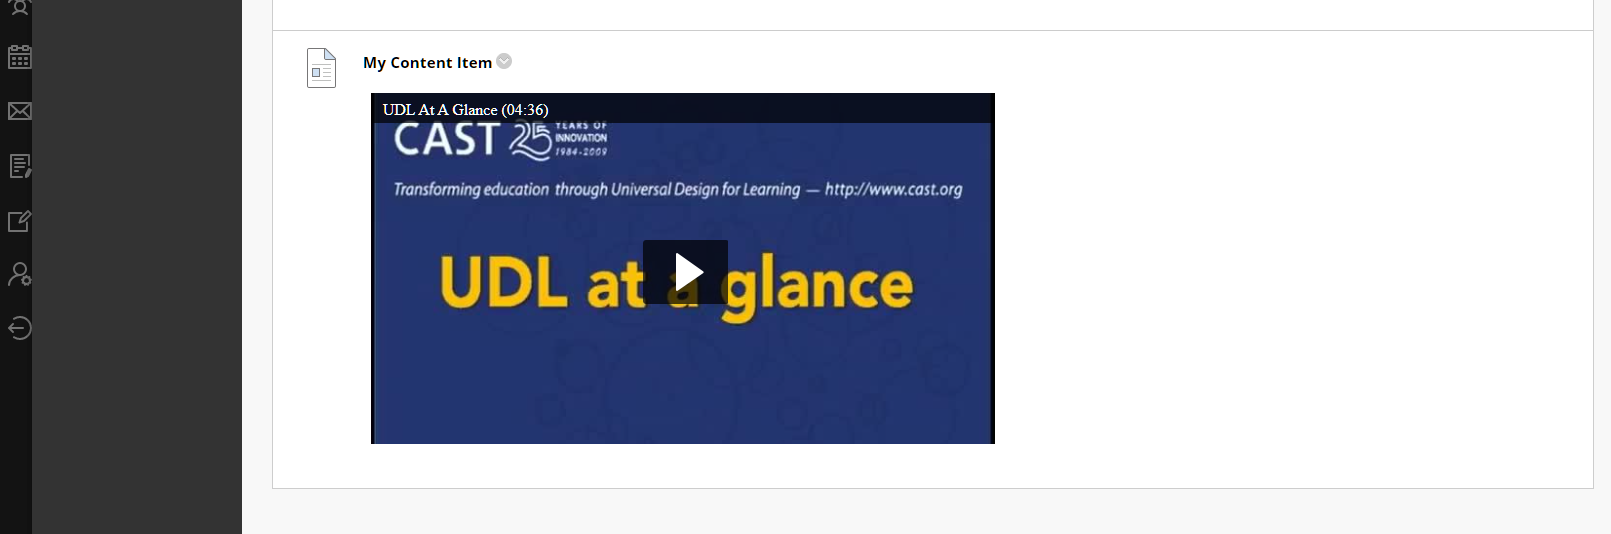
- Click on the Embed button that is displayed for the version of Browse Search and Embed that is configured. A frame is displayed within the content editor to indicate the media has been embedded.
- Click Submit to complete the process. Your new content item has been added.


 The Content Editor displays on the page.
 The Kaltura Browse, Search, and Embed dialog is displayed. The Browse, Search, and Embed window allows users to select content from a number of different Kaltura repositories. Depending on the configuration of your Kaltura account, you may see one or more of the following repository options: My Media, Media Gallery, Share Repository, and Media Gallery Playlists from which to add content. Users also have the option to upload and create new content on the fly by clicking on the Add New button.


Embedding Kaltura Media with Learn 3900.X
For versions using Learn 3900.X, Blackboard has removed the Mashups button and has replaced it with an Add Content button.
Embedding Kaltura Media with Learn 3900.X and You Have Installed Kaltura Building Block 5.4.4
- In the navigation panel, click on Courses.
- Click on the desired course.

- In the navigation panel, click on the link to the course Content Page.
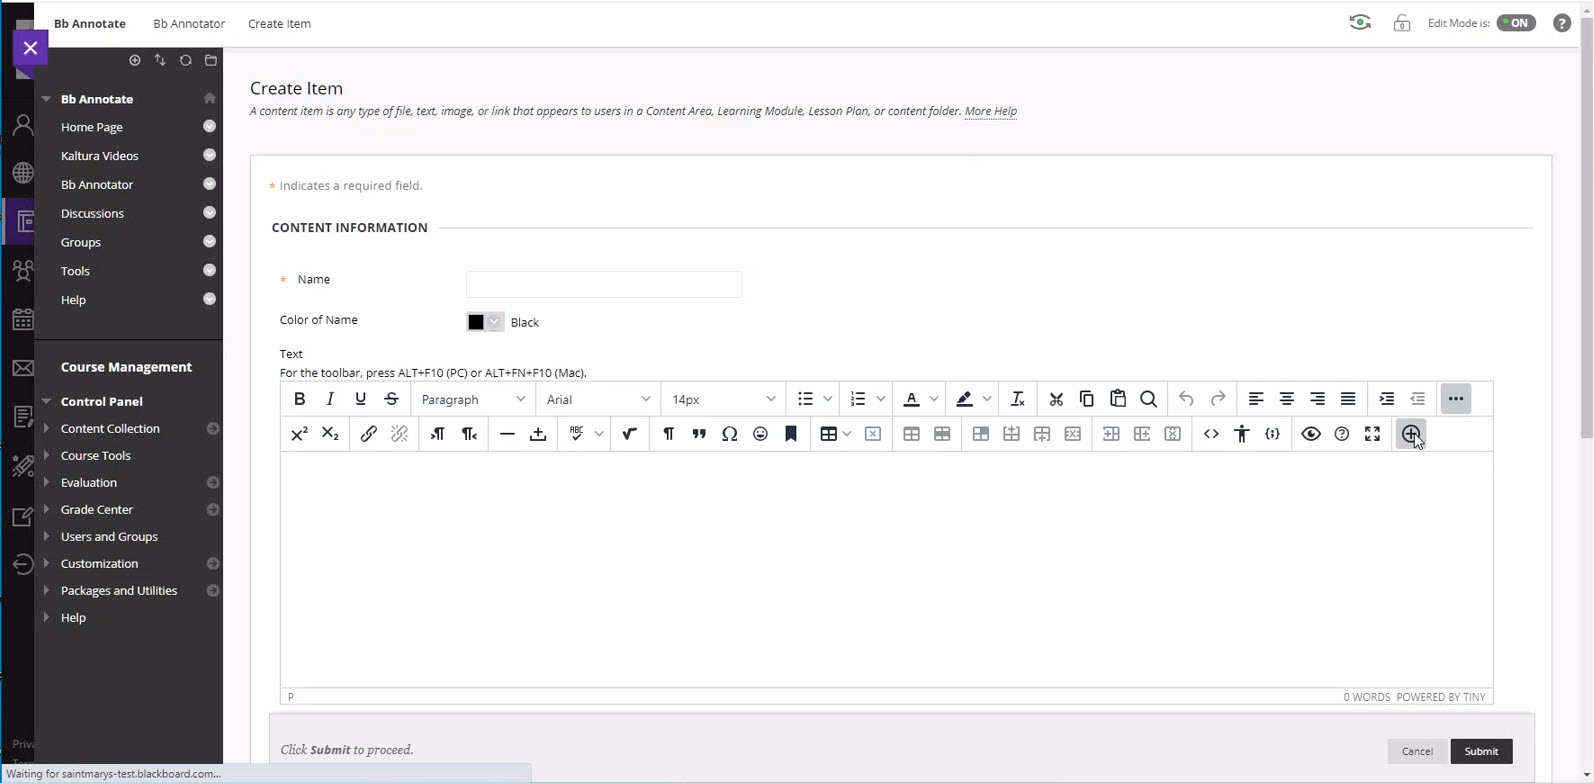
- Choose a Content Item from the Content pull down menus. In this example we have select the Item tool from the Build Content menu.The Content Editor displays on the page. You can use the Content Editor as described by Blackboard.

The Add Content button is displayed as a plus sign surrounded by a circle -

- When you are ready to add Kaltura Media, place the cursor within the content editor at the location you would like your Kaltura Media to be located, and click the Add Content button.
 The Add Content window displays.
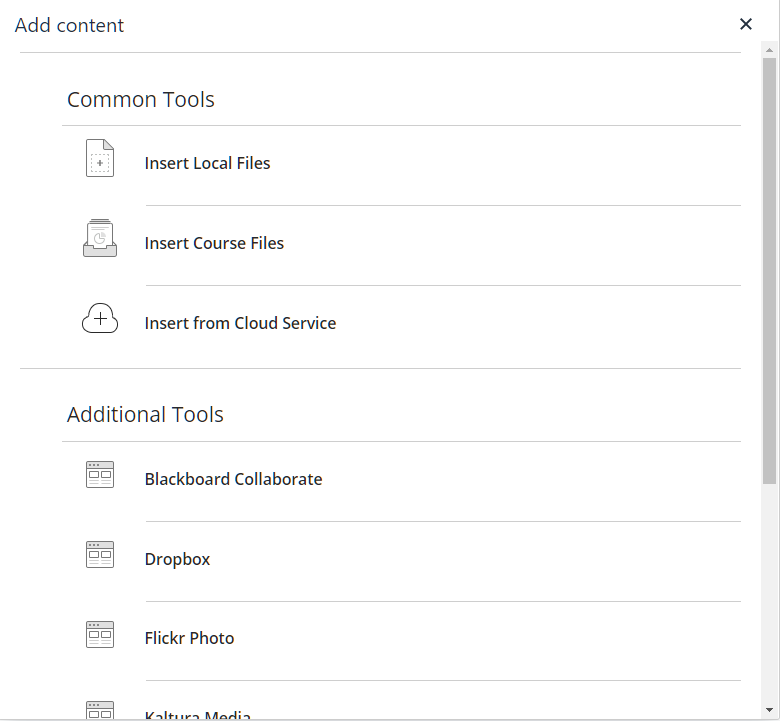
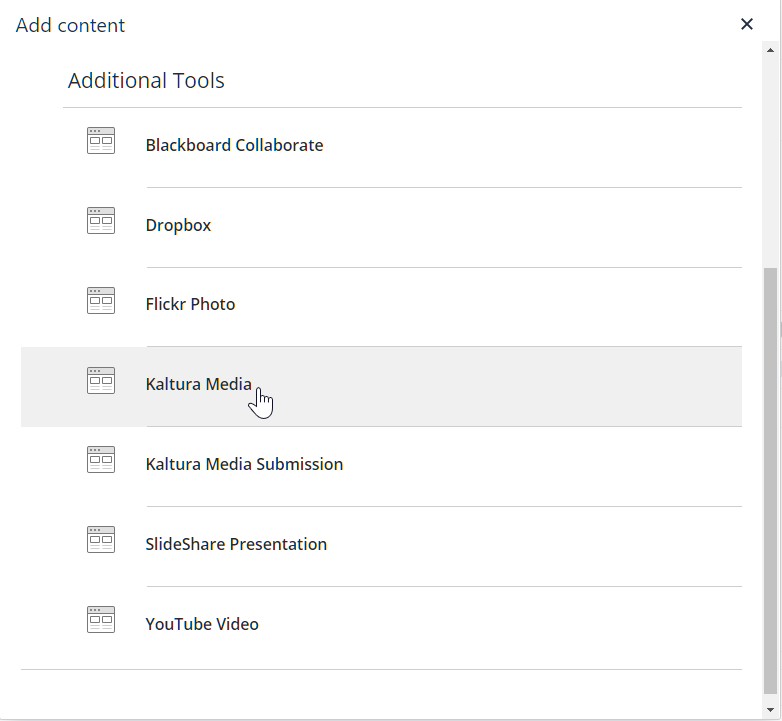
- In the Add Content window, scroll down to the Additional Tools section and click on Kaltura Media.
The Kaltura Browse, Search, and Embed dialog displays. The Browse, Search, and Embed window allows you to select content from a number of different Kaltura repositories. Depending on the configuration of your Kaltura account, you may see one or more of the following repository options: My Media, Media Gallery, Share Repository, and Media Gallery Playlists from which to add content. Users also have the option to upload and create new content on the fly by clicking on the Add New button.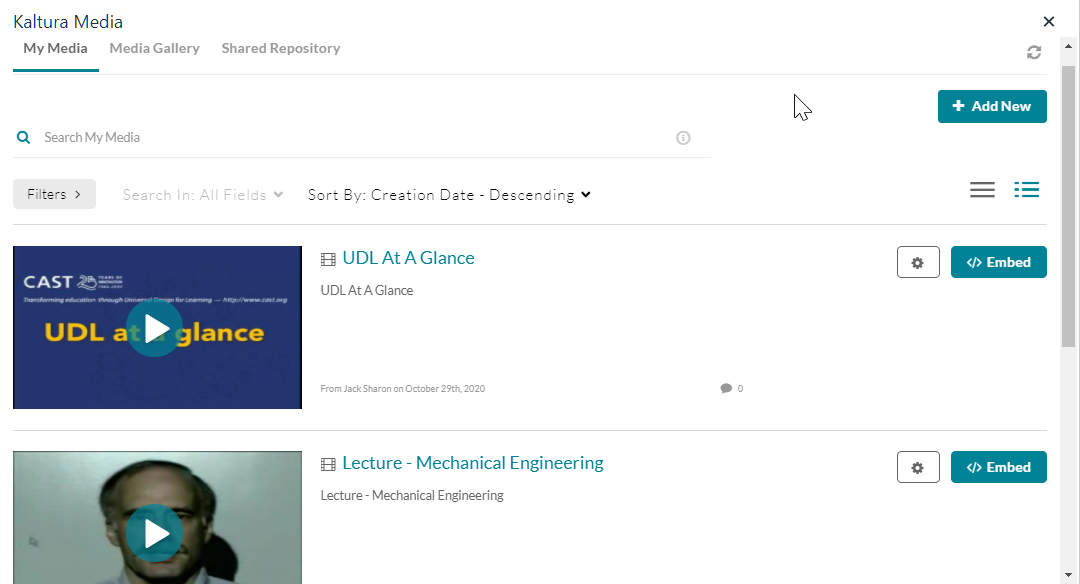
Depending on the configuration for Kaltura at your organization your Browse Search and Embed page may appear different that what is pictured above. If your organization is running Browse Search and Embed Version 3 and has Settings enabled, your window displays as above (both the Settings and the Embed button are displayed). If your organization is running Browse Search and Embed Version 3 and does not have Settings enabled, your window does not display the Settings button. If your organization is running Browse Search and Embed Version 2, your window will not display the Settings button and will display a Select button where the Embed button is shown.
- Click on the Embed button that is displayed for the version of Browse Search and Embed that is configured.
Your Kaltura Media is embedded within the Blackboard Content Editor. - You may now complete any additional settings available with the Blackboard Content Item you are using.
- Click Submit to complete the process. Your new Content Item has been added.


 The Add Content window displays.


Embedding Kaltura Media with Learn 3900.X and You Have Not Installed Kaltura Building Block 5.4.4
- In the navigation panel, click on Courses.
- Click on the desired course.
- In the navigation panel, click on the link to the course Content Page.
- Choose a Content Item from the Content pull down menus. In this example we have select the Item tool from the Build Content menu.The Content Editor displays on the page. You can use the Content Editor as described by Blackboard.
The Add Content button is displayed as a plus sign surrounded by a circle -
- When you are ready to add Kaltura Media, place the cursor within the content editor at the location you would like your Kaltura Media to be located, and click the Add Content button.The Add Content window displays.
- In the Add Content window, scroll down to the Additional Tools section and click on Kaltura Media.
The Kaltura Browse, Search, and Embed dialog displays. The Browse, Search, and Embed window allows you to select content from a number of different Kaltura repositories. Depending on the configuration of your Kaltura account, you may see one or more of the following repository options: My Media, Media Gallery, Share Repository, and Media Gallery Playlists from which to add content. Users also have the option to upload and create new content on the fly by clicking on the Add New button.Depending on the configuration for Kaltura at your organization your Browse Search and Embed page may appear different that what is pictured above. If your organization is running Browse Search and Embed Version 3 and has Settings enabled, your window displays as above (both the Settings and the Embed button are displayed). If your organization is running Browse Search and Embed Version 3 and does not have Settings enabled, your window does not display the Settings button. If your organization is running Browse Search and Embed Version 2, your window will not display the Settings button and will display a Select button where the Embed button is shown.
- Click on the Embed button that is displayed for the version of Browse Search and Embed that is configured.
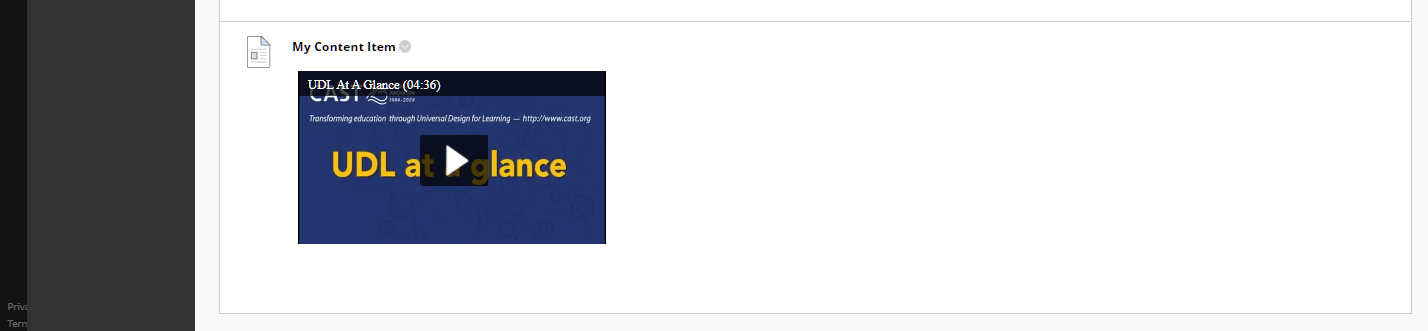
At the present time, your media will display an additional thumbnail and metadata.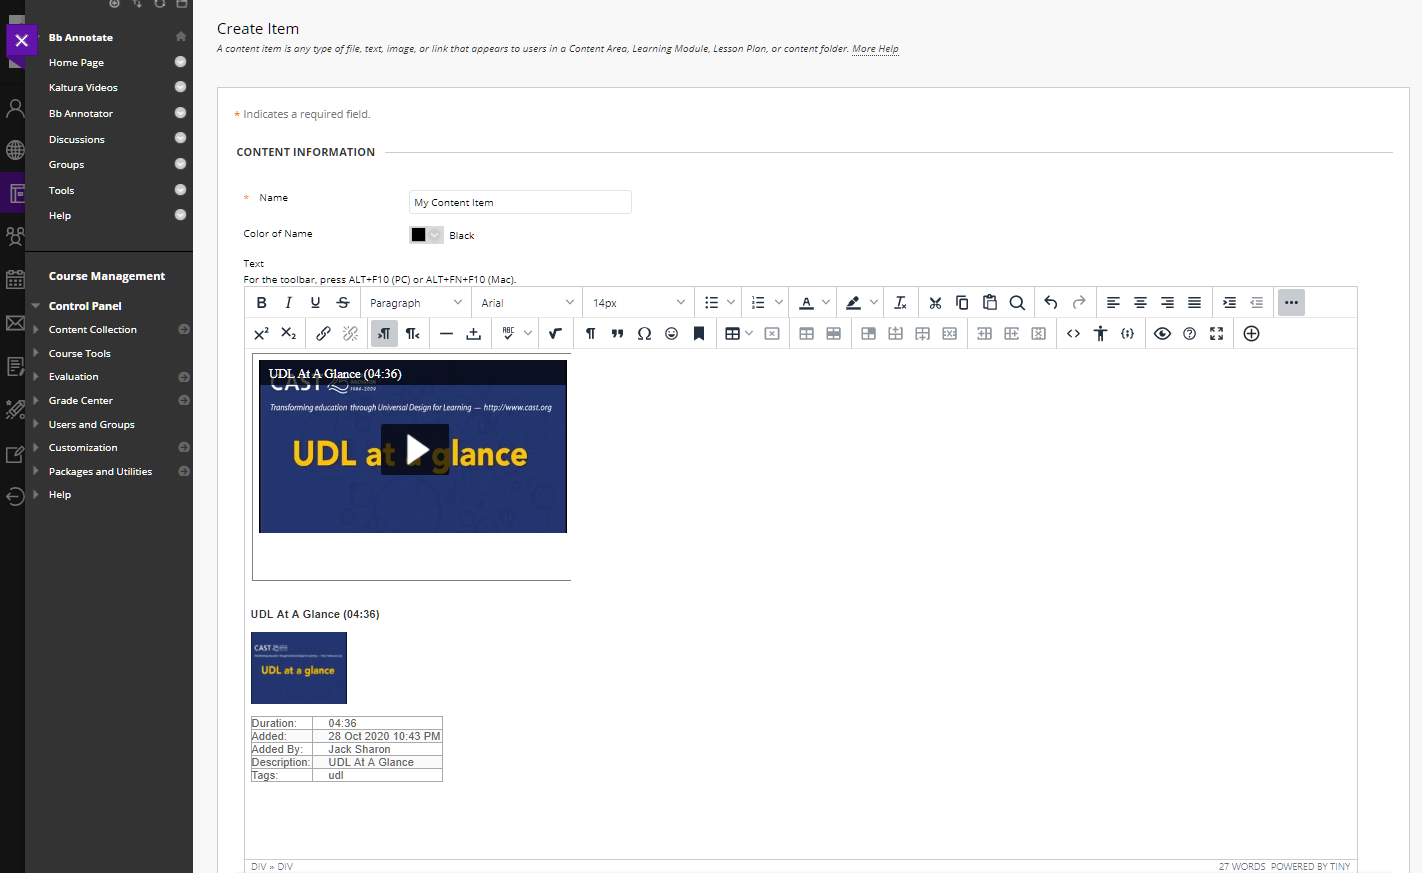 The additional thumbnail and metadata are only displayed when you are editing the content item within the content editor, and will not be displayed when viewing the content.
 - Click Submit to complete the process. Your new Content Item has been added.
- If during your embedding process you would like to add text within the content editor, you have two options.
 The additional thumbnail and metadata are only displayed when you are editing the content item within the content editor, and will not be displayed when viewing the content.
Option 1. Adding text before the media item:
a. After clicking the Embed button, the media is added into the content editor and your cursor is positioned before the media file.
b. Click the Enter key to insert line breaks before the media item.
c. You are now be able to enter text before the embedded media item. 
d. Once you have completed entering text, click Submit to save and create the content item.
Option 2. Adding Text after the media item:
a. In order to add text after the media item you will need to delete the additional small thumbnail and metadata that is added when embedding.
b. Highlight those items including the title line above the thumbnail using your cursor and press the Delete key.
c. You will also need to make sure you have deleted all line breaks after the media item.
d. If you prefer, you can delete the metadata table by placing your cursor in the table, and pressing the left button on your mouse. A set of buttons will appear above the table. Click the Delete Table button, designated by an x surrounded by a square  to remove the metadata table.
e. Once you have completed the deletion, you will be able to position your cursor after the media item and enter additional text.
f. Once you have completed entering text, click Submit to save and create the content item.
For the Kaltura Building Block for Blackboard, Thumbnail Embed and Auto Play are ON by default, and so the buttons are not available. The Max Embed Size feature (sizing) is available for Blackboard beginning KAF version 5.85 and Kaltura Building Block version 5.2.5 or later.


