About
The Notifications page allows you to create and manage notifications for your event.
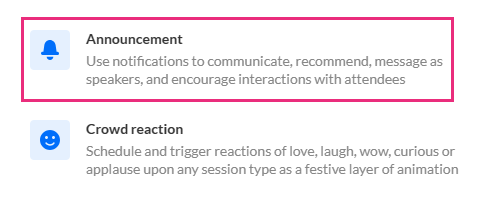
Two types of notifications are available:
- Announcement - Use a notification to communicate, recommend, send a speaker messages, and encourage engagement with attendees.
- Crowd Reaction - Schedule and trigger reactions of love, laugh, wow, curious, or applause upon any session type as a festive layer of animation.
The screens shown here represent a multi-session event. The same actions apply when working with single session.
Create announcement
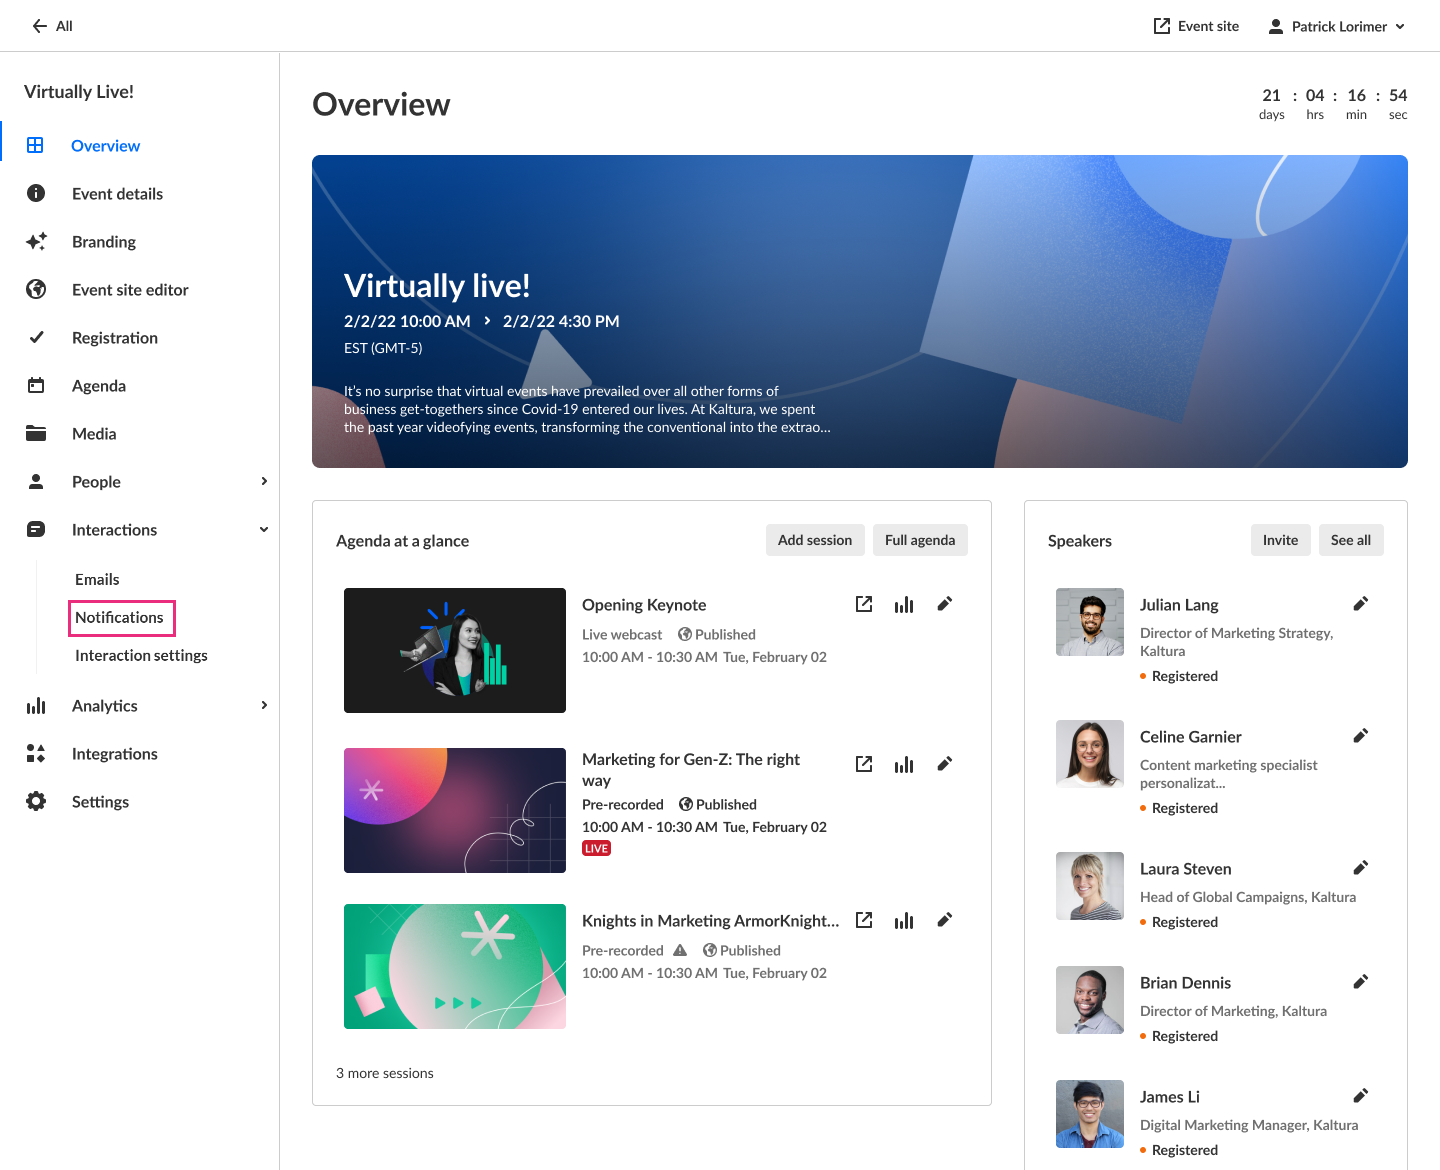
- Navigate to the Notifications page; from the Event page, choose Notifications from the Interactions tab pull-down menu.
 The Notifications page displays.
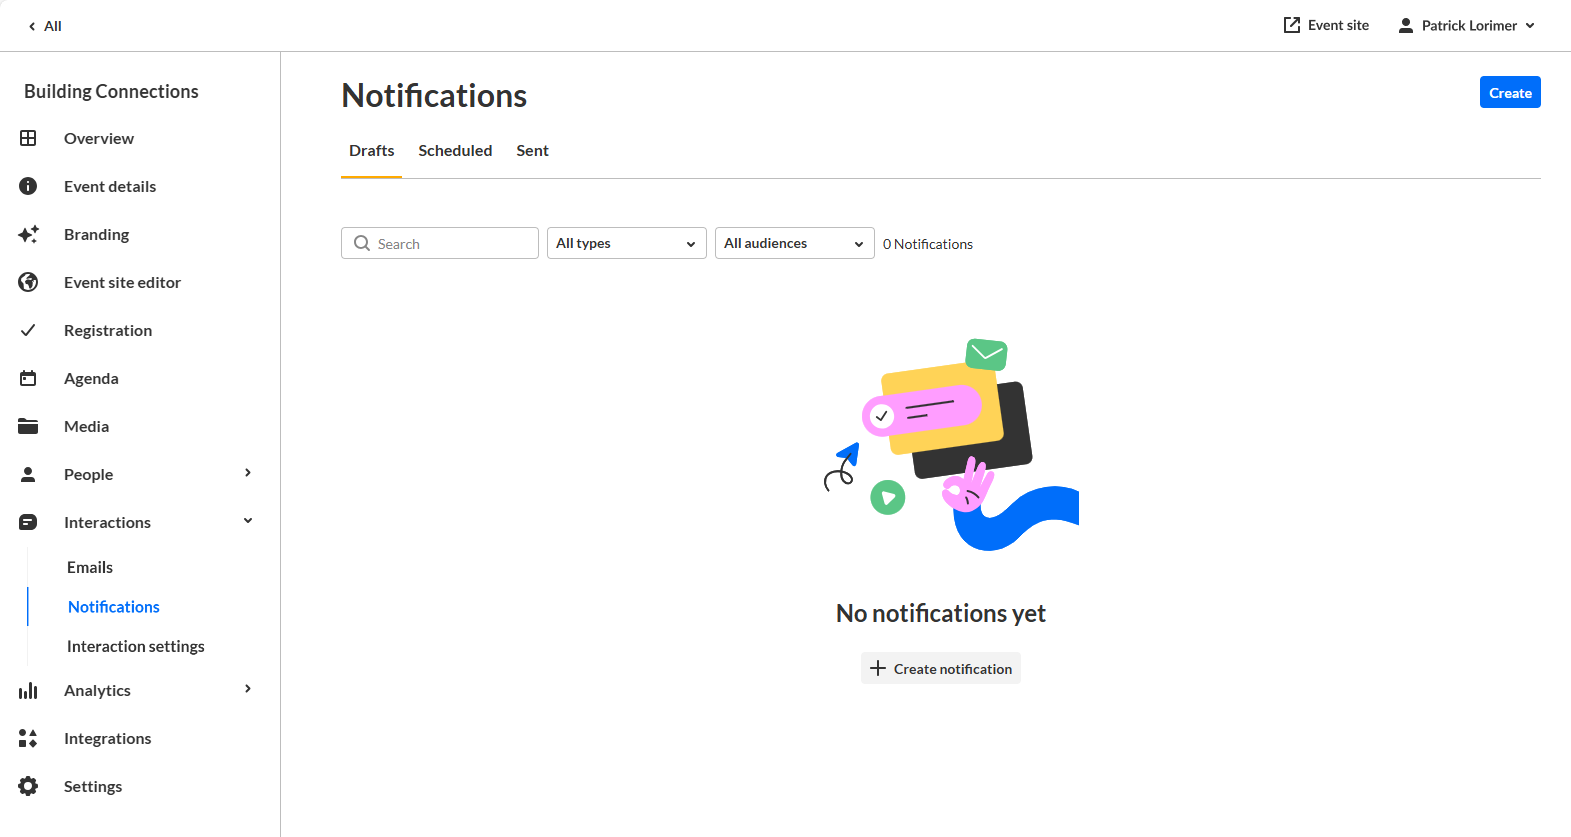
- Notice the three tabs at the top of the page - Drafts, Scheduled, and Sent. You may create notifications from all of the tabs. If there are no notifications in the present tab, click the Create button in the upper right corner of the screen, or click + Create Notification in the main body of the page to create a notification. If notifications exist in the present tab, click the Create button.
- Choose Announcement. Use this notification to communicate, recommend, send a speaker messages, and encourage engagement with attendees.
 The New notification - Announcement screen displays.
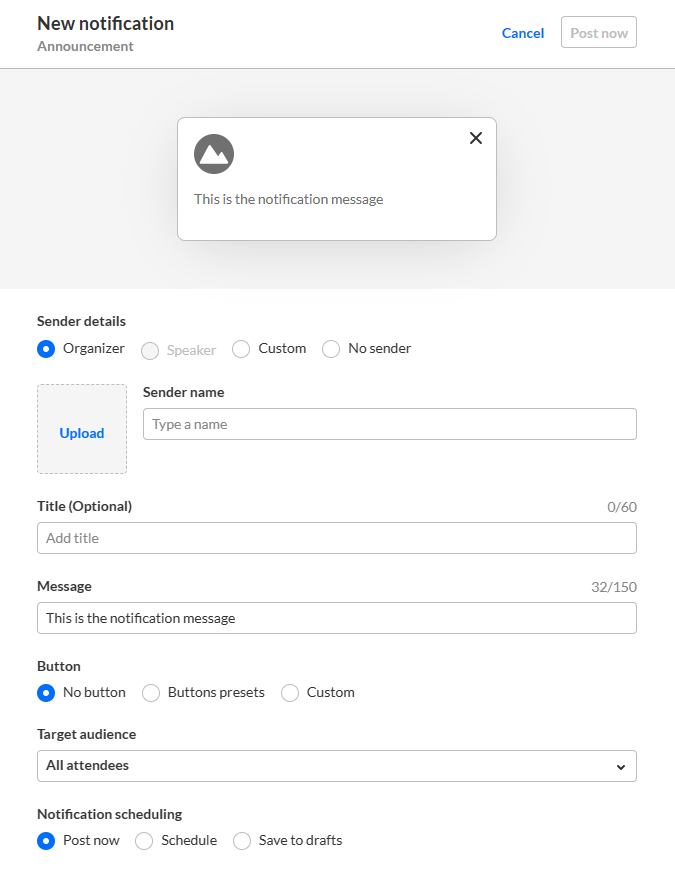
- The editable fields in the New notification - Announcement screen are as follows:
- Sender details - Choose who displays as the notification sender - Organizer, Speaker (if speakers are already set for the event), or Custom. If Speakers are already set for the event, a pull-down list displays with speaker names from which to choose.
- Upload - An image of the sender. If you wish to add an image, click Upload and choose the desired file. We recommend using an image size of 200x200 px.
- Sender name - Name of the sender. This field supports rich text.
- Title - The title of your notification. This field supports rich text.
- Message - Message that you attendees will see in the notification. This field supports rich text.
- Button - Choose the type of button, if any, that will be presented to the attendee in the notification - No Button, Buttons Preset, or Custom.
- For no button, click No Button.
- To use a present button, click Buttons presets, choose from the pull-down list of preset buttons, then type a URL. When the attendee clicks the preset button, the attendee is re-directed to the URL entered. Finally, choose whether the button opens in a new tab.
- To use a custom button, click Custom, type the button label, then type a URL. Finally, choose whether the button opens in a new tab.
- Target audience - Choose your target audience - All attendees, Moderators, Speakers, Page visitors, or Session viewers. If you chose Page visitors, you must also choose the page from the pull-down list. If you chose Session viewers, you must also choose the session from the pull-down list.
- Notification scheduling - Choose whether to post now, schedule, or save to drafts.
- To post immediately, select Post now, then click the Post now button. A message asking you to confirm your action is displayed. Click Post now to confirm or click Cancel to cancel the action. If you clicked Post now, a message that the notification was posted successfully is displayed.
- To schedule the notification, select Schedule, choose a date and time, then click the Schedule button. A message that the notification was saved successfully is displayed.
- To save as a draft, select Save to drafts, then click Save to drafts. A message asking you to confirm your action is displayed. After you save the unscheduled draft, you can schedule and post the notification later. Click Save to drafts to confirm or click Cancel to cancel the action. If you clicked Save to drafts, a message that the draft was successfully saved is displayed.
 The Notifications page displays.

 The New notification - Announcement screen displays.

Create crowd reaction
- Navigate to the Notifications page; from the Event page, choose Notifications from the Interactions tab pull-down menu.
 The Notifications page displays.

- Notice the three tabs at the top of the page - Drafts, Scheduled, and Sent. You may create notifications from all of the tabs. If there are no notifications in the present tab, click the Create button in the upper right corner of the screen, or click + Create Notification in the main body of the page to create a notification. If notifications exist in the present tab, click the Create button.
- Choose Crowd Reaction. Use this notification to schedule and trigger reactions of love, laugh, wow, curious, or applause upon any session type as a festive layer of animation.
 The New Notification - Crowd reaction screen displays.
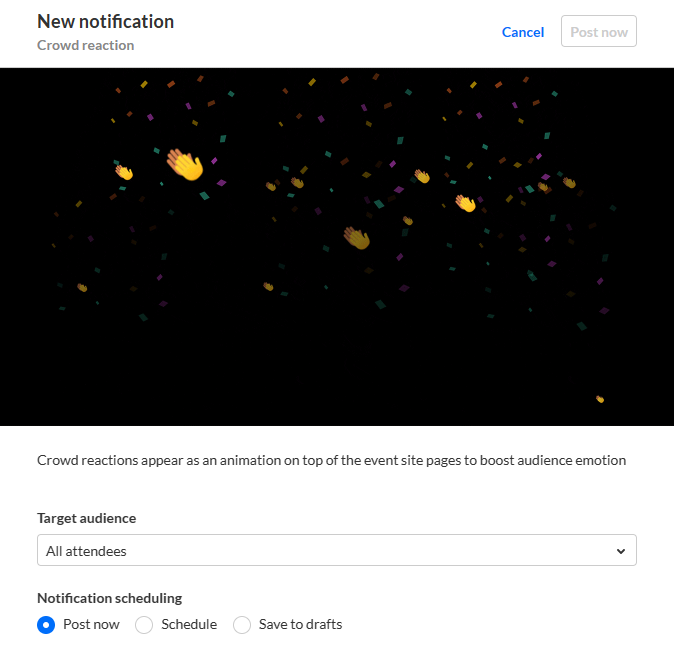
- The editable fields in the New Notification - Crowd reaction screen are as follows:
- Target Audience - Choose your target audience - All attendees, Moderators, Speakers, Page visitors, or Session viewers. If you chose Page visitors, you must also choose the page from the pull-down list. If you chose Session viewers, you must also choose the session from the pull-down list.
- Notification scheduling - Choose whether to post now, schedule, or save to drafts.
- To post immediately, select Post now, then click the Post now button. A message asking you to confirm your action is displayed. Click Post now to confirm or click Cancel to cancel the action. If you clicked Post now, a message that the notification was posted successfully is displayed.
- To schedule the notification, select Schedule, choose a date and time, then click the Schedule button. A message that the notification was saved successfully is displayed.
- To save as a draft, select Save to drafts, then click the Save to drafts button. A message asking you to confirm your action is displayed. After you save the unscheduled draft, you can schedule and post the notification later. Click Save to drafts to confirm or click Cancel to cancel the action. If you clicked Save to drafts, a message that the draft was successfully saved is displayed.
 The Notifications page displays.

 The New Notification - Crowd reaction screen displays.
Manage notifications
Draft notifications
You can post, schedule post, edit, duplicate, or delete draft notifications by using the buttons to the right of the Last Updated column.
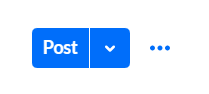
To post the draft notification:
Click the blue Post button to the right of the Last Updated column. A message asking you to confirm your action is displayed. This action displays your notification immediately in the site. Click Post Now to confirm or click Cancel to cancel the action. If you clicked Post Now, a message that the post was successful is displayed.
To schedule the draft notification:
- Click the down arrow to the right of the Post button, then choose Schedule Post.
The Edit Notification - [Announcement] or [Crowd reaction] screen displays, depending on what type of notification you are scheduling. - Make appropriate edits, then click Schedule. A message that the notification was saved successfully is displayed.
To edit the draft notification:
- Click the three blue dots to the right of the Post button.
- Choose Edit. The Edit Notification screen displays.
- Make appropriate edits, then click Post now, Schedule, or Save To Drafts, depending on how you chose to edit the draft notification.
To duplicate the draft notification:
- Click the three blue dots to the right of the Post button
- Choose Duplicate. The New Notification - [Announcement] or [Crowd reaction] screen displays, depending on what type of notification you are duplicating. The screen displays the same information from the duplicated notification.
- Make appropriate edits, then click Post now, Schedule, or Save To Drafts, depending on how you chose to edit the duplicated notification.
To delete the draft notification:
- Click the three blue dots to the right of the Post button.
- Choose Delete. A message asking you to confirm your action is displayed. This action cannot be reverted.
- Click Delete Permanently to confirm or click Cancel to cancel the action. If you clicked Delete Permanently, a message that the notification was deleted successfully is displayed.
Scheduled notifications
You can post now, edit, save to drafts, duplicate, or delete draft notifications by using the buttons to the right of the Audience column.
To post the scheduled notification:
- Click the three blue dots to the right of the Audience column.
- Choose Post now. A message asking you to confirm your action is displayed. This action displays your notification immediately in the site. Click Post Now to confirm or click Cancel to cancel the action.
If you clicked Post Now, a message that the post was successful is displayed.
To edit the scheduled notification:
- Click the three blue dots to the right of the Audience column.
- Choose Edit. The Edit Notification - [Announcement] or [Crowd reaction] screen displays, depending on what type of notification you are editing.
- Make appropriate edits, then click Schedule. A message that the notification was saved successfully is displayed.
To save the scheduled notification to drafts:
- Click the three blue dots to the right of the Audience column.
- Choose Save to drafts. A message asking you to confirm your action is displayed. After you save the unscheduled draft, you can schedule and post the notification later. Click Save To Drafts to confirm or click Cancel to cancel the action.
If you clicked Save To Drafts, a message that the draft was successfully saved is displayed.
To duplicate the scheduled notification:
- Click the three blue dots to the right of the Audience column.
- Choose Duplicate. The New Notification - [Announcement] or [Crowd reaction] screen displays, depending on what type of notification you are duplicating. This screen displays the same information from the duplicated notification.
- Make appropriate edits, then click Schedule. A message that the notification was saved successfully is displayed.
To delete the scheduled notification:
- Click the three blue dots to the right of the Audience column.
- Choose Delete. A message asking you to confirm your action is displayed. This action cannot be reverted.
- Click Delete Permanently to confirm or click Cancel to cancel the action. If you clicked Delete Permanently, a message that the notification was deleted successfully is displayed.
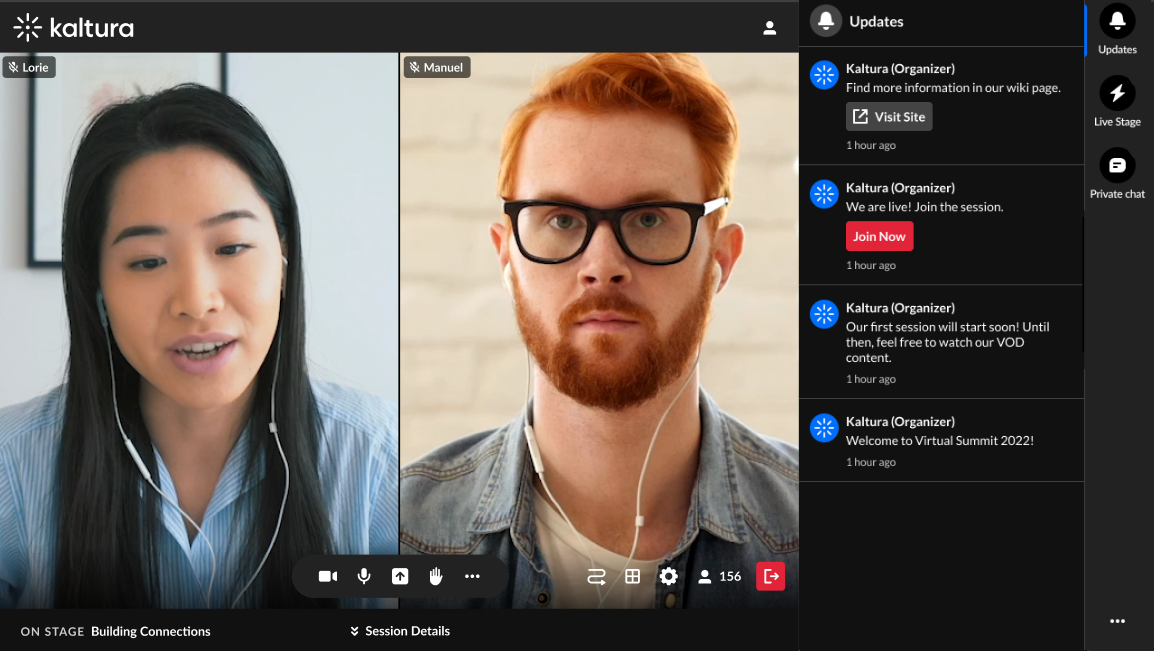
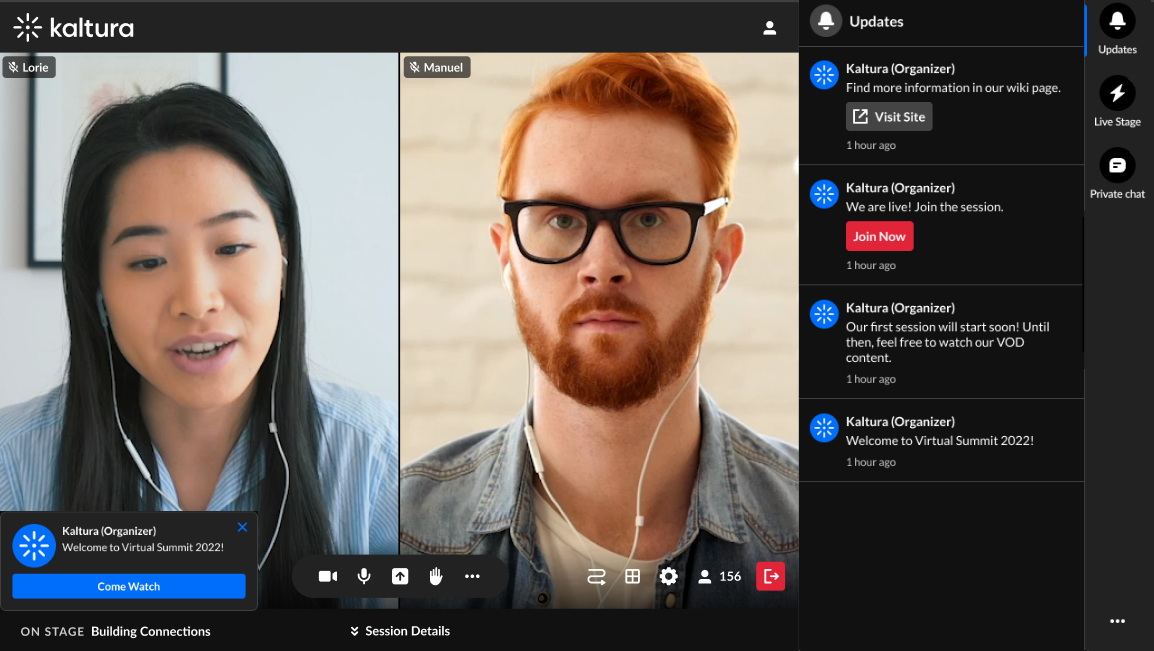
Notifications experience
Notifications are used to increase user engagement during the event days. There are two types of notifications that are complementary to one another - Pop-up and Widget.
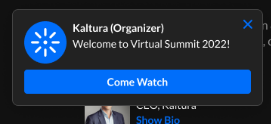
Pop-up notifications
-
A small ‘toast’ banner is displayed on the left side of the page.
-
Enabled only after the attendee's consent.
-
Setting can be updated (enabled/disabled) from the widget settings menu at any time.
Widget notifications
The Updates tab lists the notifications sent from the moderator to all participants during the session.
 Attendee View

Notifications functionality
Clicking on the toast message takes the user to the linked action (e.g., Come Watch).
Toast messages can also be closed/dismissed by clicking the “x” (top right corner).

After the popup disappears or is dismissed, the notification can be found in the notifications feed.
 Attendee View
Scrolling down in the notification feed loads more notifications. Notifications are displayed in descending chronological order, newest on top.
Notifications feed
In the notification feed, each notification has:
- Icon image
- Title - Sender / from, bold text
- Message – Plain text, up to 150 characters
- Timestamp - 'time elapsed' indicator (e.g.: 1 min. ago, 2 hours ago, 3 days ago)
Below each actionable notification, there may be a linked action.
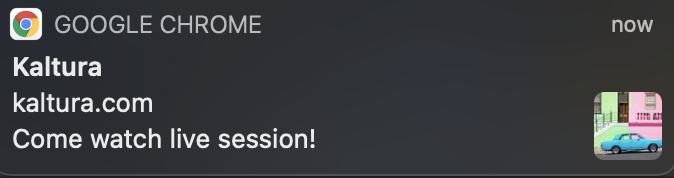
Browser notifications
Browser notifications are another way to increase attendee engagement. The browser notifications go alongside the site notifications that appear in the chat widget and are not intended to replace them.
Once approved, the attendee will receive browser notifications only when not focused on the event tab.
The browser notifications are supported only in:
-
Google Chrome
-
Firefox
-
Microsoft Edge