- Select 3D Object from the + Add New drop-down menu.
 The Brand3D Upload widget is displayed.
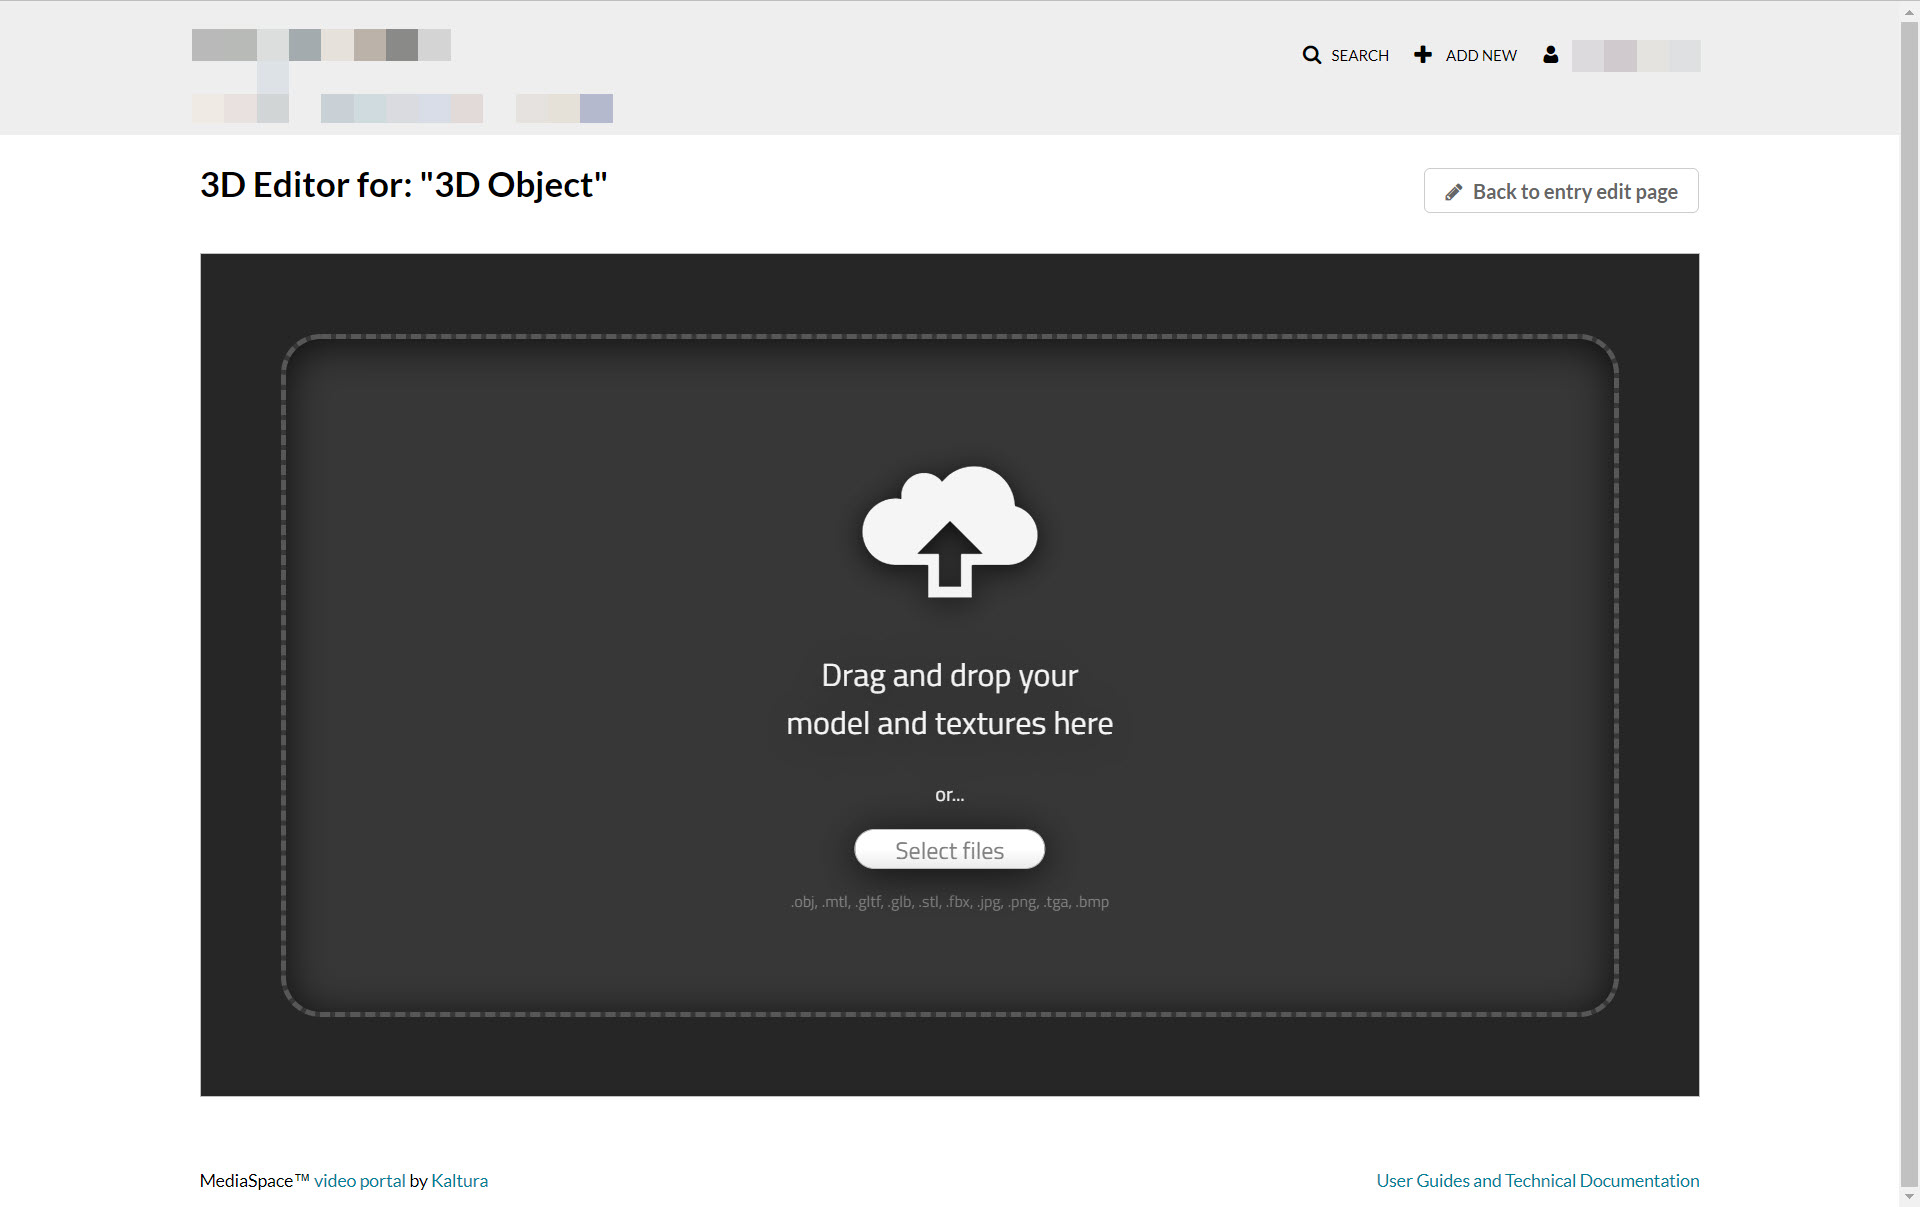
- Drag and drop your files into the designated area or click Select Files to select files from your computer. Acceptable file types are .obj, .mtl, .gltf, .glb, .stl, .fbx, .jpg, .png, .tga, and .bmp.
The file displays in the 3D Object Editor. The file represents the object, i.e., all the data needed to render the object is in this file.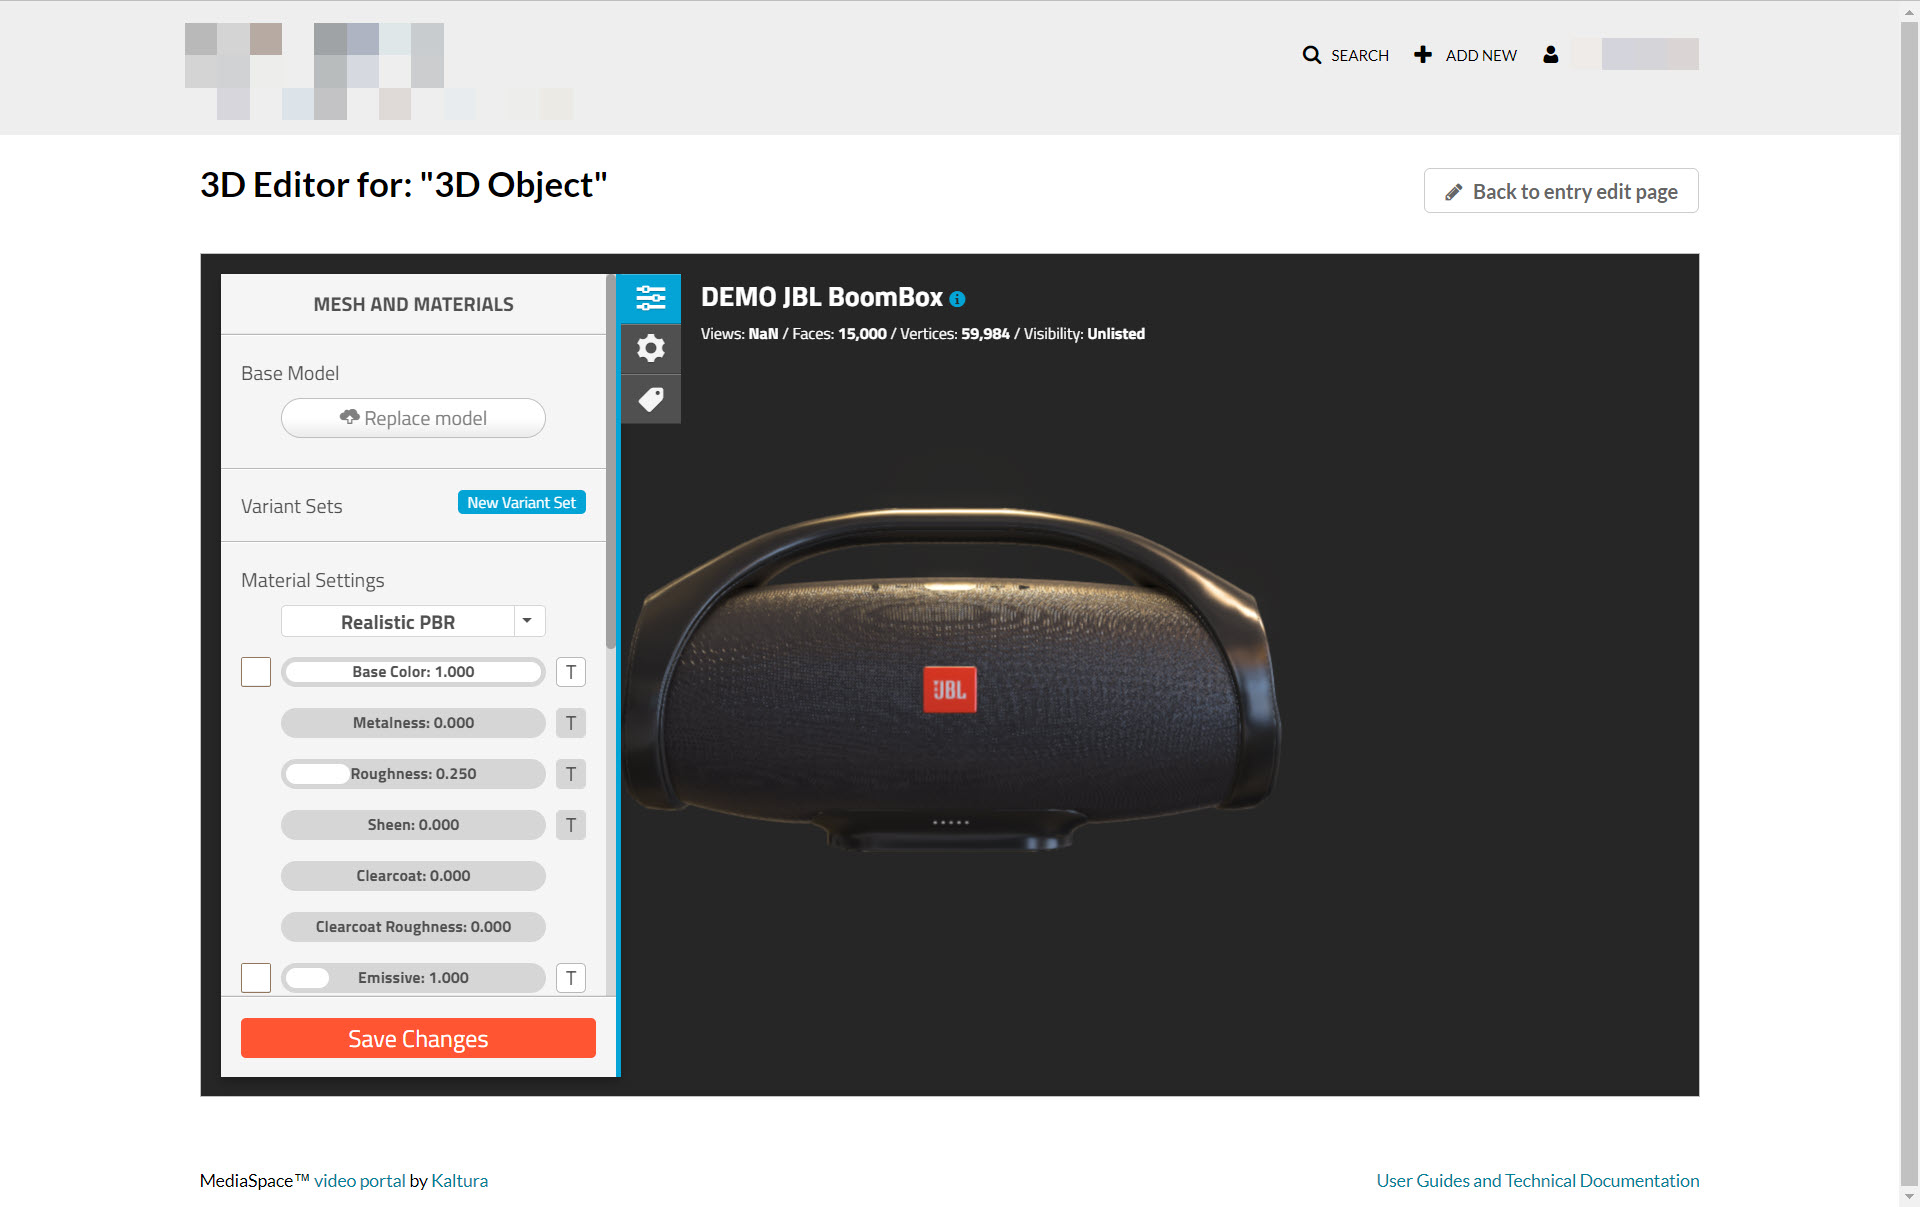
- Click the Save Changes button. The file is uploaded to the entry on Kaltura.
The 3D Object Editor (see Mesh and Materials, Model Settings, and Hotspots) provides a feature-rich interface for modifying the 3D object features, such as color, material lighting, etc., very similar to what other 3D authoring tools provide. Having the editor built into the tool, however, makes it easy to make adjustments to the object on the fly before inserting it into the video.
For instance, if you would like to set a different thumbnail than the default shown:
a. Click the Model Settings (gear) button in the configurator.
b. Drag the object with your mouse to the desired view.
c. Click the camera icon under the Default Camera section.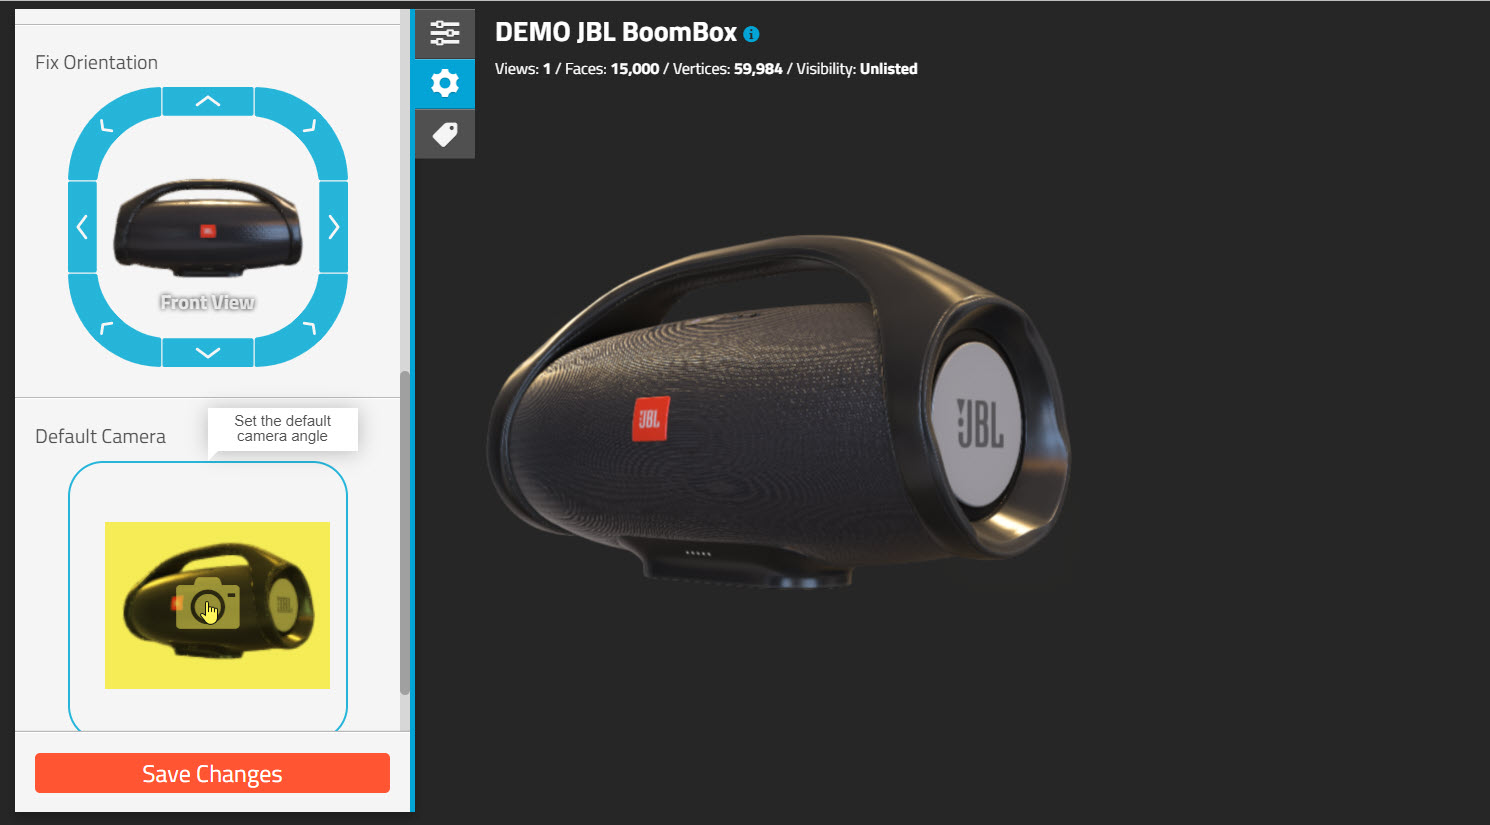 The full feature description of the 3D Object Editor is outside the scope of this article. For more information, see https://p3d.in/faq.
 - Once you are finished making your edits, click Save Changes.
 The Brand3D Upload widget is displayed.

 The full feature description of the 3D Object Editor is outside the scope of this article. For more information, see