For information on viewing your channels, see My Channels.
In the Add Media to Channel page you can add existing media or upload new content to the channel.
Add Media to a Channel or Category
- Select My Channels from the User drop down menu.
- Click on the Channel to which you want to add content.
- Click on the Media tab.
- Click Add to Channel. The Add Media to Channel page displays. You can filter the types of media. See Displaying and Viewing Content.
- Select the content you want to add or select an option from the Add New drop down to add media.
- Click Publish.
Delete Media from a Channel or Category
- Select My Channels from the User drop down menu.
- Click on the Channel from which you want to delete content.
- Click on the Media tab.
- Click the three dots on the lower right side of the media item you want to delete and click the Remove from Channel (X) button.
- Confirm the deletion.
Edit Channel Configuration and Metadata
- Select My Channels and then click on a channel.
- Select Edit from the hamburger menu. The Edit <channel name> window displays. The Details tab is open by default.
Use this tab to edit name, description, and tags and make adjustments to other channel settings. - When you are finished, click Save.
Add a Channel Theme
Admins and channel managers may use this tab to:
- enable the channel carousel (places a carousel at the top of the channel, instead of the regular header)
- select which tab should be displayed first in the channel
- select the set of players to use as the default for media in this channel
- select which theme should take precedence when a themed entry is published to this channel.
- Select My Channels and then click on a channel.
- Select Edit from the hamburger menu. The Edit <channel name> window displays.
- Click on the Theme tab.

- Configure the following fields and click Save.

Enable channel carousel - check to enable the channel carousel. When checked, the Channel carousel playlist is displayed.
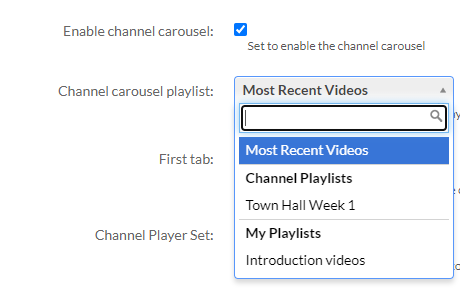 Choose a playlist from your personal playlists ("My Playlists") OR channel playlists (Note that if a personal playlist is chosen, only content published in the channel is displayed on the carousel.)
The following graphic demonstrates a Channel carousel.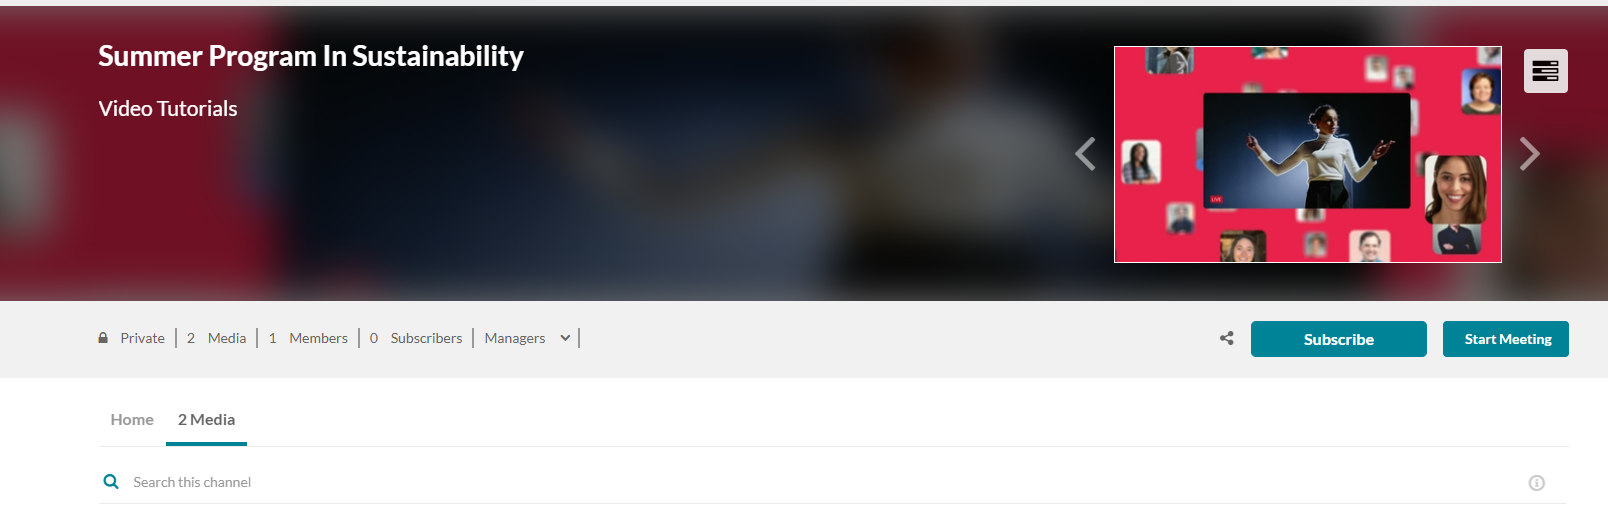
First tab - Select which tab should be displayed first in the channel.
- Site Default
- Media
- Home
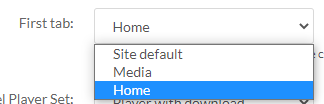

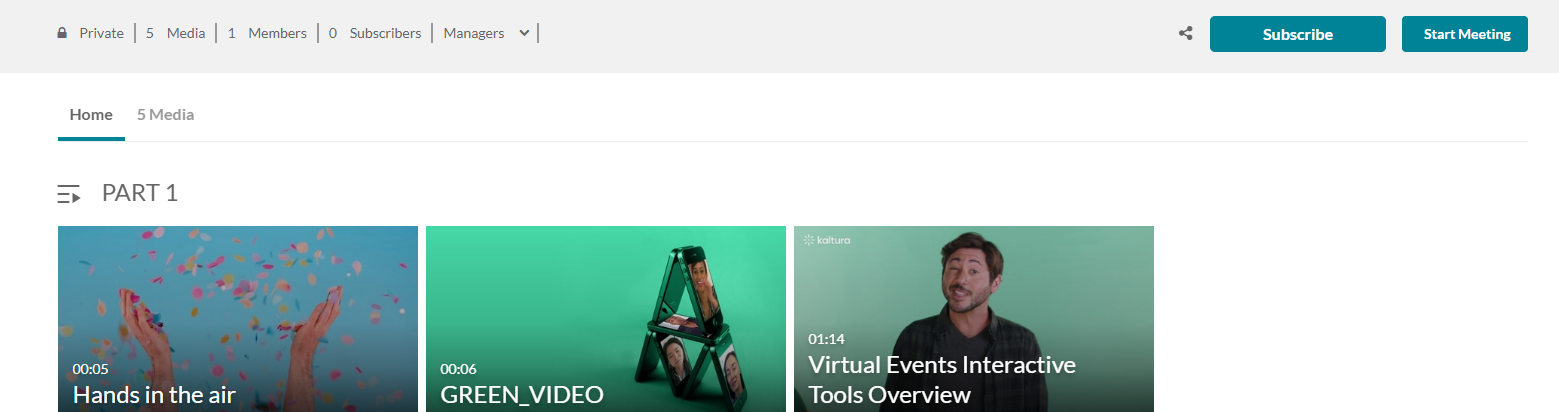
The following graphic demonstrates the Home tab as the first in the channel.
Channel Player Set - Select the set of players you want to use as the default for entries in this channel.
- Site Default Players
- Other
The following graphic demonstrates the Channel Player set available. Playersets are preconfigured by your KMS admin.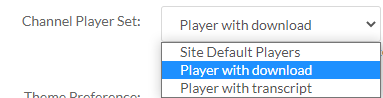
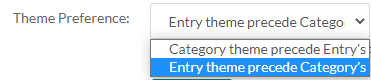
Theme Preference - Choose which theme should take precedence in the case a themed entry is published to this channel. To learn more about a themed entry, please see Entrydesign.
- Category theme precedes Entry's
- Entry theme precedes Category's
The following graphic demonstrates the setting of the Entry theme preceding the channel's theme.
Moderate Channel Content
Channel managers and moderators approve or reject content when a channel manager's approval is required before media is displayed.
To moderate channel content
- Select My Channels from the user drop down and select a channel.
- Select Actions > Edit in the upper right corner.
- Under Options, check Moderate content. (Media will not appear in category until approved by category manager.)
- Click Save. The channel is moderated. If content is uploaded to the channel the status will be pending approval.
If media is waiting for moderation, you cannot preview or publish it until it is approved.
You can edit media information while waiting for moderation.
To approve content that is pending
- Go the My Channels page.
- Click on the pending link on a channel that has media pending or on the Channel page click Browse Pending. The browser pending media window is displayed.
- Click Approve or Reject. Approved content is displayed on the channel page. Rejected content will not be added to the channel.
Edit Channel Users
To configure and add users to a channel
Adding users applies only to channels that are restricted or open.
- Select My Channels and then click on a channel.
- Select Actions > Edit.
- Click the Users tab. If you are the channel manager or owner, you can add users to the channel.
- Click Add Users.
- In the Add Users window, start typing a user or group name to display user names/group names and select a user/group to add.
- In the Add Users window under Select permissions, select the user's permission.
The following table outlines the actions associated with each permission level.
Permission | Actions |
Member | View channel content only. |
Contributor | View channel content and add media to the channel. |
| Moderator | View channel content, add media to the channel, and moderate channel content. |
| Manager | View channel content, add media to the channel, moderate channel content, and manage the channel (delegate managerial rights to additional users). Please note: A Manager cannot edit/modify media metadata inside the channel. |
7. Click Add to add the selected user with the specified permission.
8. Click Save to apply your changes.
To modify a channel member’s permission
- Select My Channels and then click on a channel.
- Select Actions > Edit.
- On the Users tab, you can choose from one of the following options:
- Edit the permission - a drop down appears
- Select a member.
- Assign the user to be the channel owner.
- Click the Save icon to apply the modified permission to the member.
Download CSV List of Channel Users
- Select My Channels and then click on a channel.
- Select Edit from the hamburger menu.
- Click the Users tab.
- On the Users tab, click the Download List button.
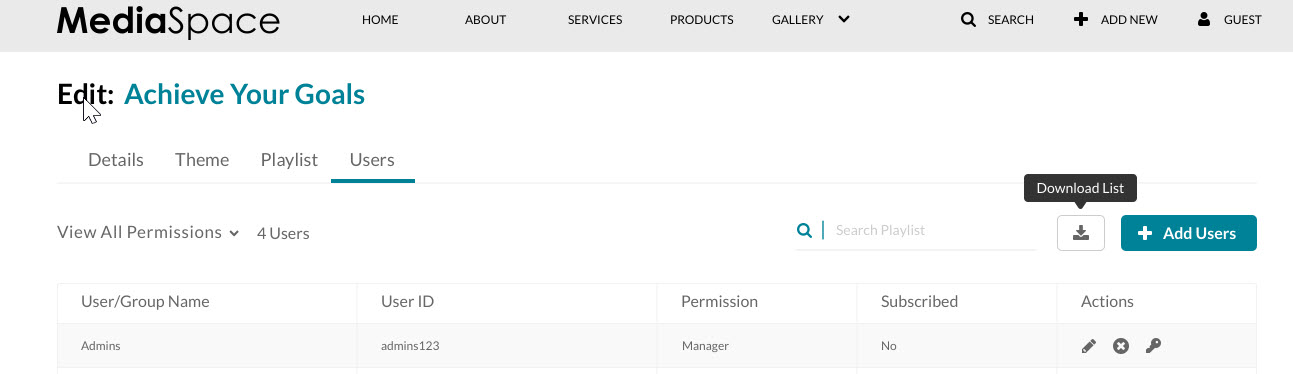
A CSV list of the channel's users is downloaded.

Delete a Channel
Once a channel is deleted, it cannot be restored. Deleting a channel, however, does not delete the media from MediaSpace. If the channel was deleted by accident, for example, the user may recreate the channel and re-add those media entries to the channel.
To delete a channel
- Select My Channels and then click on a channel.
- Select Actions > Edit.
- Click Delete Channel.
- Click Delete to confirm the deletion.
Import Content from Other Channels/Galleries
To import content from other Channels/Media Galleries that are managed by you
- Enter the Media Gallery or Channel. When a Channel/Media Gallery Manager enters an empty Channel/Media Gallery, the following message is displayed:
- The importing process can also be initiated from the Actions drop down menu or by clicking ‘Click here’ on the page.
- Choose a Channel/Media Gallery to import content from. The list includes all Channels/Media Galleries the user manages that have content.
- Click the selected Channel/Media Gallery and select Import. A confirmation message is displayed.
After the import is complete you will be required to refresh the page to view the imported content.
After importing media and refreshing the page, the imported media is displayed with all the channel statistics.

