About
Encountering issues with your webcam or microphone during a virtual session can be frustrating. This article provides an overview of common reasons why your devices may be unavailable and offers step-by-step solutions to resolve them.
Watch the video below for a comprehensive guide on troubleshooting your devices.
If you encounter problems connecting your microphone, headset, or webcam, follow these steps to resolve the issue.
Double check physical connections
Microphone / Headset
- Secure Connection: Ensure your microphone or headset is securely connected. Pull out the cable (audio jack or USB) and plug it back in securely.
- Check Settings: If your device is not recognized, ensure it appears in your system settings.
Webcam
Secure Connection: Ensure your webcam is properly connected if it uses a USB interface.
Check your computer settings
Windows 10
Watch the video below or follow these steps to check your computer settings.
- Go to Settings > Privacy.
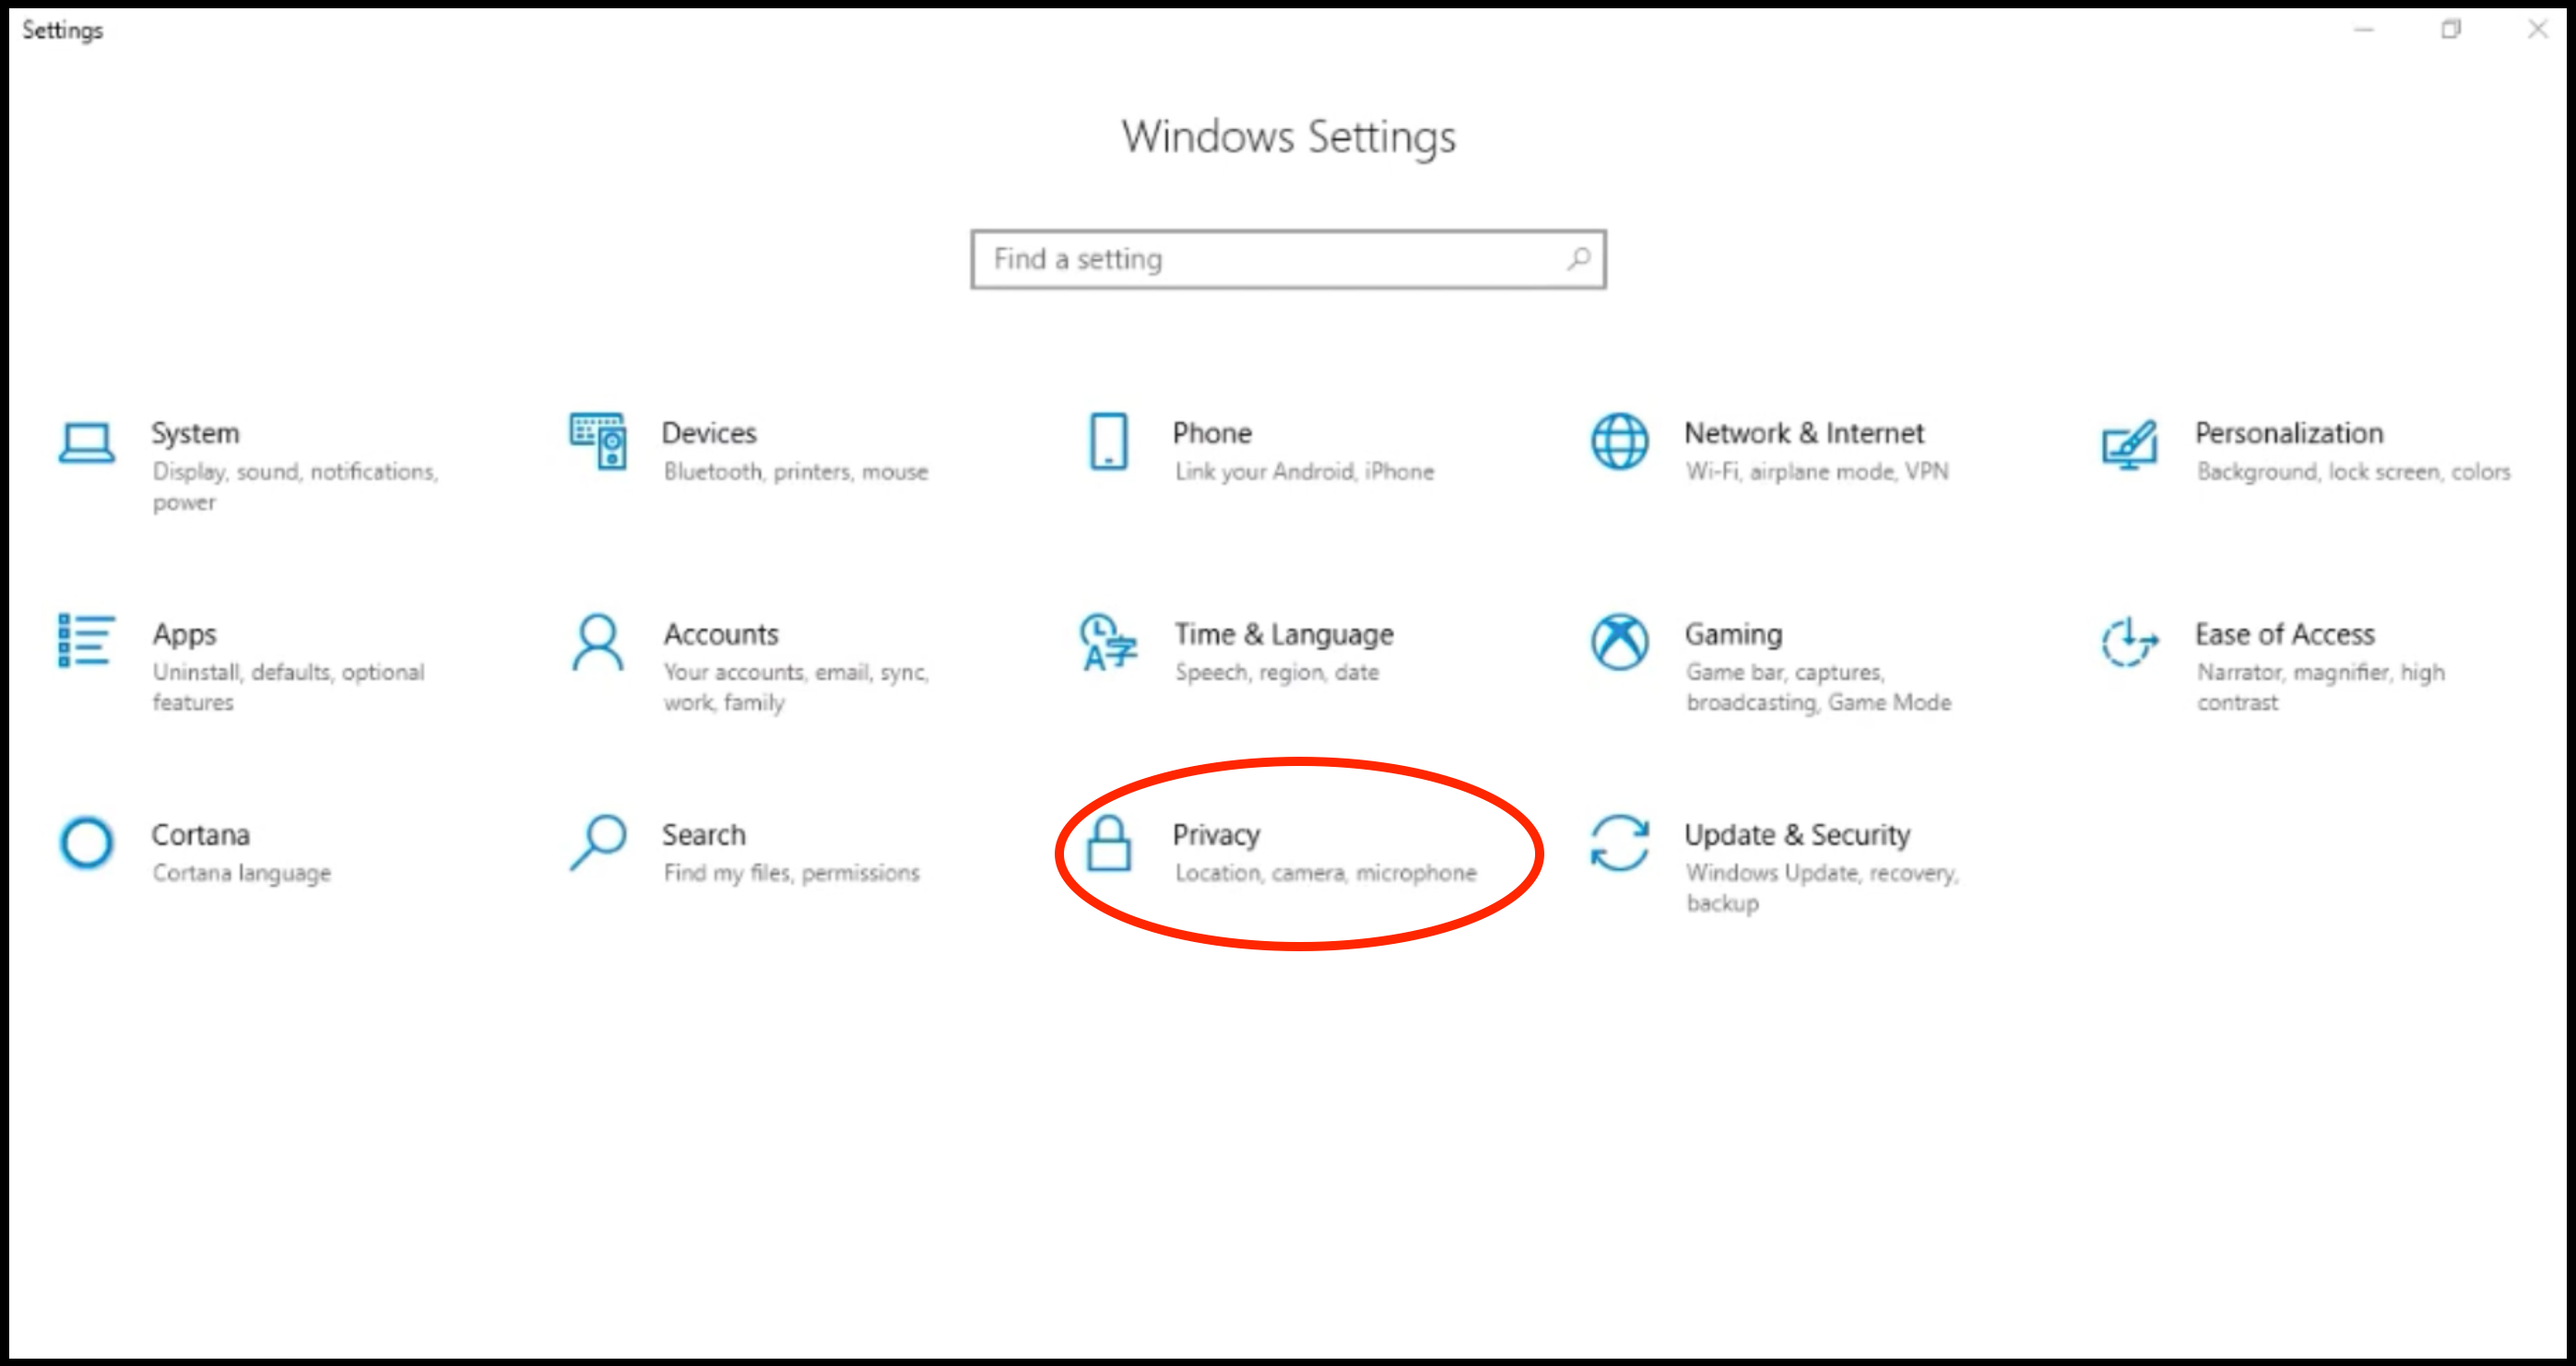
- Scroll through the list on the left and select Camera or Microphone, as needed.
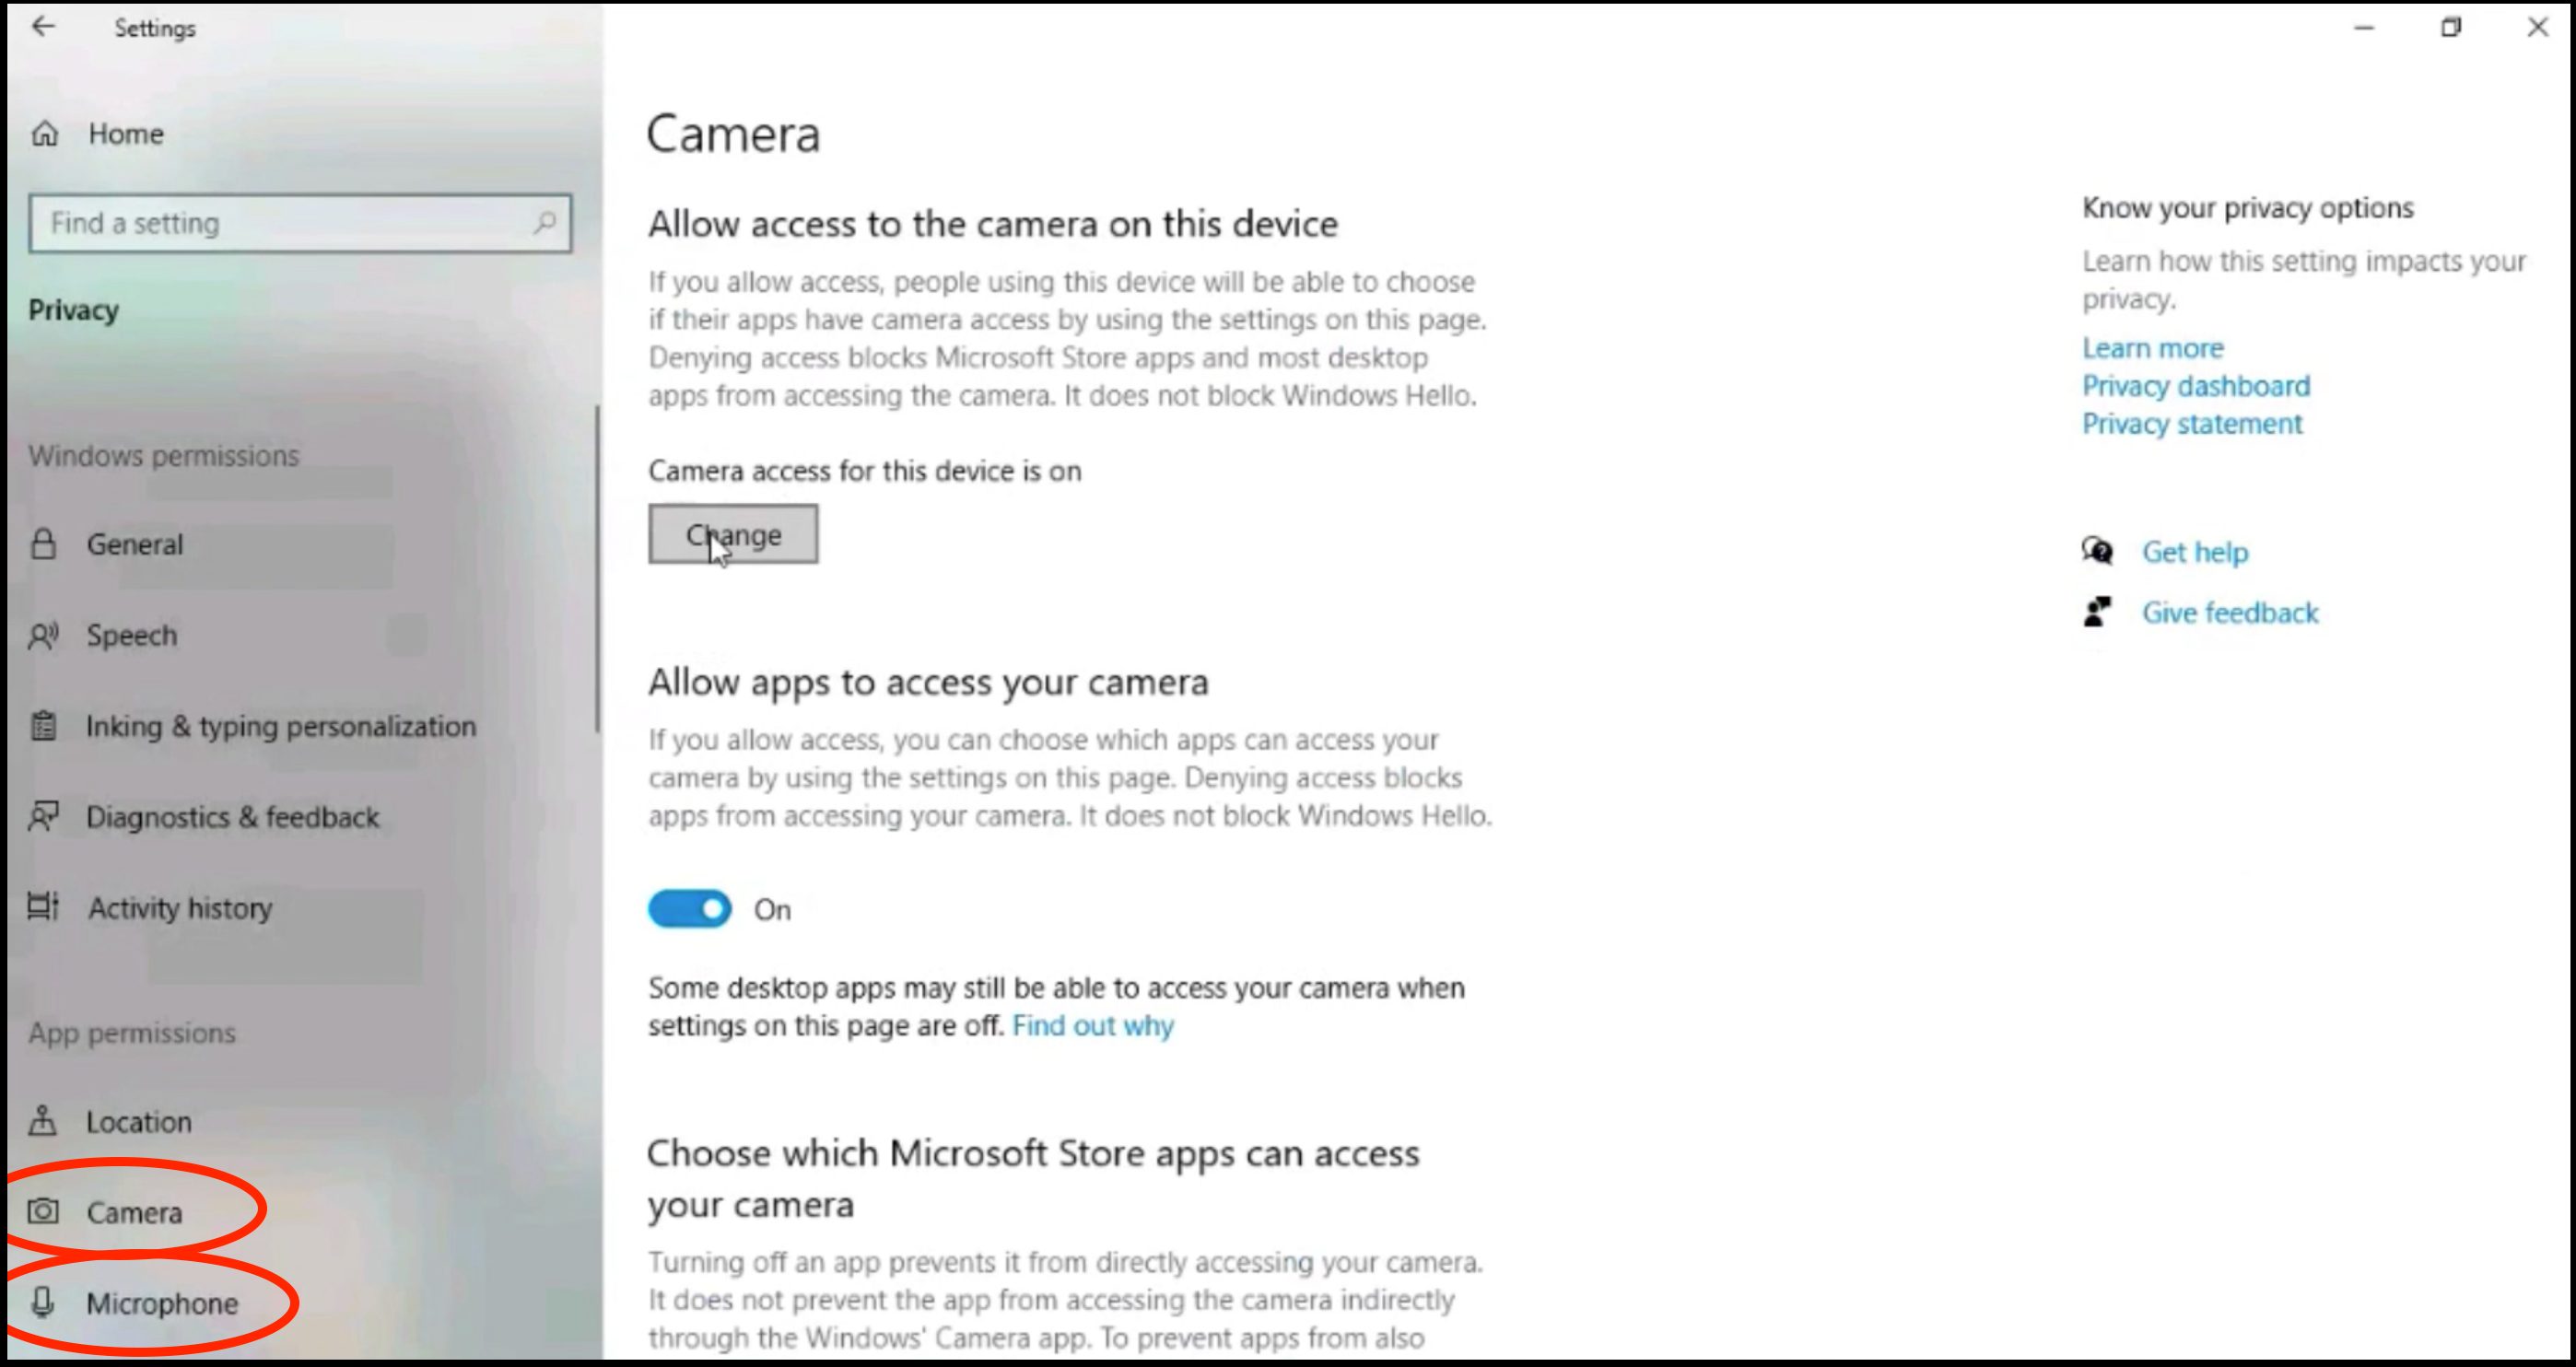
- Under Allow access to the camera on this device click the Change button and make sure it is on.

- Make sure that Allow apps to access your camera / microphone is switched to On.
- Quit your browser and relaunch.


For more information, check out Microsoft's article Windows camera, microphone, and privacy.
MacOS
Watch the video below or follow these steps to check your computer settings.
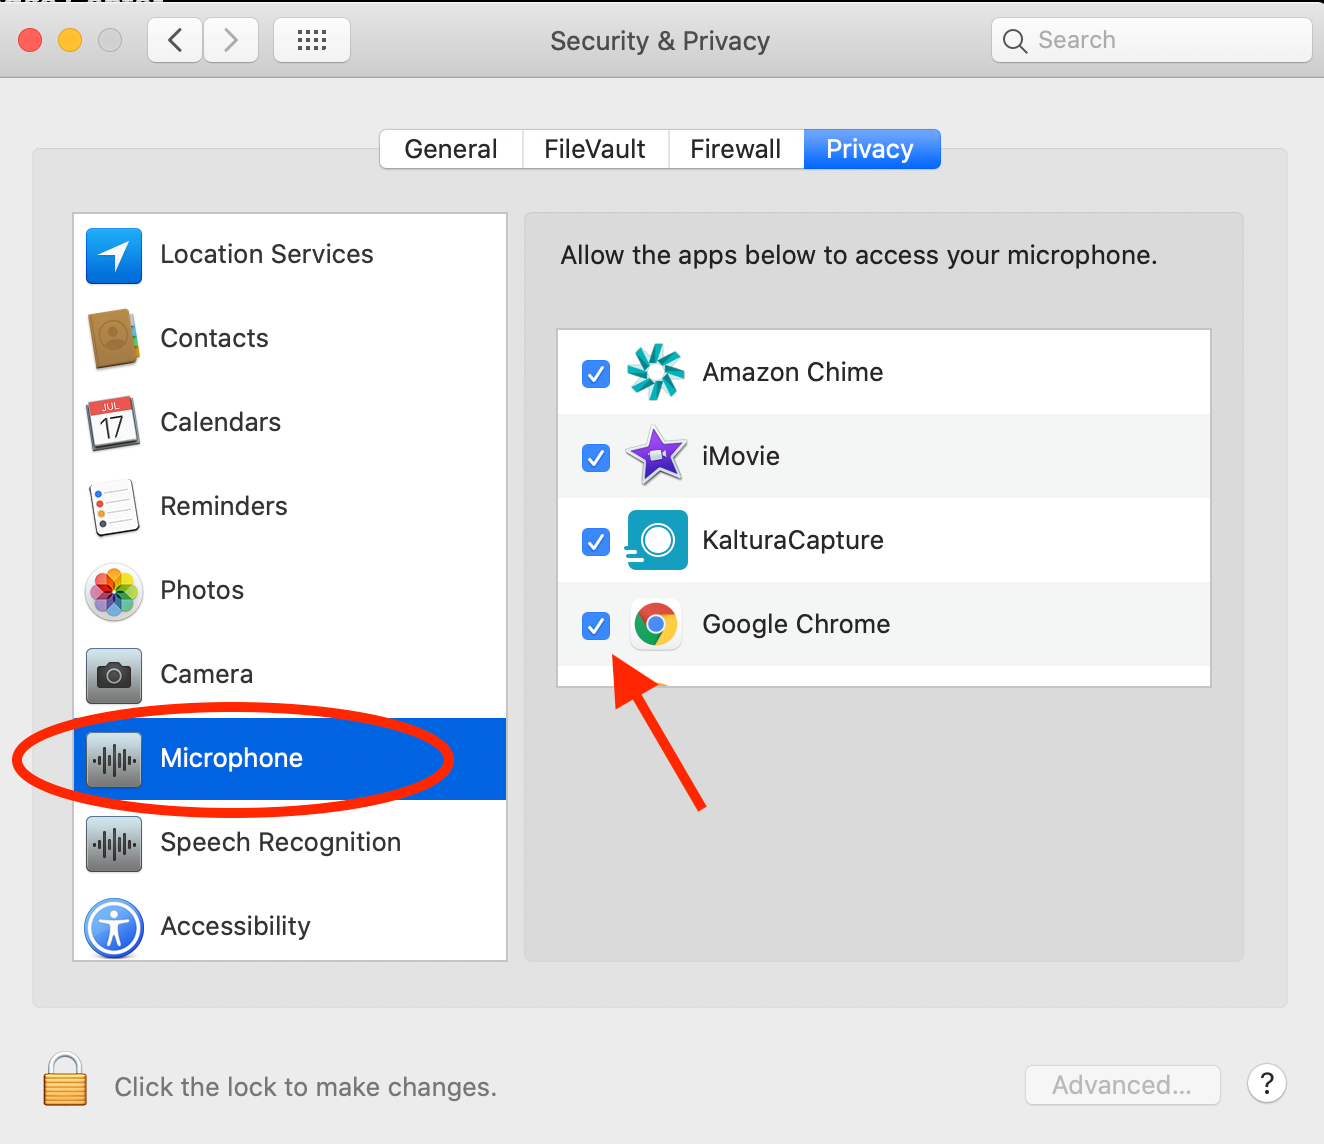
- Go to System Preferences > Security & Privacy.

- Choose the Privacy tab.

- Scroll through the list on the left and select Camera (MacOS Mojave).
- Under Allow the apps below to access your camera, check Kaltura Meetings Desktop.

- Scroll through the list on the left and select Microphone (MacOS Mojave).
- Under Allow the apps below to access your camera, check the box corresponding to your browser (Chrome or Firefox).
- You will be prompted to quit your browser. Choose Quit Now.
- Relaunch your browser and join your Kaltura Live Room session to access to your webcam and mic.


For more information, see this post in iDownloadBlog. Note that you will want to make sure to add Chrome or Firefox to the allowed apps.
Browser blocking access
Chrome
- Look for a camera icon with a red x in the address bar.
- Click the icon, select Always Allow, and click Done.
- Refresh your window.
Firefox
- Click the camera and mic icons with slashes through them in the address bar.
- Remove the blocks and click Allow in the permission pop-up.
- Activate your devices in the live session.
Devices in use
- Ensure no other applications (like Skype) are using your webcam/mic.
- Quit these applications and refresh the virtual classroom.
- Restart your computer if necessary to reset the drivers.
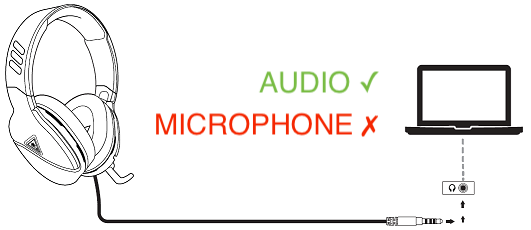
USB vs. Auxiliary microphone
USB Microphones: Both PC and Mac support USB microphones for audio input/output.
Auxiliary Microphones: PCs may support auxiliary microphones, but the port might be for output only. Ensure your PC supports dual input/output through the same port.

Plugging an auxiliary microphone headset into your PC might not connect the microphone. Your PC's port might only support audio output, not input.
Update or install audio drivers
- If your device is not recognized or not working, you may need to update or install audio drivers.
- Visit your computer manufacturer's website and install the latest sound drivers available.
By following these steps, you should be able to resolve most issues and join your live session with full access to your webcam and microphone.

