About
Hotspots are clickable interactive objects in a video that viewers interact with to further engage with the content. They can serve various purposes, such as acting as a call-to-action, providing additional information, enabling viewers to skip to another point in the video, accessing an online shopping area, and more.
For Simulive (pre-recorded) sessions, adding hotspots is simple! Just include them in the source VOD entry, just like you would with any VOD entry. They'll automatically show up on the webcast entry when it's broadcasted. But please note, during Simulive broadcasts, you won't see hotspot cue points on the timeline.
Access the Kaltura Video Editor
For instructions, see Kaltura Video Editor User Guide.
If you don't see the Hotspots button in your editor, ask your administrator to enable the Hotspots module.
Hotspots window layout

The Hotspots window has three main areas, left pane, right pane and bottom pane:
- Left pane - Displays the +Add Hotspot button (1) and all the hotspots created for that media (2).
- Right pane - Consists of the following:
- Kaltura Editor Player (3) - as defined in the Editor Module by your administrator. Use to preview your timeline modifications.
- protected zone (4) - a visual rectangle at the bottom of the player which is reserved for player configuration and fields. Hotspots may not be created on this area and a warning message is displayed.
- timer (5)
- buttons for play / pause / jump to start of next hotspot / previous hotspot (6)
- Bottom pane - Displays the timeline (7). The timeline includes the following icons and tools:
- Real time marker with handlebars (8) which you can use to move to a certain point on the video segment.
- Show / hide audio button (9)
- Zoom marker (10) - Simply drag the zoom marker to adjust the level of detail you prefer. This expands the visible timeline, offering more frames for viewing. Zoom out for a broader perspective.
Create a hotspot
- Seek to the point in the video where you want to add a hotspot (you can also click play and add the hotspot after pausing).
- Click + Add Hotspot.
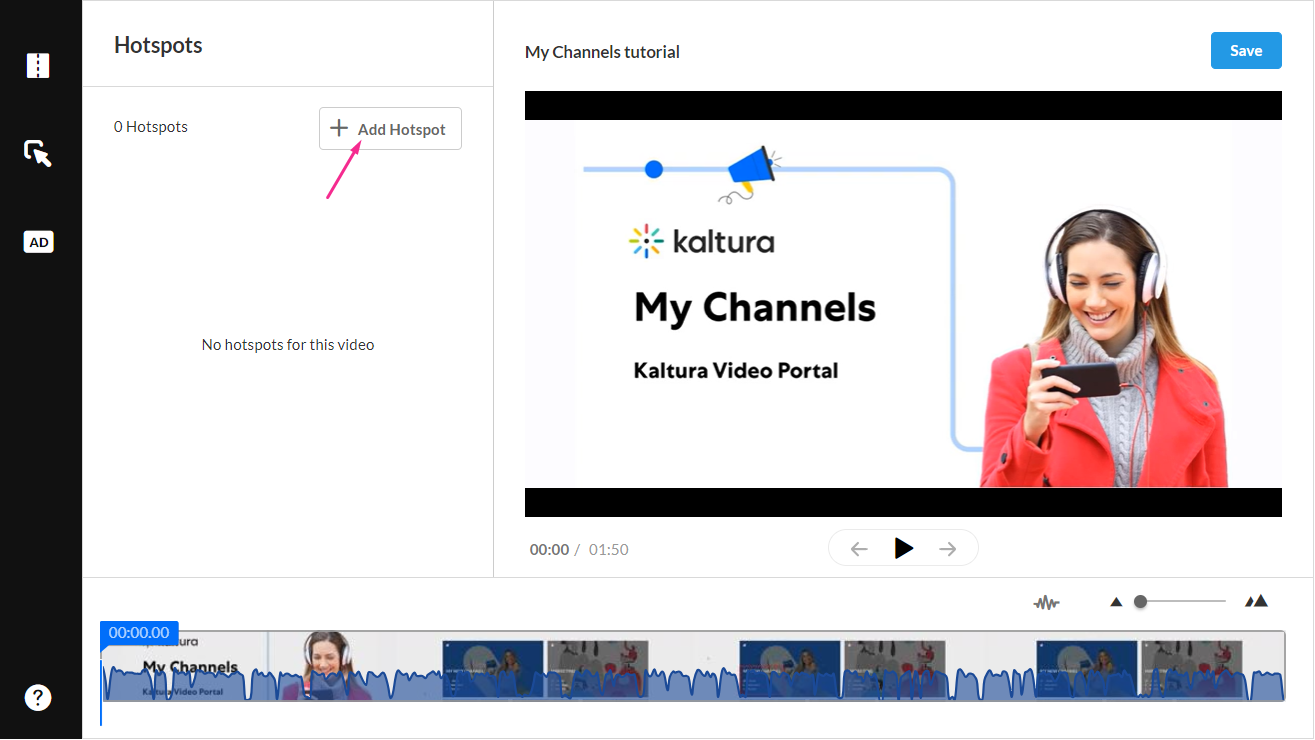

A hotspot is created at the selected time on your media, and a settings box displays.
You can move the hotspot to the desired position by dragging it. The position and size can later be accurately adjusted using the Advanced Settings.
In the settings box, configure the following:
- Text - type a name for your hotspot.
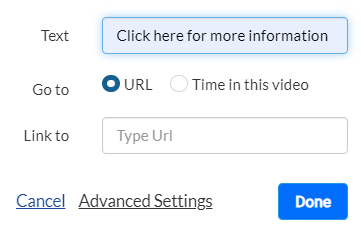

Choose where you want the hotspot to direct users:
- URL - If you'd like the hotspot to lead to a specific URL, select URL and enter a URL in the Link to field.
Note: Kaltura supports "Mailto" hotspots, enabling you to offer viewers a convenient way to reach you via email. Simply enter a descriptive text like "Email us" in the Text field, select URL, and type "mailto:[email address]" in the Link to field. When viewers click the "Mailto" hotspot in the video, their email application launches with a new email draft addressed to the specified email address.
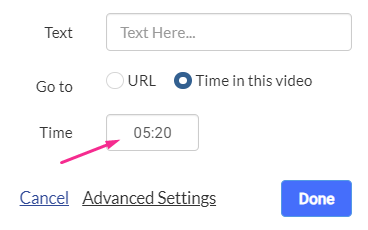
- Time in this video - If you'd like the hotspot to lead to a specific time in the video, select Time in this video and enter a time in the Time field.

Text, Go to, and Time are all optional. If you leave them blank, the hotspot will be transparent.
Advanced Settings
Click Advanced Settings to edit your hotspot as follows: 
- Text - edit the text you typed in
- Go to - edit where you want the hotspot to lead
- Time - edit the time when you want the hotspot to appear
STYLES
- Text Color & Style - click to open the color palette and change the text color. Use the drop down to change the font weight
- Text Size - choose the weight of the font by typing the font size, or by using the up and down arrows or slider
- Roundness - choose a roundness by typing a number or by using the slider
- Background Color - select a background color from the palette or type in a hex code / RGB
- Position - enter a position for the hotspot in X and Y coordinates (0,0 point is the top left of the player)
- Size - enter a width and height for the hotspot. The position may be used to align your hotspots accurately on the display and depends on the player boundaries. The size is in pixels and should conform to your display screen configuration.

TIMELINE
- Start Time - enter a start time for the selected hotspot to display
- End Time - entre an end time for the hotspot to stop displaying
Click Done to save your settings.
The new hotspot displays in the left pane.
The duration of the hotspot is highlighted in the timeline in yellow with handlebars for editing. The order of the hotspots is according to the start time. If you change the start time in the timeline, hotspots will automatically reorder accordingly.
If you change the Advanced Settings when creating a hotspot, the settings become the default settings for the current editing session. If you edit the Advanced settings for an existing hotspot, the default settings will not change.
3 dots menu
Each hotspot in the Hotspots list includes a 3 dots menu. Use the menu to Duplicate, Edit or Delete a hotspot. 
Edit
- Click on the hotspot on the player, click on the hotspot in the hotspots list, or click the 3 dots menu on the hotspot in the list and select Edit or Advanced Settings.
- Modify the desired fields.
- Click Done.
Delete
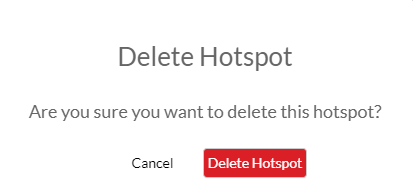
- Click on the hotspot on the player and click Delete or click on the 3 dots menu in the Hotspots display list and select Delete.
- A warning message displays: Are you sure you want to delete this hotspot?
- Click Delete Hotspot

Duplicate
- Click the 3 dots menu and select Duplicate.
- After you duplicate a hotspot, you can click on it to open the settings box. You can rename the hotspot, change the Go to field or Time in this video, change the Advanced settings, and change the duration and the location.

Resize
- Grab one of the handles on the hotspot to resize (increase or decrease) the hotspot's size.
- Click and drag the hotspot to its new location.
Edit hotspots using the timeline
- Use the yellow handlebars to shorten or lengthen the hotspot duration on the Timeline.
- Use the scroll on the right side to see the hotspots created for your media. Scroll to find a specific hotspot after the list had reordered.


Display media with hotspots
After you save hotspots, you can view them in your media. The hotspots are displayed on top of the player with a real time update during play and seek.
If you don't see the hotspots on your media, ask your administrator to enable the Hotspot plugin.

Clicking on a hotspot opens the link to URL in a new tab and pauses the video. Hotspots without a URL are not clickable, and the video will continue to play.


