To help ensure a quality user experience, Kaltura MediaSpace and KAF applications provide localization configuration to adapt online content for regional specificity. Using the Application and Languages modules in the Kaltura MediaSpace Admin Console and the Languages module in the KAF Admin Console, the KMS/KAF admin can control the MediaSpace/KAF instance localization features.
Customizing Languages for a KMS
To configure the KMS language
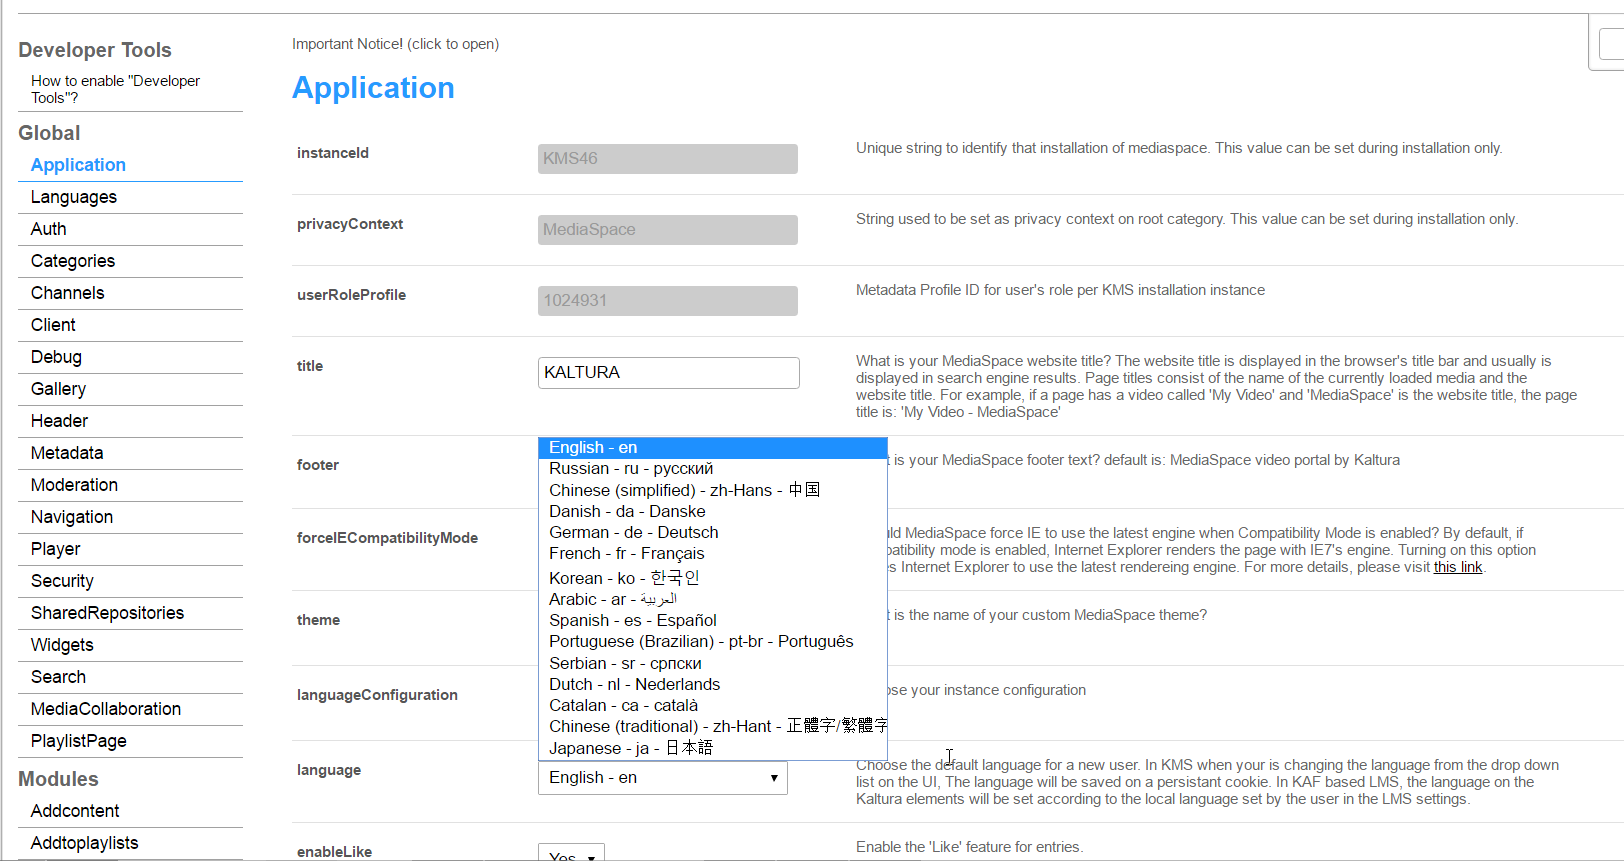
- Login to MediaSpace Admin Console
- Select the Application module in the Global section.
- Set the following:
- languageConfiguration – Set the instance configuration: multi-language instance or single language instance.
- languageSelection - Choose the default language for a new user in this specific instance.
- When the instance is configured to Multi-language, select the languages available from the languageSelection field.

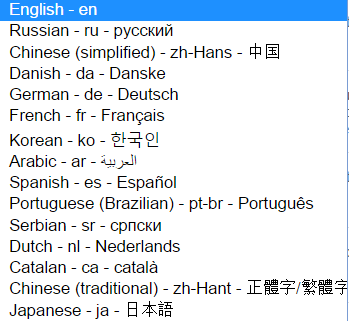
The available languages in the languageSelection field are built from the out-of-the-box Kaltura languages in addition to custom languages that were created by the admin previously.
Customizing Languages for a KMS or KAF Instance
Use the Languages module in the KMS Management Console or the KAF Admin Console to create a custom language or change text in an available language.
For KAF: Follow the KAF Specific Instructions in addition to the customizing instructions that follow.
You will need to download the existing application text file and then upload the new/modified file.
To download language texts
- Select the Languages module in the Global section.
- In the DownloadLocaleText field,click Download Texts to download the latest texts of KMS.
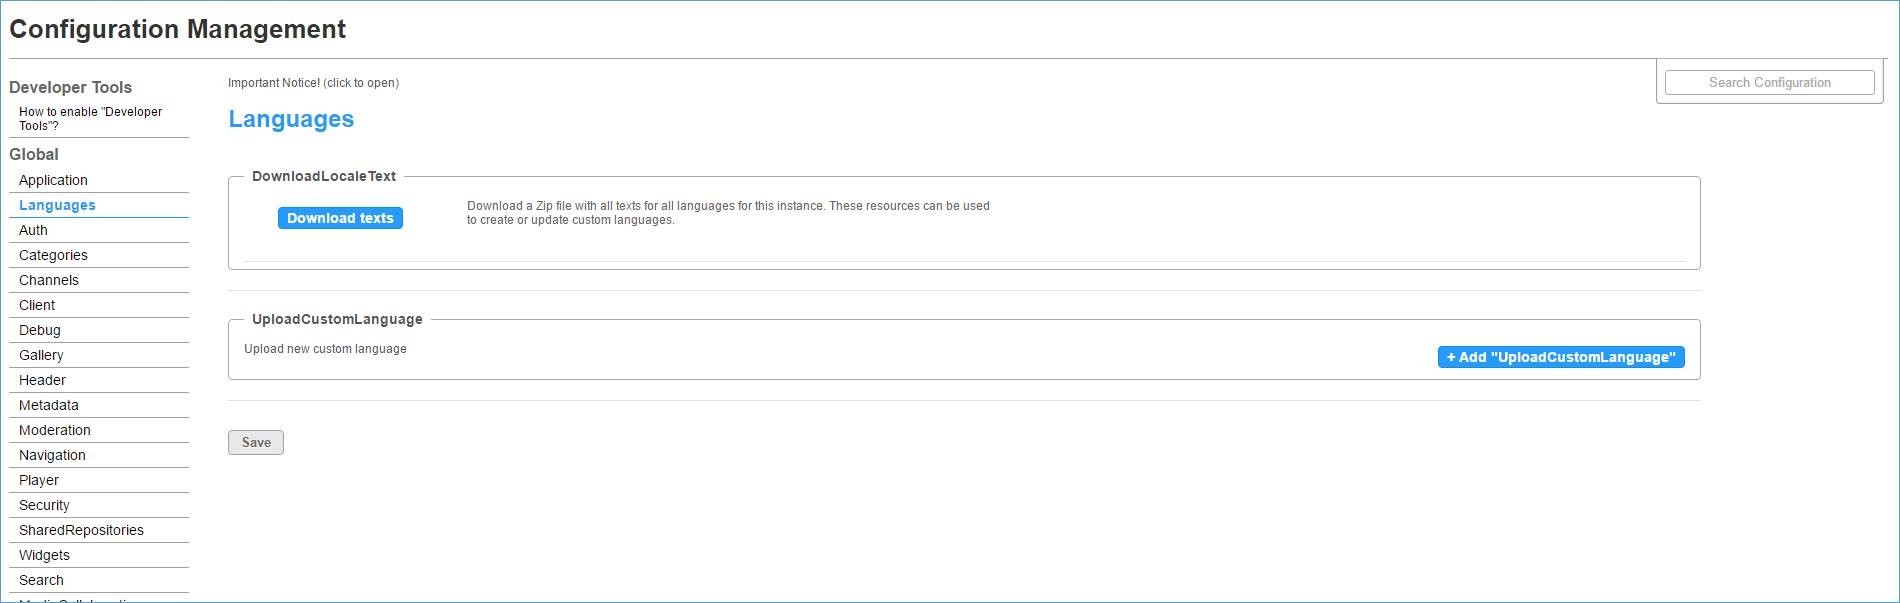
A zip file with a standard locale.po files for all languages are created. The zip file contains all text for all languages for this specific KMS/KAF instance.
Select the desired language and modify the text as necessary. You can use translation editors available on the web, for example, poedit, to modify text. The final result should be a binary .mo file.


To upload language texts
- Select the Languages module in the Global section.
- Click +Add Upload Custom Language to upload the new/modified texts for KMS or your KAF instance (a binary .mo file).
- Configure the following fields to upload the custom Language and click Save.
Field
Description
languageAdminName
Enter the name of the language to be presented in the language drop-down list (for the admin), in Application module, languageSelection, and language fields.
languageClientName
Enter the name of the language to be presented in the language drop-down list for the users.
languageCode
For KAF only: Select the formal language code to be used to sync the instance language to the hosting application (LMS,CMS, SBS) chosen language.
localeFile
Click upload locale. Upload your customized .mo file. In order to convert your customized .po file to an.mp file, you can use some available tools on the web.
localeIcon
Click upload flag. Upload a custom language flag icon to be presented to the users. The icon should be in *.jpg;*.jpeg;*.bmp;*.png;*.gif;*.tif;*.tiff;*.ico format and the dimensions should be 30px X 26px (The application will resize any given image, however for the best visual result, use these dimensions). You can also choose from this library of icons: http://freebiesbug.com/psd-freebies/100-flat-flag-psd-icons/
languageId
Unique language id for application usage (not for KMS/KAF admin usage).
KAF Specific Information
When the instance is from a KAF-based LMS Extension (specifically - Sakai, Blackboard, Canvas, Brightspace, Moodle to follow in the future) the following is relevant:
- The Kaltura instance (the Kaltura screens) receives the language settings from the hosting application (Sakai, Blackboard, Canvas, Brightspace) – whether created or added by the application admin or the user.
Custom languages may be added as described in the Customizing Languages for a KMS or KAF Instance section in this article.
- The languageCode field is for KAF use only. The KAF admin should set it for a custom language. This field is used to sync the instance language to the hosting application chosen language. The languageCode of a custom language takes precedence over the Kaltura default language with the same code.
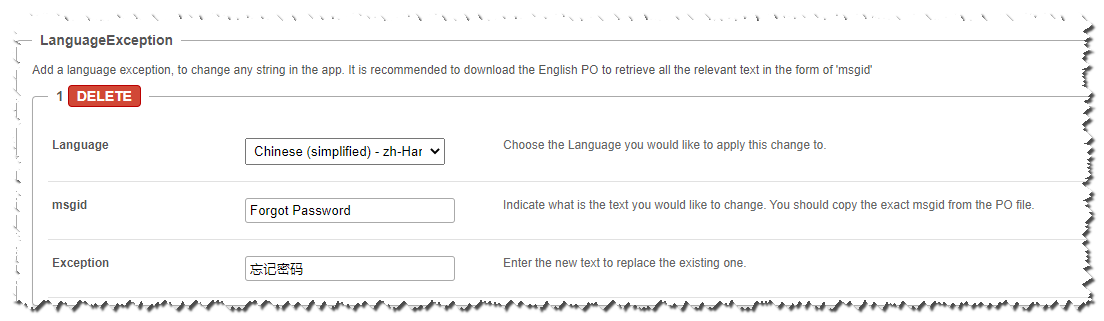
Language Exceptions
"Language Exception" fields were added to the Languages module and support multiple language exceptions for both the Kaltura MediaSpace and KAF applications. Admins can change a specific language text/string to any other supported language, without having to upload a new MO file. The text/string change is made directly in the admin Languages module.
To add a language exception and change any string in the app
It is recommended to download the English PO to retrieve all the relevant text in the form of 'msgid.
- Choose the language you would like to apply the exception to.
- Enter the text you want to change in English. Copy the exact msgid text from the PO file.
- Enter the new text in your selected language.
Notes:
- The list of languages displayed is from the available POs.
- Note if a PO is removed, the exception may remain however the application will not render the changed text string.
For a language exception example, please refer to How to change the Access Denied error message?
Be certain to Save in the exception modal before saving all changes at the bottom of the KMS Admin page.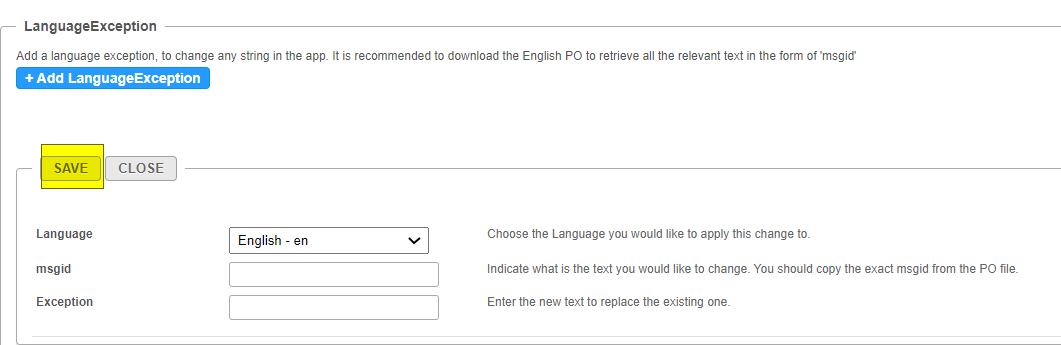
Custom Tokens
Custom tokens may be created and used as a simple way to replace variables in KMS texts. Custom tokens may be extermely useful when creating and using email templates or any other text sent to users. You may add custom tokens in the body of the email template or for example in the Disclaimer text. The values are then filled in autiomatically by the system. You may also set the language for the custom token so that when you change the language for your KMS instance the custom token value automatically changes according to the language.
To add Custom Tokens
- In the Languages module enter the TokenID. This is the name of the variable you will use in the text.
- Select the Language.
- Enter the TokenValue - this is the value entered and is displayed wherever the custom token is used.
- Click Save.
Example
In the following screen SITETITLE is used as the TokenID. 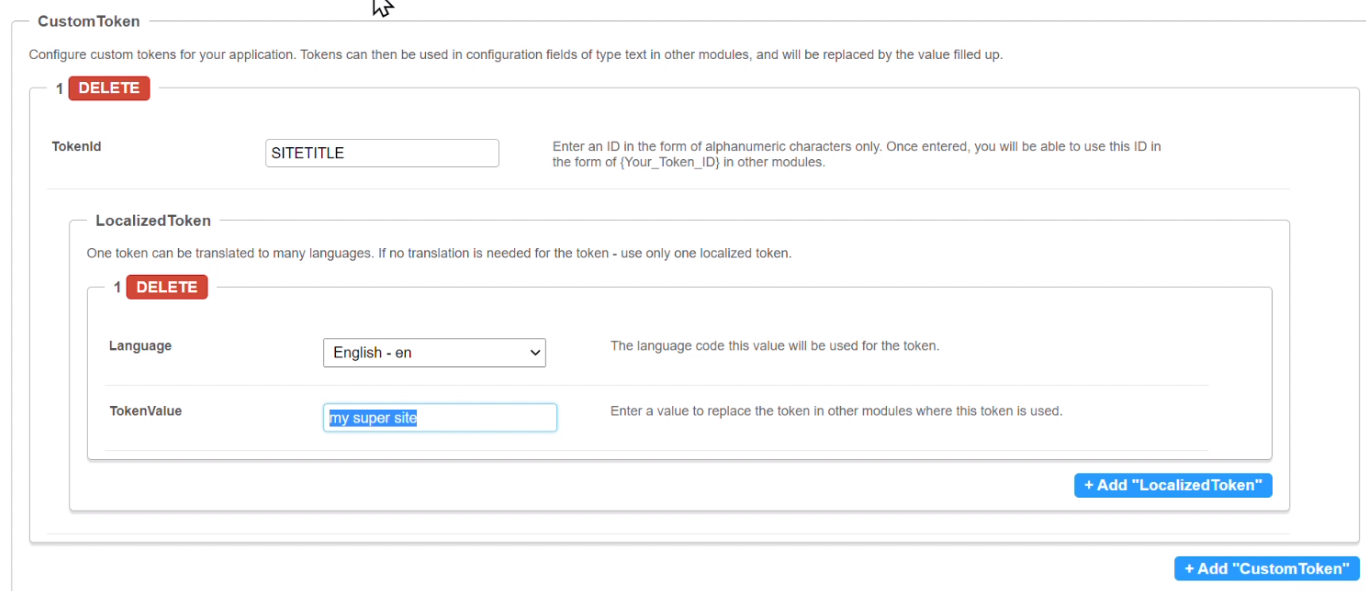 The Custom Token (in curly brackets) is then used in the Disclaimer text.
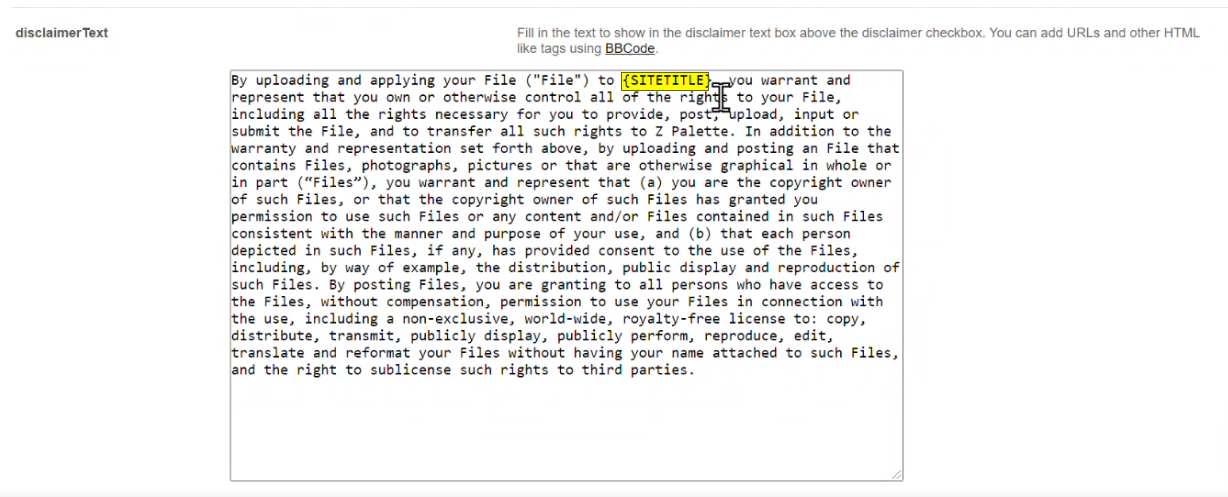
The TokenValue, in this case "my super site" replaces everywhere the TokenID is. The Token ID is set and you may subtitute different Token Values as necessary. There is no need to change the Disclaimer text or for example Email Templates text.
You may use Custom Tokens for all available languages. For example, select a language and input a TokenValue. In this example the value is Los Videos.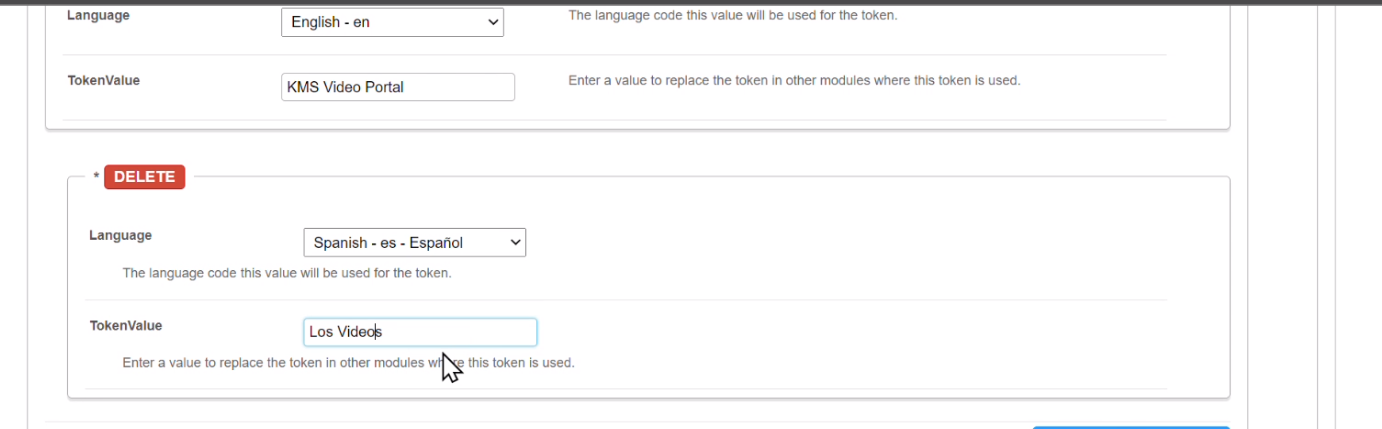
Change the language of your instance and the Custom Token is automatically updated with the Token Value. There is no need to modify the Disclaimer text or Email Template text.

