Editing Chapters and Slides
Contact your Kaltura Account Manager to activate the relevant Kaltura modules on your account.
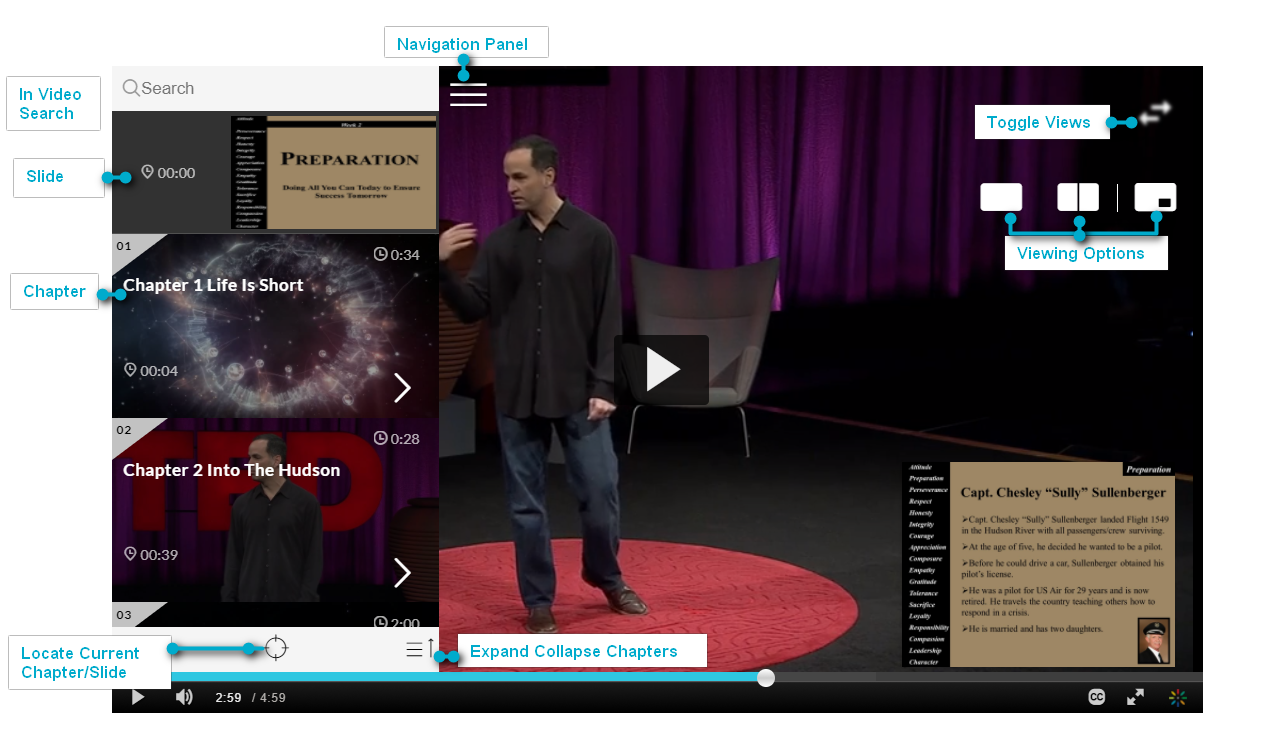
You can easily navigate through video content using slides and chapters in Kaltura Players using the Navigation Menu. You can add, edit, and delete chapters and slides when editing videos through the Kaltura media portals.
Slides are automatically created when a presentation is recorded using Kaltura Capture. To learn more about recording presentations using Kaltura Capture, see the article Kaltura Capture - Recording PowerPoint Slides.
Using Chapters in Kaltura Videos
Chapters are like bookmarks in the video and can be used to navigate through the video. You can use chapters to mark the beginning of a new topic, highlight important segments, or help navigate through the content of a long video.
Edit or Add a Chapter
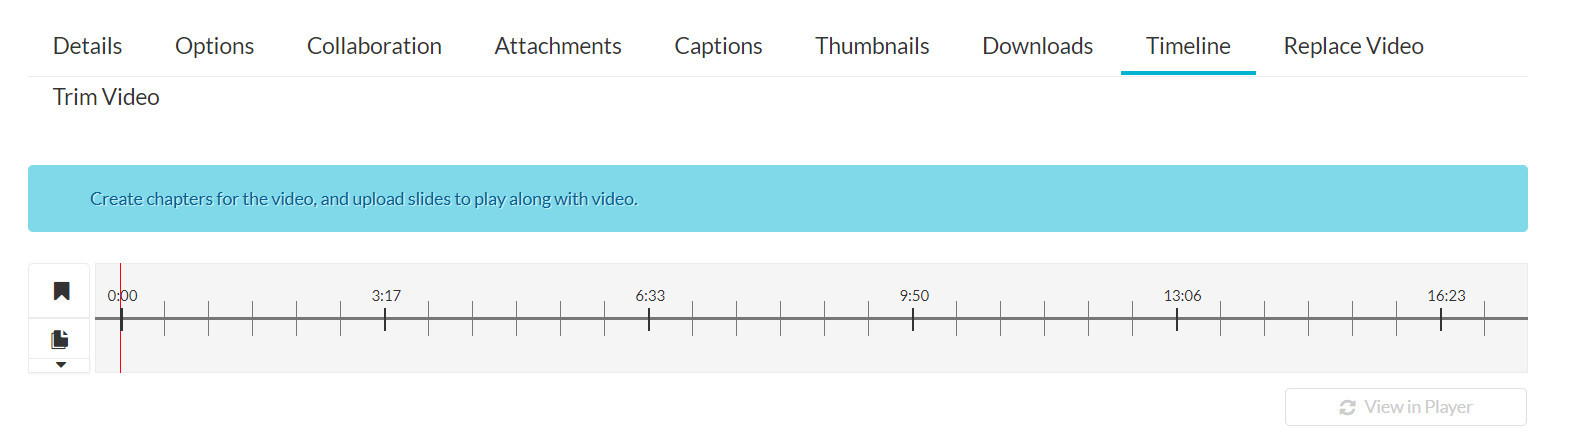
- Click the edit icon next to the video you want to edit.
- Select the Timeline tab. Here you can view all the chapters and slides in the video.
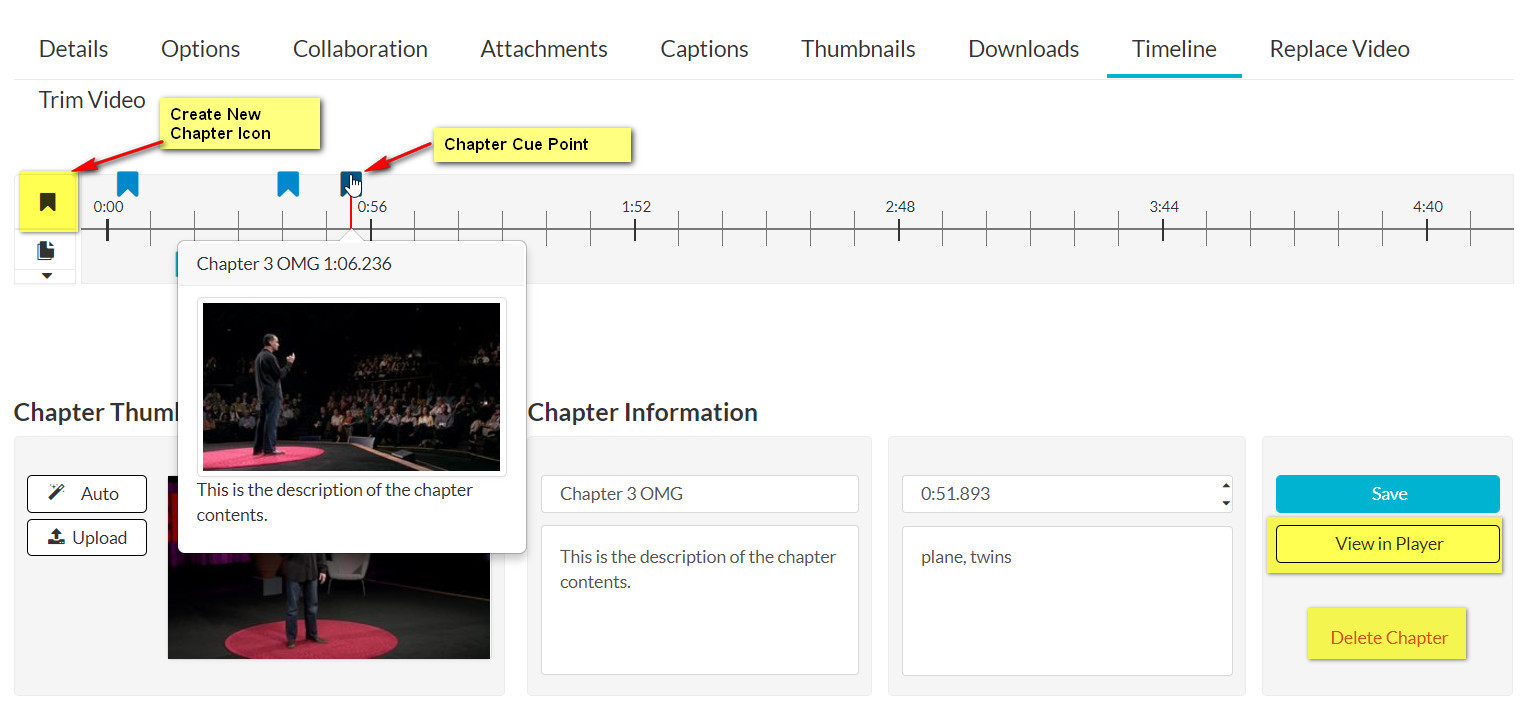
Place the cursor on the timeline and click the Create New Chapter icon to create or update a chapter, or click on the cue point for the chapter you want to edit to view its properties.
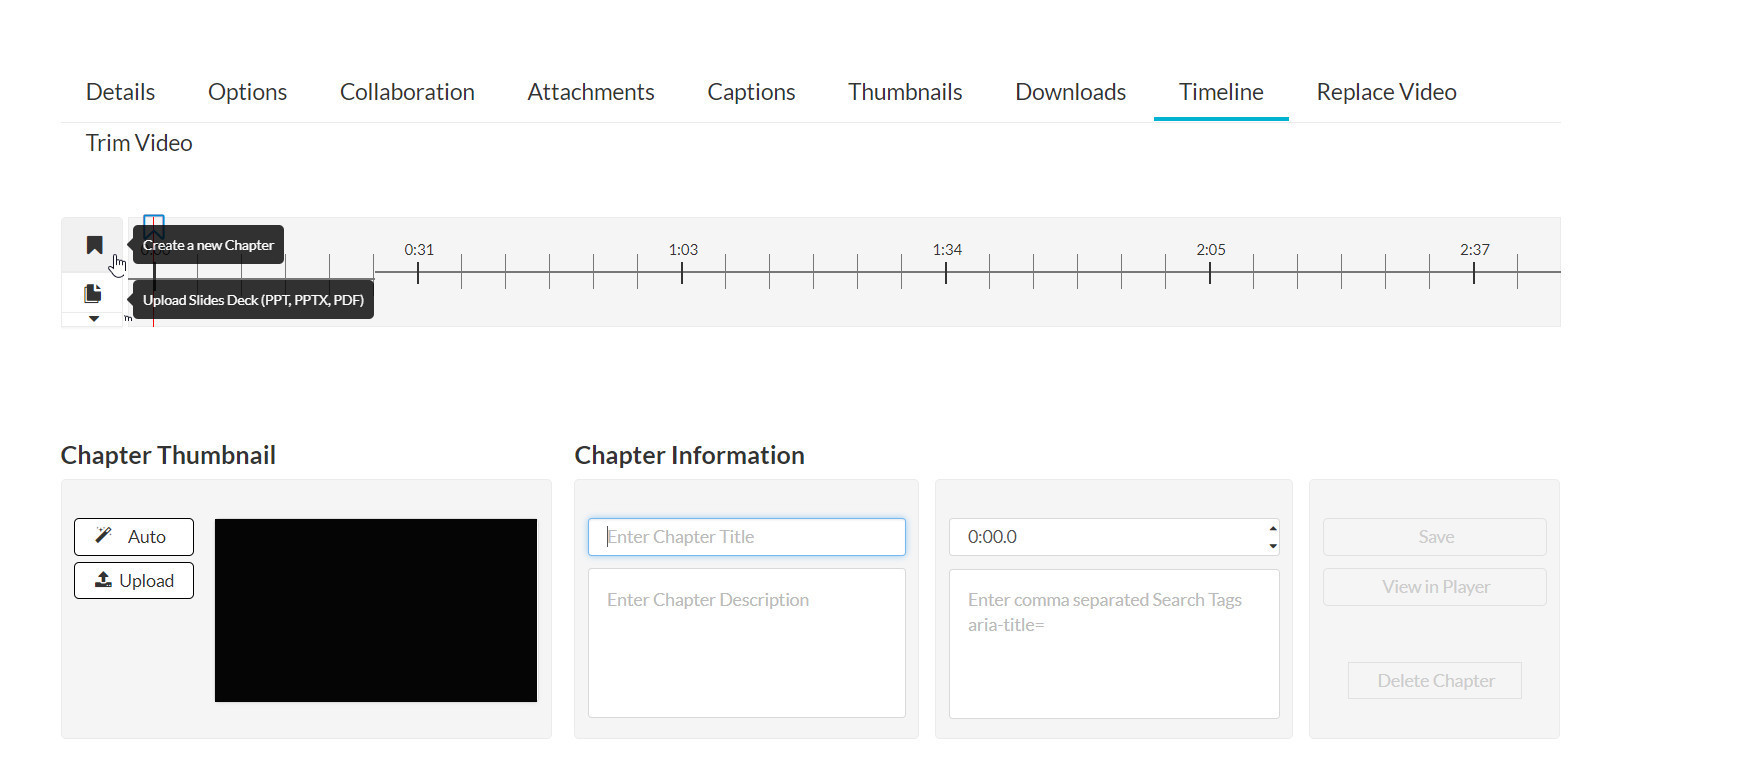
- After you create a chapter, you can:


- Add or modify the Chapter Title.
- Select a thumbnail. You can upload a thumbnail image for the chapter, or automatically create one from the video.
- Add or modify the Chapter Description (optional).
- Add Search Tags (optional).
Delete a Chapter
To delete a chapter
- Click the edit icon next to the video you want to edit.
- Select the Timeline tab to view all the chapters and slides in the video.
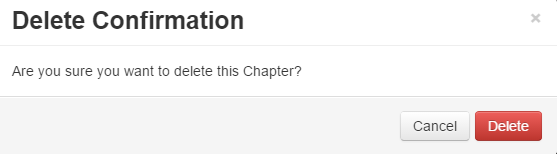
- Click on the cue point of the chapter you want to delete from the timeline of the video.
- Click Delete Chapter.
- A confirmation box is displayed, click Delete to confirm.
- Click View in Player to see your changes.

Using Slides in Kaltura Videos
Slides are part of the video content, and viewers can view the slides in the player simultaneously with the video. Using the Navigation Panel, you can navigate the video using the slides. Slides are automatically created when a presentation is recorded using Kaltura Capture. To learn more about recording presentations using Kaltura Capture, see the article Kaltura Capture - Recording PowerPoint Slides.
Edit or Add Slides
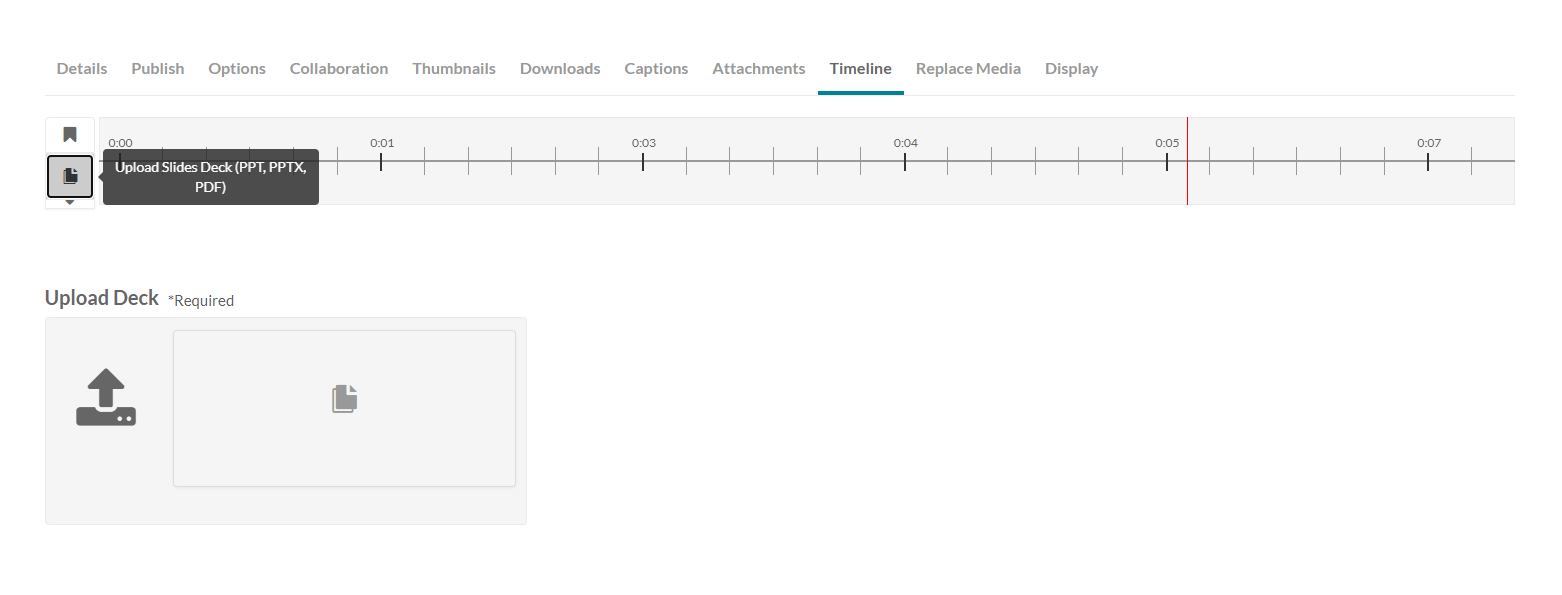
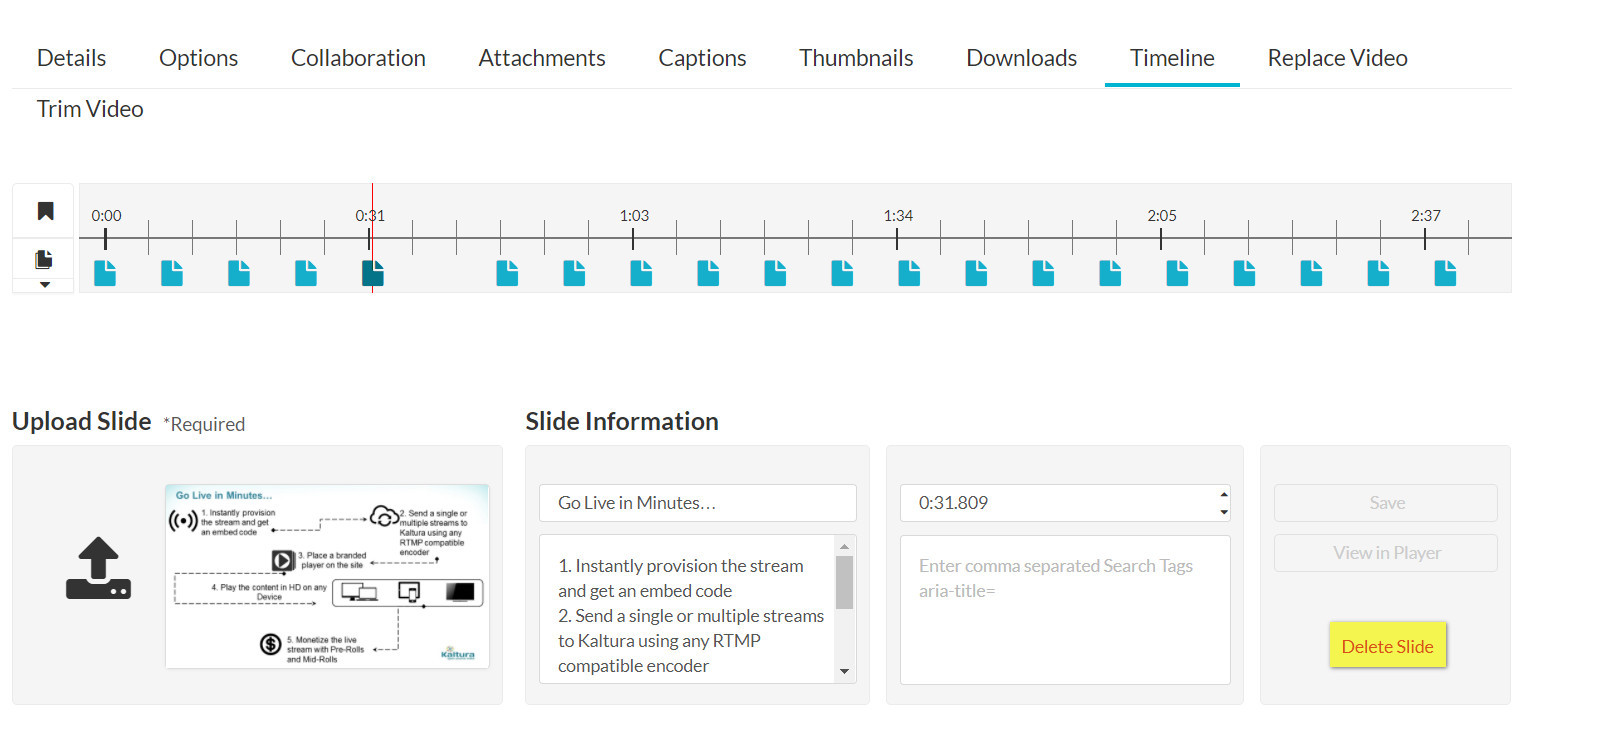
- Click on the Edit icon near the entry you want to edit and select the Timeline tab. You can either add an enitre slide deck or a single slide. The formats for each case are listed.

- To upload a full slide deck:
- Place the cursor on the timeline and click Upload Full Deck. The supported formats are: PPT, PPTX, and PDF.
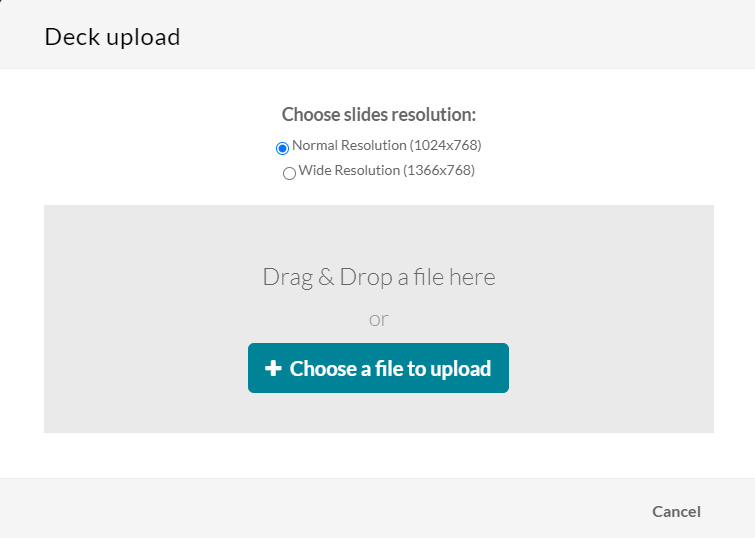
- Click on the arrow and upload the slide deck.
- Choose the resolution and start the upload.
 or
or
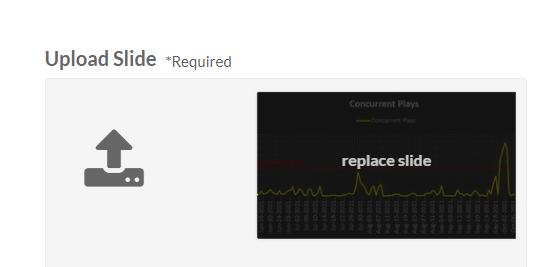
- To upload a single slide
- Place the cursor on the timeline and click Upload Single Slide.
- Click on the arrow and upload the image. Images of the following types are supported:
1"*.3gp;*.jpg;*.jpeg;*.bmp;*.png;*.gif;*.tif;*.tiff;*.3GP;*.JPG;*.JPEG;*.BMP;*.PNG;*.GIV;*.TIF;*.TIFF;"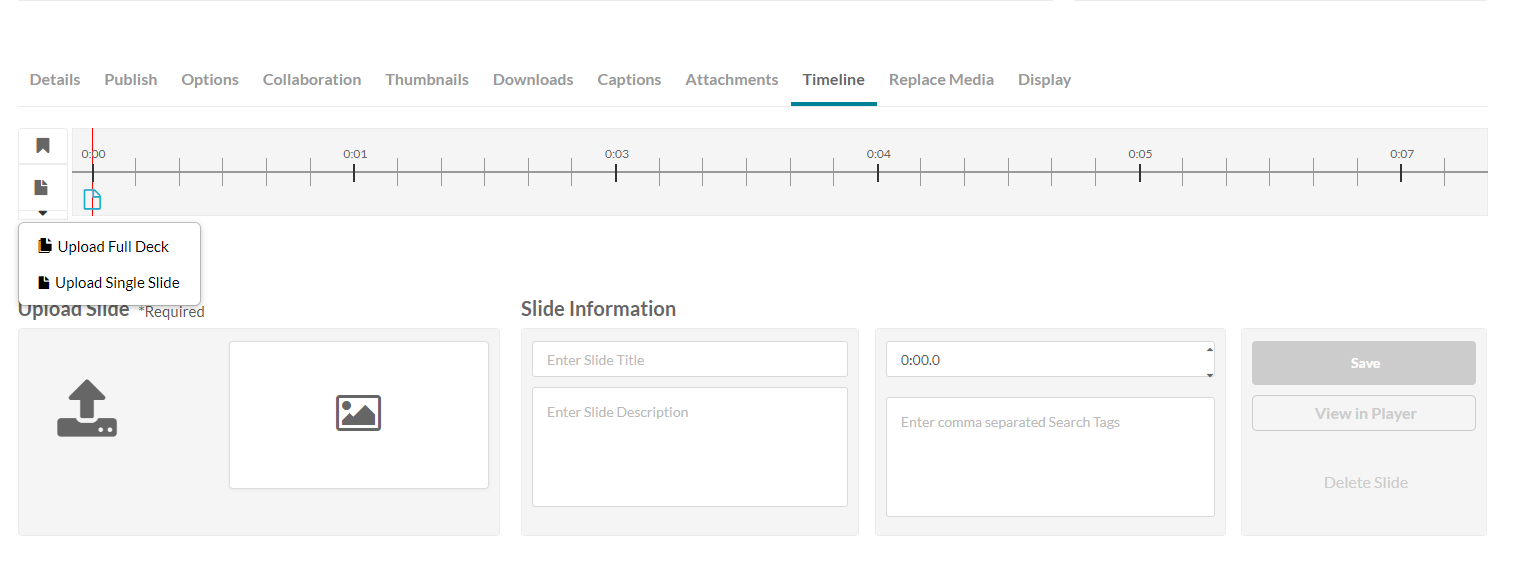
- Enter the Slide Information, for example, the Title. the cue point, or search tags (optional) amd Save.
Note - once the upload and processing is done, the slides will be equally spread across the timeline for you to manually arrange them.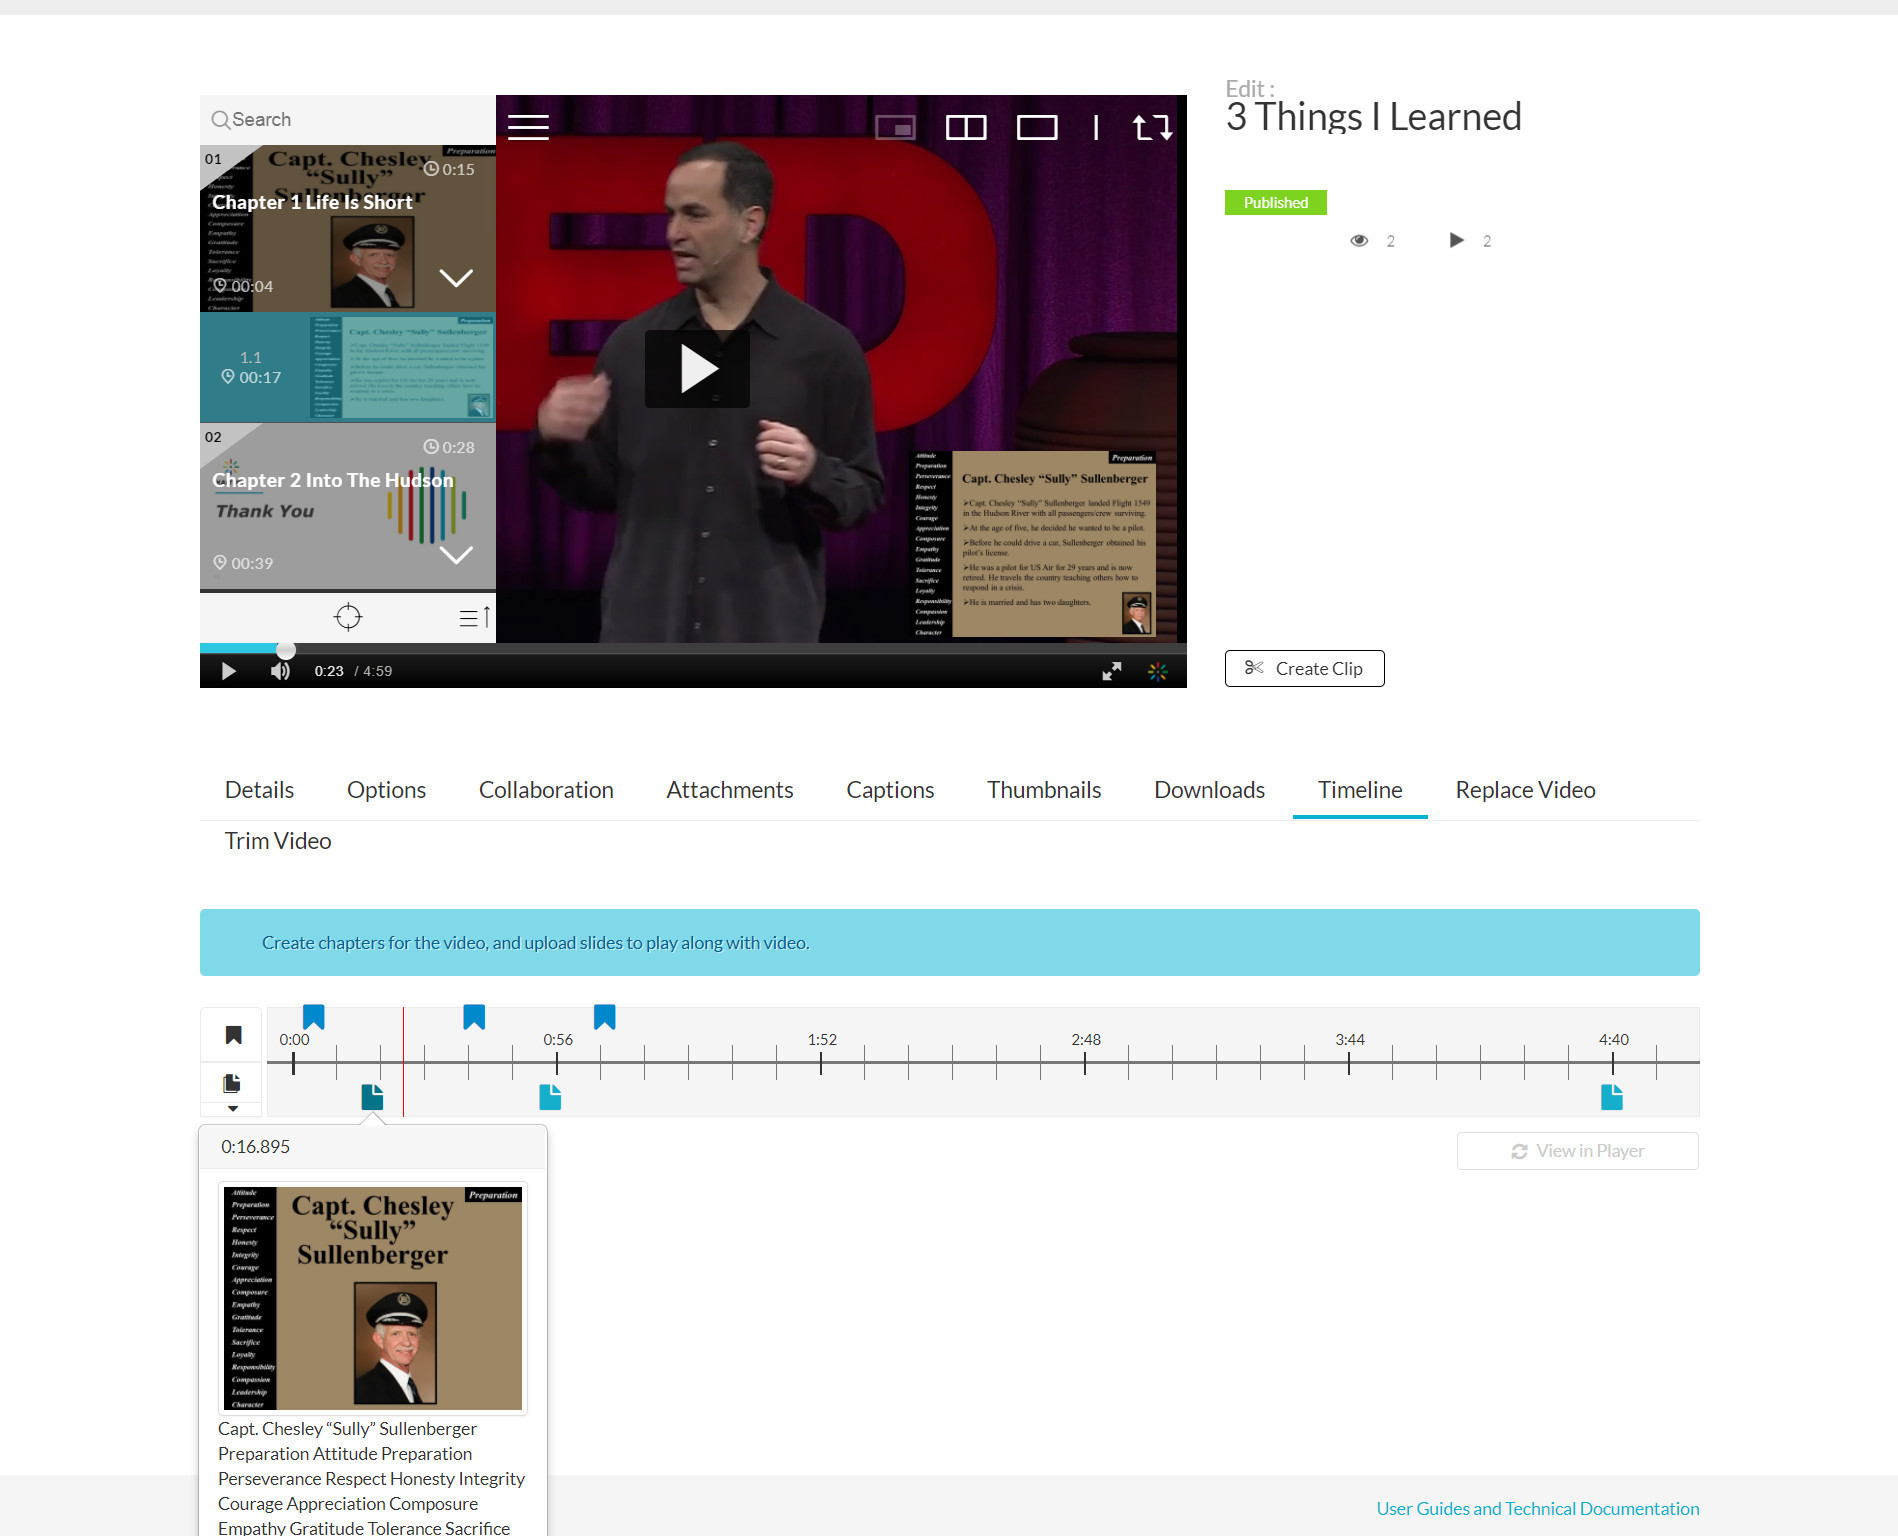
- Move each slide to its desired point in the timeline and save.
- After you upload a slide deck, or a single slide you can:
- Click on the cue point for the slide you want to edit to view its properties.
- Add or modify the slide image.
- Add or modify the slide title.
- Add or modify the slide description (optional).
- Add search tags. (optional)
- Replace a single slide.
- Click View in Player to see your changes.


Delete a Slide
To delete a slide
- Click on the Edit icon near the entry you want to edit and select the Timeline tab.
- Click on the cue point of the slide you want to delete from the timeline of the video.
- Click Delete Slide.
A confirmation box is displayed, click Delete to confirm.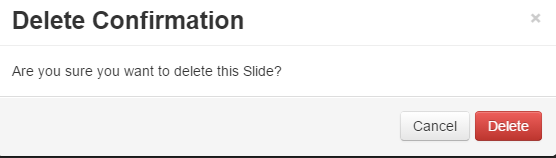
- Click View in Player to see your changes.


