About
Google Analytics 4 is an analytics service that enables you to measure traffic and engagement across your websites and apps.
This guide will explore setting up GA4 for your Kaltura Video Portal.
To install GA4 on the Kaltura player, see The Kaltura Player Studio Admin Guide - Integrations.
Google Analytics 4 is the next-generation measurement solution, and it has replaced Universal Analytics. Starting on July 1, 2023, standard Universal Analytics properties will stop processing new data. To maintain your website measurement, you'll need a Google Analytics 4 property. Learn how to make the switch to Google Analytics 4
Before you begin
This guide assumes that you've done the following:
- Go to https://analytics.google.com/
- If you're already signed in to Google, you'll be taken directly to Analytics. Otherwise, you will be prompted to enter your Google Account and password.
- If you can't sign in to your account, go to Unable to sign in to account.
- If you are still using Universal Analytics and haven't completed your migration to GA4, follow the steps in this guide How to migrate to Google Analytics 4.
- If you have not created a new Google Analytics 4 property and/or added a data stream, follow this guide Set up Analytics for a website and/or app.
Setup GA4
- Sign in to your Google Analytics account.
- Click Admin.
- At the top of the Property column, select your property.
- In the Property column, click Data streams > Web.
- Click the data stream for your website.
- Under Google tag, click View tag instructions.
- On the Installation instructions page, select Install manually:
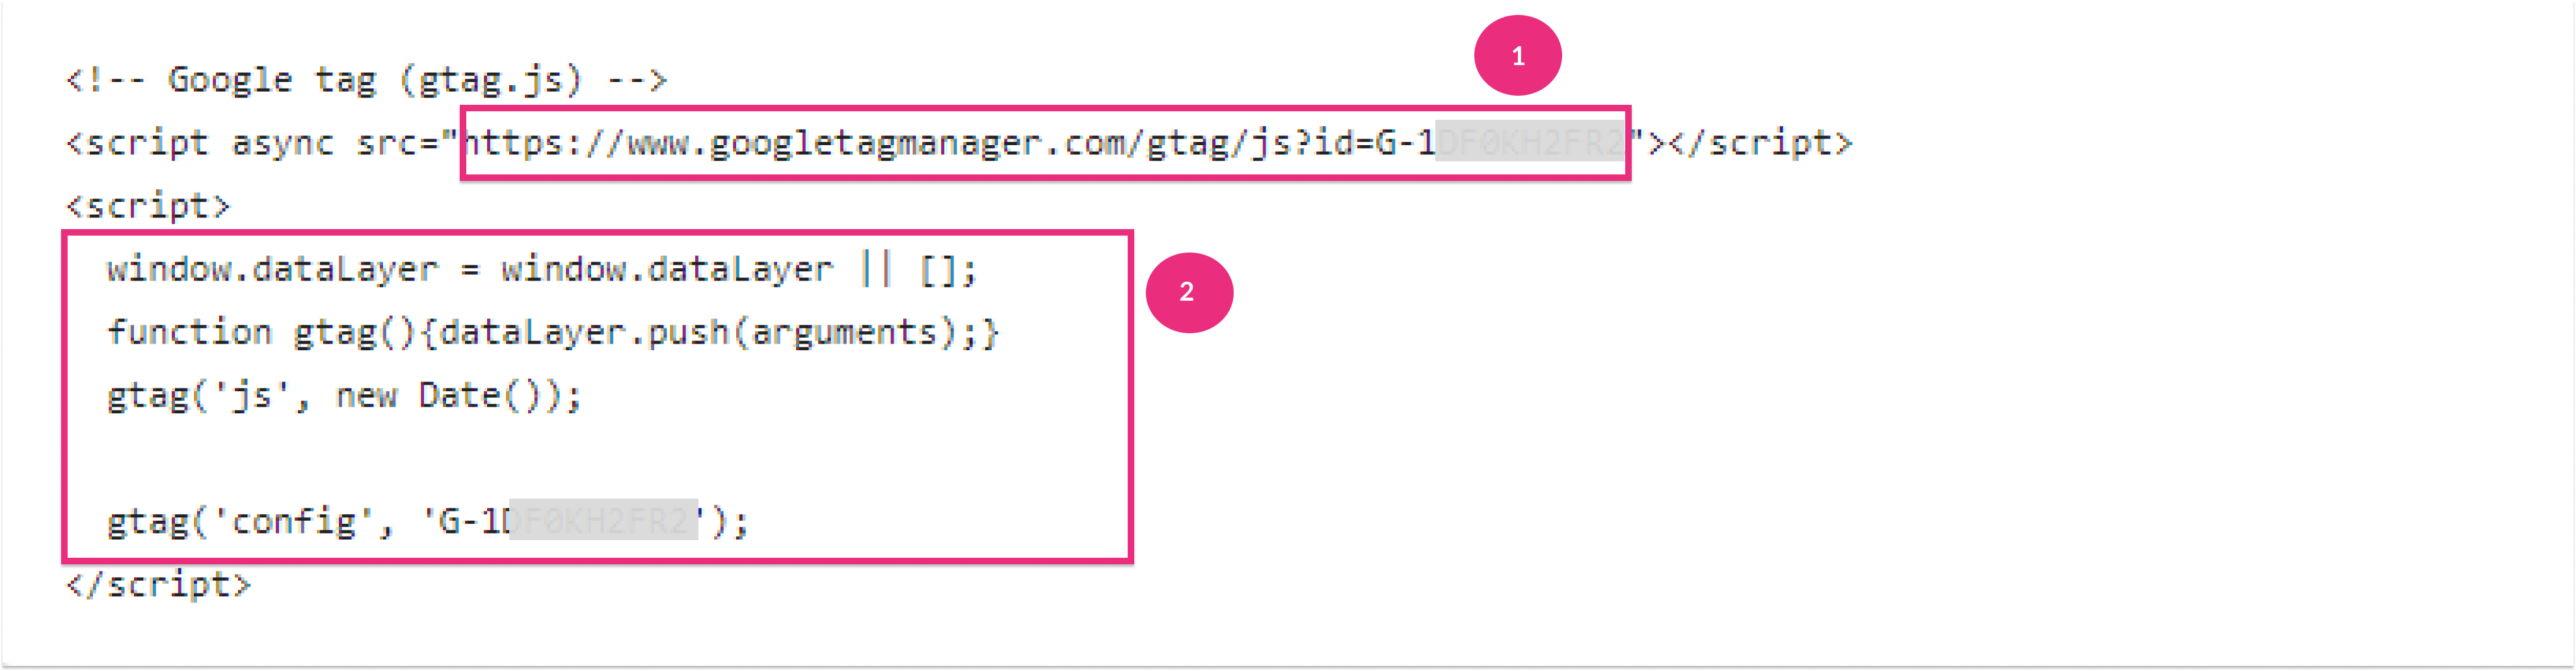
- On the screen, you’ll see the JavaScript snippet for your account's Google tag. Your Google tag is the entire section of code that appears, beginning with:
<!-- Google tag (gtag.js) -->
and ending with</script>
- On the screen, you’ll see the JavaScript snippet for your account's Google tag. Your Google tag is the entire section of code that appears, beginning with:
- Go to your KMS/KAF admin page.
- Under the Application module, fill in the required fields as demonstrated below.
- headerJSlinks > +Add "headerJSlinks > url - Enter the url, as seen in No.1.
- headerJS - Enter the JS code, as seen in No.2.
 The configuration should look like this:
- Click Save.
 The configuration should look like this:
Validate the GA4 installation - Go to the Realtime report to confirm that the Video Portal traffic can be seen.
Events Tracking
Automatic Events
GA4 collects more than 30 events automatically. Some of them are: page_view, session_start, view_search_results, video_progress, video_start, video_complete, user_engagement, scroll, screen_view, notification_receive, os_update, notification_foreground, notification_dismiss, in_app_purchase, form_start, form_submit and many others.
Though you can disable several automatic events in GA4 -> Admin -> Data Streams -> Data Stream Details -> Enhanced Measurement, there are several events that you can’t turn off, for instance, the “session_start” event.
To learn more, see [GA4] Automatically collected events.
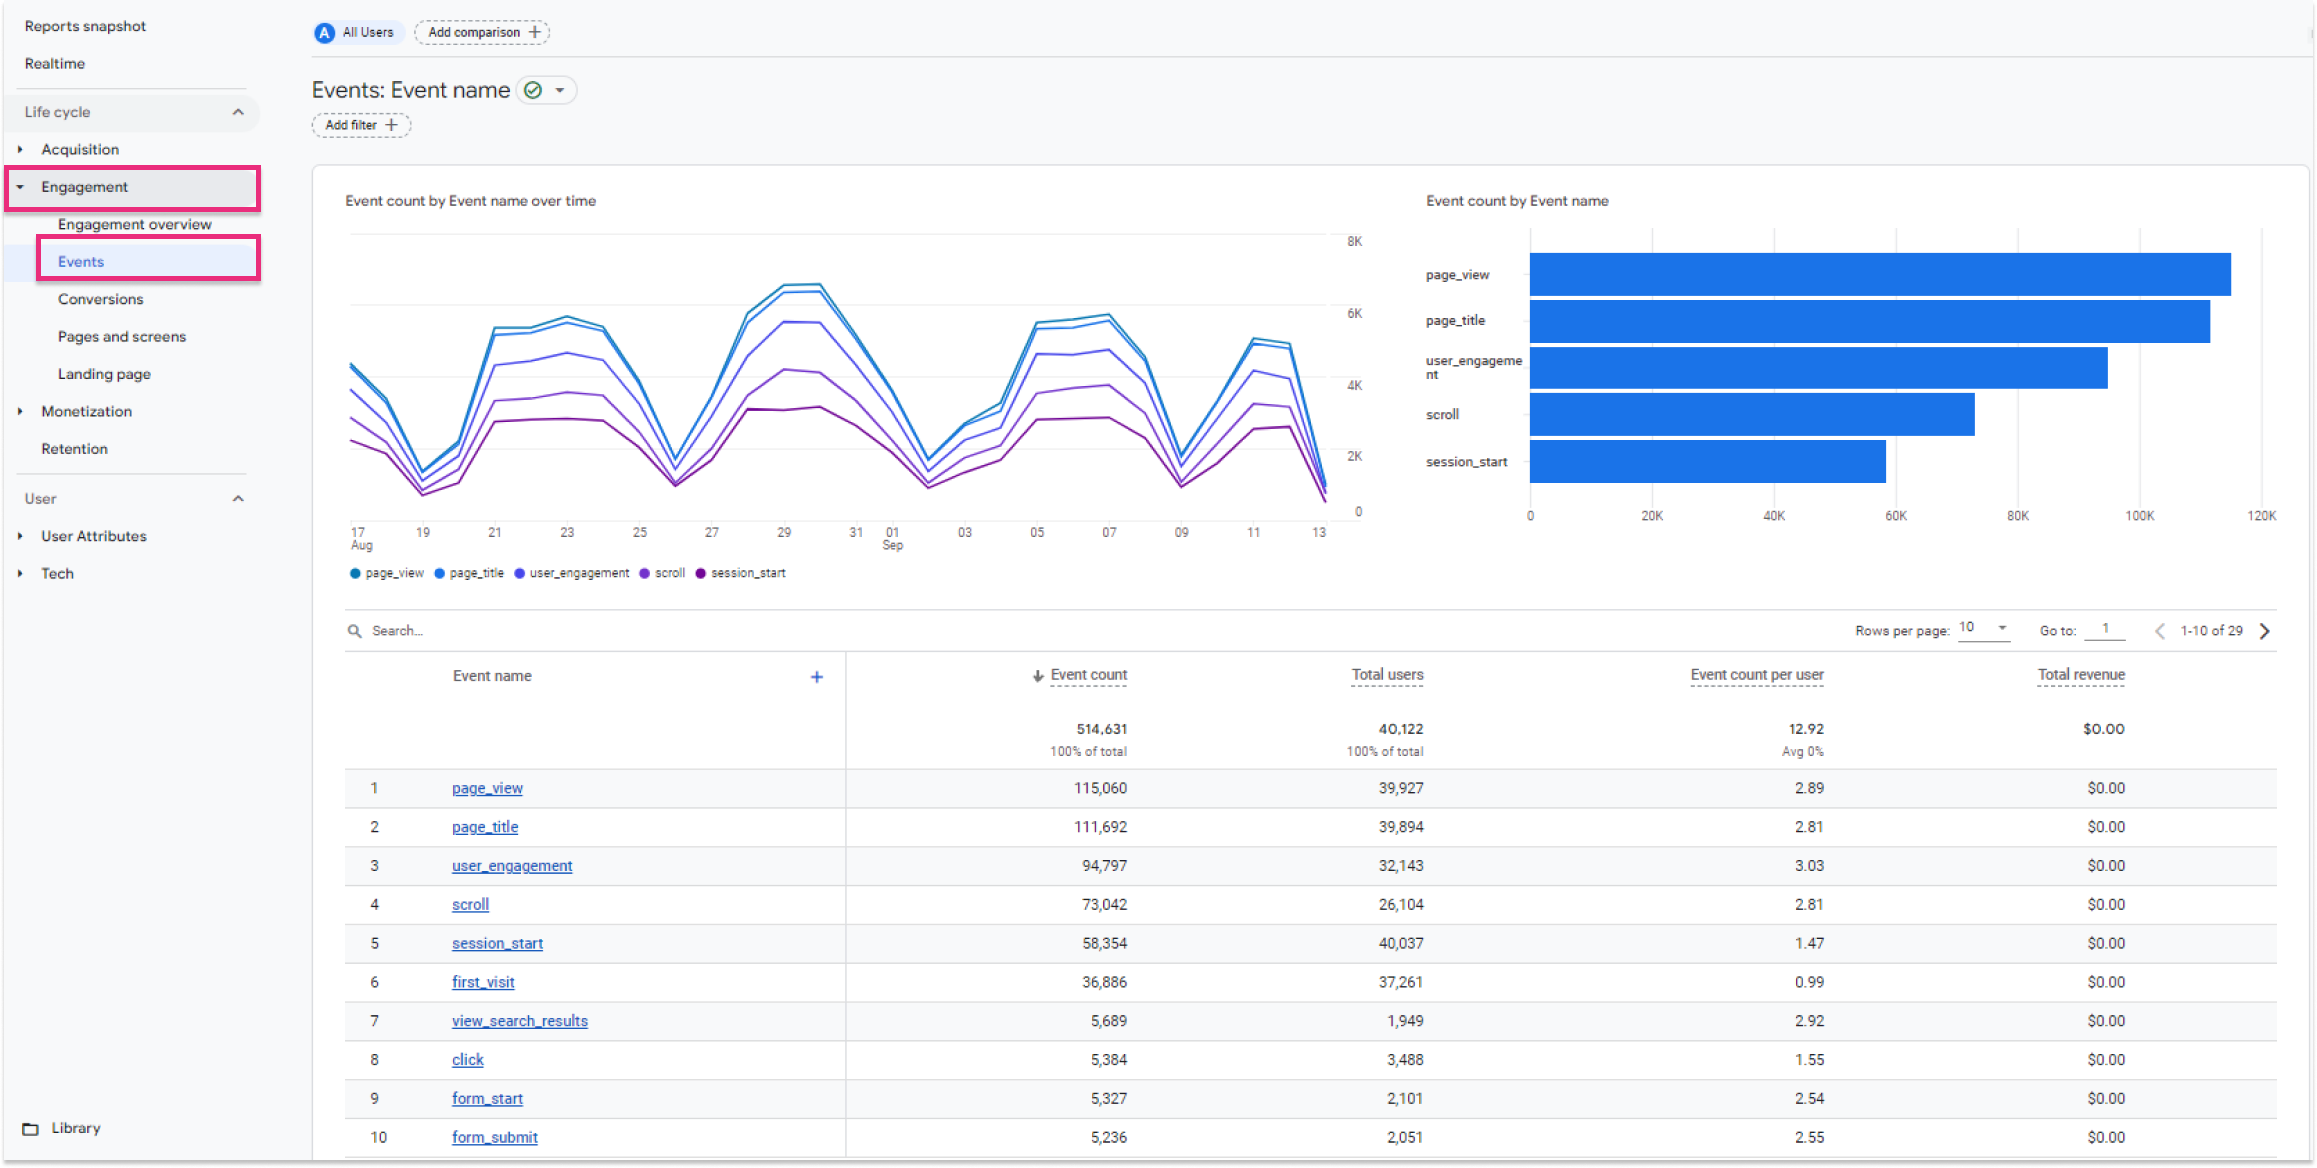
The following is a screen capture example of the Events report.
Custom Events
Before you create a custom event, make sure the event you want to create isn't already collected through an automatically collected event or recommended as a recommended event. It's always better to use an existing event because these events automatically populate dimensions and metrics that are used in your reports.
You can implement a custom event in a few different ways, depending on how you set up your website or app measurement. These include:
Let's explore an example of a custom event to add to your JavaScript (gtag.js (for websites)). In our example, we will track the Watch Now button event clicks on your Video Portal homepage.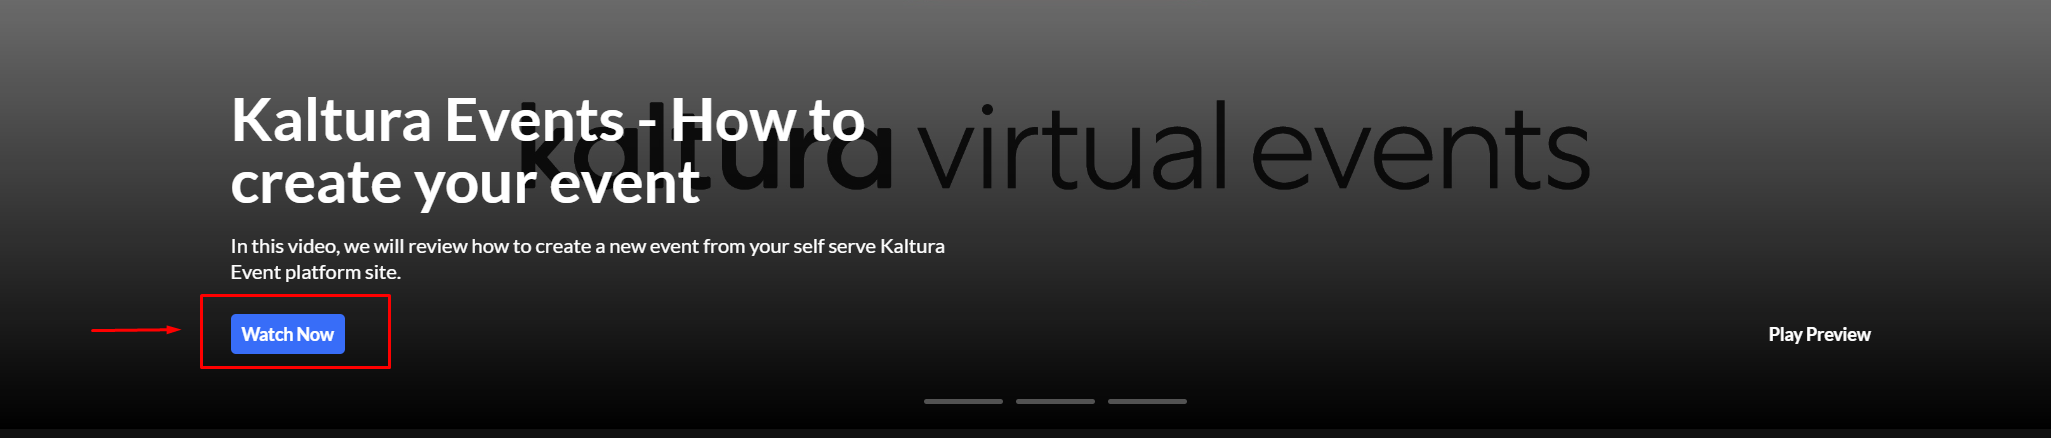
To do this, add the following script to the headerJS field on the Application module.
     gtag('event', 'watch_now', {
            'app_name': 'KMSVideoPortal',
            'screen_name': 'Home'
      });
The watch_now custom event will now appear in the GA4 event report.

A full Google tag with the custom event looks like this.
<!DOCTYPE html>
<html lang="en">
<head>
    <!-- Google tag (gtag.js) -->
    <script async src="https://www.googletagmanager.com/gtag/js?id=G-XXXXXXXXXX"></script>
    <script>
    window.dataLayer = window.dataLayer || [];
    function gtag(){dataLayer.push(arguments);}
    gtag('js', new Date());

    gtag('config', 'G-XXXXXXXXXX');
    </script>

    <custom event script addition>
      /**
      * The following event is sent when the user clicks on the Watch Now button. You could
      * wrap the event in a JavaScript function so the event is
      * sent when the user performs some action.
      */
      gtag('event', 'watch_now', {
        'app_name': 'KMSVideoPortal',
        'screen_name': 'Home'
      });
    </script>
</body>
</html>
